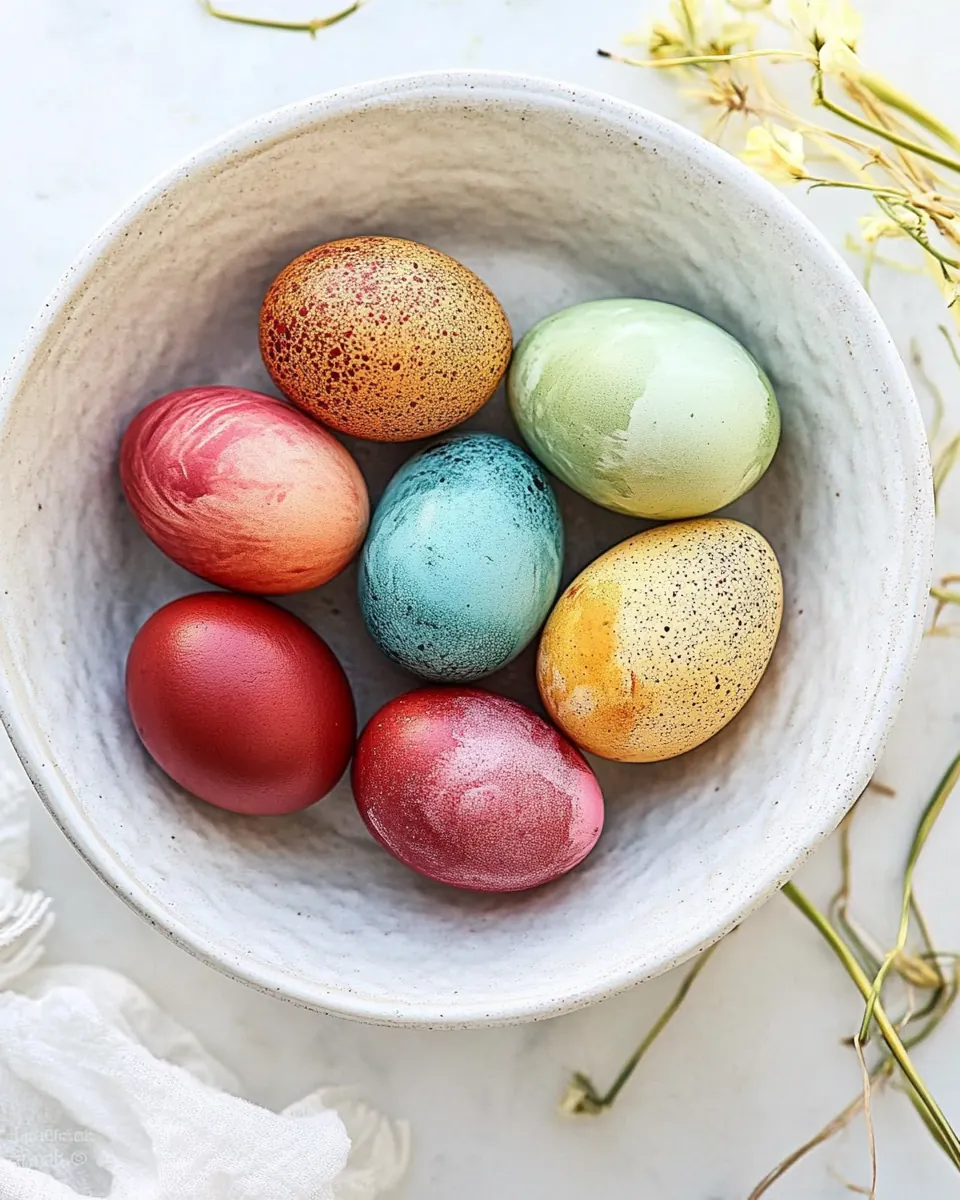
Natural Easter Egg Dye
Natural Easter Egg Dye has been my go to way to bring bright, unexpected color to our holiday eggs using simple produce and pantry staples.
I remember the first spring I swapped chemical dyes for pots of simmering vegetables, watching my kids press their faces to the counter as wisps of steam carried floral and earthy scents around the kitchen. We would lay out jars like little science experiments, labeling each one and making guesses about which would turn the deepest blue or the sunniest yellow. There was one afternoon when the beet pot yielded a jewel tone so vivid my aunt asked if we had painted the shells, not realizing the hue had come straight from a vegetable she tosses in salads. That year felt hands on in a new way, and the ritual stuck.
Over time I learned the little details that make a big difference, like steep time and vinegar levels, and how to coax layered colors by dipping an egg first into one jar, then into another. My friends started requesting a lesson each spring, and now I enjoy that slow, intentional pace of making together rather than rushing to a store bought kit. Beyond the color, there is something quietly satisfying about using natural ingredients to transform ordinary eggs into keepsakes you can still eat.
Recipe Snapshot
50 mins
30 mins
20 mins
Medium
80 kcal
American
Vegan, Gluten-Free
Appetizers
Saucepan, Fine sieve, Jars or bowls, Slotted spoon, Wire rack or towels
What You’ll Enjoy About This Natural Easter Egg Dye
Real ingredients, real color
I love that Natural Easter Egg Dye uses things you already know how to buy and prep, so you can control intensity and tone. When I steep a pot of beet or red cabbage, I can practically see the pigment separate out as the water takes on a translucent stain. The color payoff feels honest, and I prefer the subtle variations that come from real produce.
Safe and family friendly
We often have young children helping at the sink, so avoiding chemical dyes makes the whole activity calmer. I feel better about letting little hands dunk eggs and experiment with layering because the materials are edible and familiar. That peace of mind turns a chaotic craft into a relaxed family moment.
Creative layering possibilities
I’m drawn to the way colors blend when you dip an egg first in one jar, then in another. For instance, a quick dunk in a pale yellow <strong>turmericstrong> bath followed by a longer soak in a blue <strong>cabbagestrong> jar produces lovely green tones. I enjoy encouraging friends to test combinations, because the results are always a bit unpredictable, and that surprise is part of the charm.
Budget friendly and sustainable
Using scraps like onion skins or <strong>frozenstrong> <strong>blueberriesstrong> not only stretches your grocery dollars, it reduces waste. I started saving onion skins and tossing them into a mason jar in the freezer until I had enough to make a rich amber dye. It’s an eco friendly way to celebrate and it makes me feel resourceful.
Hands on education
Beyond pretty shells, each pot is a small lesson in color chemistry. I enjoy explaining to kids why acid like vinegar helps the pigment adhere to the eggshell, and how time and temperature change hue. Those quick explanations make the activity feel meaningful, and everyone remembers more than just the final color.
Ingredients to Make <strong><strong>Naturalstrong> Easter Egg Dyestrong>
These ingredients are the heart of the process, each contributing pigment, acidity, or a clarifying quality. The strong players like beet and red cabbage provide bold colors, while items such as turmeric and onion skins offer earthy tones. Paired with water and a small amount of acid, these ingredients release their <strong>naturalstrong> dyes and create a palette you can mix and layer.
- 1 large beet, diced + 2 cups water: Provide intense magenta dye when simmered; release pigment that stains eggshells vibrantly. Combine with vinegar to improve color adhesion and simmer gently for 20–30 minutes to extract maximum hue.
- 1/2 red cabbage, sliced + 2 cups water: Yield deep blue to teal tones when boiled; acids shift pigment toward brighter blues. Slice and simmer to extract anthocyanins, then strain and add vinegar to help the color set on shells.
- skins from 4 large onions + 2 cups water: Produce warm golden to rusty brown shades from outer layers; <strong>naturalstrong> tannins give earthy tones. Simmer skins with water and a splash of vinegar for about 20 minutes, then strain before dyeing eggs.
- 1/4 cup sliced fresh turmeric or 2 tablespoons dried turmeric + 2 cups water: Offer bright yellow-orange color from curcumin; use fresh or dried <strong>turmericstrong> to create vivid hues. Simmer in water to extract pigment, strain, and add vinegar for better adhesion to the eggshell surface.
- More Natural Color Suggestions: Suggest additional <strong>naturalstrong> sources for varied pastel and vibrant shades; experiment with different plant parts and steeping times. Include acidic modifiers like vinegar to help pigments bind and keep notes on color intensity for repeatable results.
- 2 cups frozen blueberries + 2 cups water (don’t boil this one. Just let it steep!): Deliver soft purple to navy shades when steeped cold; pigments are delicate and heat can dull the color. Place <strong>frozenstrong> <strong>blueberriesstrong> in hot water off the boil and steep until desired intensity is reached, then strain and add vinegar.
- 3 large carrots, sliced + 2 cups water: Contribute warm orange to apricot hues from beta-carotene-rich flesh; boiling extracts a gentle pigment suited for lighter tones. Simmer <strong>slicedstrong> <strong>carrotsstrong> in water, strain, and mix with vinegar to set color on eggs.
- 2 cups spinach or 1 bunch parsley + 2 cups water: Provide fresh green hues from chlorophyll-rich leaves or herbs; colors are best when processed gently to avoid browning. Blanch <strong>spinachstrong> or <strong>parsleystrong> in water, strain, and add vinegar to help the pigment adhere to shells.
- skins from 4 large onions + 2 cups water: Produce deep amber to rust tones similar to other onion skins; outer skins are high in quercetin and tannins that yield rich browns. Simmer skins in water for 20–30 minutes, strain, and use vinegar to improve dye uptake.
- 2 cups strong brewed coffee: Create warm brown to <strong>coffeestrong>-toned dyes using <strong>brewedstrong> <strong>coffeestrong>; strong brew imparts rich, consistent color. Brew a concentrated pot, cool slightly, and add vinegar before immersing eggs to help the color set.
How to Make <strong><strong>Naturalstrong> Easter Egg Dyestrong>
These steps guide you from hard boiling the eggs to creating jars of dye and achieving layered colors. I walk you through sensory cues and common missteps so you can feel confident at each stage. Keep your workspace organized, and have several jars or bowls ready for simultaneous steeping and cooling.
- Boil the eggs: Use the water boiling or steaming method to hard-boil your eggs before coloring. Make sure they are completely cooled before you dye them! We recommend using the water boiling or steaming method. Check out this post here. We normally love the Instant Pot for steaming eggs, but not here. We don't recommend using the Instant Pot for colored eggs because they are more likely to crack in the food coloring. Again, let the eggs cool completely before coloring.: The steam or water method for hard boiling gives you firm yolks and intact shells, and when the pot whistles quietly you should see gentle bubbling rather than a furious roll which can crack shells. You want the shells fully set and cooled, otherwise the dye will run and produce blotchy patches. A common mistake is shocking the eggs while they are still hot, which increases cracking, so always cool completely before coloring. As the cooled shells sit, they feel slightly chalky to the touch, and you can tap them gently to check for firmness; a soft rattle may indicate undercooking which affects how evenly the dye takes.
- Boil the food item: Place 2 cups of water into a pan along with the food item of your choice. Bring the mixture to a boil, then let it simmer for 20 minutes. Strain and cool completely.: Simmering two cups of water with the chosen ingredient extracts pigment into the liquid; you will notice the water shift from clear to tinged, then to a deeper color as the minutes pass. Reduce heat to a gentle simmer and keep an eye on the surface for small wisps of steam and occasional bubbles, which signal steady extraction. Strain through a fine sieve when the liquid reaches the color you want, and allow it to cool fully, because hot dye can crack eggs. A typical error is boiling too rapidly which can evaporate water unevenly and concentrate flavors unpredictably, so maintain a consistent gentle heat.
- Add vinegar: Once the dyed water is cool, add 2 teaspoons of vinegar.: Adding two teaspoons of vinegar to the cooled dye helps pigments adhere to the shells, and you can sense a slight sharp tang in the liquid after stirring it in. Vinegar adjusts the pH which is why color shifts occur; for example, <strong>cabbagestrong> can swing toward blue when acid is present. Mix thoroughly and let the jar settle, because undissolved vinegar can pool and create streaks. One pitfall is adding the vinegar while the dye is still hot, which can intensify fumes and be unpleasant to work around, so always wait until the bath is cool.
- Soak: Gently drop the cooked and cooled eggs into the natural Easter egg dye so they are completely submerged. Let the eggs soak overnight in the fridge. The longer they sit, the more brilliant the color will be!: Submerge the cooked and cooled eggs so they are fully covered, and you will notice the shell slowly taking on tint at the points facing the jar walls first. I like to use a slotted spoon so eggs can be lowered smoothly without splashing, and I transfer the jars to the fridge for a cool, slow soak which often yields more even tones. Overnight preserves depth of color, but watch for over steeping which can alter texture if left too long; a common problem is leaving them at room temperature which may lead to over cooking in hot dye, so refrigeration is safer for long soaks.
- Dip again (optional): If you want to dip the egg again to get a darker hue or to create another color, now’s the time.: Re dipping lets you deepen a hue or layer colors for new effects, and you will see the shell darken in stages rather than in one sudden shift. When layering, start with the lightest color and allow the egg to dry or set briefly before re dipping; otherwise the colors can run into muddy blends. A typical mistake is trying to force a darker shade by boiling the egg in dye, which risks cracking and uneven absorption, so gradual dunking is best.
- Dry: Place a clean kitchen towel down on the counter. Pull the eggs out of the dye and place them on the towel. Let them air dry. When you are ready to take the eggs out of the color, place a clean kitchen towel down and gently pull out the eggs and place on the towel, or you could place them on a wire rack to prevent and the towel from wiping off any of the color. Let it air dry, do not rub it. If you'd like to dip the egg again to get a darker hue do that once it has dried. In addition, if you want to combine colors to make different hues (think coloring an egg first yellow, then blue=green) now is the time to do it.: Air drying on a clean towel or a wire rack preserves the finish and prevents smudging, and you can tell an egg is dry when it loses that slight tacky sheen and feels smooth to the touch. The towel method gently blots excess moisture, but a wire rack avoids any risk of fabric lifting pigment. Avoid rubbing which smears color, and do not crowd the drying area which can trap moisture and cause uneven tones. If you notice streaks, let the egg sit upright to encourage even drying.
- Once completely dry: You can gently rub it with oil to help prevent the color from changing. We found that some of the eggs changed colors over a few days time (especially the beet one). Do them the day before Easter if you'd like them to be as close to the color as you want as possible.: Rubbing a tiny bit of neutral oil into the shell can deepen the color and add a subtle shine, and as you buff the surface you will see the color deepen and become more saturated. Use a very small amount applied with a paper towel and work in circular motions to avoid pooling. One mistake is using too much oil which can dissolve some pigments and leave patches, so apply sparingly and test on a sample egg first.
- Store: Dyed Easter eggs will last in the fridge for 4-5 days. Keep in mind their color can change as they sit. Don’t worry, though. They taste the same on the inside!: Keep the dyed eggs refrigerated for up to four to five days, and you will notice colors may shift slightly over time, especially brighter pigments like beet. Store them in a single layer or in an egg carton to avoid bumps that could chip the shell. A common oversight is leaving them at room temperature for display too long, which can accelerate color change and reduce freshness, so plan displays close to serving time if you want the colors to remain true.
Change It Up
These variation tips help you experiment confidently, whether you want subtler pastels or vibrant jewel tones. Below are practical, hands on ideas to shift hue, texture, and finish using the same basic ingredients.
- Layer colors by starting with pale baths and moving to darker ones; allow partial drying in between to create two tone effects and avoid muddiness by beginning with the lightest shade.
- Try resist techniques such as wrapping sections with rubber bands or using wax to keep areas white, then dip the egg and remove the resist once dry to reveal patterns.
- Mix dyes in small cups to test blends before dunking an egg; a small splash of one jar into another can preview combined tones without committing the whole egg.
- Use different steep lengths for variation; short soaks yield pastels while overnight soaks deliver saturated color, and test times on a spare egg to gauge results.
- Apply oil for sheen sparingly after drying to intensify colors and give a polished finish, but blot excess to avoid streaks.
- Preserve a natural palette by combining two earthy dyes like onion skins and <strong>coffeestrong> for warm, aged tones that contrast nicely with single bright pigments.
How to Enjoy <strong><strong>Naturalstrong> Easter Egg Dyestrong>
These serving ideas show how to present your dyed eggs for display, gifting, or eating. Think about the occasion, storage, and pairing to get the most from your efforts.
- Display on a single tray using a shallow bowl of dried moss or straw to cradle eggs for a rustic centerpiece, place them strategically so contrasting colors sit next to each other for visual pop.
- Gift in small cartons by arranging a half dozen dyed eggs in a decorated carton with a clear label of the dye ingredients, which makes a thoughtful hostess or neighbor present.
- Serve at brunch by slicing and arranging on a platter with simple sides like bread and fresh greens, label the colors so guests know which ones were dyed with ingredients they enjoy.
- Store in the fridge in a single layer to prevent rubbing and color transfer, and use within four to five days to maintain freshness and true hue.
- Use for crafts after the holiday by turning empties into ornaments or place card holders once blown out, taking care to seal any fragile shells before hanging.
- Plan seasonal pairings such as pastel tones for an Easter brunch or richer, earthier shades for a spring dinner, matching the mood of the table to the colors you produce.
- Label for food safety with the date you dyed them and any notes about unusual pigments, so you can keep track of freshness and color shifts.
- Combine with fresh herbs for presentation by tucking sprigs of <strong>parsleystrong> or rosemary around eggs to echo green tones and add fragrance to your display.
- Create a tasting activity by placing small cards beside each egg describing the dye ingredient and soak time, encouraging guests to compare shades and methods.
- Rotate for longer display by refreshing the arrangement daily, moving eggs to keep sunlight from fading colors, and storing extras in the fridge until needed.
FAQ
Conclusion
Natural Easter Egg Dye stands out because it transforms everyday produce into a creative, hands on tradition that is both beautiful and sustainable. It invites experimentation, family participation, and a sense of discovery that store bought kits cannot replicate. Give it a try this season, and you may find the process is as rewarding as the final colors. I hope this inspires you to mix, layer, and share these naturally dyed eggs with friends and family for a memorable holiday moment.
Natural Easter Egg Dye
Equipment
- Saucepan
- Fine sieve
- Jars or bowls
- Slotted Spoon
- Wire rack or towels
Ingredients
- 1 large beet, diced + 2 cups water Provide intense magenta dye when simmered; release pigment that stains eggshells vibrantly. Combine with vinegar to improve color adhesion and simmer gently for 20–30 minutes to extract maximum hue.
- 1/2 red cabbage, sliced + 2 cups water Yield deep blue to teal tones when boiled; acids shift pigment toward brighter blues. Slice and simmer to extract anthocyanins, then strain and add vinegar to help the color set on shells.
- skins from 4 large onions + 2 cups water Produce warm golden to rusty brown shades from outer layers; natural tannins give earthy tones. Simmer skins with water and a splash of vinegar for about 20 minutes, then strain before dyeing eggs.
- 1/4 cup sliced fresh turmeric or 2 tablespoons dried turmeric + 2 cups water Offer bright yellow-orange color from curcumin; use fresh or dried turmeric to create vivid hues. Simmer in water to extract pigment, strain, and add vinegar for better adhesion to the eggshell surface.
- More Natural Color Suggestions Suggest additional natural sources for varied pastel and vibrant shades; experiment with different plant parts and steeping times. Include acidic modifiers like vinegar to help pigments bind and keep notes on color intensity for repeatable results.
- 2 cups frozen blueberries + 2 cups water (don’t boil this one. Just let it steep!) Deliver soft purple to navy shades when steeped cold; pigments are delicate and heat can dull the color. Place frozen blueberries in hot water off the boil and steep until desired intensity is reached, then strain and add vinegar.
- 3 large carrots, sliced + 2 cups water Contribute warm orange to apricot hues from beta-carotene-rich flesh; boiling extracts a gentle pigment suited for lighter tones. Simmer sliced carrots in water, strain, and mix with vinegar to set color on eggs.
- 2 cups spinach or 1 bunch parsley + 2 cups water Provide fresh green hues from chlorophyll-rich leaves or herbs; colors are best when processed gently to avoid browning. Blanch spinach or parsley in water, strain, and add vinegar to help the pigment adhere to shells.
- skins from 4 large onions + 2 cups water Produce deep amber to rust tones similar to other onion skins; outer skins are high in quercetin and tannins that yield rich browns. Simmer skins in water for 20–30 minutes, strain, and use vinegar to improve dye uptake.
- 2 cups strong brewed coffee Create warm brown to coffee-toned dyes using brewed coffee; strong brew imparts rich, consistent color. Brew a concentrated pot, cool slightly, and add vinegar before immersing eggs to help the color set.
Instructions
- Boil the eggs: Use the water boiling or steaming method to hard-boil your eggs before coloring. Make sure they are completely cooled before you dye them! We recommend using the water boiling or steaming method. Check out this post here. We normally love the Instant Pot for steaming eggs, but not here. We don't recommend using the Instant Pot for colored eggs because they are more likely to crack in the food coloring. Again, let the eggs cool completely before coloring.: The steam or water method for hard boiling gives you firm yolks and intact shells, and when the pot whistles quietly you should see gentle bubbling rather than a furious roll which can crack shells. You want the shells fully set and cooled, otherwise the dye will run and produce blotchy patches. A common mistake is shocking the eggs while they are still hot, which increases cracking, so always cool completely before coloring. As the cooled shells sit, they feel slightly chalky to the touch, and you can tap them gently to check for firmness; a soft rattle may indicate undercooking which affects how evenly the dye takes.
- Boil the food item: Place 2 cups of water into a pan along with the food item of your choice. Bring the mixture to a boil, then let it simmer for 20 minutes. Strain and cool completely.: Simmering two cups of water with the chosen ingredient extracts pigment into the liquid; you will notice the water shift from clear to tinged, then to a deeper color as the minutes pass. Reduce heat to a gentle simmer and keep an eye on the surface for small wisps of steam and occasional bubbles, which signal steady extraction. Strain through a fine sieve when the liquid reaches the color you want, and allow it to cool fully, because hot dye can crack eggs. A typical error is boiling too rapidly which can evaporate water unevenly and concentrate flavors unpredictably, so maintain a consistent gentle heat.
- Add vinegar: Once the dyed water is cool, add 2 teaspoons of vinegar.: Adding two teaspoons of vinegar to the cooled dye helps pigments adhere to the shells, and you can sense a slight sharp tang in the liquid after stirring it in. Vinegar adjusts the pH which is why color shifts occur; for example, cabbage can swing toward blue when acid is present. Mix thoroughly and let the jar settle, because undissolved vinegar can pool and create streaks. One pitfall is adding the vinegar while the dye is still hot, which can intensify fumes and be unpleasant to work around, so always wait until the bath is cool.
- Soak: Gently drop the cooked and cooled eggs into the natural Easter egg dye so they are completely submerged. Let the eggs soak overnight in the fridge. The longer they sit, the more brilliant the color will be!: Submerge the cooked and cooled eggs so they are fully covered, and you will notice the shell slowly taking on tint at the points facing the jar walls first. I like to use a slotted spoon so eggs can be lowered smoothly without splashing, and I transfer the jars to the fridge for a cool, slow soak which often yields more even tones. Overnight preserves depth of color, but watch for over steeping which can alter texture if left too long; a common problem is leaving them at room temperature which may lead to over cooking in hot dye, so refrigeration is safer for long soaks.
- Dip again (optional): If you want to dip the egg again to get a darker hue or to create another color, now’s the time.: Re dipping lets you deepen a hue or layer colors for new effects, and you will see the shell darken in stages rather than in one sudden shift. When layering, start with the lightest color and allow the egg to dry or set briefly before re dipping; otherwise the colors can run into muddy blends. A typical mistake is trying to force a darker shade by boiling the egg in dye, which risks cracking and uneven absorption, so gradual dunking is best.
- Dry: Place a clean kitchen towel down on the counter. Pull the eggs out of the dye and place them on the towel. Let them air dry. When you are ready to take the eggs out of the color, place a clean kitchen towel down and gently pull out the eggs and place on the towel, or you could place them on a wire rack to prevent and the towel from wiping off any of the color. Let it air dry, do not rub it. If you'd like to dip the egg again to get a darker hue do that once it has dried. In addition, if you want to combine colors to make different hues (think coloring an egg first yellow, then blue=green) now is the time to do it.: Air drying on a clean towel or a wire rack preserves the finish and prevents smudging, and you can tell an egg is dry when it loses that slight tacky sheen and feels smooth to the touch. The towel method gently blots excess moisture, but a wire rack avoids any risk of fabric lifting pigment. Avoid rubbing which smears color, and do not crowd the drying area which can trap moisture and cause uneven tones. If you notice streaks, let the egg sit upright to encourage even drying.
- Once completely dry: You can gently rub it with oil to help prevent the color from changing. We found that some of the eggs changed colors over a few days time (especially the beet one). Do them the day before Easter if you'd like them to be as close to the color as you want as possible.: Rubbing a tiny bit of neutral oil into the shell can deepen the color and add a subtle shine, and as you buff the surface you will see the color deepen and become more saturated. Use a very small amount applied with a paper towel and work in circular motions to avoid pooling. One mistake is using too much oil which can dissolve some pigments and leave patches, so apply sparingly and test on a sample egg first.
- Store: Dyed Easter eggs will last in the fridge for 4-5 days. Keep in mind their color can change as they sit. Don’t worry, though. They taste the same on the inside!: Keep the dyed eggs refrigerated for up to four to five days, and you will notice colors may shift slightly over time, especially brighter pigments like beet. Store them in a single layer or in an egg carton to avoid bumps that could chip the shell. A common oversight is leaving them at room temperature for display too long, which can accelerate color change and reduce freshness, so plan displays close to serving time if you want the colors to remain true.
Notes
- Layer colors by starting with pale baths and moving to darker ones; allow partial drying in between to create two tone effects and avoid muddiness by beginning with the lightest shade.
- Try resist techniques such as wrapping sections with rubber bands or using wax to keep areas white, then dip the egg and remove the resist once dry to reveal patterns.
- Mix dyes in small cups to test blends before dunking an egg; a small splash of one jar into another can preview combined tones without committing the whole egg.
- Use different steep lengths for variation; short soaks yield pastels while overnight soaks deliver saturated color, and test times on a spare egg to gauge results.
- Apply oil for sheen sparingly after drying to intensify colors and give a polished finish, but blot excess to avoid streaks.
- Preserve a natural palette by combining two earthy dyes like onion skins and coffee for warm, aged tones that contrast nicely with single bright pigments.