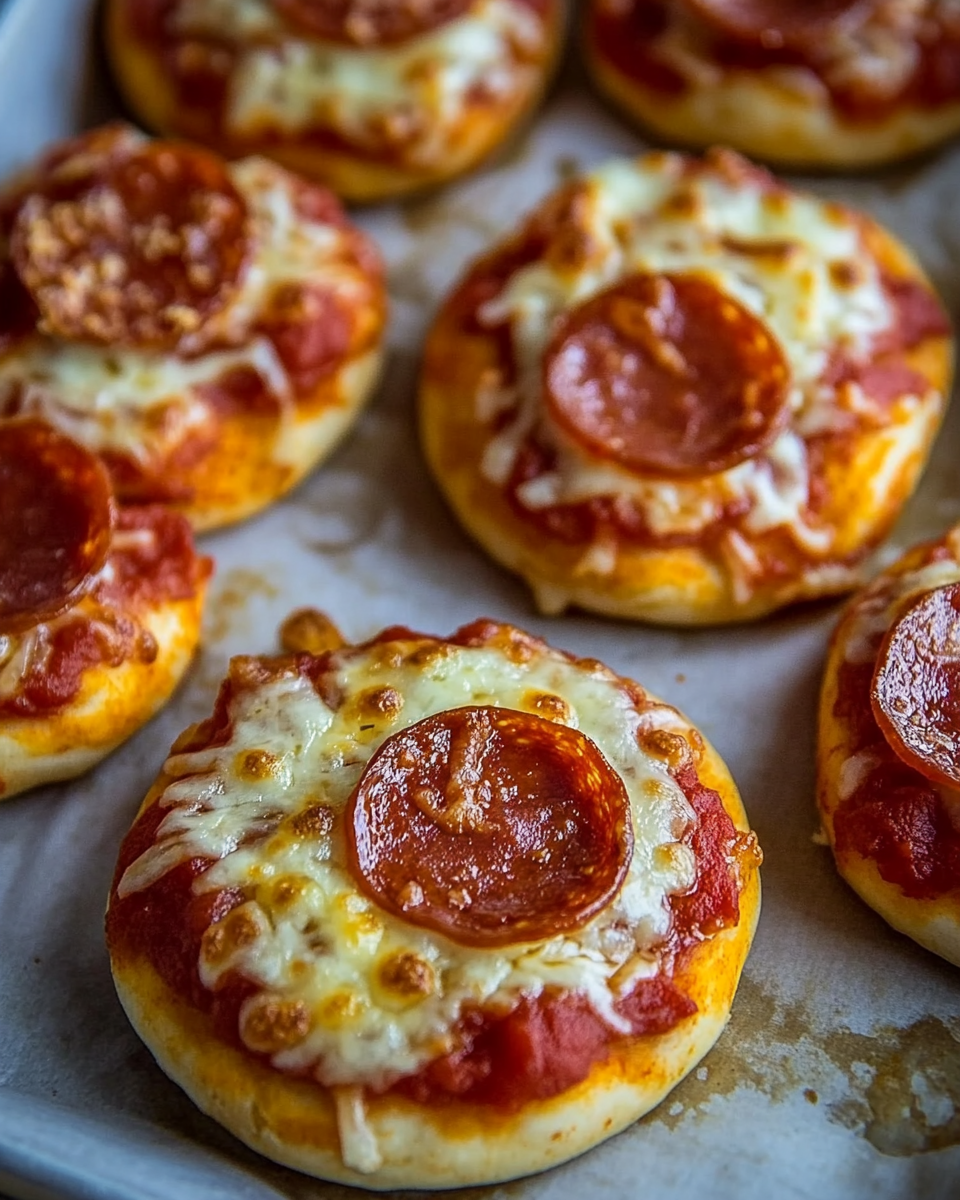
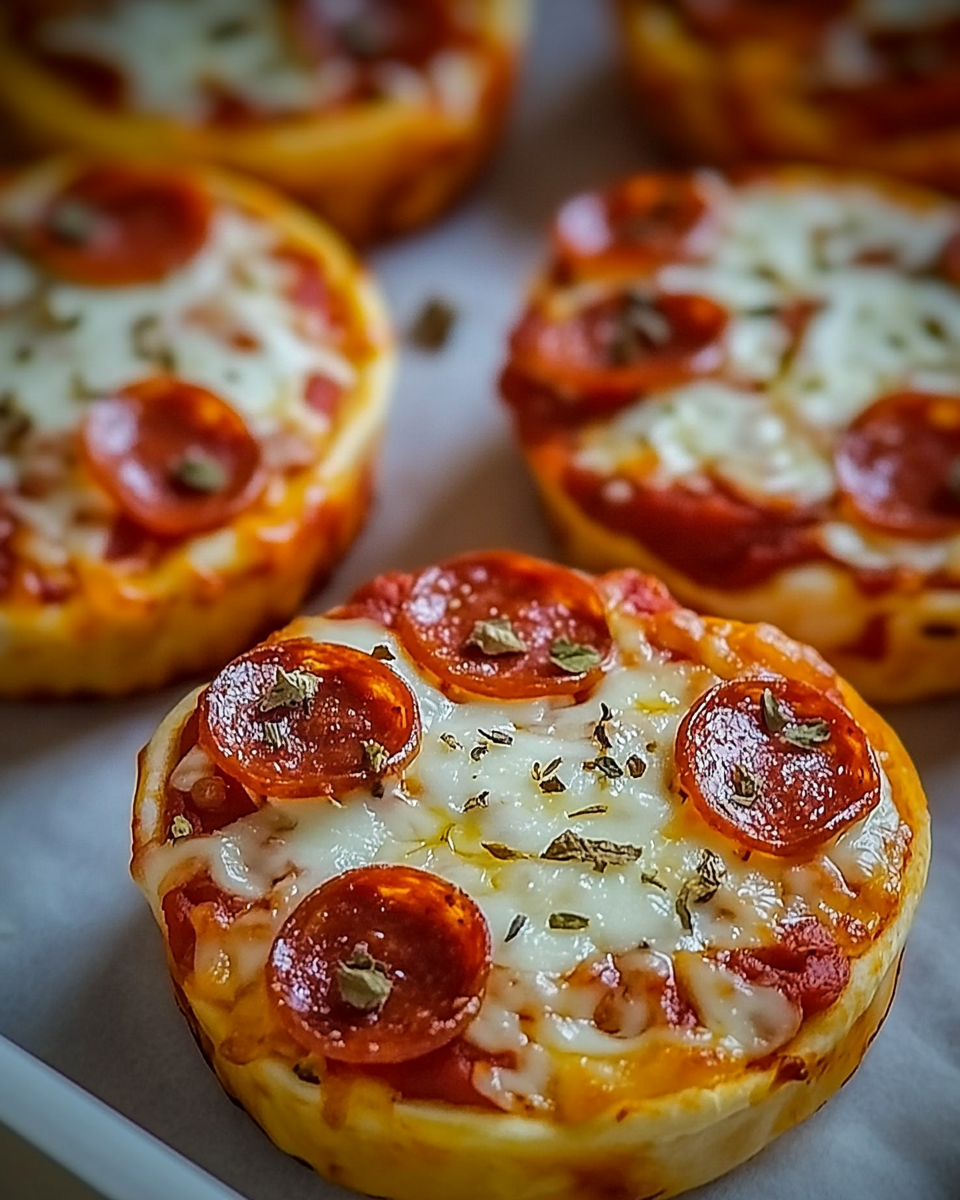
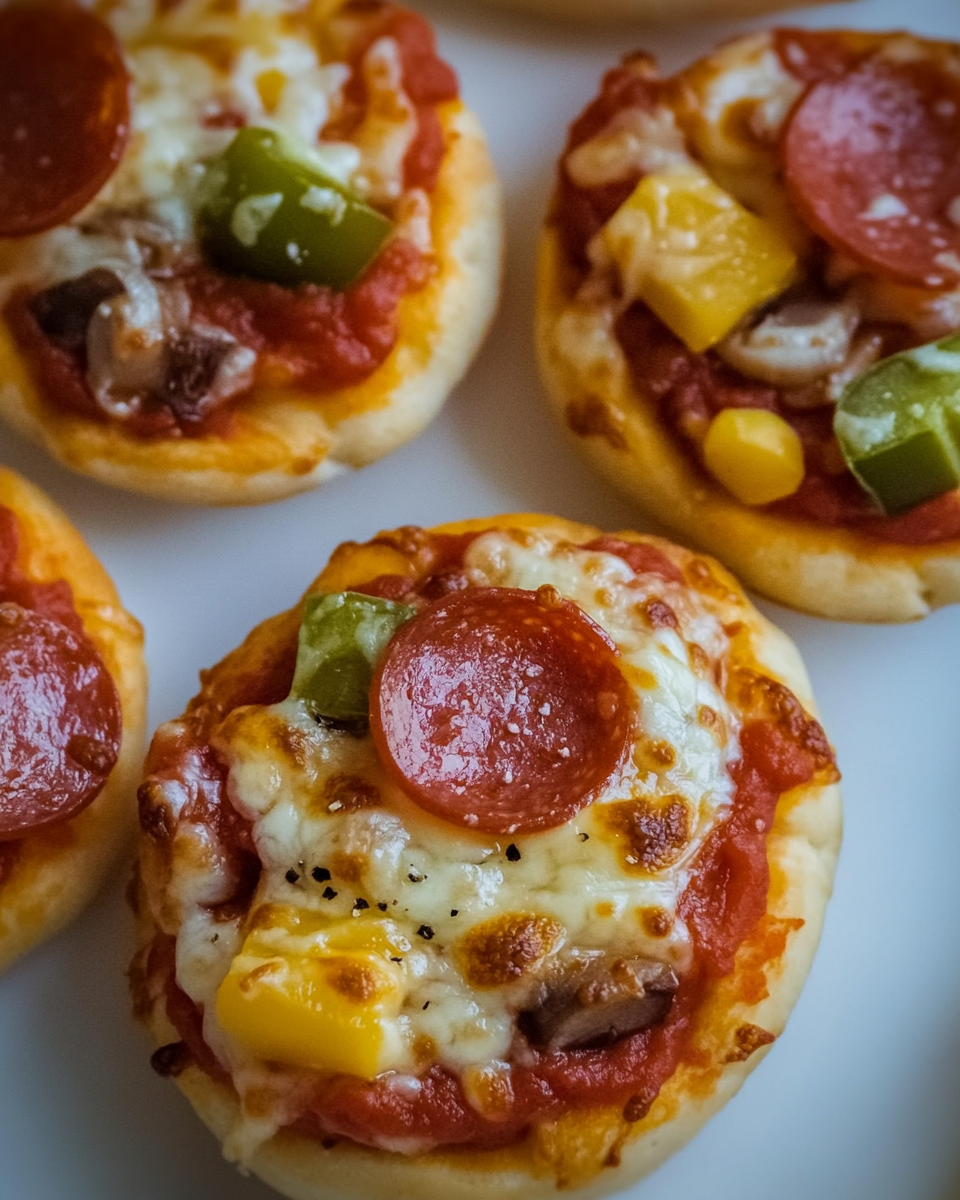
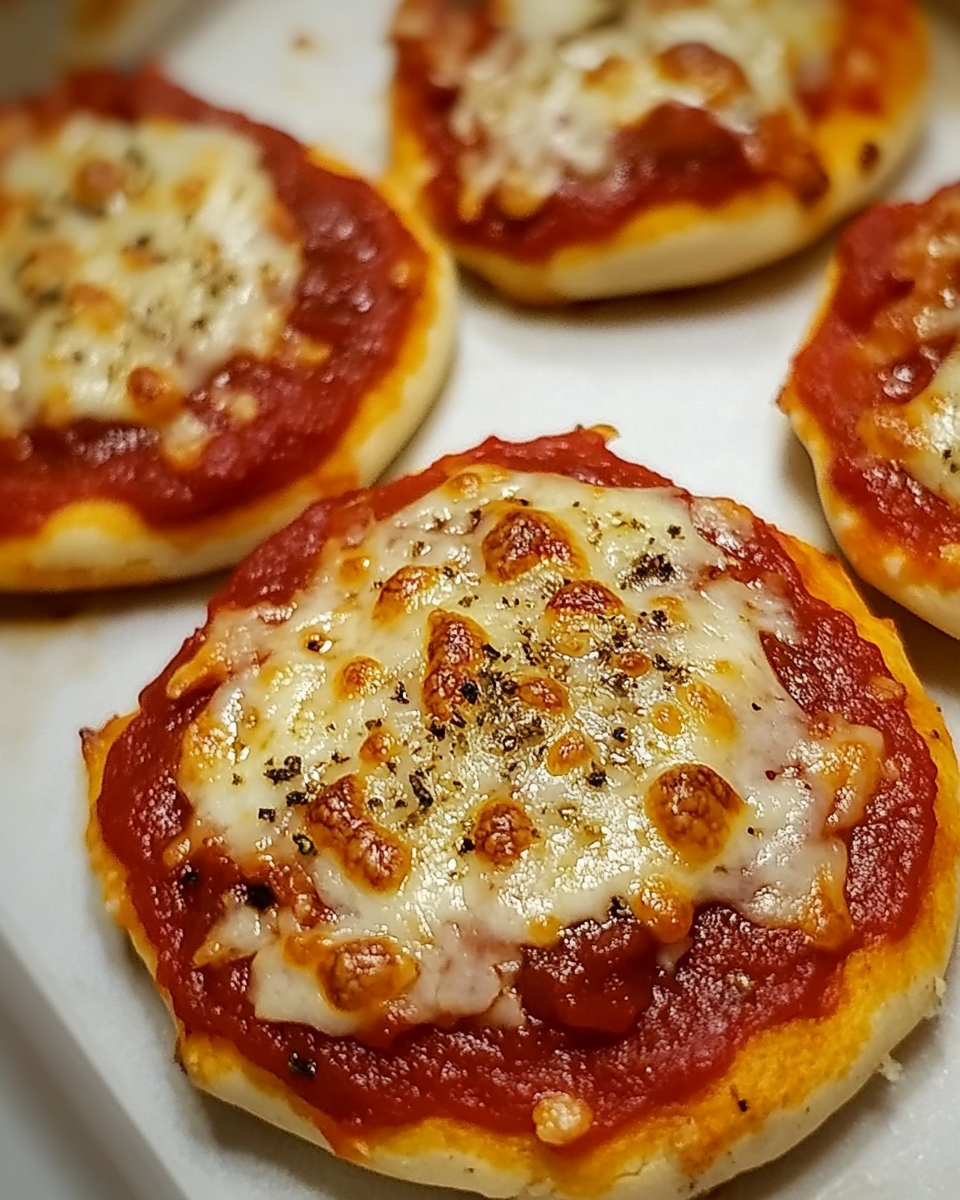
Mini Lunchbox Pizzas
Mini Lunchbox Pizzas are the perfect solution for a fun and satisfying meal that caters to both kids and adults alike. These bite-sized delights are easy to prepare and can be customized to suit individual tastes, making them an ideal addition to any lunchbox. Whether you’re packing a meal for a school day, a picnic, or just a quick snack at home, these pizzas bring a sense of joy and creativity to any mealtime. With a crispy crust topped with rich tomato sauce, gooey cheese, and a variety of favorite toppings, Mini Lunchbox Pizzas are sure to satisfy any pizza lover’s cravings. Plus, they can be made ahead of time and stored in the refrigerator, ensuring you have a quick meal option ready to go. This recipe is not only fun to make but also encourages kids to get involved in the kitchen, promoting creativity and teamwork. Get ready to enjoy a delicious and versatile meal that everyone will love!
Why You’ll Love This Recipe?
There are several reasons why Mini Lunchbox Pizzas will become a staple in your meal prep routine. First, their appealing appearance makes them a hit for lunchboxes. Kids love finger foods, and these mini pizzas look vibrant and inviting, making lunchtime more enjoyable. Second, the preparation is incredibly easy, making it a perfect recipe for those busy days. With just a few simple ingredients, you can whip these up in no time, allowing you to spend more time enjoying your meal rather than preparing it. Lastly, the customization options are endless. From classic pepperoni to gourmet vegetable toppings, each person can create their own unique masterpiece. This versatility not only caters to different tastes but also encourages creativity, making every lunch an exciting adventure. Mini Lunchbox Pizzas are not just a meal; they are an experience that brings joy and satisfaction.
Ingredients:
To create these delectable Mini Lunchbox Pizzas, gather the following ingredients:
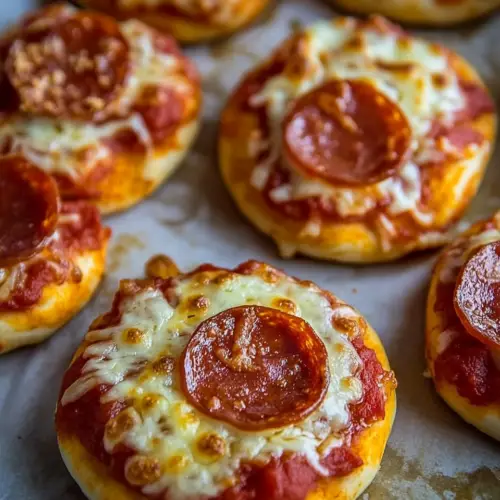
- Mini pizza crusts: 12 pieces (store-bought or homemade, about 3 inches in diameter) – These serve as the foundation for your pizzas, providing the perfect base for all your toppings.
- Pizza sauce: 1 cup – A rich, flavorful tomato sauce acts as the glue that holds your toppings together. Choose a brand that you love, or make your own for an extra touch.
- Shredded mozzarella cheese: 2 cups – The classic choice for pizza, mozzarella melts beautifully and provides that gooey, cheesy goodness that everyone craves.
- Fresh basil leaves: ¼ cup, chopped – Adding a touch of freshness and aroma, basil enhances the overall flavor profile of your mini pizzas.
- Olive oil: 2 tablespoons – A drizzle of olive oil on top of the pizzas adds richness and helps to crisp the crust.
- Variety of toppings: Choose up to 1 cup total from the following options:
- Pepperoni slices: 1 cup
- Sliced bell peppers: ½ cup
- Sliced mushrooms: ½ cup
- Diced onions: ½ cup
- Black olives: ½ cup, sliced
- Cooked chicken pieces: ½ cup, shredded
- Parmesan cheese: ¼ cup, grated – For a touch of nuttiness, sprinkle grated Parmesan on top before baking.
- Crushed red pepper flakes: Optional, to taste – For those who enjoy a little heat, add some crushed red pepper flakes to the top of your pizzas.
These ingredients combine to create a delicious and satisfying meal that is both fun to eat and easy to make. The variety of toppings allows for endless combinations, ensuring that everyone can enjoy their favorite flavors.
How To Make Mini Lunchbox Pizzas?
Creating Mini Lunchbox Pizzas is a straightforward process that will have you enjoying these tasty bites in no time. Follow these detailed steps to make your pizzas:
- Preheat your oven: Begin by preheating your oven to 400°F (200°C). A hot oven ensures that the pizzas will cook evenly and the crust will become crispy.
- Prepare a baking sheet: Line a baking sheet with parchment paper or lightly grease it with cooking spray to prevent sticking. This also makes for easy cleanup.
- Arrange the mini crusts: Place the mini pizza crusts on the prepared baking sheet, leaving a little space between each one to allow for expansion while baking.
- Spread the sauce: Using a spoon, spread a generous tablespoon of pizza sauce over each crust, making sure to cover the surface evenly but leaving a small border around the edges for the crust.
- Add the cheese: Sprinkle a layer of shredded mozzarella cheese over the sauce on each pizza. Be generous, as the cheese is what gives these pizzas their gooey texture.
- Top with your favorites: Here is where the fun begins. Add your choice of toppings to each mini pizza. Whether you prefer classic pepperoni, colorful bell peppers, or a mix of everything, let your creativity shine.
- Drizzle with olive oil: Lightly drizzle olive oil over the top of each pizza to enhance flavor and promote browning.
- Sprinkle with Parmesan cheese: For added flavor, sprinkle grated Parmesan cheese on top of the pizzas.
- Add crushed red pepper flakes: If you enjoy a bit of spice, add crushed red pepper flakes to taste.
- Bake the pizzas: Place the baking sheet in the preheated oven and bake for 10-15 minutes, or until the cheese is melted and bubbly, and the edges of the crust are golden brown.
- Cool and serve: Once baked, remove the pizzas from the oven and let them cool for a few minutes. Serve them warm or allow them to cool completely before packing them in lunchboxes.
These simple steps will guide you through the process of creating delicious Mini Lunchbox Pizzas that are sure to please everyone. Enjoy the satisfaction of making your own personalized pizzas!
Tips For Variations:
One of the best aspects of Mini Lunchbox Pizzas is their versatility. Here are some unique variation ideas that allow you to experiment with flavors, textures, and budget options:
- Different crust types: While mini pizza crusts are a great base, consider using whole wheat pita bread or English muffins for a different texture. These options can also add a hearty element to your pizzas.
- Homemade pizza sauce: Making your own pizza sauce can enhance the flavor significantly. Combine canned tomatoes, garlic, onion powder, oregano, and basil for a fresh taste. Adjust the seasonings to suit your preference.
- Cheese choices: While mozzarella is a classic, try using a blend of cheeses like provolone, cheddar, or gouda for a unique flavor profile. Mixing different cheeses can elevate the overall taste of your pizzas.
- Vegetarian options: For a vegetarian twist, load up on vegetables like spinach, artichokes, and zucchini. You can also add a white sauce base with ricotta or cream cheese for a creamy texture.
- Sweet pizzas: Consider making dessert versions of Mini Lunchbox Pizzas. Use a sweet pizza dough, spread Nutella as a base, and top with fresh fruits like strawberries, bananas, and a sprinkle of powdered sugar.
- Budget-friendly toppings: If you’re looking to save money, use seasonal vegetables or canned toppings like mushrooms or olives. These can provide great flavor without breaking the bank.
- Make-ahead options: Prepare a batch of mini pizzas and freeze them before baking. When you’re ready to eat, bake straight from the freezer, adding a few extra minutes to the cooking time for perfect results.
These variations not only keep the meal exciting but also allow for creativity in the kitchen. Don’t hesitate to experiment with different combinations to find your perfect Mini Lunchbox Pizza.
Serving Suggestions:
Mini Lunchbox Pizzas can be enjoyed in various ways, making them a versatile meal option. Here are some creative serving suggestions:
- Lunchbox pairing: Pack your mini pizzas in lunchboxes alongside fresh fruits, such as apple slices or grapes, and a small container of carrot sticks for a well-rounded meal. This combination adds color and nutritional variety.
- Dipping sauces: Enhance the pizza experience by including dipping sauces such as ranch dressing, marinara sauce, or garlic aioli. These can be packed in small containers and provide an extra layer of flavor.
- Picnic option: For a picnic, serve the mini pizzas with a side salad of mixed greens topped with cherry tomatoes and a light vinaigrette. This refreshing side complements the richness of the pizzas.
- Movie night treat: Transform these mini pizzas into a fun movie night snack. Serve them on a platter with popcorn and assorted snacks, creating an enjoyable and relaxed atmosphere.
- Buffet style: When hosting a gathering, set up a mini pizza bar with a variety of toppings and sauces. Allow guests to create their own mini pizzas, making it an interactive and fun experience for everyone.
These serving suggestions can elevate your Mini Lunchbox Pizzas, making them suitable for any occasion. Their versatility means you can enjoy them in numerous ways, whether for lunch, dinner, or a fun snack.
FAQ:
Can I freeze Mini Lunchbox Pizzas?
Yes, you can freeze Mini Lunchbox Pizzas before baking. Just assemble them, place them on a baking sheet, and freeze until firm. Then transfer to a freezer bag. Bake from frozen when ready to enjoy.
How long do Mini Lunchbox Pizzas last in the refrigerator?
Mini Lunchbox Pizzas can be stored in the refrigerator for up to 3 days. Make sure to keep them in an airtight container to maintain freshness.
Can I make these pizzas gluten-free?
Absolutely! Use gluten-free pizza crusts or alternatives like cauliflower crusts to make delicious gluten-free Mini Lunchbox Pizzas that everyone can enjoy.
What toppings work best for Mini Lunchbox Pizzas?
The best toppings are those that cook well and don’t release too much moisture. Consider using pepperoni, bell peppers, olives, and cooked chicken for the best results.
How can I make Mini Lunchbox Pizzas healthier?
To make them healthier, use whole wheat crusts, load up on vegetables, and opt for reduced-fat cheese. You can also use homemade sauces to control the ingredients.
Mini Lunchbox Pizzas
Equipment
- Baking Sheet
- Parchment Paper
- Spoon
Ingredients
Pizza Crusts
- 12 pieces Mini pizza crusts Store-bought or homemade, about 3 inches in diameter.
Sauce
- 1 cup Pizza sauce Rich, flavorful tomato sauce.
Cheese
- 2 cups Shredded mozzarella cheese Classic choice for pizza.
Herbs
- ¼ cup Fresh basil leaves, chopped Enhances flavor.
Oil
- 2 tablespoons Olive oil Drizzle on top for richness.
Toppings
- 1 cup Variety of toppings Choose from pepperoni, bell peppers, mushrooms, onions, olives, or chicken.
Cheese
- ¼ cup Grated Parmesan cheese For sprinkling on top.
Spices
- Crushed red pepper flakes Optional, to taste.
Instructions
- Preheat your oven to 400°F (200°C).
- Line a baking sheet with parchment paper or lightly grease it.
- Arrange the mini crusts on the prepared baking sheet.
- Spread a tablespoon of pizza sauce over each crust.
- Sprinkle shredded mozzarella cheese over the sauce.
- Add your choice of toppings to each mini pizza.
- Drizzle olive oil over the top of each pizza.
- Sprinkle grated Parmesan cheese on top.
- Add crushed red pepper flakes if desired.
- Bake for 10-15 minutes until cheese is melted and crust is golden brown.
- Let cool for a few minutes before serving.