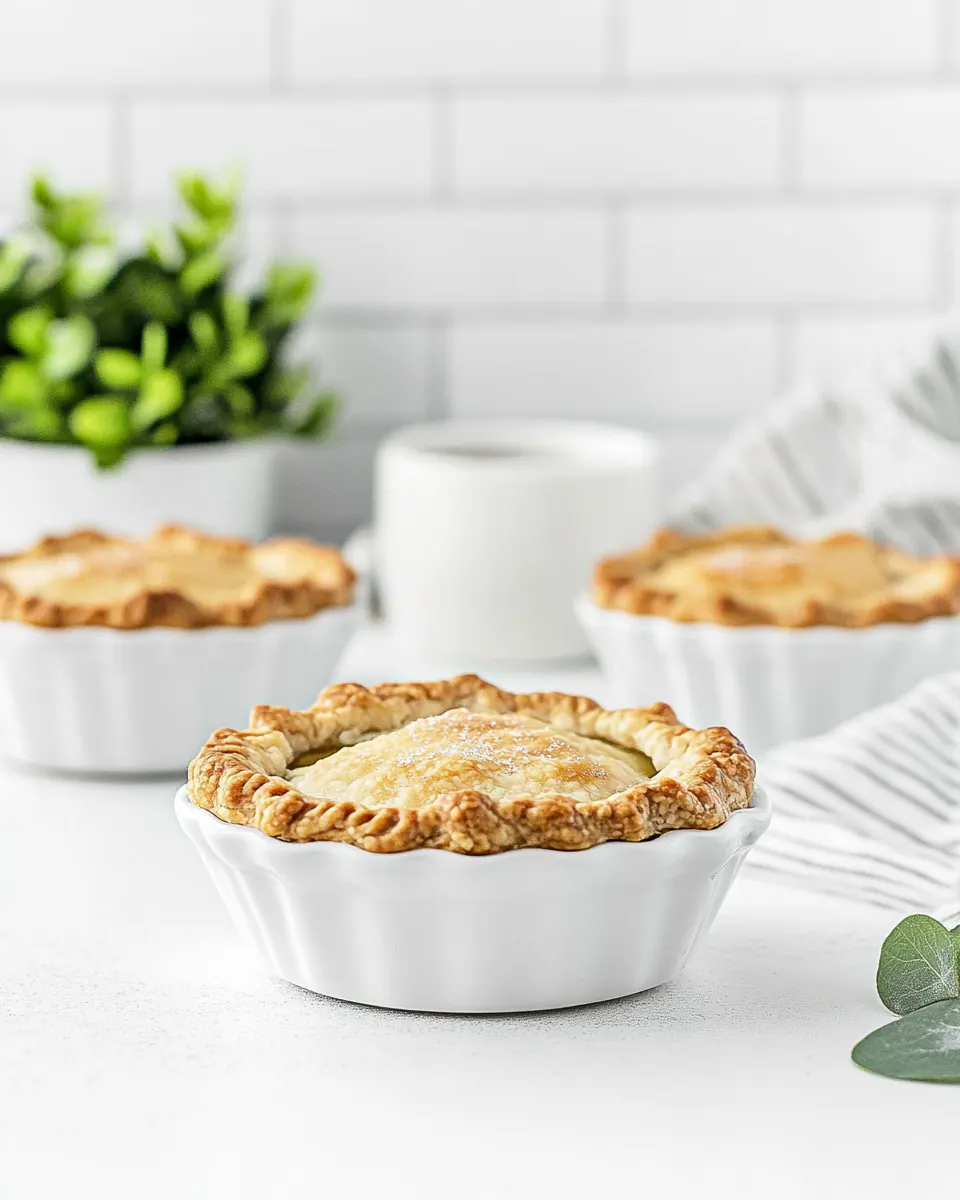
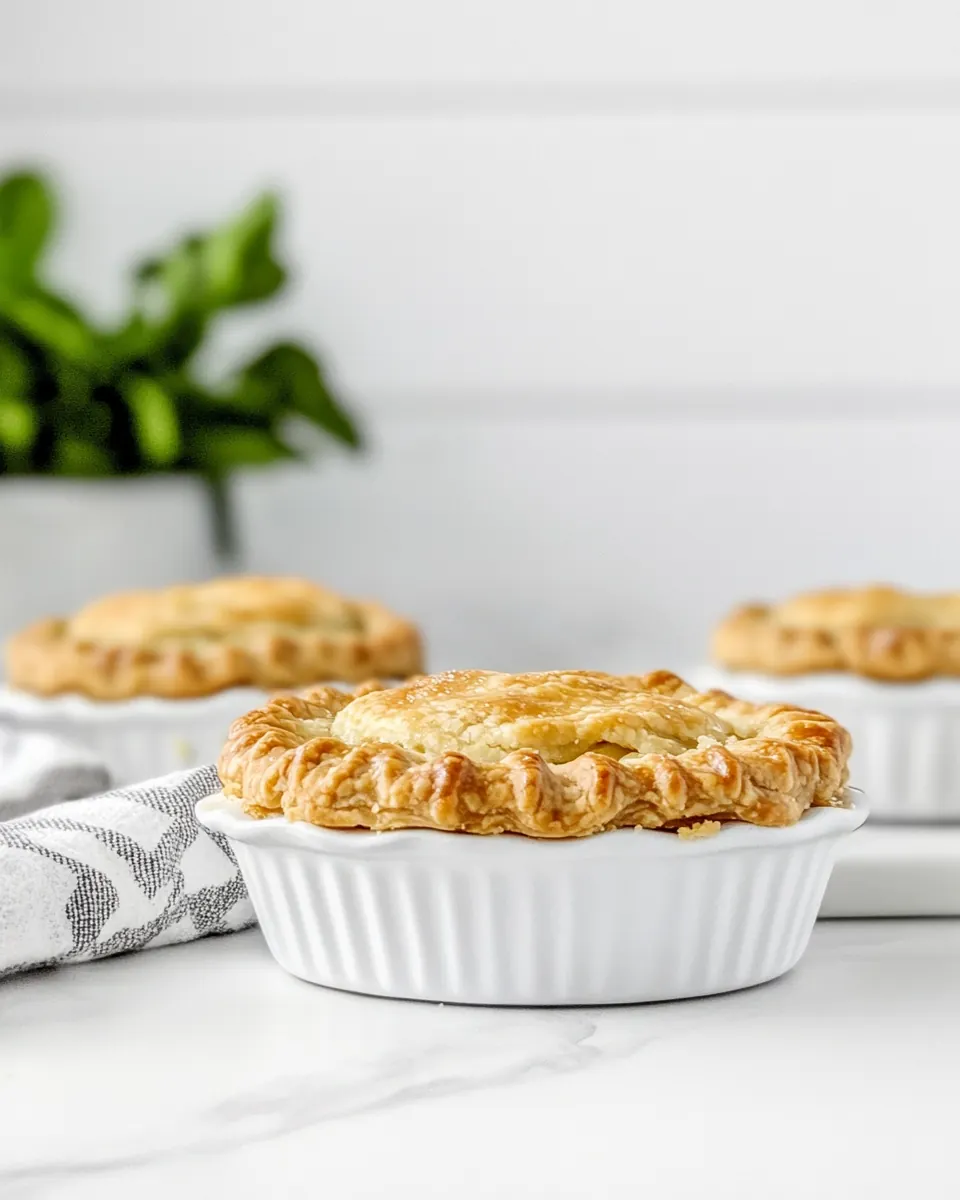
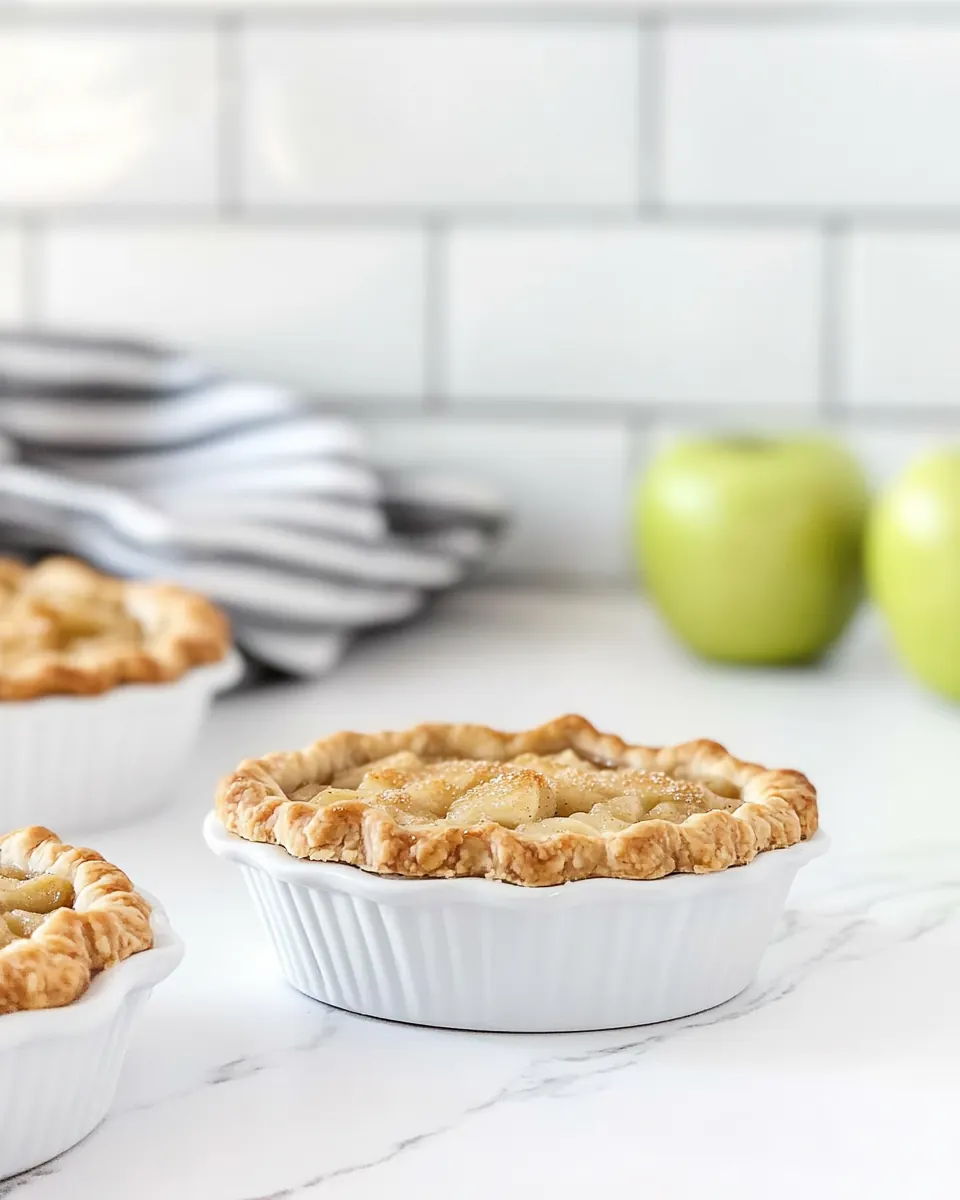
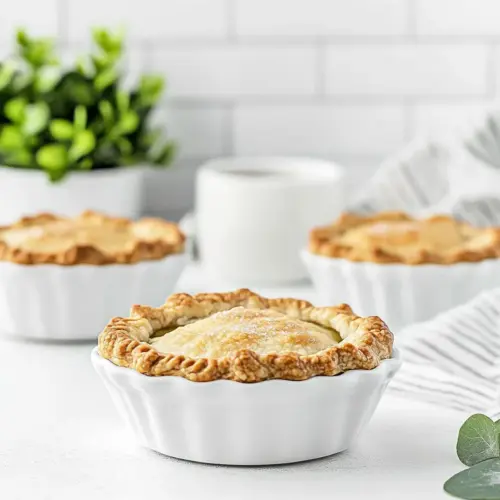
Mini Apple Pies
Mini Apple Pies are one of those recipes I reach for whenever I want to turn a simple afternoon into a memory. The first time I made these, the kitchen smelled like warm cinnamon and butter, and my neighbor knocked on the door because the aroma wandered into the hallway. I remember stacking the tiny pies on a scalloped plate and feeling oddly proud that something so small could feel so celebratory. Over the years, I have adjusted the crumb topping and the balance of sweetness so the filling stays tender while the crust crisps up just enough to give you that satisfying little crack when you bite in.
There is a comfortable ritual to making Mini Apple Pies that I adore. Rolling out the refrigerated crust, cutting rounds, and folding the edges becomes almost meditative. I like to invite a friend or a kid to help press the dough into the mini dishes, because those imperfect, hand fluted edges are what give each pie personality. Every time I make them for a holiday or a casual weekend, people remark on how nostalgic they feel, and I always answer that it is part technique, part heart.
Recipe Snapshot
1 hr 10 mins
25 mins
45 mins
Medium
250 kcal
American
Gluten-Free, Vegan
Desserts
Oven, Mini pie dishes, Large bowl, Baking sheet, Parchment paper
Why Try This Mini Apple Pies
Small Size, Big Impact
I love that Mini Apple Pies deliver all the charm of a classic apple pie without the commitment of a full pie. They bake more evenly and each guest gets a personal portion, which is perfect when I want everyone to have that fresh out of the oven experience. The size concentrates flavor, so each bite is intensely apple forward, with buttery crust and a crunchy topping.
Textural Harmony
One reason I keep coming back to this recipe is the contrast between the tender, syrupy apple filling and the crumbly topping. The filling is thickened with a bit of Argo Corn Starch, which gives a glossy, slightly gelled texture that clings to the apple pieces. On top, the crumb made from all purpose flour, light brown sugar, and melted unsalted butter creates a lovely sandy crunch that plays against the soft fruit.
Straightforward Ingredients
I appreciate how honest the ingredient list is. Using refrigerated pie crusts saves time and keeps the pantry simple, while common staples like cinnamon and sugar do the heavy lifting on flavor. Because these pies are composed of familiar elements, they are easy to scale or tweak subtly without risking the whole thing.
Reliable for Gatherings
These mini pies are crowd friendly. They are portable, single serve, and present beautifully on a platter. I usually bake them on a parchment lined sheet to keep everything tidy, and because they finish in under an hour, they are an easy addition to a holiday spread. I find they travel well and store nicely for a day or two.
Comfort and Versatility
Finally, Mini Apple Pies are comfort food with options. You can make them for a festive brunch, a quiet dessert, or as a thoughtful gift. I often tweak the sweetness slightly depending on the tartness of the apples I have, which makes the recipe forgiving and adaptable.
Mini Apple Pies Ingredients
These ingredients are chosen to create balance, structure, and pure apple pie flavor. The refrigerated pie crust gives flakiness and convenience, while the apples provide the main texture and character. The syrup and starch form a glossy, thick filling, and the crumb topping adds richness and crunch. Each component plays a specific role, from binding to mouthfeel, so the result feels classic yet approachable.
- 29 inch refrigerated pie crusts: Chill and provide a flaky, buttery base for the mini pies; use 29-inch refrigerated pie crusts to line and cover molds easily. Handle gently to avoid stretching, and keep cold until baking to ensure a tender texture. Re-roll scraps as needed to maximize yield without affecting final flakiness.
- 5 large baking apples peeled, cored and coarsely chopped: Peel, core and coarsely chop five large baking apples to create tender, flavorful filling pieces that soften while keeping some texture. Choose firm baking varieties for best structure and balance of sweet-tart flavor. Toss with syrup and spices immediately to prevent browning and ensure even coating.
- 1/3 cup Karo® Syrup: Sweeten and add moisture with one-third cup Karo® Syrup, helping to bind the apple filling and contribute a glossy finish. Use light corn syrup for a smooth texture and to prevent crystallization during baking. Stir into the fruit mixture to distribute sweetness evenly.
- 2 tablespoons unsalted butter melted: Add richness and a silky mouthfeel by using two tablespoons unsalted butter melted into the filling or brushed on crust edges. Melted butter helps meld flavors and promotes browning on exposed pastry surfaces. Reserve a bit for brushing tops before baking if desired.
- 2 tablespoons sugar: Provide granular sweetness and a bit of texture with two tablespoons sugar mixed into the apple filling. Granulated sugar helps draw juices from the fruit and balances tartness, aiding in caramelization during baking. Adjust slightly for apple sweetness level, but keep quantity consistent for recipe balance.
- 1 1/2 tablespoons Argo® Corn Starch: Thicken filling juices by incorporating one and a half tablespoons Argo® Corn Starch to prevent runny pies and create a glossy, sliceable interior. Dissolve starch in a little cold water or combine directly with dry ingredients to avoid lumps before adding to the hot fruit. Use exact amount to maintain filling consistency without becoming gummy.
- 1 teaspoon ground cinnamon: Warm and enhance the fruit flavor using one teaspoon ground cinnamon stirred into the apple mixture for classic pie spice character. Cinnamon complements apples by adding aromatic depth and subtle warmth. Mix thoroughly to distribute spice evenly among fruit pieces.
- pinch of salt: Enhance overall flavor balance with a pinch of salt added to the filling to brighten sweetness and deepen taste profiles. Salt controls perception of sweetness and rounds out other ingredients without making the dish salty. Add sparingly to avoid overpowering delicate flavors.
- 3/4 cup all-purpose flour: Create a tender, slightly crumbly topping or dough component using three-quarters cup all-purpose flour as the structure-providing dry ingredient. Flour combines with fats and sugars to form crumbs or dough that bake to golden textures. Measure accurately and mix gently to avoid overworking gluten.
- 1/2 cup light brown sugar: Impart molasses-like sweetness and chewiness with one-half cup light brown sugar incorporated into the topping or filling for deeper flavor. Brown sugar adds moisture and contributes to caramelization, enhancing color and taste. Pack lightly when measuring for consistent sweetness and texture.
- Pinch of salt: Balance sweetness and enhance flavors with a pinch of salt added to the topping or dough to lift other ingredients and prevent cloying taste. Small amounts of salt improve overall palate perception and emphasize buttery notes. Sprinkle evenly while mixing dry ingredients.
- 5 tablespoons unsalted butter melted: Bind and enrich the topping or dough using five tablespoons unsalted butter melted to provide moisture, flavor, and a tender crumb. Melted butter helps create cohesive crumbs or brushable glazes that brown nicely in the oven. Use melted form for easy incorporation and even distribution.
The Process for Making Mini Apple Pies
Get cozy, because these steps walk you through each moment from prep to golden finish. I like to set out all my ingredients and tools first, then move through the recipe with calm focus. The directions below expand on each moment so you know what to look, smell, and listen for.
- Preheat oven to 375°F.: When the oven warms to 375°F you will notice a dry, toasty heat that helps the crust set quickly, promoting a crisp, golden edge. This temperature is ideal because it browns the crust while allowing the filling to bubble gently without burning. A common mistake is not preheating long enough, which can lead to soggy bottoms, so wait until the oven fully reaches temperature before baking.
- Cut 4 6-inch rounds out of the pie crusts, and fit them into 4 5-inch mini pie dishes. Use a fork to crimp the edges, or use two hands to flute the edges of the pie crusts.: The visual cue you want is even, snug crusts pressed into each dish with no thin spots, and a decorative edge that will hold juices. The dough should feel cool and slightly firm while you work. If the pastry warms in your hands it becomes sticky and tears easily, so chill briefly if needed. Avoid overworking the dough, which can make it tough rather than flaky.
- In a large bowl, stir together the Karo® Syrup, butter, sugar, corn starch, cinnamon and salt. Pour over apples and stir to coat.: At this stage the mixture should shine, the Karo® Syrup making the glaze glossy and the corn starch evenly distributed so no clumps remain. When you fold this into the apples , you want each piece to glisten with coating but not be swimming in liquid. If you see puddles of syrup, the corn starch may need more thorough mixing. A frequent error is adding the thickener directly to hot liquid which can form lumps, so whisk it into the sugar and syrup first for a smooth finish.
- Evenly divide the apples between the prepared pie crusts.: Aim for uniform mounds so each mini pie bakes at the same rate, and the filling settles similarly across pies. You should hear the soft clink as apples nestle into the crust and see the glossy filling around them. Overfilling is a common issue, it can bubble over and make a sticky mess, so leave a small gap under the crust edge.
- Prepare the crumb topping by mixing the flour, brown sugar, salt and butter with a fork until crumbs form. Top each pie with crumb topping.: Work until the mixture resembles coarse sand with pea sized clumps, so the topping toasts unevenly and gives contrast. The melted unsalted butter should bind the sugar and flour but not make it a paste. If the crumbs are too wet, they will steam instead of crisping, so add a touch more all purpose flour to dry them out slightly. Avoid packing the crumbs down, they should remain loose for a proper crunch.
- Place mini apple pies on a large baking sheet lined with parchment paper or a silicone mat.: The sheet catches any bubbling filling, keeping your oven clean, and the parchment helps the bottoms heat evenly, reducing the chance of sticking. You should arrange them with some space so hot air circulates around each dish for even browning. A typical mistake is placing them too close together which can slow browning and create uneven results.
- Bake pies in preheated oven for 40-45 minutes, until crusts are browned and apples are tender.: During baking you want to watch for a bubbling, syrupy filling and a deep golden top. The aroma will shift from raw fruit to caramelized sweetness, and the topping should develop toasted notes. If the crust browns too quickly, tent with foil to prevent burning while the filling finishes. Underbaked filling will be runny when cooled, so test by inserting a small knife; it should meet gentle resistance from cooked apple, not raw crunch.
Helpful Notes about Mini Apple Pies
These notes expand on common questions and small adjustments I use when I bake Mini Apple Pies. They are practical reminders that improve texture, flavor, and ease of preparation.
- Chill the dough: If your refrigerated pie crust warms while working, pop it back in the fridge for 10 minutes to prevent tearing, and for flakier results.
- Measure apples by volume: Aim for evenly sized pieces so filling cooks consistently, and avoid filling the crust to the brim to prevent overflows.
- Mix the thickener well: Combine the Argo Corn Starch with the dry sugar first, then whisk into the syrup to avoid lumps and ensure a glossy filling.
- Use a baking sheet: Baking the mini pies on a lined sheet ensures even bottom heat and contains any bubbling filling, keeping the oven clean.
- Rest before serving: Allow the pies to cool a bit so the filling firms up, making them easier to move and more pleasant to eat.
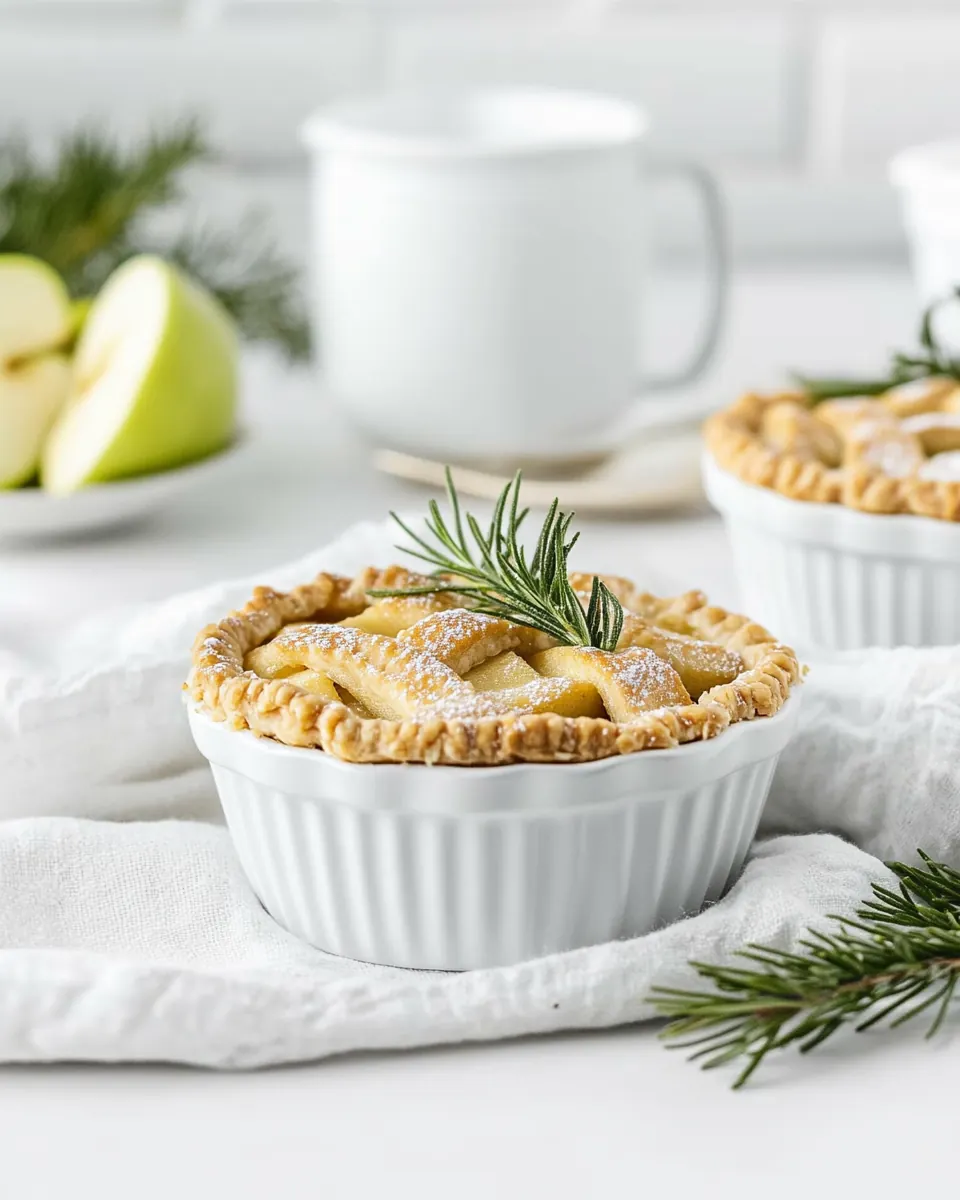
Perfect Pairings for Mini Apple Pies
These mini pies pair beautifully with a variety of serving ideas and occasions. Here are ways I like to present them, store them, and enjoy them across seasons and gatherings.
- Serve warm with a soft dollop: A small spoonful of plain cream or a non dairy alternative complements the warm spices and adds a cooling contrast.
- Plating for gatherings: Place the pies on a rustic wooden board or a delicate cake stand for an inviting presentation, and garnish each with a tiny sprinkle of extra cinnamon.
- Occasions: These are perfect for Thanksgiving platters, casual brunches, or afternoon tea when you want a small individual dessert that feels special.
- Storage: Keep leftover pies in an airtight container at room temperature for up to one day, or refrigerate for two to three days; reheat gently to crisp the topping.
- Seasonal notes: In fall when apples are at their best, these pies shine as a cozy dessert, and they also work well for holiday cookie swaps or potlucks because they are easy to transport.
- Serving style: Offer small dessert forks or spoons, and consider labeling flavors if you make variations so guests know what to expect.
FAQ
Conclusion
Mini Apple Pies stand out because they condense the comforting flavor of a classic pie into perfect single servings that are easy to share. They are approachable to make, with pantry friendly ingredients and a straightforward process that rewards you with warm, cinnamon scented results. Try them for your next gathering or a cozy night at home, and enjoy the way they make ordinary moments feel a little more special. These small pies are a lovely way to celebrate the season and bring people together around a simple, satisfying dessert.
Mini Apple Pies
Equipment
- Oven
- Mini pie dishes
- Large Bowl
- Baking Sheet
- Parchment Paper
Ingredients
- 29 -inch refrigerated pie crusts Chill and provide a flaky, buttery base for the mini pies; use 29-inch refrigerated pie crusts to line and cover molds easily. Handle gently to avoid stretching, and keep cold until baking to ensure a tender texture. Re-roll scraps as needed to maximize yield without affecting final flakiness.
- 5 large baking apples peeled, cored and coarsely chopped Peel, core and coarsely chop five large baking apples to create tender, flavorful filling pieces that soften while keeping some texture. Choose firm baking varieties for best structure and balance of sweet-tart flavor. Toss with syrup and spices immediately to prevent browning and ensure even coating.
- 1/3 cup Karo® Syrup Sweeten and add moisture with one-third cup Karo® Syrup, helping to bind the apple filling and contribute a glossy finish. Use light corn syrup for a smooth texture and to prevent crystallization during baking. Stir into the fruit mixture to distribute sweetness evenly.
- 2 tablespoons unsalted butter melted Add richness and a silky mouthfeel by using two tablespoons unsalted butter melted into the filling or brushed on crust edges. Melted butter helps meld flavors and promotes browning on exposed pastry surfaces. Reserve a bit for brushing tops before baking if desired.
- 2 tablespoons sugar Provide granular sweetness and a bit of texture with two tablespoons sugar mixed into the apple filling. Granulated sugar helps draw juices from the fruit and balances tartness, aiding in caramelization during baking. Adjust slightly for apple sweetness level, but keep quantity consistent for recipe balance.
- 1 -1/2 tablespoons Argo® Corn Starch Thicken filling juices by incorporating one and a half tablespoons Argo® Corn Starch to prevent runny pies and create a glossy, sliceable interior. Dissolve starch in a little cold water or combine directly with dry ingredients to avoid lumps before adding to the hot fruit. Use exact amount to maintain filling consistency without becoming gummy.
- 1 teaspoon ground cinnamon Warm and enhance the fruit flavor using one teaspoon ground cinnamon stirred into the apple mixture for classic pie spice character. Cinnamon complements apples by adding aromatic depth and subtle warmth. Mix thoroughly to distribute spice evenly among fruit pieces.
- pinch of salt Enhance overall flavor balance with a pinch of salt added to the filling to brighten sweetness and deepen taste profiles. Salt controls perception of sweetness and rounds out other ingredients without making the dish salty. Add sparingly to avoid overpowering delicate flavors.
- 3/4 cup all-purpose flour Create a tender, slightly crumbly topping or dough component using three-quarters cup all-purpose flour as the structure-providing dry ingredient. Flour combines with fats and sugars to form crumbs or dough that bake to golden textures. Measure accurately and mix gently to avoid overworking gluten.
- 1/2 cup light brown sugar Impart molasses-like sweetness and chewiness with one-half cup light brown sugar incorporated into the topping or filling for deeper flavor. Brown sugar adds moisture and contributes to caramelization, enhancing color and taste. Pack lightly when measuring for consistent sweetness and texture.
- Pinch of salt Balance sweetness and enhance flavors with a pinch of salt added to the topping or dough to lift other ingredients and prevent cloying taste. Small amounts of salt improve overall palate perception and emphasize buttery notes. Sprinkle evenly while mixing dry ingredients.
- 5 tablespoons unsalted butter melted Bind and enrich the topping or dough using five tablespoons unsalted butter melted to provide moisture, flavor, and a tender crumb. Melted butter helps create cohesive crumbs or brushable glazes that brown nicely in the oven. Use melted form for easy incorporation and even distribution.
Instructions
- Preheat oven to 375°F.: When the oven warms to 375°F you will notice a dry, toasty heat that helps the crust set quickly, promoting a crisp, golden edge. This temperature is ideal because it browns the crust while allowing the filling to bubble gently without burning. A common mistake is not preheating long enough, which can lead to soggy bottoms, so wait until the oven fully reaches temperature before baking.
- Cut 4 6-inch rounds out of the pie crusts, and fit them into 4 5-inch mini pie dishes. Use a fork to crimp the edges, or use two hands to flute the edges of the pie crusts.: The visual cue you want is even, snug crusts pressed into each dish with no thin spots, and a decorative edge that will hold juices. The dough should feel cool and slightly firm while you work. If the pastry warms in your hands it becomes sticky and tears easily, so chill briefly if needed. Avoid overworking the dough, which can make it tough rather than flaky.
- In a large bowl, stir together the Karo® Syrup, butter, sugar, corn starch, cinnamon and salt. Pour over apples and stir to coat.: At this stage the mixture should shine, the Karo® Syrup making the glaze glossy and the corn starch evenly distributed so no clumps remain. When you fold this into the apples , you want each piece to glisten with coating but not be swimming in liquid. If you see puddles of syrup, the corn starch may need more thorough mixing. A frequent error is adding the thickener directly to hot liquid which can form lumps, so whisk it into the sugar and syrup first for a smooth finish.
- Evenly divide the apples between the prepared pie crusts.: Aim for uniform mounds so each mini pie bakes at the same rate, and the filling settles similarly across pies. You should hear the soft clink as apples nestle into the crust and see the glossy filling around them. Overfilling is a common issue, it can bubble over and make a sticky mess, so leave a small gap under the crust edge.
- Prepare the crumb topping by mixing the flour, brown sugar, salt and butter with a fork until crumbs form. Top each pie with crumb topping.: Work until the mixture resembles coarse sand with pea sized clumps, so the topping toasts unevenly and gives contrast. The melted unsalted butter should bind the sugar and flour but not make it a paste. If the crumbs are too wet, they will steam instead of crisping, so add a touch more all purpose flour to dry them out slightly. Avoid packing the crumbs down, they should remain loose for a proper crunch.
- Place mini apple pies on a large baking sheet lined with parchment paper or a silicone mat.: The sheet catches any bubbling filling, keeping your oven clean, and the parchment helps the bottoms heat evenly, reducing the chance of sticking. You should arrange them with some space so hot air circulates around each dish for even browning. A typical mistake is placing them too close together which can slow browning and create uneven results.
- Bake pies in preheated oven for 40-45 minutes, until crusts are browned and apples are tender.: During baking you want to watch for a bubbling, syrupy filling and a deep golden top. The aroma will shift from raw fruit to caramelized sweetness, and the topping should develop toasted notes. If the crust browns too quickly, tent with foil to prevent burning while the filling finishes. Underbaked filling will be runny when cooled, so test by inserting a small knife; it should meet gentle resistance from cooked apple, not raw crunch.
Notes
- Chill the dough: If your refrigerated pie crust warms while working, pop it back in the fridge for 10 minutes to prevent tearing, and for flakier results.
- Measure apples by volume: Aim for evenly sized pieces so filling cooks consistently, and avoid filling the crust to the brim to prevent overflows.
- Mix the thickener well: Combine the Argo Corn Starch with the dry sugar first, then whisk into the syrup to avoid lumps and ensure a glossy filling.
- Use a baking sheet: Baking the mini pies on a lined sheet ensures even bottom heat and contains any bubbling filling, keeping the oven clean.
- Rest before serving: Allow the pies to cool a bit so the filling firms up, making them easier to move and more pleasant to eat.