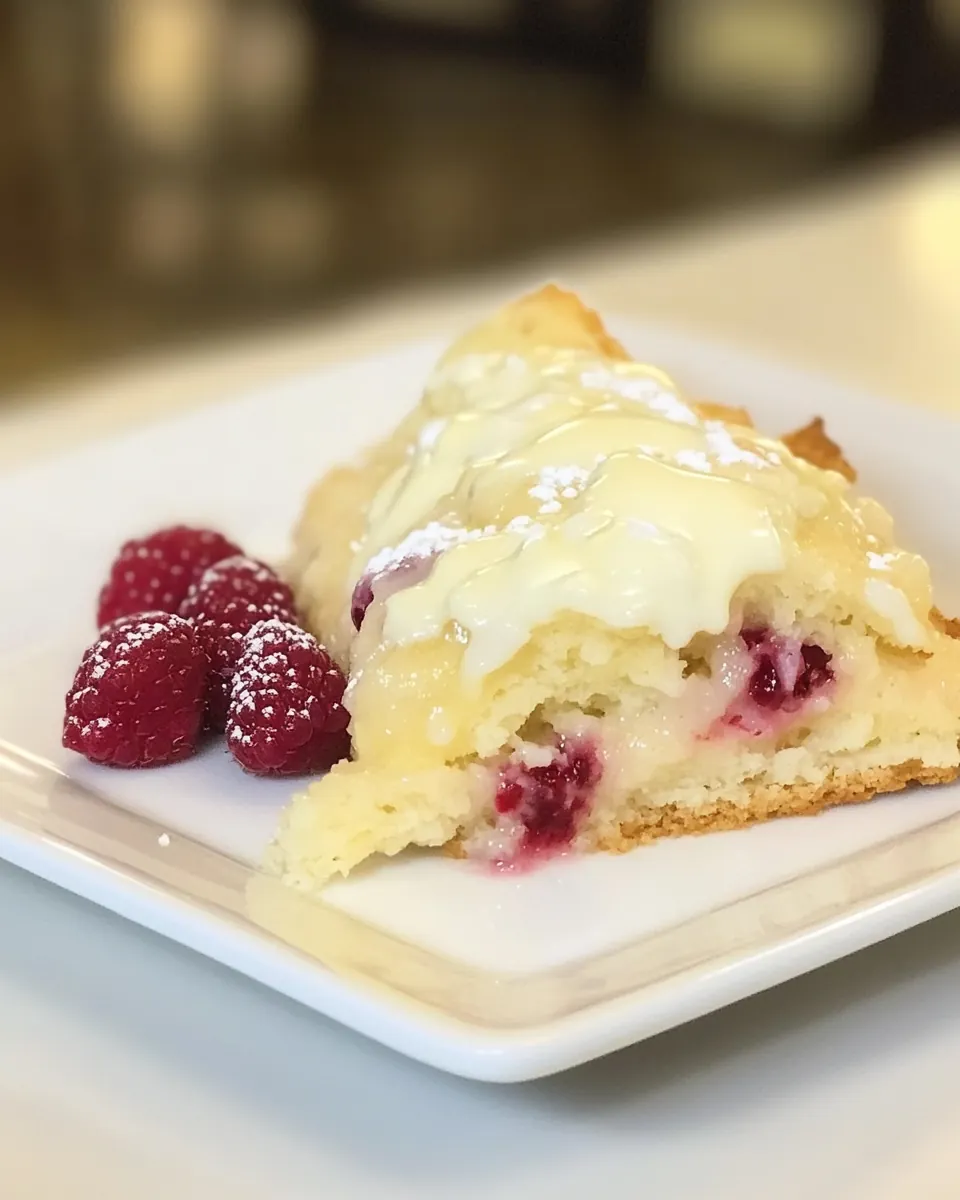
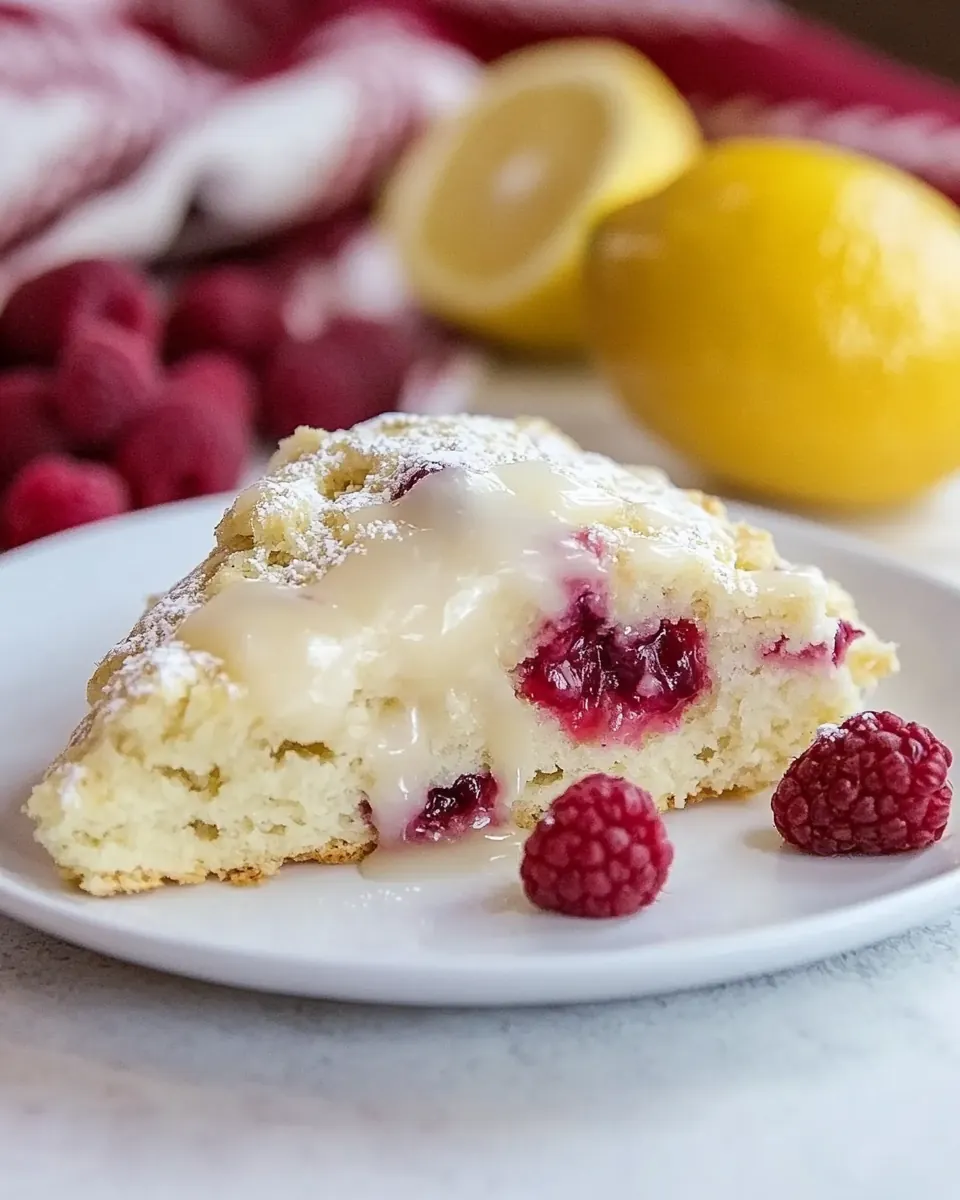
Meyer Lemon Raspberry Scones
Meyer Lemon Raspberry Scones are one of those treats I reach for when I want something that feels elegant but is honestly simple to make. The first time I baked these I was chasing sunshine, literally zesting a Meyer lemon over the counter as the morning light spilled in, while the raspberries sat like little jewels waiting to be folded into the dough.
I remember juggling a toddler on my hip and still managing to rub the zest into the sugar with my fingertips, because that small act releases the bright, floral oils that make these scones sing. The texture surprised me too, flaky with a tender crumb, yet sturdy enough to hold a gloss of glaze without getting soggy.
Every batch feels a little like a tiny victory. When guests arrive and I present a platter of warm, golden Meyer Lemon Raspberry Scones, the room quiets for a second while people decide whether to dive in or admire them. That pause is one of my favorite parts of baking, the anticipation before the first bite. I also learned to trust gentle handling so the raspberries don’t turn the dough pink mush, and to chill the butter properly so the scones rise with flaky layers.
Recipe Snapshot
30 mins
15 mins
15 mins
Easy
200 kcal
American
Gluten-Free, Low FODMAP
Breakfast
Oven, Baking sheet, Parchment paper, Large bowl, Pastry blender, Spatula, Whisk
Why This Meyer Lemon Raspberry Scones Stands Out
Bright, balanced flavor
I love how the Meyer Lemon Raspberry Scones balance tart and sweet. The Meyer lemon offers a softer citrus note than regular lemons, and when combined with the fresh raspberries you get a nuanced, layered flavor. I often find that guests comment on the lemon first, then the pop of berry, and I think that contrast is the real charm.
Textural delight
The texture is where these scones win my heart. Cold unsalted butter cut into the flour creates pockets of steam as it bakes, giving a tender, flaky crumb. I pay attention to not overworking the dough, because that keeps the crumb light. When you bite through one, you should notice a delicate crumble with occasional berry bursts.
Simple, impressive technique
What I appreciate is how straightforward the method is, yet it feels elevated. A quick zesting, a short mix, and a gentle fold of heavy cream and raspberries—then into the oven. It’s a technique that rewards care rather than skill, which makes it perfect for both confident bakers and those trying something new.
Flexible and giftable
These scones travel well, so I often bring them to brunches or give a box to neighbors. The glaze made from powdered sugar and Meyer lemon juice adds a pretty finish that feels celebratory. They keep for a day or two at room temperature and can be refreshed with a quick zap in a warm oven or toaster oven.
Seasonal star
Because Meyer lemons feel like spring sunshine and raspberries peak in warmer months, these scones make the best impression during spring gatherings. I find myself reaching for this recipe when I want a simple dessert or a bright breakfast that still feels special.
Meyer Lemon Raspberry Scones Shopping List
These ingredients come together with a clear purpose: bright citrus, tender fat, and juicy berries create a scone that is both fragrant and flaky. The key players are the all purpose flour and cold unsalted butter for structure and flakiness, the Meyer lemon for aromatic lift, and the raspberries for a fresh, fruity contrast. Together they make a pastry that feels light, yet satisfying.
- 3 tablespoons granulated sugar: Provide sweetness and help tenderize the scone crumb; granulated sugar balances the lemon's tartness and aids in browning during baking, contributing to a lightly caramelized exterior.
- Zest from 1 Meyer lemon: Add bright citrus aroma and concentrated lemon flavor; fresh Meyer lemon zest infuses fragrant oils into the dough, enhancing overall brightness without adding extra liquid.
- 2 cups (250 g) all-purpose flour: Form the structural base of the scones; all-purpose flour provides gluten for texture and stability while allowing a tender, flaky crumb when handled minimally.
- 1 tablespoon baking powder: Leaven the dough and produce lift; baking powder creates gas bubbles during baking to give scones a light, tender rise and slightly airy interior.
- 1/2 teaspoon (0.5 teaspoon) salt: Enhance flavor and control fermentation balance; salt rounds out sweetness and intensifies other flavors while strengthening gluten structure for better texture.
- 6 tablespoons unsalted butter, cold, cut into cubes: Contribute rich fat for flakiness and tender layers; cold, cubed unsalted butter creates pockets of steam as it melts, yielding flaky, buttery scone layers.
- 1 cup (238 ml) heavy cream: Provide moisture, richness, and binding; heavy cream adds fat for tenderness and helps hydrate the flour while producing a moist, rich crumb.
- 1 cup (120 g) raspberries: Offer bursts of fresh tart-sweet fruit and texture; raspberries add bright flavor, moisture, and visual appeal while reducing the need for additional fruit flavoring.
- 1 cup (120 g) powdered sugar: Create a sweet glaze or dusting with smooth sweetness; powdered sugar dissolves easily into a lemon glaze for a glossy finish and balanced sweetness.
- 2 tablespoons Meyer lemon juice: Add concentrated citrus juice for flavor and glaze acidity; Meyer lemon juice brightens the dough or glaze with gentle tartness and enhances the overall lemon profile.
Making This Meyer Lemon Raspberry Scones
These steps are straightforward, but I like to take my time so each sensory cue is clear. The dough benefits from cool hands and a gentle touch, and the oven provides the final transformation into golden, slightly crisp scones with a tender interior.
- Make the Scones: Preheat oven to 400 degrees F. Line a baking sheet with parchment paper; set aside.: The oven roaring to life at 400 degrees F fills the kitchen with heat and the promise of golden edges. As the temperature climbs, the moment you slide the tray in you should hear the quiet settling of dough, then within minutes the edges begin to set and hint at crispness. This high heat encourages a rapid rise, creating flaky layers where the pockets of cold butter steam. A common mistake is starting with an oven that is not fully preheated, which causes the scones to spread instead of rising, so always wait for steady heat. Watch for a deep golden color and a firm top to know they are done. If your scones brown too quickly, rotate the pan halfway through baking for even color.
- Place the sugar in a large bowl and add the lemon zest. Using your fingertips, rub the lemon zest into the sugar until it is evenly distributed. Add the flour, baking powder and salt to the bowl and whisk to combine.: When you rub the zest into the sugar , the mixture becomes fragrant, releasing citrus oil that perfumes the whole dough. The sugar will look slightly damp and speckled with tiny yellow threads, and the aroma will feel instantly brighter. This step matters because infusing the sugar intensifies the lemon flavor evenly, instead of having pockets of zest. A typical pitfall is using coarse zest or leaving pith bits, which can add bitterness. Work the zest thoroughly until evenly distributed so every bite picks up that citrus note.
- Add the cubed butter and, using a pastry blender or two knives, cut the butter into the flour mixture until it is the texture of coarse sand and there are no pieces of butter larger than the size of a pea remaining.: The dry mixture should appear light and uniform, with the baking powder dispersed so each bite can rise evenly. Whisking aerates the flour slightly and breaks up clumps, which promotes a tender crumb. The sound of the whisk is soft, and visually you’ll notice a pale, sandy texture. Avoid heavy-handed agitation of the flour , which can develop gluten and toughen the scones. A common error is skipping the whisk step, leading to uneven bake and possible dense spots.
- Pour the heavy cream and raspberries into the flour mixture and, using a spatula, gently fold until a dough starts to come together. Turn the dough out onto a lightly floured surface and gently knead a few times to bring the dough together. Using floured hands, gently pat the dough into a 7-inch circle and cut into 8 triangles.: When the cold butter is worked into the flour , you should see pea sized specks of butter coated in flour, which is exactly what creates flakiness. The texture should resemble coarse sand with little lumps, and it will feel cool to the touch. This technique matters because those butter bits melt in the oven leaving steam pockets that lift the scones. Overworking the butter will warm it and make the dough greasy, which flattens the rise, so keep your tools quick and efficient. If you notice melted butter, chill the bowl briefly before continuing.
- Transfer the scones to the prepared baking sheet and bake for 15 to 20 minutes, or until golden brown and set. Remove from the oven and allow to cool completely.: As the heavy cream meets the dry mix, you’ll hear a soft folding sound and see the dough clumping into a shaggy mass dotted with bright raspberries . The berries will release little flecks of red, but gentle folding keeps them mostly intact, preserving bursts of fruit within the dough. This is where restraint pays off because overmixing crushes the raspberries and creates too much moisture. A typical mistake is adding excessive stirring which activates gluten and makes tough scones. Stop folding when you have a cohesive, slightly sticky dough that holds together when pinched.
- Make the Glaze: In a small bowl, whisk together the powdered sugar and juice from Meyer lemons and drizzle over scones. Add more powdered sugar or juice if you prefer a thicker or thinner glaze.: The dough should feel cool and slightly tacky, and as you knead you will notice the raspberries nestle in while small strings of dough smooth out. Knead just enough to unite the ingredients, maybe four to six gentle presses and folds, because too much handling warms the butter and activates gluten. The visual cue is a smooth surface that still has some texture, not a perfect ball. A common oversight is over-kneading, which yields a dense final product, so keep your touch light and quick.
- Using floured hands gently pat the dough into a 7 inch circle and cut into 8 triangles: Patting the dough to a 7 inch circle creates uniform scones that bake evenly; the sound is a soft thud as your palm meets the dough, and the surface should be lightly floured to prevent sticking. Cutting into triangles gives classic shapes with pointed edges that brown nicely. Use a sharp knife or bench scraper for clean lines, pressing straight down to avoid sealing the edges. If you press too hard while shaping, you risk compressing the layers and losing flakiness. A helpful sign is when the cut edges look clean and the dough holds its shape on the tray.
- Transfer the scones to the prepared baking sheet and bake for 15 to 20 minutes or until golden brown and set: In the oven, the scones will first expand slightly, then the tops begin to color and the edges firm. The aroma shifts from floury to toasty sweet, and the sound is silent, save for the occasional soft crack as moisture escapes. Baking until golden brown ensures a crisp exterior and a tender interior. Underbaking leaves the center gummy, while overbaking dries them out, so aim for a warm golden hue and a set center. If your oven runs hot, reduce time and check early to avoid over browning.
- Remove from the oven and allow to cool completely: Cooling lets the interior finish setting and prevents the glaze from sliding off when applied. The scones will exhale a gentle steam as they cool, and the crust will firm slightly, becoming pleasantly crisp. Patience here maintains texture balance, because glazing while too warm can melt the icing and make it runny. A frequent error is glazing immediately and losing the pretty finish, so let them reach room temperature for the best result.
- Make the Glaze: When you whisk the powdered sugar with Meyer lemon juice , the mixture turns silky and glossy, emitting a bright citrus scent that complements the warm scones. Start with a small amount of juice to control consistency, adding more to thin the glaze until it drips slowly off a spoon. This step enhances presentation and adds a sweet tang that ties the flavors together. A common misstep is adding too much juice at once, producing a glaze that is too thin and runs off; correct this by whisking in more powdered sugar a little at a time.
- Drizzle over scones add more powdered sugar or juice if you prefer a thicker or thinner glaze: The final drizzle should glint on the surface, pooling slightly in the crevices and accentuating the golden tops. The interplay of sweetness and citrus is immediate on the nose and palate, and visually the glaze gives a bakery finish. If you want a heavier coating, add powdered sugar to thicken; for a lighter sheen, thin with additional Meyer lemon juice . Avoid pouring while the scones are too hot, which will cause the glaze to run and create a mess. Aim for a graceful ribbon of glaze that sets to a soft sheen.
How to Switch It Up
These suggestions will help you vary the recipe without losing what makes it special. Small swaps and technique tweaks can change texture, flavor intensity, and presentation while keeping the process familiar.
- Use frozen raspberries carefully if fresh berries are not available, toss them briefly in a little flour before folding to reduce bleeding and extra moisture.
- Adjust the glaze consistency by adding powdered sugar to thicken or Meyer lemon juice to thin, aiming for a ribbon that holds for a moment before settling.
- Make mini scones by reducing the circle size and cutting smaller wedges, this shortens baking time and produces more delicate portions for teatime.
- Chill the dough for 15 to 30 minutes before shaping if your kitchen is warm, this firms the butter and helps the scones keep their height.
- Brush with cream before baking for a shinier, slightly crisp top, the heavy cream promotes attractive browning without changing texture.
Perfect Matches for Meyer Lemon Raspberry Scones
These serving ideas help you present and enjoy the scones in multiple settings, from casual breakfasts to spring brunches. Think about texture contrasts and complementary flavors when planning pairings.
- Serve warm with tea, pairing the tender Meyer Lemon Raspberry Scones with a cup of bright, floral tea enhances the citrus notes and makes for a relaxed morning treat.
- Create a brunch platter with sliced fruit and soft spreads, letting guests build their own bites; the scones work well alongside mild cheeses and honey if desired.
- Offer them at spring gatherings where the Meyer lemon and raspberries feel seasonally appropriate, they make a pretty addition to a shower or luncheon table.
- Storage tip Keep scones in an airtight container at room temperature for up to two days, or freeze unglazed scones for longer storage and reheat briefly to refresh their texture.
- Presentation idea Arrange on a serving platter with a light dusting of powdered sugar and a small bowl of extra glaze for drizzling, it looks elegant and invites guests to customize.
FAQ
Conclusion
These Meyer Lemon Raspberry Scones stand out for their bright citrus aroma, tender flaky crumb, and the fresh bursts of raspberry in every bite. Give them a try when you want a simple bake that looks and tastes special, whether for a leisurely breakfast or a sunny brunch. I hope you enjoy the process of rubbing zest into sugar, feeling the cool dough in your hands, and presenting warm, glazed scones that make mornings feel a little more celebratory.
Meyer Lemon Raspberry Scones
Equipment
- Oven
- Baking Sheet
- Parchment Paper
- Large Bowl
- Pastry blender
- Spatula
- Whisk
Ingredients
- 3 tablespoons granulated sugar Provide sweetness and help tenderize the scone crumb; granulated sugar balances the lemon's tartness and aids in browning during baking, contributing to a lightly caramelized exterior.
- Zest from 1 Meyer lemon Add bright citrus aroma and concentrated lemon flavor; fresh Meyer lemon zest infuses fragrant oils into the dough, enhancing overall brightness without adding extra liquid.
- 2 cups (250 g) all-purpose flour Form the structural base of the scones; all-purpose flour provides gluten for texture and stability while allowing a tender, flaky crumb when handled minimally.
- 1 tablespoon baking powder Leaven the dough and produce lift; baking powder creates gas bubbles during baking to give scones a light, tender rise and slightly airy interior.
- 1/2 teaspoon (0.5 teaspoon) salt Enhance flavor and control fermentation balance; salt rounds out sweetness and intensifies other flavors while strengthening gluten structure for better texture.
- 6 tablespoons unsalted butter, cold, cut into cubes Contribute rich fat for flakiness and tender layers; cold, cubed unsalted butter creates pockets of steam as it melts, yielding flaky, buttery scone layers.
- 1 cup (238 ml) heavy cream Provide moisture, richness, and binding; heavy cream adds fat for tenderness and helps hydrate the flour while producing a moist, rich crumb.
- 1 cup (120 g) raspberries Offer bursts of fresh tart-sweet fruit and texture; raspberries add bright flavor, moisture, and visual appeal while reducing the need for additional fruit flavoring.
- 1 cup (120 g) powdered sugar Create a sweet glaze or dusting with smooth sweetness; powdered sugar dissolves easily into a lemon glaze for a glossy finish and balanced sweetness.
- 2 tablespoons Meyer lemon juice Add concentrated citrus juice for flavor and glaze acidity; Meyer lemon juice brightens the dough or glaze with gentle tartness and enhances the overall lemon profile.
Instructions
- Make the Scones: Preheat oven to 400 degrees F. Line a baking sheet with parchment paper; set aside.: The oven roaring to life at 400 degrees F fills the kitchen with heat and the promise of golden edges. As the temperature climbs, the moment you slide the tray in you should hear the quiet settling of dough, then within minutes the edges begin to set and hint at crispness. This high heat encourages a rapid rise, creating flaky layers where the pockets of cold butter steam. A common mistake is starting with an oven that is not fully preheated, which causes the scones to spread instead of rising, so always wait for steady heat. Watch for a deep golden color and a firm top to know they are done. If your scones brown too quickly, rotate the pan halfway through baking for even color.
- Place the sugar in a large bowl and add the lemon zest. Using your fingertips, rub the lemon zest into the sugar until it is evenly distributed. Add the flour, baking powder and salt to the bowl and whisk to combine.: When you rub the zest into the sugar , the mixture becomes fragrant, releasing citrus oil that perfumes the whole dough. The sugar will look slightly damp and speckled with tiny yellow threads, and the aroma will feel instantly brighter. This step matters because infusing the sugar intensifies the lemon flavor evenly, instead of having pockets of zest. A typical pitfall is using coarse zest or leaving pith bits, which can add bitterness. Work the zest thoroughly until evenly distributed so every bite picks up that citrus note.
- Add the cubed butter and, using a pastry blender or two knives, cut the butter into the flour mixture until it is the texture of coarse sand and there are no pieces of butter larger than the size of a pea remaining.: The dry mixture should appear light and uniform, with the baking powder dispersed so each bite can rise evenly. Whisking aerates the flour slightly and breaks up clumps, which promotes a tender crumb. The sound of the whisk is soft, and visually you’ll notice a pale, sandy texture. Avoid heavy-handed agitation of the flour , which can develop gluten and toughen the scones. A common error is skipping the whisk step, leading to uneven bake and possible dense spots.
- Pour the heavy cream and raspberries into the flour mixture and, using a spatula, gently fold until a dough starts to come together. Turn the dough out onto a lightly floured surface and gently knead a few times to bring the dough together. Using floured hands, gently pat the dough into a 7-inch circle and cut into 8 triangles.: When the cold butter is worked into the flour , you should see pea sized specks of butter coated in flour, which is exactly what creates flakiness. The texture should resemble coarse sand with little lumps, and it will feel cool to the touch. This technique matters because those butter bits melt in the oven leaving steam pockets that lift the scones. Overworking the butter will warm it and make the dough greasy, which flattens the rise, so keep your tools quick and efficient. If you notice melted butter, chill the bowl briefly before continuing.
- Transfer the scones to the prepared baking sheet and bake for 15 to 20 minutes, or until golden brown and set. Remove from the oven and allow to cool completely.: As the heavy cream meets the dry mix, you’ll hear a soft folding sound and see the dough clumping into a shaggy mass dotted with bright raspberries . The berries will release little flecks of red, but gentle folding keeps them mostly intact, preserving bursts of fruit within the dough. This is where restraint pays off because overmixing crushes the raspberries and creates too much moisture. A typical mistake is adding excessive stirring which activates gluten and makes tough scones. Stop folding when you have a cohesive, slightly sticky dough that holds together when pinched.
- Make the Glaze: In a small bowl, whisk together the powdered sugar and juice from Meyer lemons and drizzle over scones. Add more powdered sugar or juice if you prefer a thicker or thinner glaze.: The dough should feel cool and slightly tacky, and as you knead you will notice the raspberries nestle in while small strings of dough smooth out. Knead just enough to unite the ingredients, maybe four to six gentle presses and folds, because too much handling warms the butter and activates gluten. The visual cue is a smooth surface that still has some texture, not a perfect ball. A common oversight is over-kneading, which yields a dense final product, so keep your touch light and quick.
- Using floured hands gently pat the dough into a 7 inch circle and cut into 8 triangles: Patting the dough to a 7 inch circle creates uniform scones that bake evenly; the sound is a soft thud as your palm meets the dough, and the surface should be lightly floured to prevent sticking. Cutting into triangles gives classic shapes with pointed edges that brown nicely. Use a sharp knife or bench scraper for clean lines, pressing straight down to avoid sealing the edges. If you press too hard while shaping, you risk compressing the layers and losing flakiness. A helpful sign is when the cut edges look clean and the dough holds its shape on the tray.
- Transfer the scones to the prepared baking sheet and bake for 15 to 20 minutes or until golden brown and set: In the oven, the scones will first expand slightly, then the tops begin to color and the edges firm. The aroma shifts from floury to toasty sweet, and the sound is silent, save for the occasional soft crack as moisture escapes. Baking until golden brown ensures a crisp exterior and a tender interior. Underbaking leaves the center gummy, while overbaking dries them out, so aim for a warm golden hue and a set center. If your oven runs hot, reduce time and check early to avoid over browning.
- Remove from the oven and allow to cool completely: Cooling lets the interior finish setting and prevents the glaze from sliding off when applied. The scones will exhale a gentle steam as they cool, and the crust will firm slightly, becoming pleasantly crisp. Patience here maintains texture balance, because glazing while too warm can melt the icing and make it runny. A frequent error is glazing immediately and losing the pretty finish, so let them reach room temperature for the best result.
- Make the Glaze: When you whisk the powdered sugar with Meyer lemon juice , the mixture turns silky and glossy, emitting a bright citrus scent that complements the warm scones. Start with a small amount of juice to control consistency, adding more to thin the glaze until it drips slowly off a spoon. This step enhances presentation and adds a sweet tang that ties the flavors together. A common misstep is adding too much juice at once, producing a glaze that is too thin and runs off; correct this by whisking in more powdered sugar a little at a time.
- Drizzle over scones add more powdered sugar or juice if you prefer a thicker or thinner glaze: The final drizzle should glint on the surface, pooling slightly in the crevices and accentuating the golden tops. The interplay of sweetness and citrus is immediate on the nose and palate, and visually the glaze gives a bakery finish. If you want a heavier coating, add powdered sugar to thicken; for a lighter sheen, thin with additional Meyer lemon juice . Avoid pouring while the scones are too hot, which will cause the glaze to run and create a mess. Aim for a graceful ribbon of glaze that sets to a soft sheen.
Notes
- Use frozen raspberries carefully if fresh berries are not available, toss them briefly in a little flour before folding to reduce bleeding and extra moisture.
- Adjust the glaze consistency by adding powdered sugar to thicken or Meyer lemon juice to thin, aiming for a ribbon that holds for a moment before settling.
- Make mini scones by reducing the circle size and cutting smaller wedges, this shortens baking time and produces more delicate portions for teatime.
- Chill the dough for 15 to 30 minutes before shaping if your kitchen is warm, this firms the butter and helps the scones keep their height.
- Brush with cream before baking for a shinier, slightly crisp top, the heavy cream promotes attractive browning without changing texture.