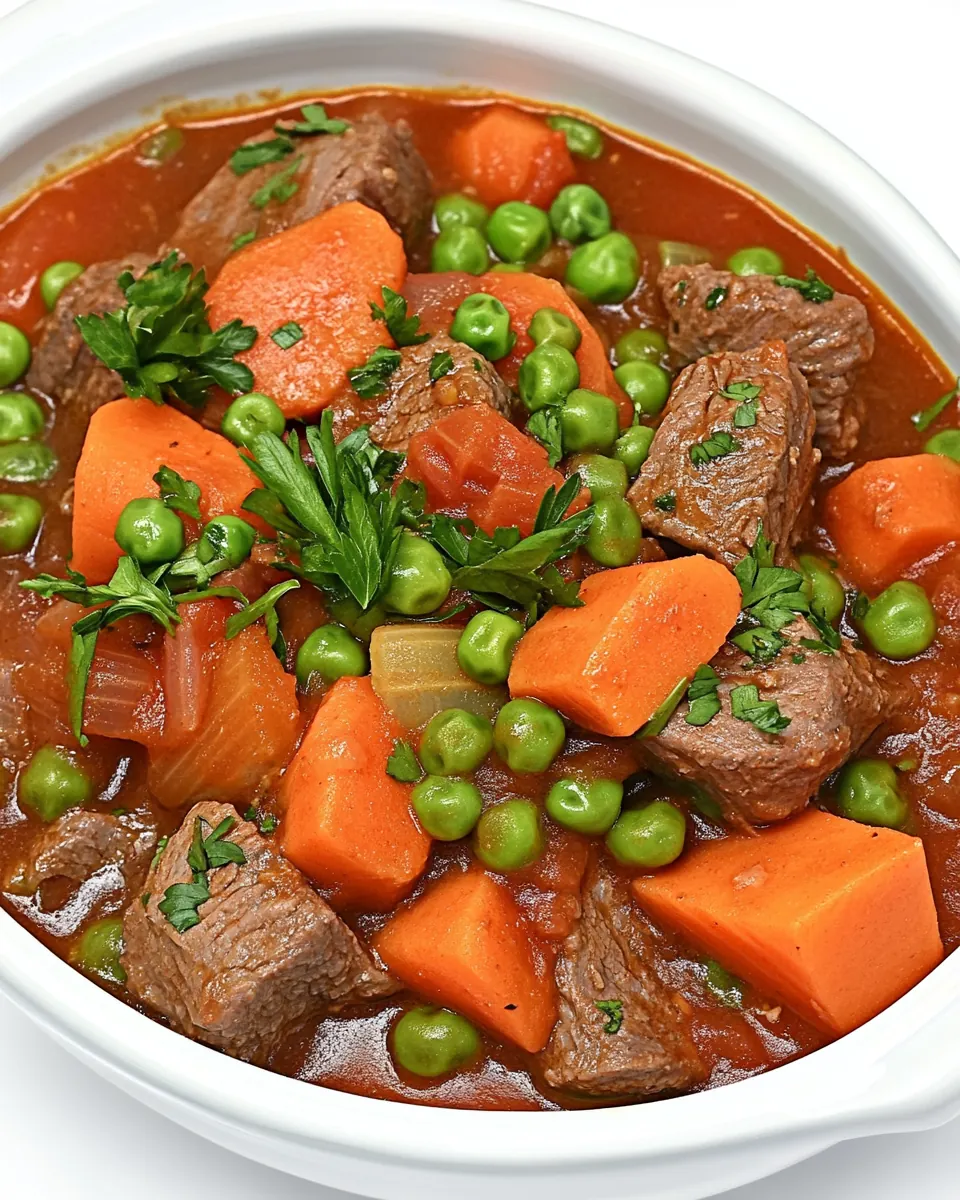
McCormick Beef Stew
McCormick Beef Stew is the kind of recipe I reach for when the sky is low and the house needs a warm, honest dinner.
Growing up, a bubbling pot of stew meant relatives gathered and stories stretched long into the night. I still remember the small ritual of trimming and tasting as the stew simmered, the kitchen filling with a rich, homey aroma that pulled everyone closer. That memory shaped how I approach this dish now, focusing on simple techniques that coax deep flavor from basic pantry items. I love how a few quality moves turn everyday beef and vegetables into something comforting and memorable.
When I make McCormick Beef Stew, I like to move deliberately. Browning the cubes until they gleam with color, scraping up those fond bits, and then letting a low simmer do the quiet work makes all the difference. It is the slow hum of the stove and the occasional sniff of spice that tell me the stew is finding itself. I also enjoy the visual payoff, the glossy broth and tender chunks that promise a spoonful of satisfying texture.
Recipe Snapshot
2 hr 15 mins
15 mins
120 mins
Hard
350 kcal
American
Whole30, Gluten-Free
Dinner
Dutch oven, Wooden spoon
What You’ll Enjoy About This McCormick Beef Stew
Hearty, Honest Flavor
I love this stew because it delivers a deep, meaty flavor without fuss. The combination of flour coated on the beef and the searing step builds a browned base that gives the broth body and complexity. You end up with a rich mouthfeel that feels slow cooked even when you follow a straightforward process.
Simple Ingredients, Big Impact
We lean on a short list of pantry-friendly items, and each one has a job. The vegetable oil carries heat for browning, the flour thickens, and the melting connective tissue in the beef turns into silky richness. I appreciate recipes that respect ingredients and let them shine.
Comfort Food That Scales
This recipe is forgiving for family dinners or small gatherings. I find that it holds up well for leftovers, tasting even better the next day as flavors settle. That makes it a practical choice for busy weeks when you want a make ahead winner.
Technique That Teaches
Every step teaches something useful: how to brown properly, why scraping the pan matters, and how low heat transforms tough cuts into tender bites. I like passing these simple lessons along, since they translate to so many other dishes.
Visual and Textural Rewards
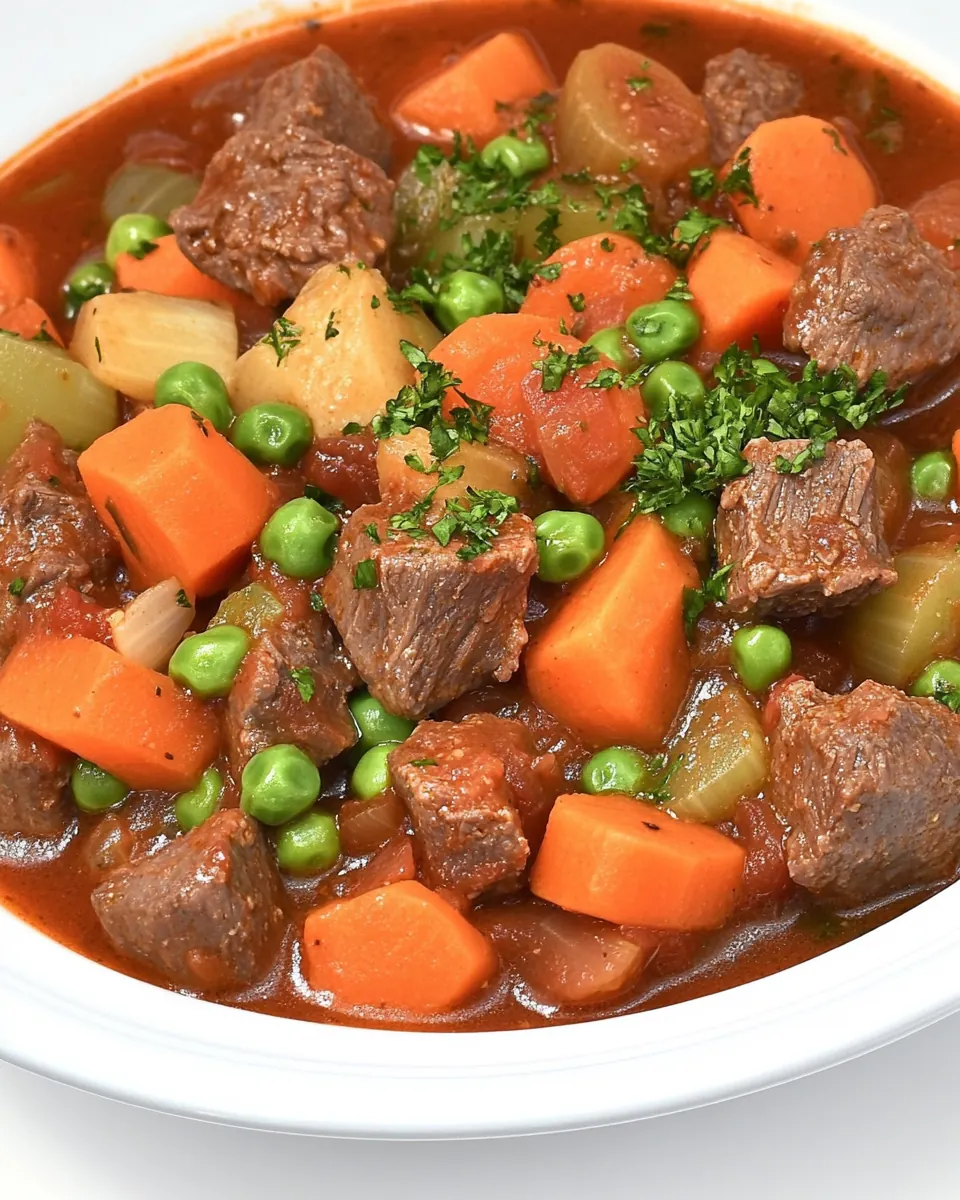
Finally, the balance of glossy broth, tender beef, and chunky vegetables makes for a satisfying bowl. The colors and textures are comforting and approachable, which is why this stew becomes an instant family favorite in my kitchen.
Ingredient List for McCormick Beef Stew
These ingredients form the backbone of a classic, no fuss stew. I like recipes that let each component pull its weight. The focus here is on building fond, extracting flavor into the liquid, and balancing body and texture with a simple thickener. Together these items yield a stew that is robust, spoonable, and warmly familiar.
- 2 Tbs Vegetable Oil: Heat and lubricate the pan to prevent sticking and promote even browning; vegetable oil helps transfer heat to the beef for a flavorful sear. Maintain moderate-high heat to develop a caramelized crust that adds depth to the stew.
- 3 Tbs all purpose flour: Thicken and create a silky coating for the stew by absorbing fats and liquids; all purpose flour combines with cooking juices to form a roux-like base. Whisk into oil or sprinkle over seared beef to eliminate lumps and build body.
- 2 lbs stew beef cut into bite sized pieces: Provide rich protein and hearty texture as the main element of the stew; stew beef yields tender, flavorful chunks when simmered slowly. Brown pieces first to enhance savory flavors before braising in liquid until fork-tender.
- 3 cups water: Loosen flavors and facilitate slow cooking by providing the simmering medium; water dissolves and distributes seasonings while extracting beef and vegetable essences. Adjust simmer time to concentrate flavors and achieve the desired consistency.
- 6 cups chopped vegetables mix of onions, carrots and potatoes: Contribute bulk, natural sweetness, and varied textures to balance the dish; a mix of onions, carrots, and potatoes adds aromatic depth, caramelized notes, and starchy thickness. Chop uniformly to ensure even cooking and harmonious bites throughout the stew.
How to Assemble McCormick Beef Stew
I approach the assembly like a slow conversation between heat, meat, and time. The goal is to coax flavor at each stage, listening for the right sizzle and adjusting heat as needed. Below, I walk through each direction and expand on the sensory cues and pitfalls to avoid.
- Heat the oil in a 6 quart dutch oven on the stove top over medium high heat.: The pan will begin to shimmer and you will notice a faint ripple on the oil surface, that is the cue that it is ready. A properly heated pot gives an immediate sear when the beef hits, producing a sharp sizzling sound and a smell of caramelizing sugars. If the oil smokes heavily, reduce the temperature to prevent burnt notes. One common mistake is adding meat too early, which cools the pan and leads to steaming rather than browning; wait for that shimmery surface for best results.
- Coat the stew beef with the flour in a medium sized bowl. If some of the flour remains loose in the bowl, don't worry about it too much.: When you toss the beef in the flour the cubes should take on a light, even dusting. That dry coating becomes golden as it sears, contributing to both color and body in the eventual broth. You may feel a slight powderiness at first, but as the flour browns it will smell nutty and toasty, which is desirable. Avoid clumping by shaking off excess flour; too much stuck in lumps can create gritty bits in the sauce later.
- Add the beef stew all at once when the oil is hot and shimmery. Add any remaining flour from the bowl to the hot oil in the dutch oven. Cook the beef until it is browned on all sides (you are not trying to cook the meat through, just getting some color on the meat) some of the flour and juices will brown on the bottom of the pan, don't worry about it, just keep going.: When the beef hits the oil you should hear an energetic sizzle, and the pieces will start forming browned crusts within minutes. Browning on all sides builds flavor through Maillard reactions, and those browned fragments on the pan bottom will become the base of the stew's savory profile. A misstep here is moving the meat too often; allow each side to color before turning, otherwise you will not get a deep crust.
- Add the water when the meat is browned and use a wooden spoon to scrape the bits of burnt meat and flour from the bottom of the pan.: The loose flour will brown in the fat and start to create a roux like coating that thickens and flavors the cooking liquid. As it toasts you will smell a warm, toasty aroma indicating the flour is integrating. Watch closely; if the flour darkens too fast, lower the heat to avoid a burnt taste. A common error is ignoring those browned bits, which are flavor gold; scraping them up later salvages that complexity.
- Place the lid on the pan and bring to a simmer, lower the heat to medium low and continue the simmer for 45 minutes.: The beef should look deeply golden, with browned edges and a slightly crusted exterior. That crust traps juices inside and contributes to a savory broth once liquid is added. If pieces appear pale, raise the heat slightly to encourage browning, but be careful not to char. Overcrowding the pot will lower pan temperature and cause steaming; brown in batches if needed.
- After 45 minutes, add the vegetables all at once and bring back to a simmer. Add the lid and allow to simmer for another hour or until the meat and vegetables are tender and falling apart.: As the water hits the hot pan you will hear a satisfying hiss and see those browned bits lift into the liquid, instantly enriching the broth with deep color and flavor. Scraping with a wooden spoon helps dissolve that fond and ensures it becomes part of the stew. If you skip this, you lose a lot of concentrated taste. A common mistake is stirring too aggressively which can make the flour suspension cloudy rather than smooth.
- Place the lid on the pan and bring to a simmer, lower the heat to medium low and continue the simmer for 45 minutes.: As the pot comes to a gentle simmer you will notice small, steady bubbles and a fragrant steam rising. This low, sustained heat allows connective tissues in the beef to break down slowly, releasing gelatin that thickens and enriches the broth. If the heat is too high you will get rapid boiling which toughens the meat, so keep it at a gentle bubble. A frequent error is lifting the lid constantly, which interrupts the even temperature needed for tenderness.
- After 45 minutes, add the vegetables all at once and bring back to a simmer.: When you add the vegetables the pot will release a fresh, sweet aroma, and the broth may momentarily dip in temperature. Uniformly cut pieces will soften at the same rate, becoming tender without falling apart. Return to a simmer promptly to continue cooking evenly. If the vegetables break down too much, it is usually because they were cut too small or cooked at too high a heat.
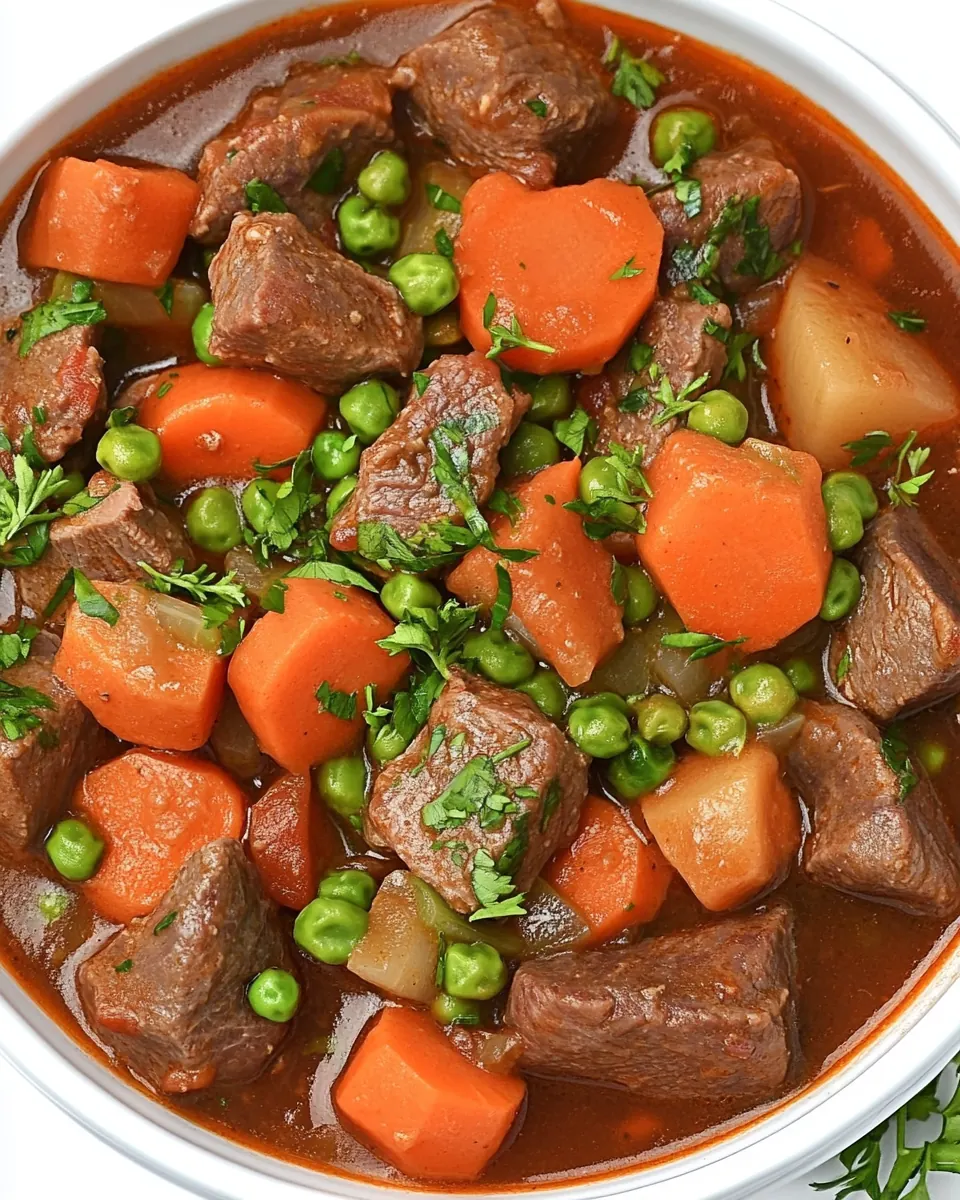
- Add the lid and allow to simmer for another hour or until the meat and vegetables are tender and falling apart.: Over this final hour the stew will develop a glossy sheen and the beef will shred slightly when you prod it with a spoon. Aromas will deepen and the broth will thicken as starches and gelatin meld. Taste occasionally and adjust seasoning if needed near the end, but resist adding salt prematurely as reduction concentrates flavor. One mistake is assuming visual bubbling equals doneness; tenderness is best judged by probing the meat and vegetables for that falling apart texture.
Helpful Hints
These hints will help you get the best results with minimal fuss. They expand on technique, timing, and visual cues so you can approach this stew with confidence and clarity.
- Trim and size the meat Do keep the beef pieces bite sized for quicker, more even cooking and a pleasing mouthfeel. Small, even cubes will cook through uniformly and mingle nicely with the vegetables.
- Don’t discard rendered fat Allow small amounts of fat to render while browning as it adds depth and body to the stew; you can skim excess later if you prefer a leaner finish.
- Control the heat Aim for a steady simmer rather than a rolling boil during long cooks to prevent toughening the beef and to extract gelatin slowly.
- Use a wooden spoon Scrape the fond with a wooden spoon when adding the water to ensure all browned bits dissolve into the broth and deepen the flavor.
- Uniform vegetable cuts Cut the onions, carrots, and potatoes similarly so they reach tenderness together without one turning to mush before the others are done.
- Rest for flavor If you can, refrigerate and reheat the stew the next day; the flavors will harmonize and often taste richer after resting.
Serving Ideas for McCormick Beef Stew
This stew is comforting and versatile, suitable for weeknight dinners, a cozy weekend lunch, or a family gathering. Below are thoughtful serving suggestions, storage tips, and pairing ideas to make the most of your pot.
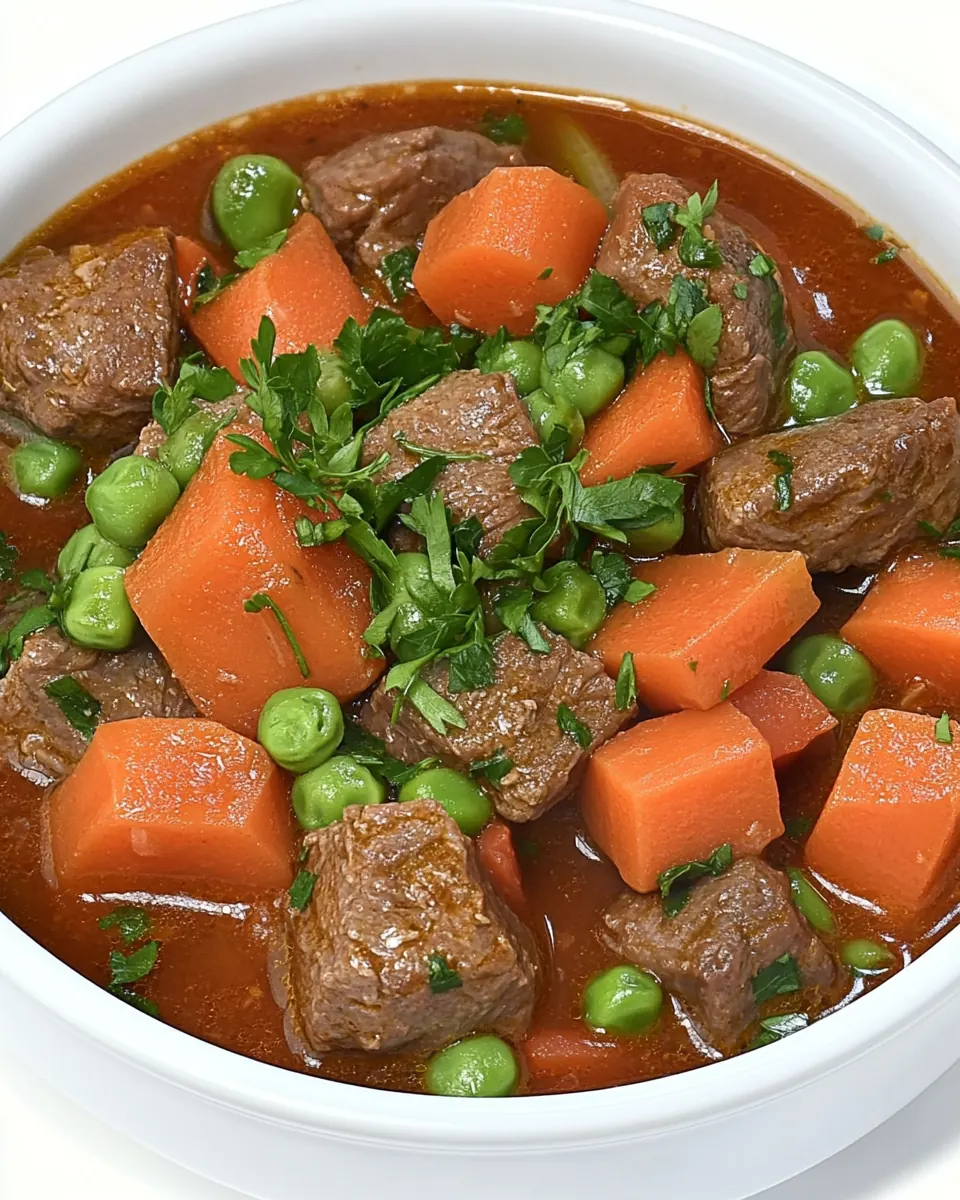
- Classic bowl service Serve ladled into deep bowls with a sprinkle of fresh herbs if available for brightness. A slice of crusty bread is lovely for sopping up the rich broth.
- Family style Place the dutch oven at the center of the table and let everyone serve themselves, encouraging warm conversation and casual sharing.
- Weeknight dinner Pair the stew with a simple green salad for contrast and a light, crisp element that balances the richness.
- Make ahead and reheat Store leftovers in an airtight container in the refrigerator for up to 4 days. Reheat gently on the stove, adding a splash of water if the sauce has thickened too much.
- Freezing This stew freezes well. Cool completely before transferring to freezer safe containers, leaving headroom for expansion. Thaw overnight in the fridge before reheating.
- Seasonal pairings In winter, serve with warm roasted root vegetables and a hearty grain like barley for added comfort and texture.
FAQ
Conclusion
McCormick Beef Stew stands out for its deep, comforting flavor and straightforward technique that yields tender meat and a silky, flavorful broth. This recipe invites patience during the simmer, but rewards you with a bowl that tastes like home and improves on day two. I hope you give it a try, letting the slow transformation on the stove bring warmth and satisfaction to your table. Share it with family or save the leftovers for an easy, delicious lunch—the comfort is worth the wait.

McCormick Beef Stew
Equipment
- Dutch Oven
- Wooden Spoon
Ingredients
- 2 Tbs Vegetable Oil Heat and lubricate the pan to prevent sticking and promote even browning; vegetable oil helps transfer heat to the beef for a flavorful sear. Maintain moderate-high heat to develop a caramelized crust that adds depth to the stew.
- 3 Tbs all purpose flour Thicken and create a silky coating for the stew by absorbing fats and liquids; all purpose flour combines with cooking juices to form a roux-like base. Whisk into oil or sprinkle over seared beef to eliminate lumps and build body.
- 2 lbs stew beef cut into bite sized pieces Provide rich protein and hearty texture as the main element of the stew; stew beef yields tender, flavorful chunks when simmered slowly. Brown pieces first to enhance savory flavors before braising in liquid until fork-tender.
- 3 cups water Loosen flavors and facilitate slow cooking by providing the simmering medium; water dissolves and distributes seasonings while extracting beef and vegetable essences. Adjust simmer time to concentrate flavors and achieve the desired consistency.
- 6 cups chopped vegetables mix of onions, carrots and potatoes Contribute bulk, natural sweetness, and varied textures to balance the dish; a mix of onions, carrots, and potatoes adds aromatic depth, caramelized notes, and starchy thickness. Chop uniformly to ensure even cooking and harmonious bites throughout the stew.
Instructions
- Heat the oil in a 6 quart dutch oven on the stove top over medium high heat.: The pan will begin to shimmer and you will notice a faint ripple on the oil surface, that is the cue that it is ready. A properly heated pot gives an immediate sear when the beef hits, producing a sharp sizzling sound and a smell of caramelizing sugars. If the oil smokes heavily, reduce the temperature to prevent burnt notes. One common mistake is adding meat too early, which cools the pan and leads to steaming rather than browning; wait for that shimmery surface for best results.
- Coat the stew beef with the flour in a medium sized bowl. If some of the flour remains loose in the bowl, don't worry about it too much.: When you toss the beef in the flour the cubes should take on a light, even dusting. That dry coating becomes golden as it sears, contributing to both color and body in the eventual broth. You may feel a slight powderiness at first, but as the flour browns it will smell nutty and toasty, which is desirable. Avoid clumping by shaking off excess flour; too much stuck in lumps can create gritty bits in the sauce later.
- Add the beef stew all at once when the oil is hot and shimmery. Add any remaining flour from the bowl to the hot oil in the dutch oven. Cook the beef until it is browned on all sides (you are not trying to cook the meat through, just getting some color on the meat) some of the flour and juices will brown on the bottom of the pan, don't worry about it, just keep going.: When the beef hits the oil you should hear an energetic sizzle, and the pieces will start forming browned crusts within minutes. Browning on all sides builds flavor through Maillard reactions, and those browned fragments on the pan bottom will become the base of the stew's savory profile. A misstep here is moving the meat too often; allow each side to color before turning, otherwise you will not get a deep crust.
- Add the water when the meat is browned and use a wooden spoon to scrape the bits of burnt meat and flour from the bottom of the pan.: The loose flour will brown in the fat and start to create a roux like coating that thickens and flavors the cooking liquid. As it toasts you will smell a warm, toasty aroma indicating the flour is integrating. Watch closely; if the flour darkens too fast, lower the heat to avoid a burnt taste. A common error is ignoring those browned bits, which are flavor gold; scraping them up later salvages that complexity.
- Place the lid on the pan and bring to a simmer, lower the heat to medium low and continue the simmer for 45 minutes.: The beef should look deeply golden, with browned edges and a slightly crusted exterior. That crust traps juices inside and contributes to a savory broth once liquid is added. If pieces appear pale, raise the heat slightly to encourage browning, but be careful not to char. Overcrowding the pot will lower pan temperature and cause steaming; brown in batches if needed.
- After 45 minutes, add the vegetables all at once and bring back to a simmer. Add the lid and allow to simmer for another hour or until the meat and vegetables are tender and falling apart.: As the water hits the hot pan you will hear a satisfying hiss and see those browned bits lift into the liquid, instantly enriching the broth with deep color and flavor. Scraping with a wooden spoon helps dissolve that fond and ensures it becomes part of the stew. If you skip this, you lose a lot of concentrated taste. A common mistake is stirring too aggressively which can make the flour suspension cloudy rather than smooth.
- Place the lid on the pan and bring to a simmer, lower the heat to medium low and continue the simmer for 45 minutes.: As the pot comes to a gentle simmer you will notice small, steady bubbles and a fragrant steam rising. This low, sustained heat allows connective tissues in the beef to break down slowly, releasing gelatin that thickens and enriches the broth. If the heat is too high you will get rapid boiling which toughens the meat, so keep it at a gentle bubble. A frequent error is lifting the lid constantly, which interrupts the even temperature needed for tenderness.
- After 45 minutes, add the vegetables all at once and bring back to a simmer.: When you add the vegetables the pot will release a fresh, sweet aroma, and the broth may momentarily dip in temperature. Uniformly cut pieces will soften at the same rate, becoming tender without falling apart. Return to a simmer promptly to continue cooking evenly. If the vegetables break down too much, it is usually because they were cut too small or cooked at too high a heat.
- Add the lid and allow to simmer for another hour or until the meat and vegetables are tender and falling apart.: Over this final hour the stew will develop a glossy sheen and the beef will shred slightly when you prod it with a spoon. Aromas will deepen and the broth will thicken as starches and gelatin meld. Taste occasionally and adjust seasoning if needed near the end, but resist adding salt prematurely as reduction concentrates flavor. One mistake is assuming visual bubbling equals doneness; tenderness is best judged by probing the meat and vegetables for that falling apart texture.
Notes
- Trim and size the meat Do keep the beef pieces bite sized for quicker, more even cooking and a pleasing mouthfeel. Small, even cubes will cook through uniformly and mingle nicely with the vegetables.
- Don't discard rendered fat Allow small amounts of fat to render while browning as it adds depth and body to the stew; you can skim excess later if you prefer a leaner finish.
- Control the heat Aim for a steady simmer rather than a rolling boil during long cooks to prevent toughening the beef and to extract gelatin slowly.
- Use a wooden spoon Scrape the fond with a wooden spoon when adding the water to ensure all browned bits dissolve into the broth and deepen the flavor.
- Uniform vegetable cuts Cut the onions, carrots, and potatoes similarly so they reach tenderness together without one turning to mush before the others are done.
- Rest for flavor If you can, refrigerate and reheat the stew the next day; the flavors will harmonize and often taste richer after resting.