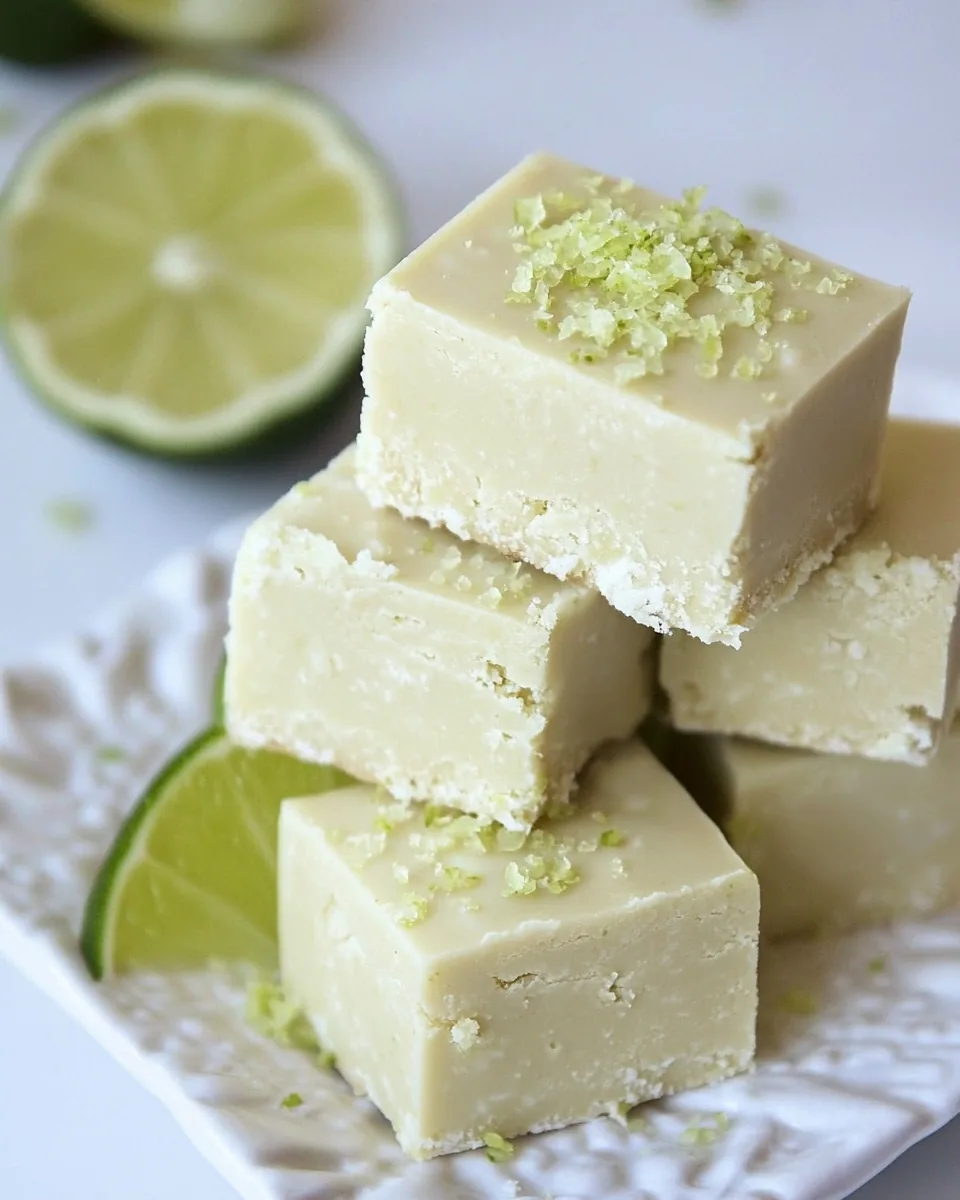
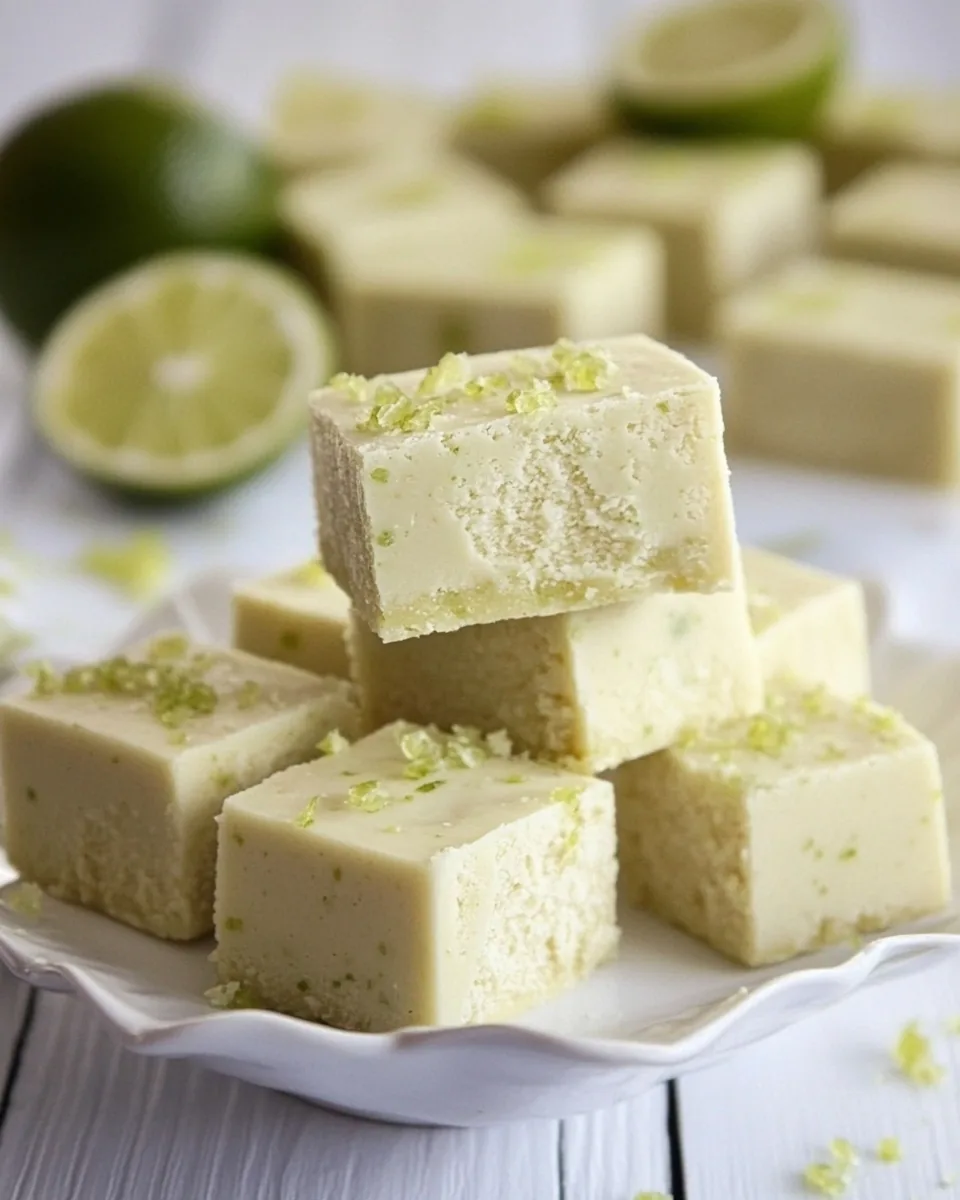
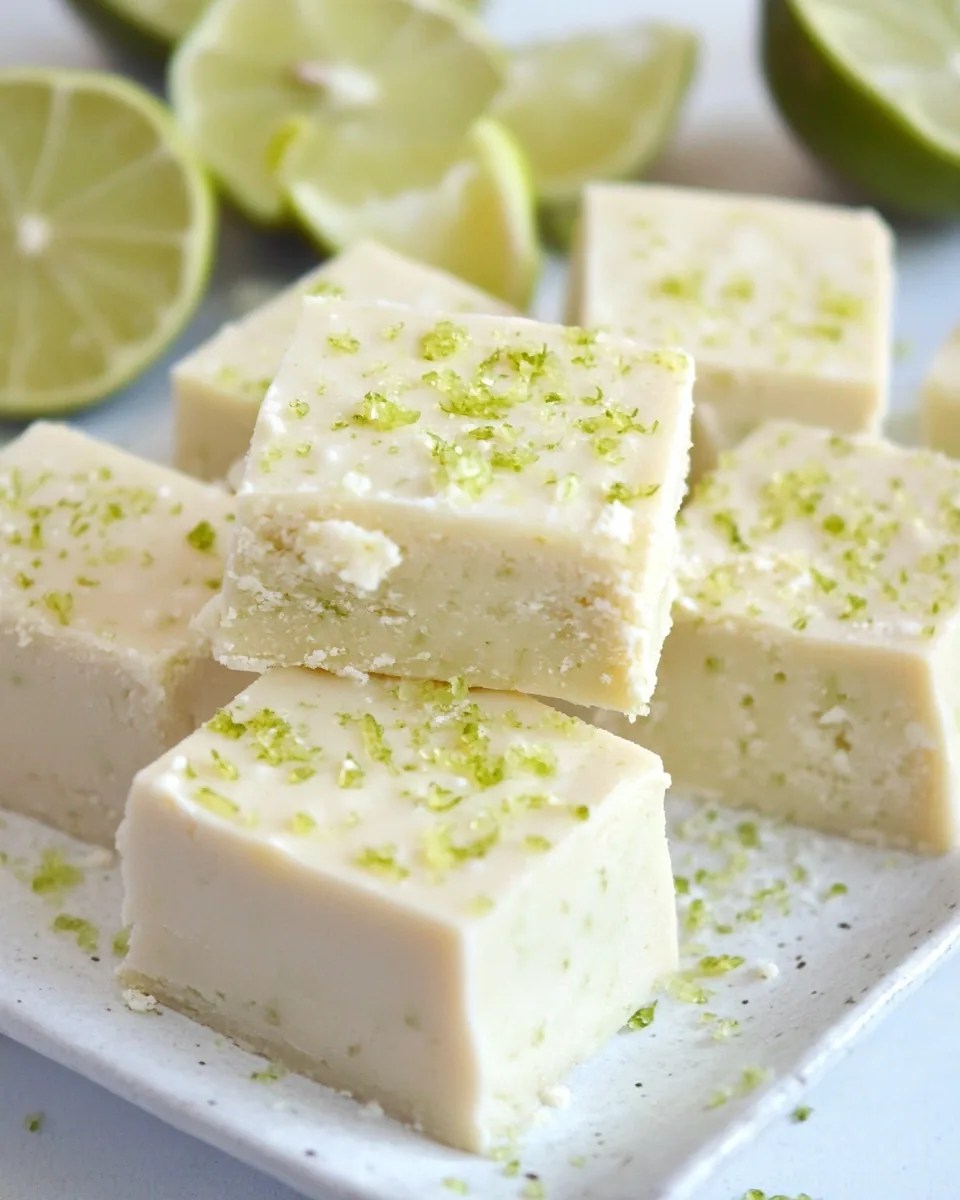
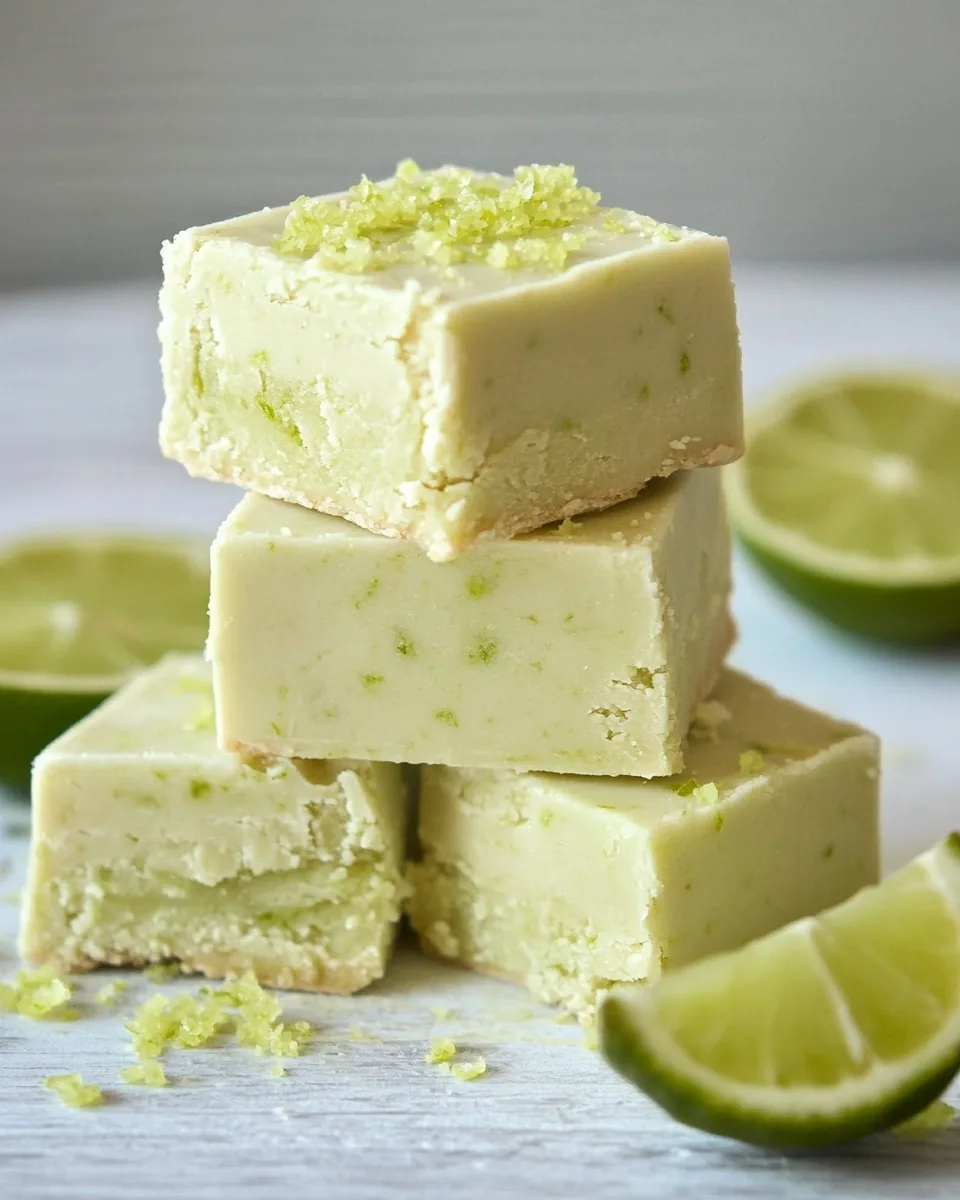
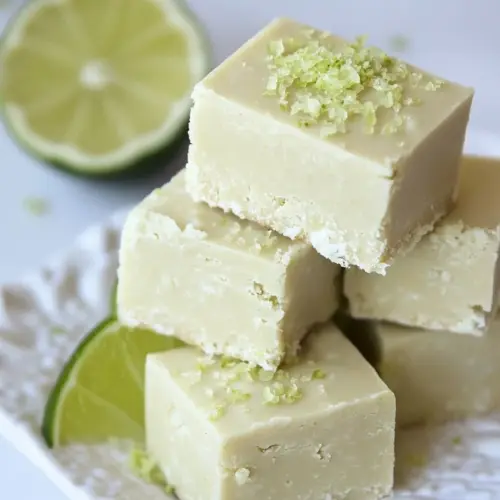
Key Lime Fudge
There’s something about making Key Lime Fudge that brings back fond memories of summer days spent by the beach. The first time I made this delightful treat, I was trying to recreate the zingy flavors of my favorite key lime pie in a more portable, fudge form. Armed with just a few ingredients, I found myself in the kitchen, mixing, melting, and stirring to create a luscious, creamy treat that’s as refreshing as it is indulgent. As the sweet aroma filled my home, I could almost hear the waves crashing outside, and my excitement grew with each step of the process.
This Key Lime Fudge is not just any dessert; it’s a celebration of flavor and texture. The combination of creamy white chocolate, tangy lime, and fluffy marshmallows creates a perfect harmony that dances on your taste buds. Every bite is a little piece of sunshine that you can enjoy year-round, whether you’re hosting a backyard barbecue, celebrating a birthday, or simply satisfying your sweet tooth. It’s a dessert that brings joy, and I can’t wait for you to try making it!
Recipe Snapshot
23 mins
15 mins
8 mins
Easy
150 kcal
1 g
Gluten-Free, Low FODMAP
7 g
Wooden Spoon, Grater, Mixing Bowl, Frying Pan, Large Pot
What We Adore About This Key Lime Fudge
A Flavorful Twist on Tradition
What I love most about this Key Lime Fudge is how it takes the classic flavors of key lime pie and transforms them into a delightful candy. This fudge captures the essence of summer while being simple enough for anyone to make at home.
Quick and Easy Prep
With minimal prep and cook time, this fudge is perfect for when unexpected guests drop by or when you crave something sweet but don’t want to spend hours in the kitchen. It’s truly a last-minute savior!
Versatile Treat
You can enjoy Key Lime Fudge on its own, but it also makes for an excellent gift. Package it in a cute box or jar, and it becomes a thoughtful present for friends, family, or coworkers. Who wouldn’t love a sweet homemade treat?
Perfect for Any Season
While this fudge screams summer with its bright flavors, it can be enjoyed all year long. The vibrant lime flavor adds a refreshing break during winter months, making it a versatile dessert option.
Kid-Friendly Fun
Making Key Lime Fudge can be a fun activity to do with kids. They can help mix the ingredients, pour them into the pan, and even decorate the top. It’s a fantastic way to spend quality time together while creating something delicious.
Customizable Options
If you’re feeling adventurous, you can experiment with variations by adding nuts, coconut, or even different flavored extracts to the fudge. Each batch can be unique and tailored to your taste!
Ingredients Overview for Key Lime Fudge
In this Key Lime Fudge, each ingredient plays a vital role in creating the perfect balance of flavors and textures. The creamy evaporated milk, sweet granulated sugar, and zesty lime juice come together to create a delightful treat that’s irresistible. Let’s take a closer look at each player in this delicious recipe.
- One 5-ounce can evaporated milk: This forms the creamy base of the fudge, providing moisture and richness.
- 1⅔ cups granulated white sugar: Sweetness is essential in balancing the tartness of the lime.
- ½ teaspoon salt: A pinch of salt enhances the overall flavor, making it more complex.
- 12 large marshmallows, quartered: These marshmallows add a fluffy texture and sweetness that rounds out the fudge.
- 2 cups white chocolate chips: The white chocolate brings creaminess and sweetness, a perfect match for the tangy lime.
- ¼ cup grated lime zest (about 5 limes): Adds a burst of fresh lime flavor that elevates the fudge.
- 2 tablespoons key lime juice (5 to 7 limes, juiced): The key to the fudge, providing the signature tartness that defines this treat.
Step by Step Guide for Key Lime Fudge
Creating Key Lime Fudge is a straightforward process that anyone can master. As you follow these steps, you’ll notice the transformation of simple ingredients into a deliciously creamy fudge. Let’s dive right in!
Start by preparing your pan. Line an 8-inch x 8-inch square pan with aluminum foil, allowing some overhang for easy removal later. Grease the foil with butter to prevent the fudge from sticking. Avoid using a 9-inch square pan, as the fudge will turn out too thin and won’t have that creamy thickness we love.
In a large heavy saucepan (or a double boiler if you have one), combine the evaporated milk, granulated sugar, and salt. Over medium heat, stir the mixture until it begins to boil. It’s crucial to keep stirring during this time to prevent scorching on the bottom.
-
Once the mixture comes to a boil, reduce the heat to medium-low and allow it to boil gently for about 5 to 6 minutes. Continue to stir constantly. This step is essential for achieving the right fudge texture. If you have a candy thermometer, aim for the soft-ball stage, but if not, trust your instincts! The mixture should thicken slightly.
Remove the saucepan from the heat. You’ll add the marshmallows, white chocolate chips, lime zest, and key lime juice now. Stir everything together until the marshmallows and chocolate melt completely, creating a smooth, creamy mixture.
Carefully scrape the fudge mixture into the prepared pan. Use a spatula to spread it out evenly, ensuring it covers the bottom. Tipping the pan gently will help in spreading it uniformly.
-
Let the fudge cool completely at room temperature. This can take a few hours, but impatience can lead to a mess! Once cooled, it’ll firm up beautifully.
After the fudge has set, use the overhanging foil to lift it out of the pan. Transfer it to a cutting board for easy slicing.
Cut the fudge into 1-inch squares, and enjoy! Each piece is a delightful burst of flavor that combines creamy sweetness with tangy zest.
-
If you want to get creative, consider drizzling some melted chocolate on top or garnishing with additional lime zest before serving!
Things Worth Knowing
- Consistency is Key: The texture of your fudge should be smooth and creamy. If it’s too runny, it may not set properly. Ensure you reach the right temperature during cooking.
- Cooling Time: Allow adequate cooling time for the fudge to set properly. If it’s not completely cooled, it will be too soft to cut.
- Don’t Rush the Melting: Take your time melting the chocolate and marshmallows. If they don’t melt completely, the texture will be off.
- Storage: Store the fudge in an airtight container at room temperature for up to a week. You can refrigerate it for longer freshness.
Change It Up
If you’re feeling adventurous, there are plenty of ways to customize your Key Lime Fudge! Here are some ideas to get your creative juices flowing:
- Storage: Store leftovers in an airtight container to keep them fresh. If you live in a warm climate, consider refrigerating them for an extra layer of protection against melting.
- Freezing: You can freeze the fudge for up to two months. Just wrap it tightly in plastic wrap and then in foil before placing it in the freezer.
- Pairing: This fudge pairs beautifully with a cup of tea or coffee. The rich flavors complement the sweetness perfectly.
- Flavor Variations: Experiment with different citrus flavors by substituting lemon or orange juice and zest. Each variation offers a unique and delightful twist.
- Garnishes: Add a sprinkle of graham cracker crumbs on top for a key lime pie feel or drizzle with chocolate for an indulgent touch.
Side Dish Ideas for Key Lime Fudge
When it comes to serving Key Lime Fudge, the options are endless. Here are some ideas to enhance your dessert experience:
- Fruit Platter: Pair the fudge with a fresh fruit platter. Slices of kiwi, mango, and pineapple complement the tangy flavors remarkably well.
- Chocolate Dipped Treats: Serve alongside chocolate-dipped strawberries for a decadent dessert table. The combination of fruity and chocolatey flavors is always a hit.
- Tea or Coffee: Offer a selection of tea or coffee to accompany the fudge. The warm beverages balance the sweet, creamy treat perfectly.
- Picnic Treat: Cut the fudge into bite-sized pieces and pack them for a picnic. They’re easy to transport and are sure to be a crowd-pleaser.
- Holiday Celebrations: During holiday gatherings, serve Key Lime Fudge as a refreshing alternative to heavier desserts. It’s a great way to cleanse the palate after a rich meal.
- Summer Barbecues: This fudge is a fantastic option for summer barbecues, providing a sweet and tangy finish to outdoor feasts.
FAQ
Conclusion
This Key Lime Fudge offers a sweet escape into the flavors of summer, no matter the season. It’s a delightful treat that’s easy to make, perfect for sharing, and loved by all. I encourage you to try making it yourself; the process is straightforward, and the results are absolutely delicious. You might just find yourself making it again and again!
Key Lime Fudge
Equipment
- Wooden Spoon
- Grater
- Mixing Bowl
- Frying Pan
- Large Pot
Ingredients
- 1 can evaporated milk
- 1⅔ cups granulated white sugar
- ½ teaspoon salt
- 12 large marshmallows quartered
- 2 cups white chocolate chips
- ¼ cup grated lime zest about 5 limes
- 2 tablespoons key lime juice (5 to 7 limes, juiced)
Instructions
- Line an 8" x 8" square pan with aluminum foil; grease the foil with butter. It's not a good recipe for a 9-inch square pan as the fudge will be too thin.
- Combine the milk, sugar and salt in a large heavy saucepan (or better yet... a double boiler) over medium heat. Stir and bring to a boil; reduce heat to medium-low and boil for 5 to 6 minutes, stirring constantly at a boil.
- Remove the pan from heat. Add the marshmallows, chocolate, zest and juice, and stir until the marshmallows and chocolate are melted and the mixture is smooth.
- Scrape the fudge into the prepared pan. Tip the pan to make sure the fudge covers the bottom evenly. Cool completely, then cut into 1-inch squares.
Notes
- This recipe can be made with regular limes too.