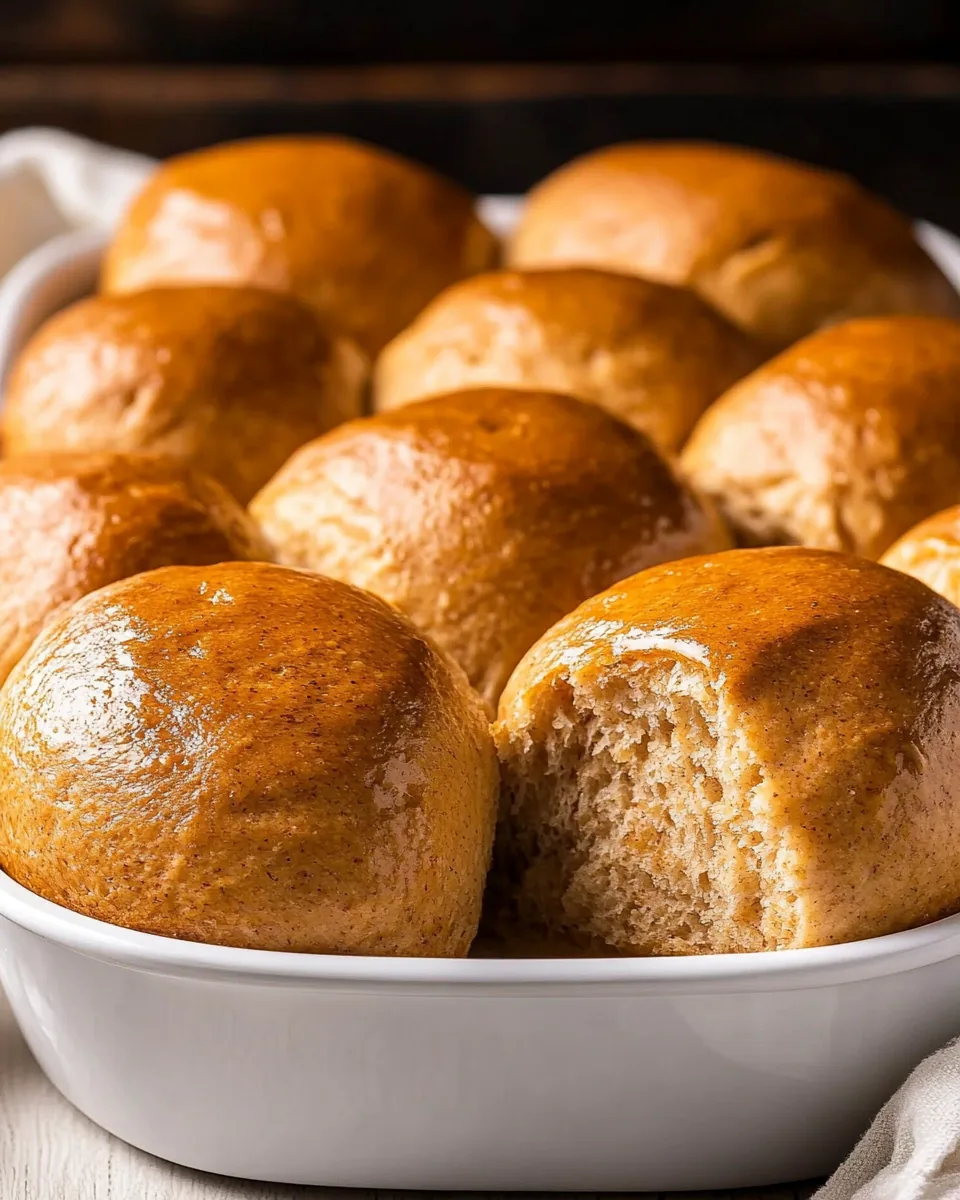
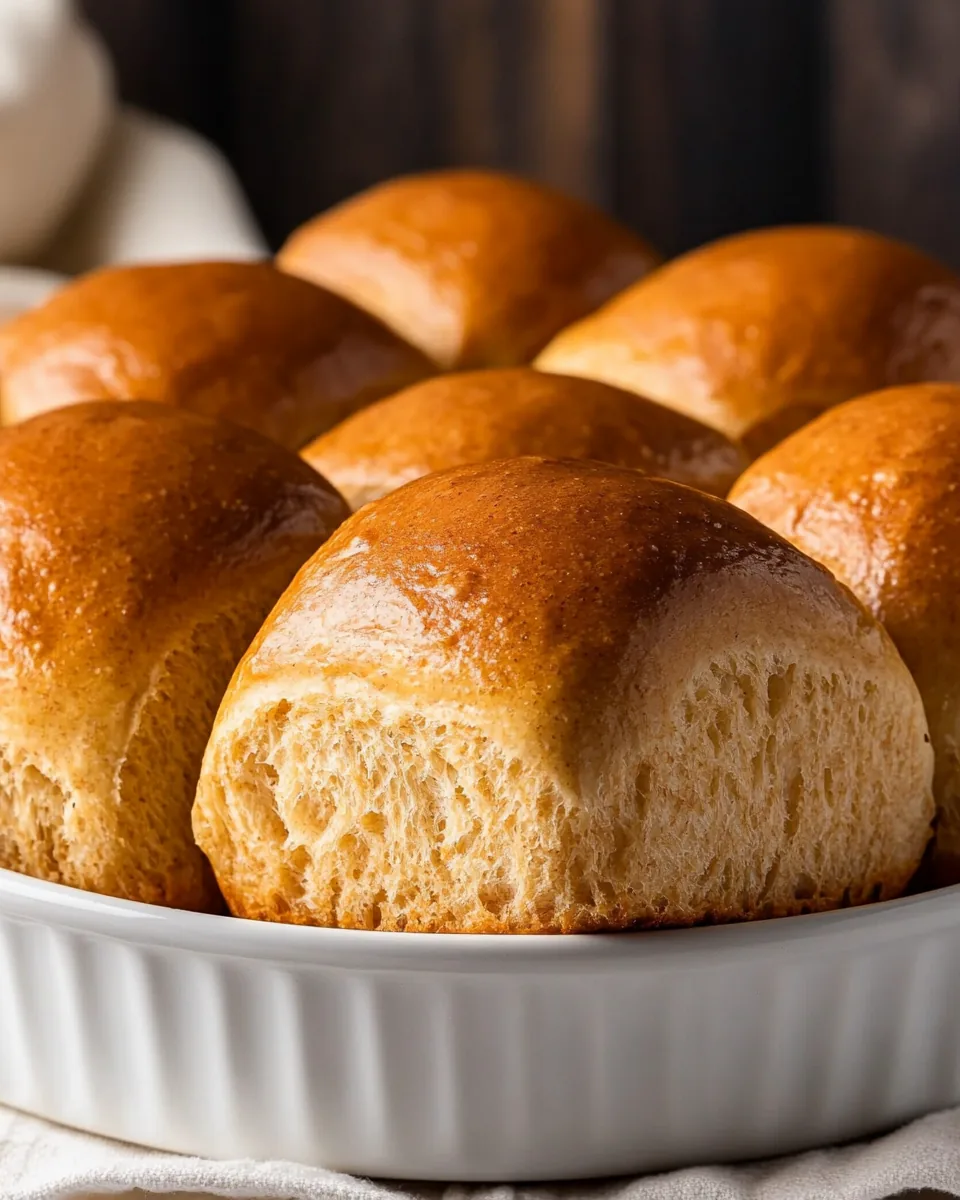
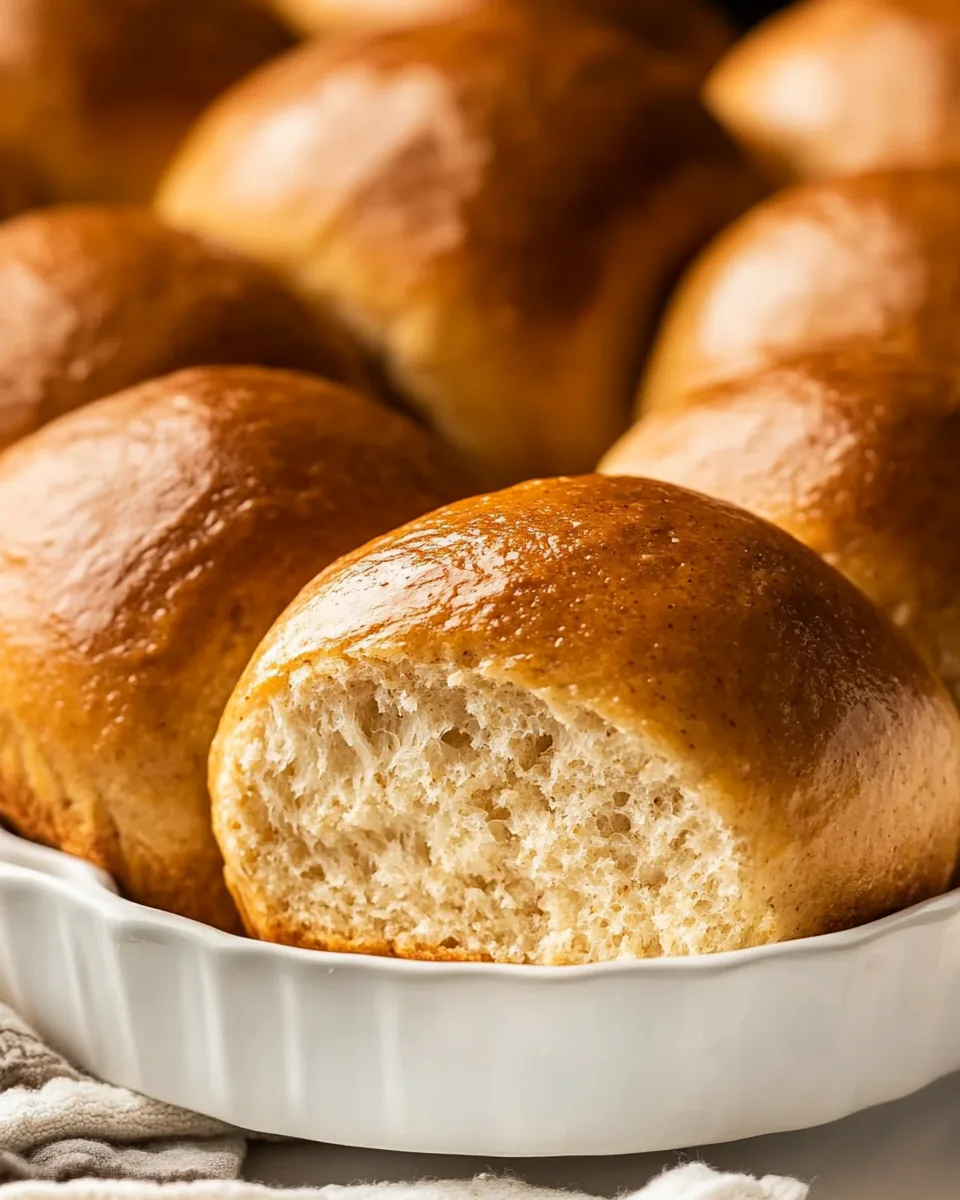
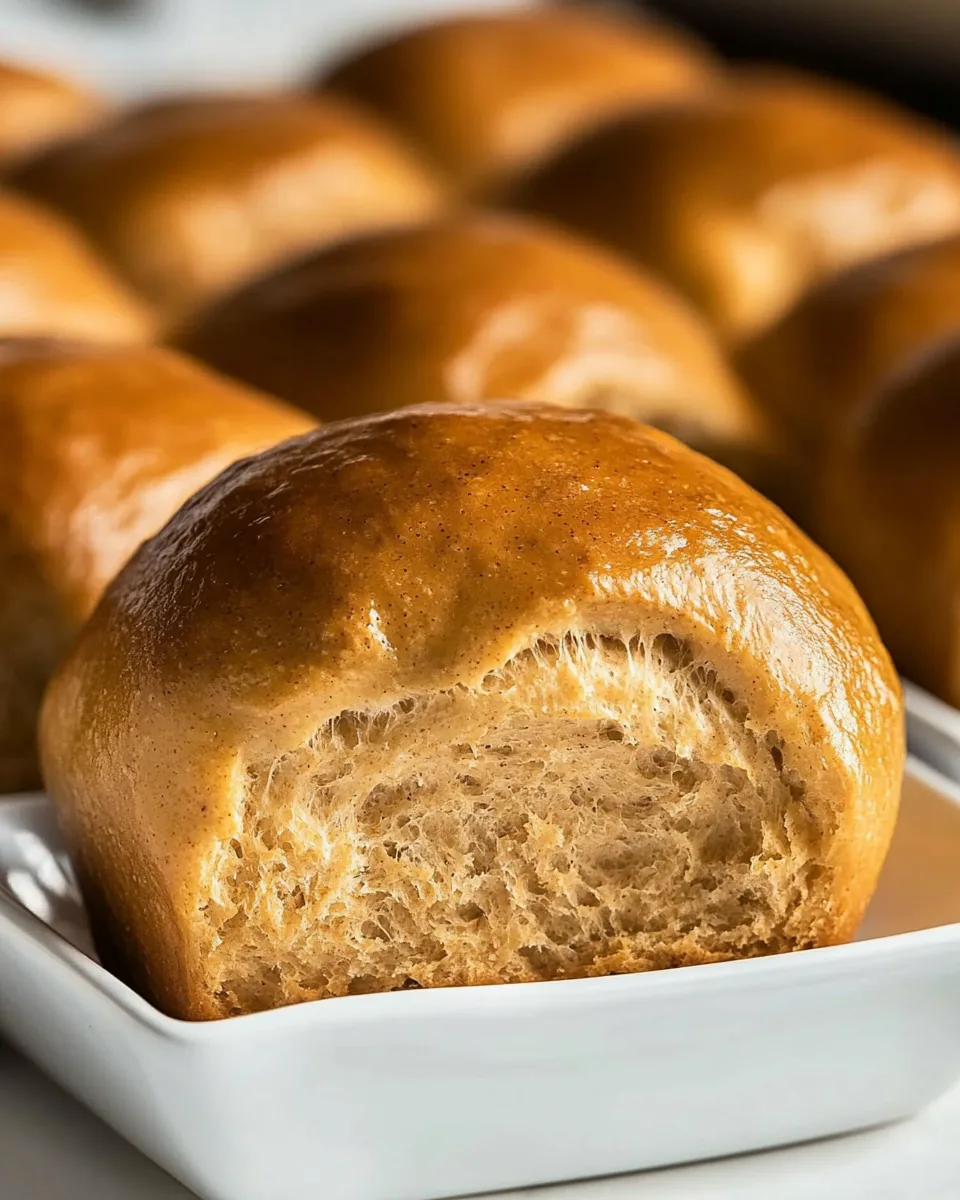
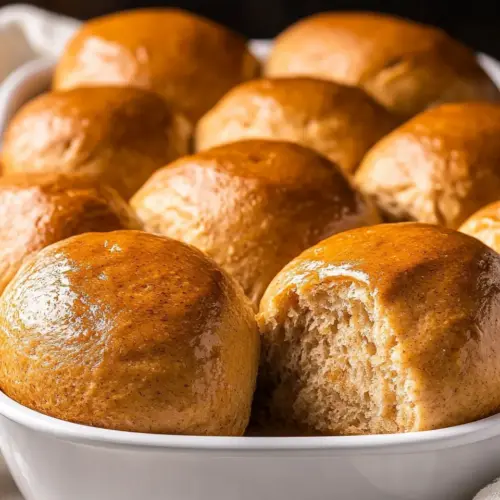
Honey Whole Wheat Rolls
The moment I first tasted Honey Whole Wheat Rolls, I knew I had stumbled upon something truly special. It was a chilly Sunday morning, and the aroma of freshly baked rolls wafted through the kitchen, instantly bringing warmth to my heart. These rolls, with their soft, fluffy texture and hint of honey sweetness, became a staple in my home. Every family gathering, I found myself baking batch after batch, each time trying to perfect that golden crust and rich flavor. With spreads of butter melting into their warm centers, they were the highlight of every meal.
Recipe Snapshot
35 mins
20 mins
15 mins
Medium
150 kcal
4 g
Standard
4 g
Mixing Bowl, Frying Pan, Whisk, Blender, Baking Sheet, Oven
Why We Love This Honey Whole Wheat Rolls
A Healthier Alternative
What I love about Honey Whole Wheat Rolls is how they offer a healthier twist on classic rolls. Made with whole wheat flour, they provide more fiber and nutrients compared to regular white rolls, making them not just delicious but also nourishing. It’s a wonderful way to indulge without the guilt!
Perfect for Any Occasion
Whether it’s a cozy family dinner, a holiday feast, or just a casual meal, these rolls fit perfectly into any occasion. Their versatility shines through, as they can accompany savory dishes or be enjoyed on their own with a drizzle of honey.
Easy to Make
Despite their gourmet taste, making Honey Whole Wheat Rolls is surprisingly easy. With simple ingredients and straightforward steps, even novice bakers can whip up a batch. You’ll feel a sense of accomplishment when you see the rolls rise and bake to perfection.
Kid-Friendly Fun
These rolls are not only a hit with adults but also with kids! I often involve my children in the process, letting them help knead the dough and shape the rolls. It turns into a fun family activity, and they love eating the fruits of their labor!
Great for Meal Prep
Another reason I adore these rolls is their meal-prepping potential. You can make a large batch, freeze them, and then just pop them in the oven whenever you need fresh bread. This makes weeknight dinners or lunch packing much easier.
Goes Beyond Just Bread
Finally, don’t underestimate the power of Honey Whole Wheat Rolls in your meal planning. They can be transformed into sandwiches, sliders, or even served alongside soups and salads. The possibilities are endless!
What to Buy for Honey Whole Wheat Rolls
When preparing to make Honey Whole Wheat Rolls, it’s essential to focus on high-quality ingredients that work harmoniously together. Each component plays a vital role, from the warm water activating the yeast to the rich honey sweetening the dough. Here’s a closer look at what you’ll need to create these delightful rolls.
- 1/2 cup warm water – at 110 – 115 degrees, this is crucial for activating the yeast, ensuring your rolls rise beautifully.
- 1 1/2 Tbsp active dry yeast – the key ingredient that makes these rolls fluffy and light.
- 1 tsp granulated sugar – this helps feed the yeast, encouraging it to work its magic.
- 1/3 cup (75g) unsalted butter – softened, this adds richness and flavor to the rolls, with a bit extra for brushing the tops.
- 1/3 cup (96g) honey – the star of the show, providing natural sweetness and moisture.
- 2 large eggs – they help bind the ingredients together and contribute to the rolls’ texture.
- 1 1/2 tsp salt – enhances the flavors of the other ingredients.
- 3/4 cup (175ml) milk – warmed to 110 – 115 degrees, it complements the yeast’s activation process.
- 1 Tbsp fresh lemon juice – adds a subtle brightness to the flavor profile.
- 2 Tbsp (19g) vital wheat gluten – this is optional but helps improve the texture of whole wheat flour, making the rolls fluffier.
- 4 cups (570g) white whole wheat flour – this is the primary flour used, giving the rolls their wholesome character.
Making Honey Whole Wheat Rolls
Making Honey Whole Wheat Rolls is a delightful process that fills your kitchen with incredible aromas. Let’s dive into the steps to create these fluffy, sweet rolls that are perfect for any occasion.
- In the bowl of an electric stand mixer, whisk together water, yeast, and sugar. Allow this mixture to rest for about 5 minutes until it becomes frothy, indicating that the yeast is activated. This is a vital step, so keep an eye on it!
- Meanwhile, place the eggs in a bowl and cover them with warm water. Let them sit for 5 minutes to bring them to room temperature. This small act helps the rolls rise better!
- After the yeast has proofed, add in the butter, honey, eggs, salt, and milk to the yeast mixture. Blend these ingredients together until smooth and well combined.
- Next, add in the lemon juice, vital wheat gluten, and 2 cups of the wheat flour. Blend until the mixture is fully incorporated.
- Switch to a dough hook and gradually add the remaining 2 cups of wheat flour. Knead the mixture on low speed for about 4 minutes. The dough should be sticky enough to cling to the bottom of the bowl but not stick to the sides or your fingertip.
- Cover the bowl and allow the dough to rest for approximately 1 hour. This resting period is crucial for developing flavor and texture.
- After resting, punch down the dough gently to release air bubbles. Divide the dough into 15 equal portions. For precision, you can weigh them, or simply roll the dough into a rectangle and cut it into pieces.
- Next, butter a 13 by 9-inch baking dish and place the shaped rolls into the dish. Cover them with plastic wrap, leaving room for the rolls to expand.
- Let the rolls rest again until they double in size, which should take about 1 hour. During the last 20 minutes of this rise, preheat your oven to 375 degrees.
- Once the rolls have risen, bake them in the preheated oven until they are golden brown and cooked through, about 12 to 15 minutes. A good indication of doneness is when they register 190 degrees in the center.
- Finally, brush the tops of the rolls with about 1 Tbsp of butter for that glossy finish. Serve warm or allow them to cool on a wire rack before storing them in an airtight container.
Things Worth Knowing
- Use warm water (not hot) for activating the yeast to ensure the best rise. Too hot can kill the yeast.
- For fluffier rolls, do not skip the kneading step. This develops gluten which gives the rolls their structure.
- If using regular whole wheat flour instead of white whole wheat, expect a denser roll.
- To test if rolls are done, tap the bottom; if they sound hollow, they are baked through.
Make It Your Own
Getting creative in the kitchen with Honey Whole Wheat Rolls is always a joy! Here are some tips to personalize your rolls:
- Storage: To keep your rolls fresh, store them in an airtight container at room temperature for up to 3 days. Alternatively, you can freeze them for longer storage.
- Freezing: These rolls freeze beautifully! After baking, allow them to cool completely, then wrap them tightly in plastic wrap and place them in a freezer-safe bag. Thaw at room temperature before serving.
- Pairing: Serve these rolls with honey butter, or alongside soups and salads for a delightful meal experience.
- Flavor Variations: Consider adding herbs like rosemary or thyme to the dough for a fragrant twist, or mix in some shredded cheese before baking for richness.
- Experiment with Sweetness: If you prefer a sweeter roll, increase the honey to 1/2 cup or add a sprinkle of cinnamon in the dough.
Perfect Matches for Honey Whole Wheat Rolls
When it comes to serving Honey Whole Wheat Rolls, the possibilities are endless. Here are some ideas to make your meals even more delightful:
- Pair with Soups: These rolls are perfect for scooping up hearty soups like butternut squash or minestrone.
- Great for Dinners: Serve them as a side at dinner parties or family gatherings. Everyone loves a soft roll!
- Sandwiches: Use them for sliders or sandwiches. They’re great for lunchboxes as well.
- Seasonal Dishes: These rolls complement seasonal dishes perfectly, whether it’s a summer barbecue or a cozy winter stew.
- Healthy Breakfast: Enjoy them toasted with a bit of butter or honey for breakfast alongside your morning coffee.
- Storage Tips: Keep rolls in an airtight container to retain moisture, or toast them for a crispy bite later.
FAQ
Conclusion
Honey Whole Wheat Rolls are not just a recipe; they are a delightful addition to any meal, bringing warmth and sweetness. Their combination of flavors and textures is sure to make them a family favorite. I encourage you to try making these rolls for your next gathering or cozy dinner at home. With each bite, you’ll experience the love and care that goes into homemade baking, making every meal a little more special.
Honey Whole Wheat Rolls
Equipment
- Mixing Bowl
- Frying Pan
- Whisk
- Blender
- Baking Sheet
- Oven
Ingredients
- 1/2 cup warm water 110 - 115 degrees
- 1 1/2 Tbsp active dry yeast
- 1 tsp granulated sugar
- 1/3 cup unsalted butter softened, plus more for brushing tops
- 1/3 cup honey
- 2 large eggs
- 1 1/2 tsp salt
- 3/4 cup milk warmed to 110 - 115 degrees
- 1 Tbsp fresh lemon juice
- 2 Tbsp vital wheat gluten
- 4 cups white whole wheat flour then more as needed
Instructions
- In the bowl of an electric stand mixer, whisk together warm water, active dry yeast, and granulated sugar. Allow this mixture to rest for about 5 minutes until it becomes frothy, indicating that the yeast is activated.
- Meanwhile, place eggs in a bowl and cover them with warm water. Let them sit for 5 minutes to bring them to room temperature.
- After the yeast has proofed, add in the butter, honey, eggs, salt, and milk to the yeast mixture. Blend these ingredients together until smooth.
- Next, add in the fresh lemon juice, vital wheat gluten, and 2 cups of the wheat flour. Blend until fully incorporated.
- Switch to a dough hook and gradually add the remaining 2 cups of wheat flour. Knead on low speed for about 4 minutes.
- Cover and allow the dough to rest for approximately 1 hour. This resting period is crucial for developing flavor and texture.
- After resting, punch down the dough gently to release air bubbles. Divide into 15 equal portions.
- Butter a 13 by 9-inch baking dish and place the rolls into it. Cover with plastic wrap.
- Let the rolls rest until they double in size, about 1 hour. Preheat oven to 375 degrees during the last 20 minutes.
- Bake until golden brown and cooked through, about 12 to 15 minutes. Brush the tops with butter for a glossy finish.
Notes
- Storage: To keep your rolls fresh, store them in an airtight container at room temperature for up to 3 days.
- Freezing: These rolls freeze beautifully! After baking, allow them to cool completely, then wrap them tightly in plastic wrap.
- Pairing: Serve these rolls with honey butter, or alongside soups and salads for a delightful meal experience.
- Flavor Variations: Consider adding herbs like rosemary or thyme to the dough for a fragrant twist.
- Experiment with Sweetness: If you prefer a sweeter roll, increase the honey to 1/2 cup.