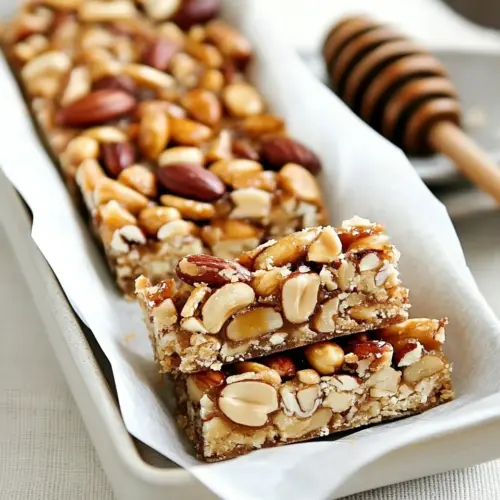
Honey Nut Bars
Honey Nut Bars are the kind of treat that sneaks into your kitchen and becomes the answer to every last minute gathering, snack attack, or afternoon with coffee. I remember the first time I made these, the kitchen smelled like warm honey and toasted nuts, and my neighbor popped over asking what on earth I was baking. We ended up chatting over a pan of still warm bars, and by the time the edges were gone she was begging for the recipe, which I was happy to share.
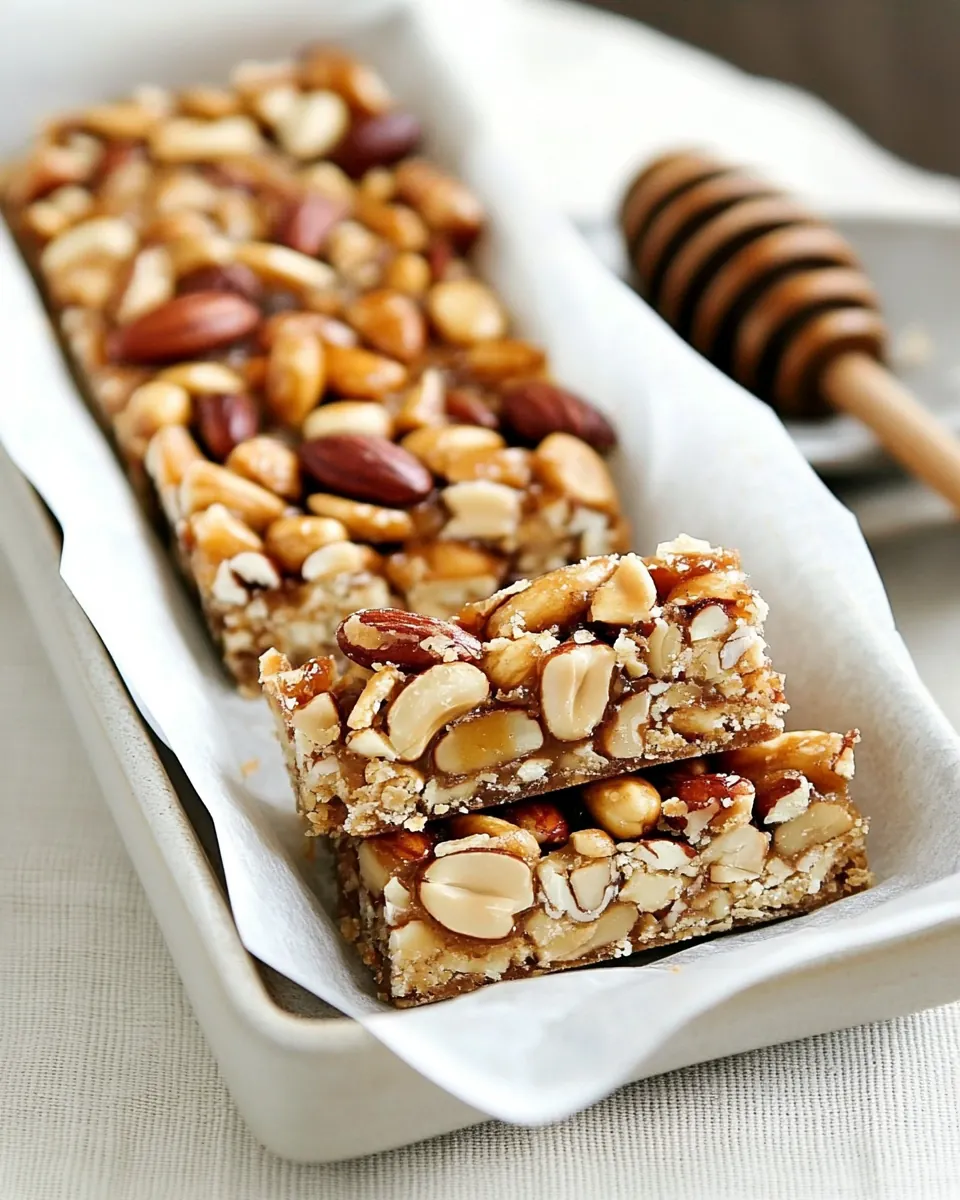
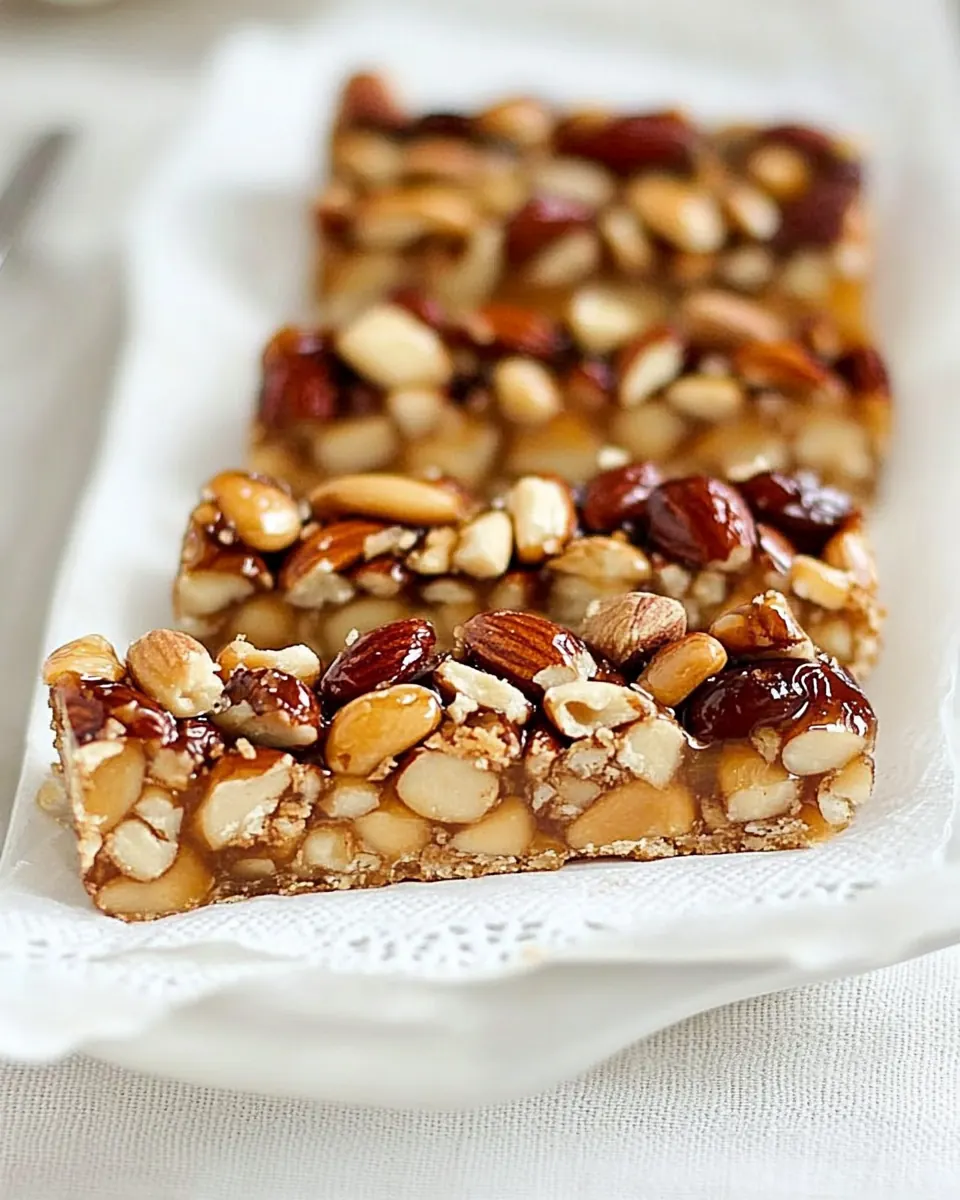
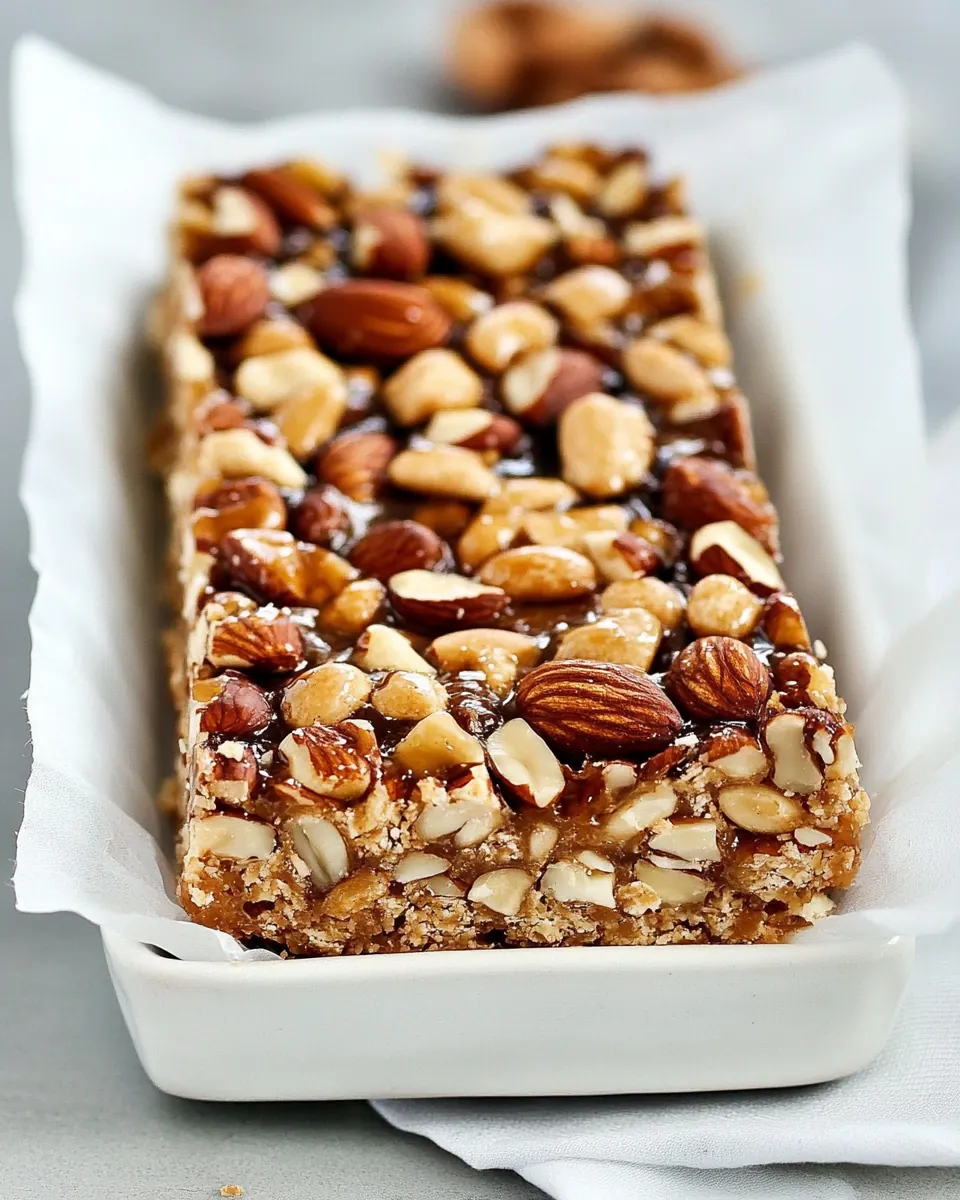
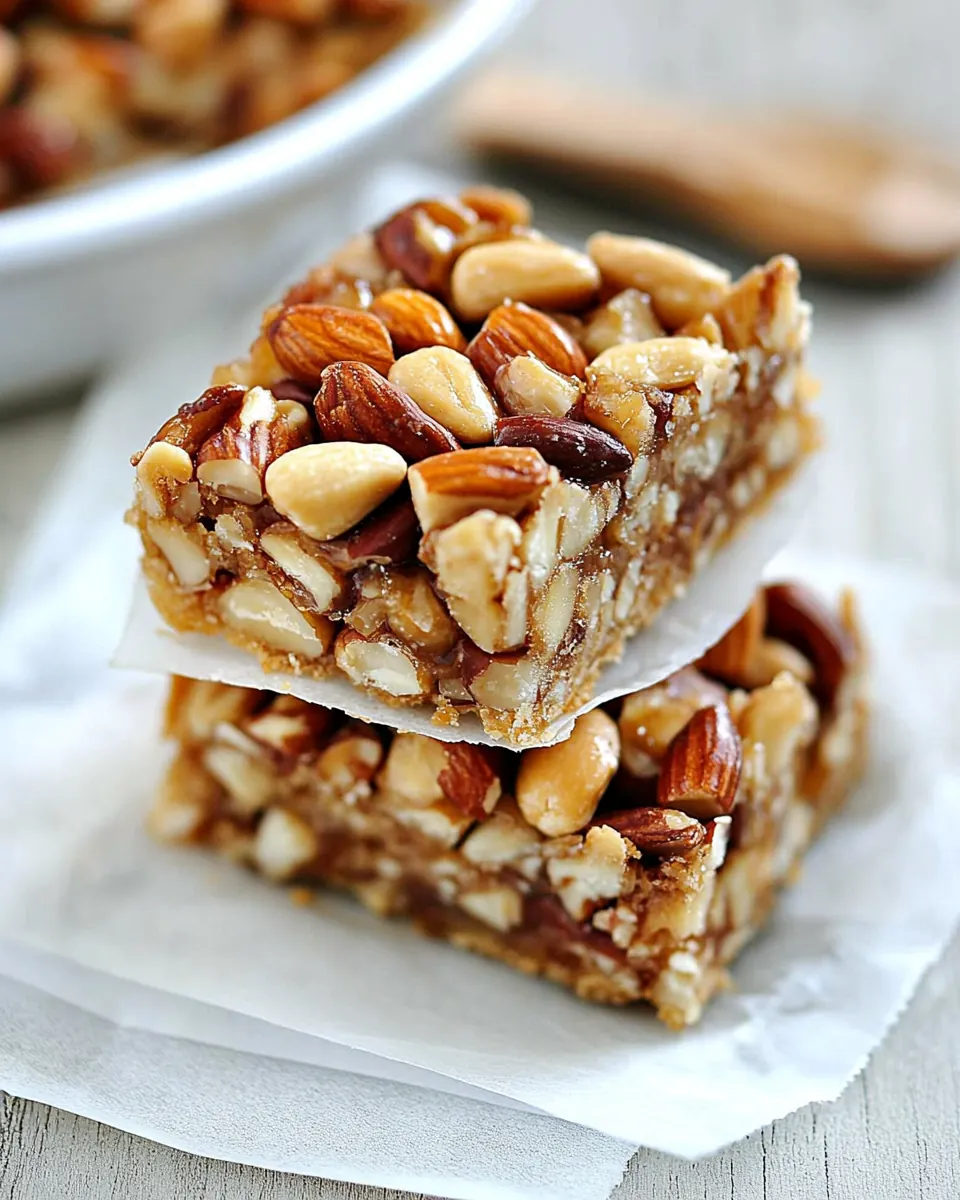
There is something about the contrast between a tender buttery crust and a glossy, nut studded topping that always wins people over. I like to make these when I want a reliable crowd pleaser that stores well, because they travel in a lunchbox just as proudly as they sit on a dessert table. Over the years I have adjusted small details, learning how long to cool the bars so they slice cleanly, and how to press the crust so it bakes evenly. Those little changes made a big difference.
Recipe Snapshot
60 mins
20 mins
40 mins
Medium
200 kcal
American
Gluten-Free, Low FODMAP
Desserts
Oven, 9 x 13-inch baking pan, Aluminum foil, Food processor, Medium saucepan, Wire rack, Sharp knife
Why This Honey Nut Bars Stands Out
Reliable Crowd Pleaser
I love that Honey Nut Bars are consistently popular at gatherings. They are easy to portion, simple to transport, and they keep their texture for days when stored properly. When I bring a pan to a potluck, people always come back for seconds, and I enjoy watching their faces the first time they bite into that sticky, nutty topping matched with a tender crust.
Textural Harmony
The magic of these bars is the balance between a buttery, crumbly base and a glossy, crunchy nut layer. The cookie like crust gives you a soft, gentle bite, while the cooked honey and brown sugar mixture envelops the nuts for a satisfying crunch. I often find myself tuning the toasting time of the mixed nuts to get just the right snap, because that crunch is what makes these bars memorable.
Straightforward Technique
There is comfort in recipes that do not overcomplicate. The steps for these Honey Nut Bars use basic pastry techniques, like pulsing to cut in butter and docking a crust to prevent bubbling. I appreciate recipes that teach you small skills while delivering impressive results. You get a little baking practice and a big payoff.
Flexible and Approachable
These bars adapt to what you have on hand. While I follow the recipe closely, I also know the dough tolerates small adjustments, and the topping will come together as long as you bring the sugar and butter to a steady boil before adding the cream. For anyone nervous about caramel like toppings, this is an accessible first step into that territory.
Make Ahead Friendly
I often make these in advance, and they hold up beautifully. I appreciate being able to bake a day ahead, slice them, and have an easy grab and go treat. They are ideal for gifting or for packaging into lunchboxes, which makes them one of my go to options when I want a no fuss, high reward dessert.
Main Ingredients for Honey Nut Bars
The philosophy behind these ingredients is simple: a sturdy, buttery crust provides a tender base, while a sweet, cooked topping binds the toasted nuts into a glossy, crunchy layer. Each component plays a clear role. The flour and butter give structure and flavor to the crust. The sugars and honey caramelize to create that satisfying chew and shine. Toasting the nuts brings forward aromas and deepens the taste, making the finished bars truly sing.
- 1/2 cup whole blanched almonds, toasted 1/2 cup granulated sugar 11-1/4 oz. (2-1/2 cups) unbleached all-purpose flour 1/2 tsp. baking powder 1/2 tsp. kosher salt 6 oz. (3/4 cup) cold unsalted butter, cut into 1/2-inch pieces 1 large egg, lightly beaten: Provide structure and flaky texture by combining toasted whole blanched almonds, granulated sugar, unbleached all-purpose flour, baking powder, kosher salt, cold unsalted butter, and a lightly beaten egg to form a rich shortbread-like base; toasting the almonds concentrates their flavor and adds crunch, while cold butter cut into pieces yields tender, crumbly layers when baked. Balance sweetness and leavening by creaming the sugar with egg and incorporating the dry ingredients until just combined, producing a sturdy crust that supports the sticky nut topping without becoming soggy.
- 3/4 cup packed light brown sugar 3 oz. (6 Tbs.) unsalted butter 1/3 cup clover honey 1/2 tsp. table salt 2 Tbs. heavy cream 1 teaspoon pure vanilla extract 3 cups whole salted mixed nuts, toasted: Create a glossy, caramel-like topping using packed light brown sugar, unsalted butter, clover honey, table salt, heavy cream, and pure vanilla extract, then fold in toasted whole salted mixed nuts to provide a sweet, sticky, and crunchy layer that contrasts the buttery base; cooking the sugar, butter, and honey together develops depth of flavor while cream and vanilla enrich the texture and taste. Adjust salt and toasting level of the mixed nuts to enhance savory notes and ensure a satisfying bite that adheres well to the shortbread foundation.
Directions for Honey Nut Bars
I approach the method for Honey Nut Bars with patience and attention to texture. A good bake depends on an evenly pressed crust and a topping that is heated just enough to bind and bubble. Below I expand the original directions into detailed, sensory rich guidance to help you get consistent results.
- Position a rack in the center of the oven and heat the oven to 350°F. Line a 9 x 13-inch baking pan with aluminum foil and spray the foil with cooking spray. Be sure to leave a bit of foil extending on the shorter sides of the pan, the foil will act as 'handles' when you remove the finished bars from the pan.: The warm oven gives you an immediate, reliable environment so the crust bakes evenly; you should feel the oven heat and hear the faint hum as it holds temperature. The foil lining will glint in the light and the sprayed surface prevents sticking, making removal a breeze. Leaving foil 'handles' is a smart move, because once the bars cool they can be lifted out cleanly, avoiding tugging that could crumble the crust. A common mistake is skipping the foil or spraying it unevenly, which can lead to the bars sticking and breaking when you try to remove them.
- In a food processor, finely grind the almonds and sugar. Add the flour, baking powder, and salt and pulse to blend. Add the butter and pulse until it's the size of small peas, 5 to 6 one-second pulses. Add the egg and pulse just until the dough begins to gather into large clumps.: The moment you grind the almonds with the granulated sugar , a fragrant almond aroma will lift from the machine; that nuttiness is key for the crust. When you pulse in the butter , aim for small pebble sized bits, because those pieces will melt during baking and create pockets of tender flakiness. The dough should look shaggy and just start to collect when you add the egg , not overworked into a smooth ball. Overmixing will activate gluten and make the crust tough, so stop pulsing as soon as large clumps form. A frequent pitfall is running the processor too long, which warms the butter and changes the texture.
- Using your fingertips, press the dough into the bottom of the prepared pan and about 1 inch up the sides to form a 1/4-inch-thick side crust. Using the tines of a fork, dock the crust evenly all over.: As you press the dough, the surface will feel cool and slightly tacky; use gentle, even pressure so the thickness is uniform from center to edge. Docking with a fork creates tiny vents that prevent the crust from puffing and ensures an even bake, producing a flat surface for the topping to sit on. When pressing up the sides, keep the edge consistent so the bars cut uniformly later. A common error is pressing too thin in some areas, which can lead to overly browned or brittle edges, so check visually that the layer looks even before baking.
- Bake until light golden brown on the edges and the center looks dry, 15 to 20 minutes. Cool the crust on a rack.: During baking you will notice the aroma of toasted almonds and butter filling the kitchen, and the edges will deepen to a gentle golden color. The center should lose its glossy wet look and appear set, though not overly dark. Cooling on a rack allows air to circulate and avoids steam making the crust soggy; if you skip this it risks a limp base that will not support the topping properly. One trap is underbaking, which leaves a gummy center that makes slicing messy; if in doubt, give it the full 20 minutes and let it cool fully.
- Bring the sugar, butter, honey, and salt to a boil in a medium saucepan over medium-high heat, stirring often. Slowly and carefully add the cream and return to a boil. Remove from the heat and carefully add the vanilla and nuts, stirring to coat.: As the light brown sugar , unsalted butter , and clover honey come together, the mixture will transform into a shimmering, syrupy concoction with a toffee like scent. When you add the heavy cream , do so slowly, because contact with the hot syrup can bubble vigorously; stir calmly until it smooths out. Once you stir in the vanilla extract and the toasted whole salted mixed nuts , the mixture will glisten and the nuts should be evenly coated. The 'why' here is that boiling briefly concentrates the sugars to create that sticky binding quality for the topping. A frequent mistake is rushing the process and not bringing it fully back to a boil after adding the cream, which can leave the topping too loose.
- Pour the nut mixture over the crust and spread evenly with a spatula. Tilt the pan to help spread the liquid to the edges and corners. Bake until the topping has just started to bubble slowly in the center, about 20 minutes.: As you pour the mixture, it should cascade into a thick, glossy layer that slowly settles over the base; the sound is a soft pour, not a splash. Using a spatula and tilting the pan helps the topping reach every edge, ensuring even distribution of nuts . In the oven the top will lose its high gloss slightly and small, slow bubbles will appear in the center, signaling readiness. This step creates the chewy, bonded layer that defines the bars; undercooking here yields a runny topping, while overbaking can make the nuts hard and brittle. Watch closely during the final minutes to avoid hard caramelization.
- Use the foil 'handles' to remove the bars from the pan and place on a wire rack to cool completely.: Lifting the pan by the foil handles feels satisfying and prevents stress on the bar edges. Cooling on a wire rack ensures air circulates beneath so the topping sets without trapping steam. The surface will firm and the aroma of toasted nuts will mellow into a warm, rich perfume. A common slip up is trying to cut while still warm, which leads to messy, deformed pieces; patience with cooling ensures clean slices.
- Place bars onto a cutting board and cut into 16 bars with a sharp knife. Take care to peel the foil away from the bars before serving.: Once cooled, the bars will have a shiny, set top and a firm but tender crust; using a sharp knife will produce neat edges. Peeling the foil away carefully prevents tearing the sides, and slicing into 16 equal pieces gives nice, shareable portions. You may wipe the knife between cuts for clean edges. One typical error is using a dull knife, which drags the topping and creates ragged pieces, so always use a sharp blade and steady pressure.
Pro Tips and Tweaks
These are my go to tips for making Honey Nut Bars turn out reliably. Small adjustments can make a big difference, so I include the tweaks I use most often.
- Check nut doneness visually: When toasting the mixed nuts, watch for an even golden color and aromatic scent, because they can go from perfect to bitter in seconds.
- Pulse carefully: In the food processor, pulse in short bursts to avoid warming the butter, which helps maintain a tender crust texture.
- Even pressing technique: Use the bottom of a measuring cup to press the dough evenly into the pan for consistent thickness across the crust.
- Slow cream addition: Add the heavy cream slowly to the boiling sugar and honey mixture to prevent an aggressive boil over and to achieve a smooth sauce.
- Sharp knife for slicing: Use a well sharpened knife and wipe it between cuts for clean, attractive bars that hold their shape.
Pairing Suggestions for Honey Nut Bars
These bars pair beautifully with simple drinks and are versatile across occasions. They work well on a dessert table, as a sweet treat for afternoon tea, and as a thoughtful addition to holiday trays. Here are detailed serving ideas and practical storage notes to get the most from your batch.
- Casual coffee break: Serve a Honey Nut Bar with a small cup of coffee or strong black tea to balance the sweetness, making a relaxed mid morning or afternoon snack.
- After dinner treat: Present a bar with a scoop of plain yogurt or a mild, creamy accompaniment to contrast the sticky topping for a simple dessert course.
- Party platter: Arrange cut bars on a board with seasonal fruit, allowing guests to nibble and combine flavors for an easy buffet style offering.
- Gifting: Wrap individual bars in parchment and tie with twine for a homemade gift that travels well, especially when packed in a sturdy tin.
- Storage: Keep the bars in an airtight container at room temperature for up to four days, or freeze individually wrapped bars for up to one month for easy thaw and serve.
- Seasonal occasions: These bars are fitting for gatherings year round, whether for casual get togethers, school events, or festive trays during holidays that call for sweet bites.
FAQ
Conclusion
These bars stand out for their perfect marriage of a tender almond scented crust and a glossy, nut studded honey topping. I encourage you to try this recipe because it rewards a bit of attention with impressive, crowd pleasing results that travel and store well. Make a pan for friends, family, or just to have by the coffee pot, and enjoy the way the warm, toasty aromas and sticky crunch bring people together.
Honey Nut Bars
Equipment
- Oven
- 9 x 13-inch baking pan
- Aluminum Foil
- Food Processor
- Medium Saucepan
- Wire Rack
- Sharp Knife
Ingredients
- 1/2 cup whole blanched almonds, toasted 1/2 cup granulated sugar 11-1/4 oz. (2-1/2 cups) unbleached all-purpose flour 1/2 tsp. baking powder 1/2 tsp. kosher salt 6 oz. (3/4 cup) cold unsalted butter, cut into 1/2-inch pieces 1 large egg, lightly beaten Provide structure and flaky texture by combining toasted whole blanched almonds, granulated sugar, unbleached all-purpose flour, baking powder, kosher salt, cold unsalted butter, and a lightly beaten egg to form a rich shortbread-like base; toasting the almonds concentrates their flavor and adds crunch, while cold butter cut into pieces yields tender, crumbly layers when baked. Balance sweetness and leavening by creaming the sugar with egg and incorporating the dry ingredients until just combined, producing a sturdy crust that supports the sticky nut topping without becoming soggy.
- 3/4 cup packed light brown sugar 3 oz. (6 Tbs.) unsalted butter 1/3 cup clover honey 1/2 tsp. table salt 2 Tbs. heavy cream 1 teaspoon pure vanilla extract 3 cups whole salted mixed nuts, toasted Create a glossy, caramel-like topping using packed light brown sugar, unsalted butter, clover honey, table salt, heavy cream, and pure vanilla extract, then fold in toasted whole salted mixed nuts to provide a sweet, sticky, and crunchy layer that contrasts the buttery base; cooking the sugar, butter, and honey together develops depth of flavor while cream and vanilla enrich the texture and taste. Adjust salt and toasting level of the mixed nuts to enhance savory notes and ensure a satisfying bite that adheres well to the shortbread foundation.
Instructions
- Position a rack in the center of the oven and heat the oven to 350°F. Line a 9 x 13-inch baking pan with aluminum foil and spray the foil with cooking spray. Be sure to leave a bit of foil extending on the shorter sides of the pan, the foil will act as 'handles' when you remove the finished bars from the pan.: The warm oven gives you an immediate, reliable environment so the crust bakes evenly; you should feel the oven heat and hear the faint hum as it holds temperature. The foil lining will glint in the light and the sprayed surface prevents sticking, making removal a breeze. Leaving foil 'handles' is a smart move, because once the bars cool they can be lifted out cleanly, avoiding tugging that could crumble the crust. A common mistake is skipping the foil or spraying it unevenly, which can lead to the bars sticking and breaking when you try to remove them.
- In a food processor, finely grind the almonds and sugar. Add the flour, baking powder, and salt and pulse to blend. Add the butter and pulse until it's the size of small peas, 5 to 6 one-second pulses. Add the egg and pulse just until the dough begins to gather into large clumps.: The moment you grind the almonds with the granulated sugar , a fragrant almond aroma will lift from the machine; that nuttiness is key for the crust. When you pulse in the butter , aim for small pebble sized bits, because those pieces will melt during baking and create pockets of tender flakiness. The dough should look shaggy and just start to collect when you add the egg , not overworked into a smooth ball. Overmixing will activate gluten and make the crust tough, so stop pulsing as soon as large clumps form. A frequent pitfall is running the processor too long, which warms the butter and changes the texture.
- Using your fingertips, press the dough into the bottom of the prepared pan and about 1 inch up the sides to form a 1/4-inch-thick side crust. Using the tines of a fork, dock the crust evenly all over.: As you press the dough, the surface will feel cool and slightly tacky; use gentle, even pressure so the thickness is uniform from center to edge. Docking with a fork creates tiny vents that prevent the crust from puffing and ensures an even bake, producing a flat surface for the topping to sit on. When pressing up the sides, keep the edge consistent so the bars cut uniformly later. A common error is pressing too thin in some areas, which can lead to overly browned or brittle edges, so check visually that the layer looks even before baking.
- Bake until light golden brown on the edges and the center looks dry, 15 to 20 minutes. Cool the crust on a rack.: During baking you will notice the aroma of toasted almonds and butter filling the kitchen, and the edges will deepen to a gentle golden color. The center should lose its glossy wet look and appear set, though not overly dark. Cooling on a rack allows air to circulate and avoids steam making the crust soggy; if you skip this it risks a limp base that will not support the topping properly. One trap is underbaking, which leaves a gummy center that makes slicing messy; if in doubt, give it the full 20 minutes and let it cool fully.
- Bring the sugar, butter, honey, and salt to a boil in a medium saucepan over medium-high heat, stirring often. Slowly and carefully add the cream and return to a boil. Remove from the heat and carefully add the vanilla and nuts, stirring to coat.: As the light brown sugar , unsalted butter , and clover honey come together, the mixture will transform into a shimmering, syrupy concoction with a toffee like scent. When you add the heavy cream , do so slowly, because contact with the hot syrup can bubble vigorously; stir calmly until it smooths out. Once you stir in the vanilla extract and the toasted whole salted mixed nuts , the mixture will glisten and the nuts should be evenly coated. The 'why' here is that boiling briefly concentrates the sugars to create that sticky binding quality for the topping. A frequent mistake is rushing the process and not bringing it fully back to a boil after adding the cream, which can leave the topping too loose.
- Pour the nut mixture over the crust and spread evenly with a spatula. Tilt the pan to help spread the liquid to the edges and corners. Bake until the topping has just started to bubble slowly in the center, about 20 minutes.: As you pour the mixture, it should cascade into a thick, glossy layer that slowly settles over the base; the sound is a soft pour, not a splash. Using a spatula and tilting the pan helps the topping reach every edge, ensuring even distribution of nuts . In the oven the top will lose its high gloss slightly and small, slow bubbles will appear in the center, signaling readiness. This step creates the chewy, bonded layer that defines the bars; undercooking here yields a runny topping, while overbaking can make the nuts hard and brittle. Watch closely during the final minutes to avoid hard caramelization.
- Use the foil 'handles' to remove the bars from the pan and place on a wire rack to cool completely.: Lifting the pan by the foil handles feels satisfying and prevents stress on the bar edges. Cooling on a wire rack ensures air circulates beneath so the topping sets without trapping steam. The surface will firm and the aroma of toasted nuts will mellow into a warm, rich perfume. A common slip up is trying to cut while still warm, which leads to messy, deformed pieces; patience with cooling ensures clean slices.
- Place bars onto a cutting board and cut into 16 bars with a sharp knife. Take care to peel the foil away from the bars before serving.: Once cooled, the bars will have a shiny, set top and a firm but tender crust; using a sharp knife will produce neat edges. Peeling the foil away carefully prevents tearing the sides, and slicing into 16 equal pieces gives nice, shareable portions. You may wipe the knife between cuts for clean edges. One typical error is using a dull knife, which drags the topping and creates ragged pieces, so always use a sharp blade and steady pressure.
Notes
- Check nut doneness visually: When toasting the mixed nuts, watch for an even golden color and aromatic scent, because they can go from perfect to bitter in seconds.
- Pulse carefully: In the food processor, pulse in short bursts to avoid warming the butter, which helps maintain a tender crust texture.
- Even pressing technique: Use the bottom of a measuring cup to press the dough evenly into the pan for consistent thickness across the crust.
- Slow cream addition: Add the heavy cream slowly to the boiling sugar and honey mixture to prevent an aggressive boil over and to achieve a smooth sauce.
- Sharp knife for slicing: Use a well sharpened knife and wipe it between cuts for clean, attractive bars that hold their shape.