Fajita Omelettes
There’s something magical about starting your day with a plate of Fajita Omelettes. I still remember the first time I made them for my family; the kitchen filled with the aroma of sizzling peppers and spices. It was a Sunday morning, the sun streaming through the windows, and we were all gathered around the table, excited for a hearty breakfast. These omelettes are not just a meal; they are a way to bring everyone together, to share stories, and to enjoy the simple pleasure of good food. The vibrant colors of the bell peppers, the soft texture of the eggs, and the tangy toppings create a combination that makes for a truly delightful start to any day.
Recipe Snapshot
30 mins
10 mins
20 mins
Medium
320 kcal
20 g
Keto, Gluten-Free, Low FODMAP
22 g
Wooden Spoon, Peeler, Skillet, Chef’s Knife, Whisk, Food Processor
What We Adore About This Fajita Omelettes
The Perfect Balance of Flavors
What I love most about Fajita Omelettes is how the flavors meld beautifully. The sweetness of the bell peppers contrasts perfectly with the spices, creating a delightful harmony in every bite.
Quick and Easy
These omelettes are quick to prepare, making them an ideal choice for busy mornings. With a total cooking time of just thirty minutes, you can whip up a delicious breakfast without feeling rushed.
Customizable to Your Taste
One of the best parts about Fajita Omelettes is that you can customize them to suit your preferences. Whether you prefer more spice, extra cheese, or even different vegetables, the options are endless.
Healthy and Nutritious
Loaded with fresh vegetables and eggs, these omelettes offer a nutritious start to your day. They are packed with protein and vitamins, ensuring you’re fueled for whatever the day holds.
A Family Favorite
These omelettes have become a staple in my household. My kids love helping out in the kitchen, from chopping the peppers to whisking the eggs. It’s a fun way to bond and create lasting memories together.
Perfect for Any Meal
While they make a fantastic breakfast, Fajita Omelettes can also be enjoyed for lunch or dinner. They are versatile and suited for any occasion, whether it’s a casual weekend brunch or a weeknight meal.
What You’ll Need for Fajita Omelettes
For the best Fajita Omelettes, you’ll want fresh, vibrant ingredients that come together in a delightful way. Each ingredient plays a crucial role, from the bell peppers that add color and sweetness to the eggs that form the base of this dish. It’s a combination that not only tastes great but is also visually appealing.
- 1 red bell pepper, cored and cut into matchsticks
- 1 green bell pepper, cored and cut into matchsticks
- 1/4 teaspoon paprika
- 1/4 teaspoon ground cumin
- sea salt to taste
- 4 to 6 eggs
- 1/4 cup cotija cheese
- 1/2 avocado, peeled and sliced
- 1/4 cup plain yogurt (I use Icelandic yogurt)
- 1/3 cup salsa
How to Cook Fajita Omelettes

Cooking Fajita Omelettes is a straightforward process that can be both fun and satisfying. With each step, you’ll witness the ingredients transform into a delicious meal. Let’s dive into the cooking process!
- Heat 2 tablespoons of cooking oil (you can use coconut oil, avocado oil, almond oil, or olive oil) in a medium-sized skillet over medium-high heat. The choice of oil can subtly influence the flavor, so select one that you enjoy.
- Add the red and green bell peppers, paprika, ground cumin, and a sprinkle of sea salt to the skillet. Sauté the mixture, stirring occasionally, until the peppers begin to soften and develop a golden hue, which usually takes about 5 to 8 minutes. The aroma will be irresistible!
- In a separate bowl, whisk together 4 to 6 eggs with a pinch of sea salt. This is where you can add a splash of milk or cream if you prefer a creamier texture. Ensure that the eggs are well mixed for a fluffy omelette.
- Heat another skillet over medium heat, just enough to coat the surface with oil. For a two-egg omelette, use a smaller skillet (around 6 to 8 inches), and for a three-egg omelette, a larger skillet (around 10 inches) works best.
- Pour the egg mixture into the hot skillet and allow it to cook undisturbed for about 3 to 5 minutes. You want to watch as the edges start to set while the center remains slightly runny; this indicates it’s time to flip.
- Gently flip the omelette using a spatula and let it cook for another 30 seconds to 1 minute, or until the eggs are fully cooked through. This technique ensures a fluffy and perfectly cooked omelette.
- Repeat this process with the remaining egg mixture, keeping the cooked omelettes warm in a low oven if needed.
- Once all omelettes are cooked, stuff each one with the sautéed pepper mixture, adding as much as you desire.
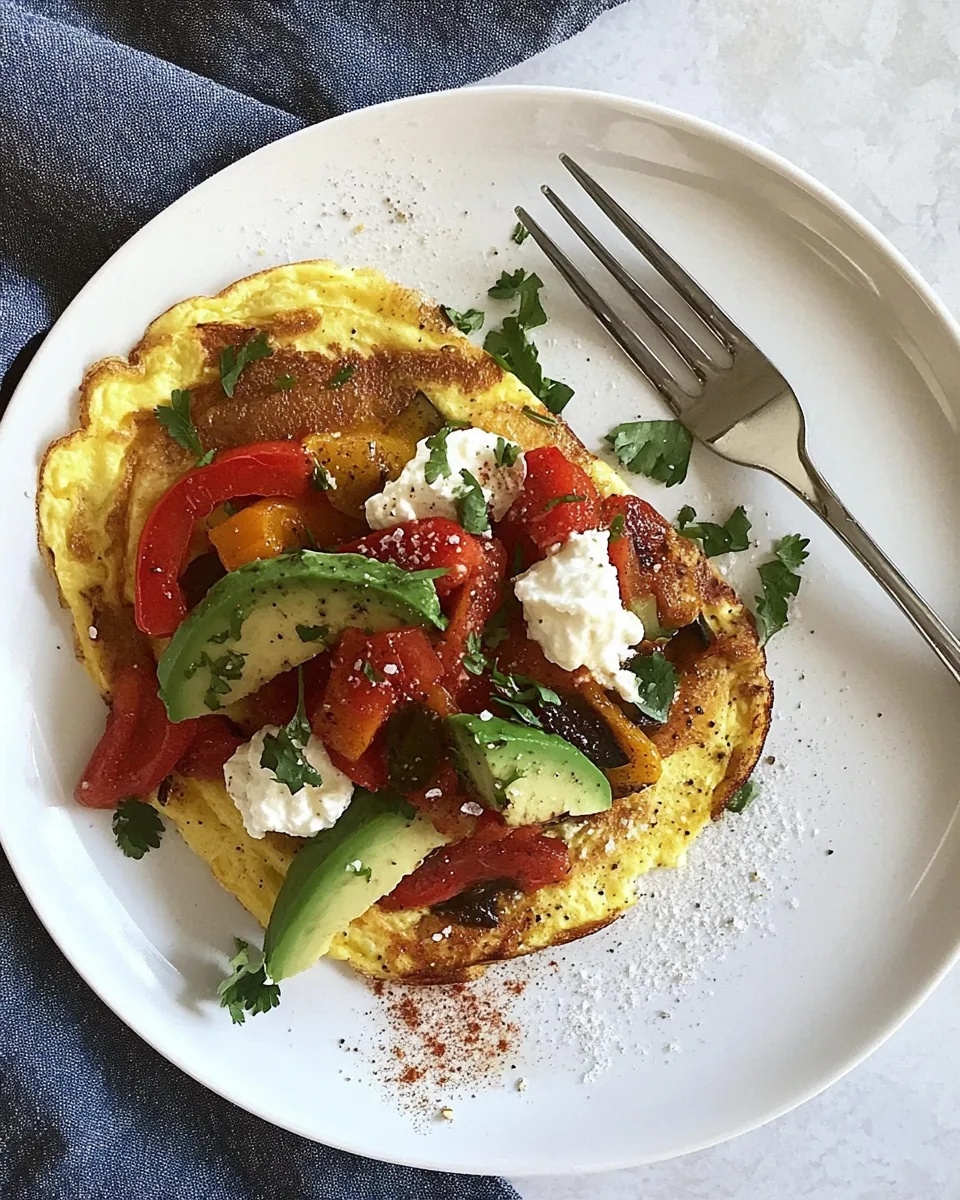
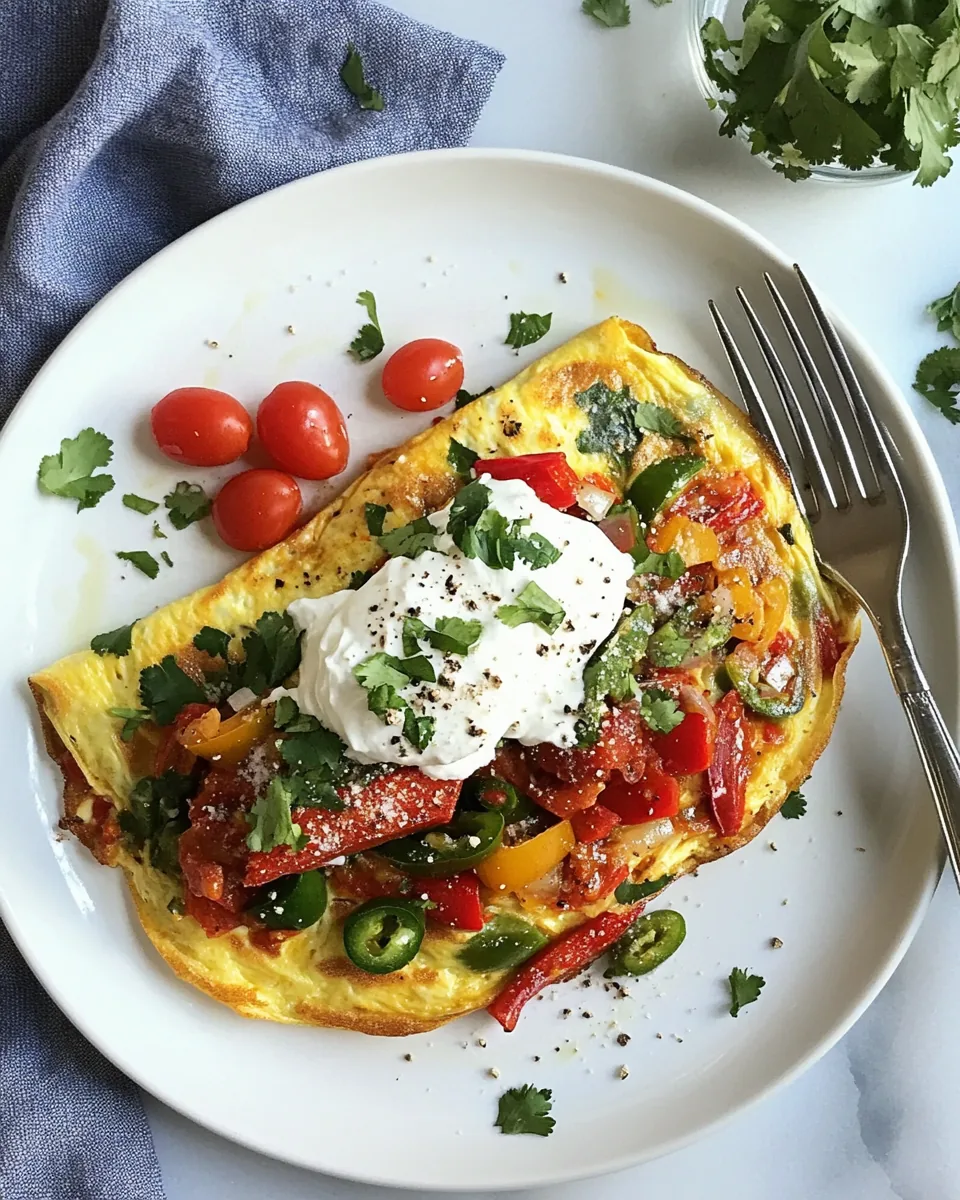
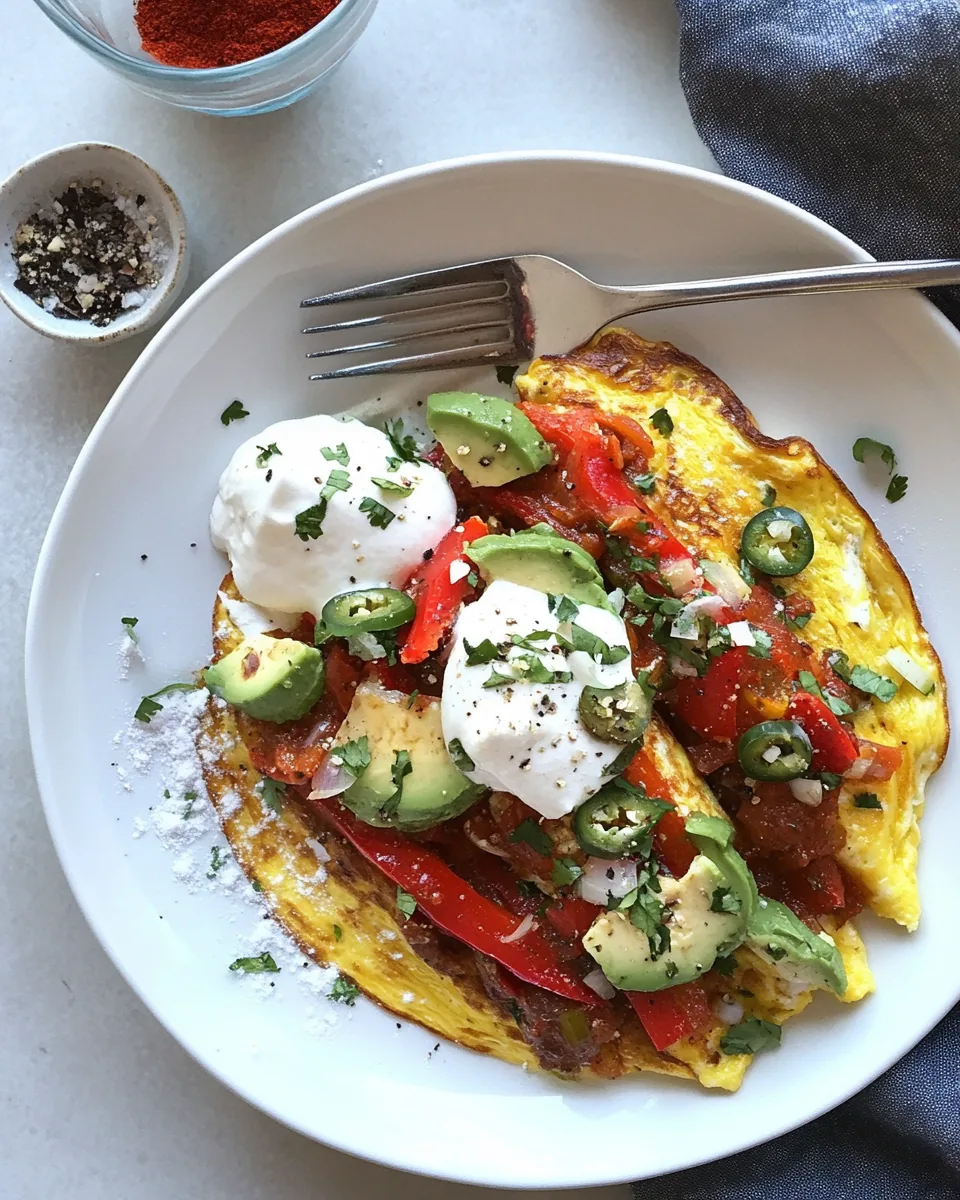
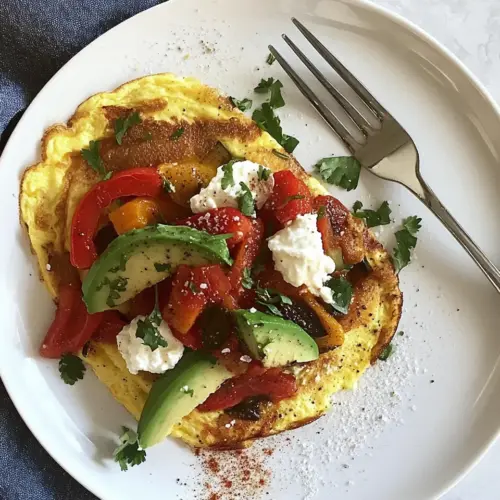
- Top your Fajita Omelettes with cotija cheese, slices of avocado, a dollop of plain yogurt, and a generous spoonful of salsa. The toppings add a delightful creaminess and zest that elevates the dish.
Things Worth Knowing
- Cooking Temperature: It’s essential to have the skillet hot enough when adding the eggs. This ensures they cook evenly and develop a nice texture.
- Egg Freshness: Always use fresh eggs for the best taste and texture. Fresh eggs will hold their shape better and result in a fluffier omelette.
- Ingredient Prep: Prepping the vegetables before starting the cooking process can make everything go smoother and faster, especially on busy mornings.
- Cooking in Batches: If making multiple omelettes, keep the completed ones warm in the oven while you cook the rest to maintain their temperature.
Recipe Notes about Fajita Omelettes
As you embark on your journey of making Fajita Omelettes, keep these helpful tips in mind to enhance your experience and outcome.
- Storage: Store any leftover omelettes in an airtight container in the refrigerator. They can typically last for up to three days.
- Freezing: You can freeze cooked omelettes, but it’s best to reheat them in the oven rather than the microwave to maintain their texture.
- Pairing: These omelettes pair wonderfully with fresh fruit, toast, or a simple green salad for a more balanced meal.
- Make-Ahead: You can prepare the filling in advance and store it in the fridge. This allows for a quick and easy assembly in the morning.
- Variations: Feel free to experiment with different vegetables or herbs. Adding spinach or cilantro can bring a new twist!
Serving Options for Fajita Omelettes
When it comes to serving Fajita Omelettes, the possibilities are endless! Here’s how you can enjoy them in various ways:
- Breakfast Delight: Serve your omelettes hot off the skillet for breakfast, paired with a side of fresh fruit or a light salad.
- Lunch Break: These omelettes make a fantastic lunch option, served with a side of crispy tortilla chips and guacamole.
- Brunch Gatherings: Impress your guests at a brunch gathering by offering a build-your-own omelette station with various toppings and fillings.
- Dinner Twist: Enjoy them for dinner when you want something light yet filling. Pair with a glass of iced tea or lemonade for a refreshing meal.
- Seasonal Touch: During summer, serve with grilled vegetables on the side for a fresh and seasonal touch.
FAQ
Conclusion
In conclusion, Fajita Omelettes are a wonderful way to elevate your breakfast experience. They combine colorful vegetables with delicious flavors and are easy to customize for everyone’s taste. I encourage you to try this recipe and enjoy the delightful flavors that come together on your plate. It’s more than just a meal; it’s a chance to create memories around the table with loved ones. Give it a go, and you may find it becomes a staple in your home as well!
Fajita Omelettes
Equipment
- Wooden Spoon
- Peeler
- Skillet
- Chef's Knife
- Whisk
- Food Processor
Ingredients
- 1 red bell pepper cored and cut into matchsticks
- 1 green bell pepper cored and cut into matchsticks
- 1/4 teaspoon paprika
- 1/4 teaspoon ground cumin
- sea salt to taste
- 4 to 6 eggs
- 1/4 cup cotija cheese
- 1/2 avocado peeled and sliced
- 1/4 cup plain yogurt I use Icelandic yogurt
- 1/3 cup salsa
Instructions
- Heat 2 tablespoons of cooking oil (you can use coconut oil, avocado oil, almond oil, or olive oil) in a medium-sized skillet over medium-high heat. The choice of oil can subtly influence the flavor, so select one that you enjoy.
- Add the red and green bell peppers, paprika, ground cumin, and a sprinkle of sea salt to the skillet. Sauté the mixture, stirring occasionally, until the peppers begin to soften and develop a golden hue, which usually takes about 5 to 8 minutes. The aroma will be irresistible!
- In a separate bowl, whisk together 4 to 6 eggs with a pinch of sea salt. This is where you can add a splash of milk or cream if you prefer a creamier texture. Ensure that the eggs are well mixed for a fluffy omelette.
- Heat another skillet over medium heat, just enough to coat the surface with oil. For a two-egg omelette, use a smaller skillet (around 6 to 8 inches), and for a three-egg omelette, a larger skillet (around 10 inches) works best.
- Pour the egg mixture into the hot skillet and allow it to cook undisturbed for about 3 to 5 minutes. You want to watch as the edges start to set while the center remains slightly runny; this indicates it’s time to flip.
- Gently flip the omelette using a spatula and let it cook for another 30 seconds to 1 minute, or until the eggs are fully cooked through. This technique ensures a fluffy and perfectly cooked omelette.
- Repeat this process with the remaining egg mixture, keeping the cooked omelettes warm in a low oven if needed.
- Once all omelettes are cooked, stuff each one with the sautéed pepper mixture, adding as much as you desire.
- Top your Fajita Omelettes with cotija cheese, slices of avocado, a dollop of plain yogurt, and a generous spoonful of salsa. The toppings add a delightful creaminess and zest that elevates the dish.
Notes
- Storage: Store any leftover omelettes in an airtight container in the refrigerator. They can typically last for up to three days.
- Freezing: You can freeze cooked omelettes, but it's best to reheat them in the oven rather than the microwave to maintain their texture.
- Pairing: These omelettes pair wonderfully with fresh fruit, toast, or a simple green salad for a more balanced meal.
- Make-Ahead: You can prepare the filling in advance and store it in the fridge. This allows for a quick and easy assembly in the morning.
- Variations: Feel free to experiment with different vegetables or herbs. Adding spinach or cilantro can bring a new twist!