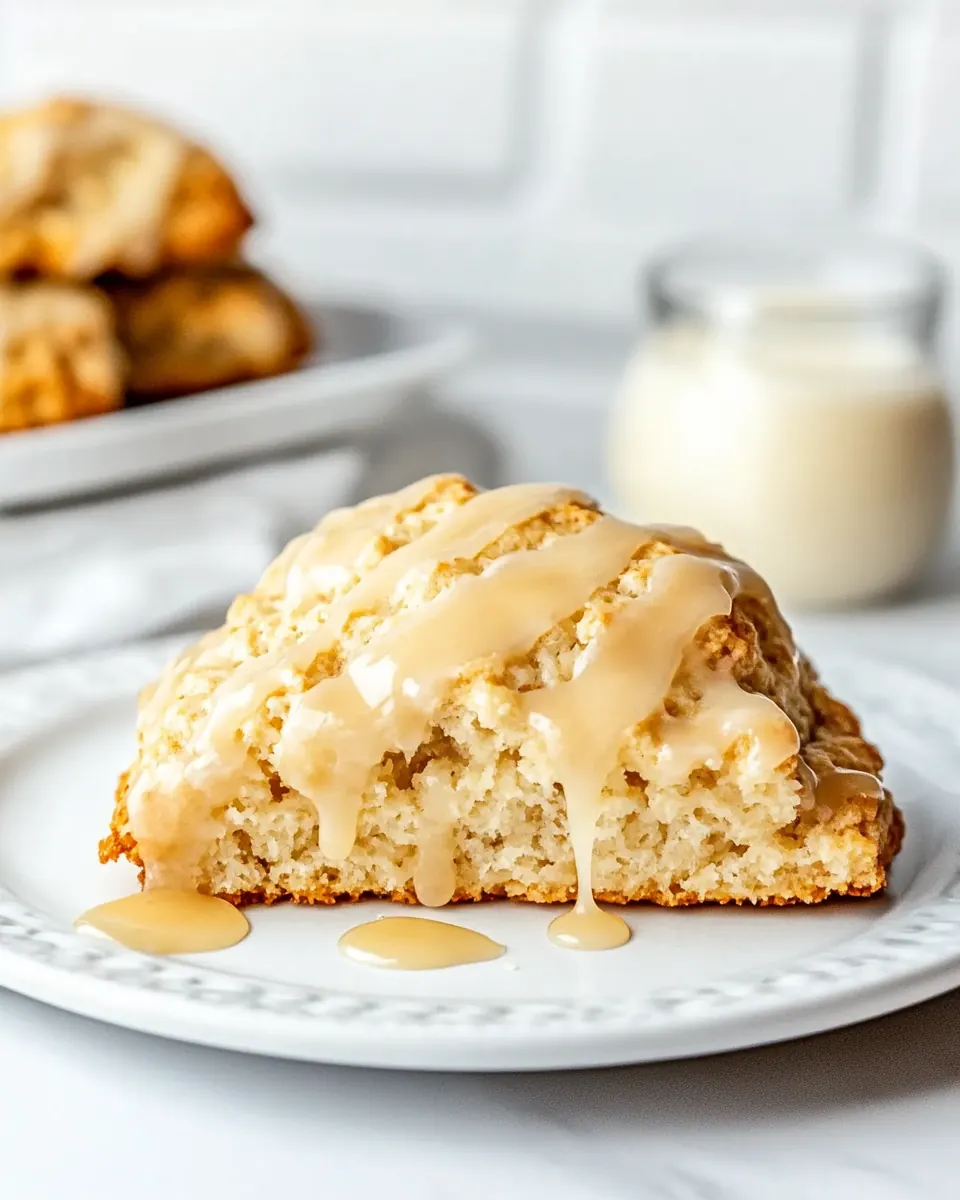
Easy Banana Scones
Easy Banana Scones are one of those recipes I turn to when ripe bananas sit lonely on the counter and I want something cozy that smells like a warm bakery at home. I remember a slow Sunday morning when I mashed the last overripe banana, pulled out a food processor, and improvised a few pantry staples into a batch that vanished before lunch. The first bite was tender, with a faintly sweet banana aroma and a buttery crumb that made me smile.
Another time I packed these into a picnic basket, wrapped in parchment, and watched friends debate whether the maple glaze made them dessert or breakfast. I love that they travel well, and they pair with coffee or tea without stealing the show. Making Easy Banana Scones has become my go to when I want a small celebration on an ordinary day, and I often vary the glaze amount to fit the mood. They feel both nostalgic and unexpectedly grown up, a recipe that comforts and impresses with very little fuss.
Recipe Snapshot
35 mins
15 mins
20 mins
Medium
180 kcal
American
Gluten-Free, Low FODMAP
Breakfast
Food processor, baking sheet, Parchment Paper or baking mat, Sharp knife or pizza cutter, Mixing bowls
Why We Love This Easy Banana Scones
They use everyday pantry staples
I adore how Easy Banana Scones lean on simple items like all purpose flour and granulated sugar, so you rarely need a special grocery run. Keeping the ingredient list straightforward means I can whip these up any morning when I spot those ripening bananas.
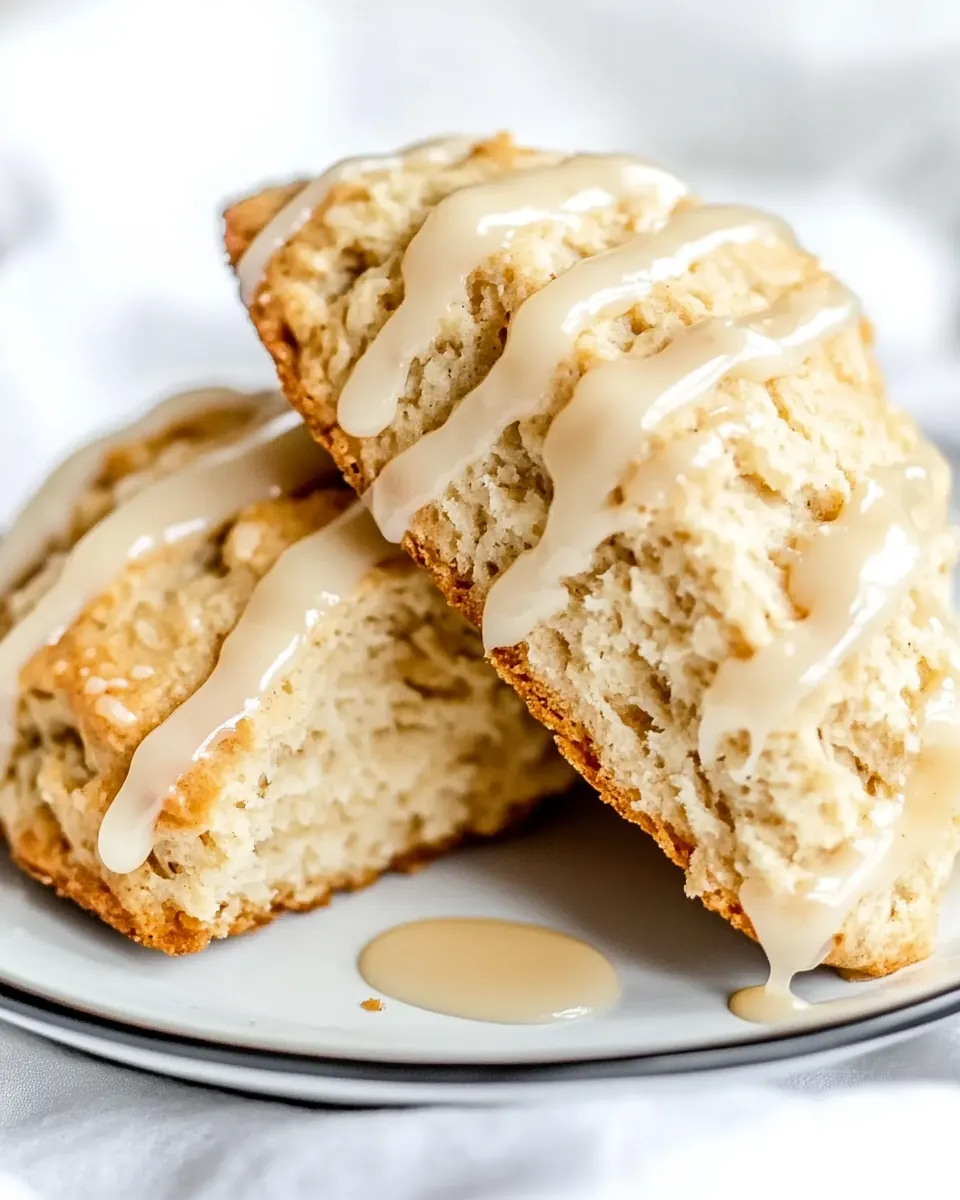
Texture that feels bakery made
The combination of cold unsalted butter and quick pulses in a food processor gives flaky layers without fuss. I can hear the little crumbles as I cut the wedges, and that tender interior with a slightly crisp exterior keeps everyone reaching for another piece.
Flexible and forgiving
These scones are forgiving: a touch more milk, a quick chill, or a little extra kneading still produce great results. I often tweak the amount of mashed banana depending on ripeness, and the dough still behaves. That flexibility makes this recipe a favorite when I want consistent success.
Maple glaze adds warmth
The simple maple glaze, made from confectioners’ sugar and real maple syrup, elevates the scones into something special. I like brushing it on while the scones are still slightly warm so it sets with a smooth sheen, and the maple aroma always draws compliments.
Great for many occasions
Whether I serve them for a lazy brunch, tuck them into lunch boxes, or bring them to a gathering, Easy Banana Scones fit right in. They’re approachable, shareable, and somehow both cozy and elegant, which is why I keep this recipe in heavy rotation.
Ingredients to Make Easy Banana Scones
I believe the right ingredients are about balance. For Easy Banana Scones, the dry staples give structure, the cold butter creates flaky layers, and the mashed banana adds moisture and natural sweetness. The maple glaze ties everything together with a glossy, sweet finish that complements, rather than overwhelms, the scone’s delicate crumb.
- 2 cups all-purpose flour: Provide structure and bulk to the scones by forming the dry base that the wet ingredients bind together with a tender crumb when mixed properly.
- 1/4 cup granulated sugar: Add sweetness and help with browning while balancing flavors; disperses evenly in the flour to ensure consistent sweetness throughout the dough.
- 1 tablespoon baking powder: Leaven the scones by producing carbon dioxide during baking, creating lift and a light, flaky texture when mixed into the dry ingredients.
- 1 teaspoon ground cinnamon: Contribute warm, aromatic flavor that complements banana; sprinkle into the dry mix to add subtle depth without overpowering the pastry.
- 1/2 teaspoons salt: Enhance overall flavor by balancing sweetness and strengthening gluten slightly; dissolve into the dough to control taste and chemical reactions.
- 1/4 cup cold unsalted butter cubed: Create flaky layers and tenderize the dough by coating flour proteins with fat; keep cold and cubed so it melts gradually during baking for flakiness.
- 1/2 cup mashed ripe bananas about 1 large or 2 medium bananas. For lower carb scones, use 1/2-1 teaspoon banana extract and increase the milk to 1/3 cup.: Provide moisture, natural sweetness, and banana flavor while contributing to texture; mashed bananas also add natural sugars and slight density to the scones.
- 1/4 cup milk: Moisten the dough and help bring ingredients together while controlling dough consistency; adjust amount for a tender but not sticky dough.
- 1 teaspoon vanilla extract: Enhance overall aroma and flavor with a sweet, floral note; stir into wet ingredients to distribute flavor evenly throughout the dough.
- 1 egg lightly beaten: Act as a binder and add richness while contributing to structure and color; beat lightly and mix into wet ingredients for uniform incorporation.
- Maple Glaze Drizzle –: Create a sweet finishing element that adds shine and extra flavor when drizzled over cooled scones to complement the banana notes.
- 1 cup confectioners’ sugar sifted: Provide the base sweetness and body for the glaze, dissolving smoothly when mixed with syrup to create a glossy topping.
- 2 tablespoons real maple syrup: Add natural sweetness and maple flavor to the glaze while thinning the confectioners’ sugar into a pourable consistency; mix thoroughly for balance.
- 1 2 teaspoons heavy cream until desired consistency is reached. (optional): Adjust glaze texture and add richness; stir in a small amount gradually until the drizzle reaches desired thickness and sheen.
Putting Together Easy Banana Scones
Bringing these scones together is all about rhythm and paying attention to temperature. Take your time to keep the butter cold, mix the dough just until it holds, and let the maple glaze be a gentle finishing touch. Below are the detailed steps I follow, with sensory cues and troubleshooting notes so you can replicate a great bake every time.
- Preheat your oven to 400°F (200°C). Line a baking sheet with parchment paper or a silicone baking mat.: Warmth spreads quickly in the kitchen, and the first sign you are ready is the oven reaching that steady heat, which produces steady browning. You should smell a faint warm scent as the oven comes to temp and the sheet warms. This step matters because a hot oven gives the scones an immediate lift, creating a tender interior and slightly crisp exterior. A common mistake is putting cold dough into an oven that hasn't fully preheated, which can lead to under risen, dense scones. Make sure the temperature is stable before you slide the tray in.
- In a food processor, pulse together the flour, sugar, baking powder, salt, and cinnamon.: As you pulse, the dry mixture takes on a uniform pale color and you can smell the warm cinnamon mingling with the flour. This step helps distribute the leavening and spices evenly so each scone behaves consistently. Pulsing rather than over mixing prevents warming the dry ingredients, which helps the butter remain cold in the next step. If you overprocess here, the mixture can become too fine, which may change how the dough holds together. Stop pulsing once the mix looks even and no large pockets of baking powder remain visible.
- Add the cold cubed butter to the flour mixture. Pulse until the flour mixture resembles coarse crumbs. Place in a large mixing bowl.: You will see pea sized pieces of butter amid the flour, and the texture should look like coarse breadcrumbs. Those little bits are crucial because they melt during baking and create flakiness. If the butter starts to melt and becomes greasy, the air pockets that form during baking will be lost. A common misstep is using room temperature butter; always use cold, cubed butter. Once the mixture looks coarse and slightly granular, transfer it to a bowl so you can finish by hand.
- In a separate bowl, mix the mashed banana, milk, vanilla extract, and beaten egg until well combined.: The mixture should be smooth with a glossy sheen from the egg and milk, and you will smell the ripe banana and vanilla. The wet mixture hydrates the dry ingredients and adds tenderness. Mixing until homogeneous ensures even pockets of moisture so the dough bakes uniformly. Avoid over stirring, which can make the batter too soft and sticky. If the banana is extremely ripe and runny, reduce the milk slightly to avoid overly wet dough.
- Pour the banana mixture into the dry ingredients. Stir until just combined. Do not overmix; the dough should be slightly sticky.: At this point you should hear a soft scraping sound as the spatula moves through the dough and see the dough coming together in irregular clumps. The slight stickiness tells you there is enough moisture to bind without making the scones heavy. This technique preserves flakiness because overmixing develops gluten, which yields toughness instead of tenderness. A common error is to keep stirring until perfectly smooth; stop when there are no large pockets of dry flour, even if the dough looks a little shaggy.
- Turn the dough out onto a lightly floured surface and gently knead it a few times. Add flour as needed until the dough holds together without being too sticky.: As you pat and fold, the dough will feel cool and slightly tacky but manageable. Kneading briefly aligns strands just enough to let the scones keep structure while remaining tender. If you press too hard or knead excessively, the scones will tighten and become dense. Use just a light touch, adding only a dusting of flour if the dough clings excessively to your hands.
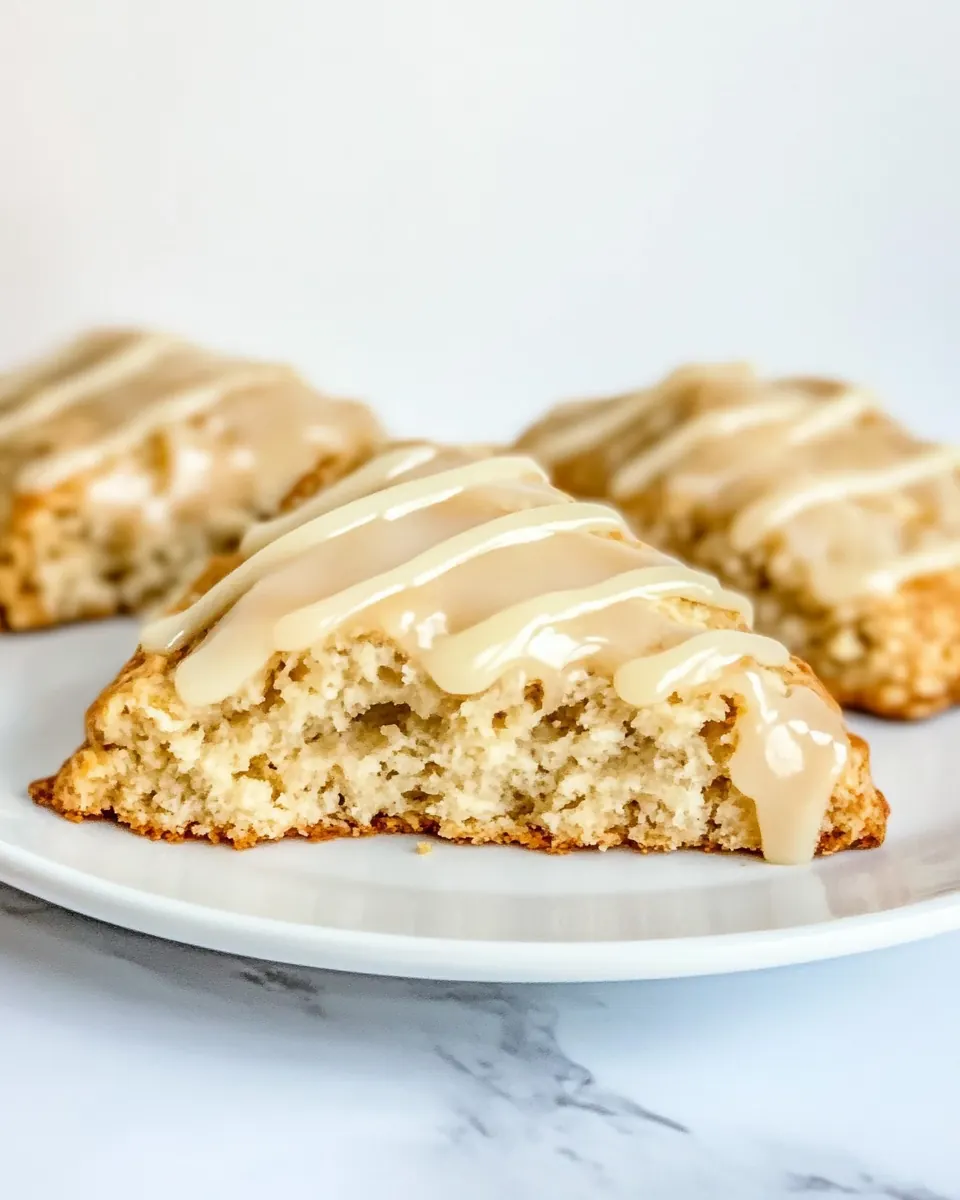
- Pat it into an 8-inch circle about 1-inch thick. Cut the circle into 8 wedges and transfer them to the prepared baking sheet.: The dough should show small layers where the butter pockets sit, and when you cut wedges you will feel a slight resistance. Uniform size means even baking and predictable browning. Pressing the circle evenly encourages a consistent rise across wedges. A frequent mistake is making pieces different sizes, which leads to some scones finishing before others. Use a sharp knife or pizza cutter for clean edges so the scones bake with neat, golden sides.
- Bake for 18-20 minutes, or until the scones are golden brown and a toothpick inserted into the center comes out clean.: As they bake, you will notice a buttered, toasty smell and see the tops turning a warm golden hue. The sound is subtle, a soft crackle as edges set. This timing gives a tender center with a crisp top; overbaking dries them out, while underbaking leaves a gummy crumb. If your oven runs hot, check toward the earlier end of the range. Use the toothpick test for confidence that the interior is set.
- Allow the scones to cool on the baking sheet for a few minutes before transferring them to a wire rack to cool completely.: The short resting period lets the structure settle so the scones hold their shape when moved. You will feel residual warmth and smell the intensified banana aroma. Moving them too soon can cause them to fall apart, while leaving them too long on the sheet may produce soggy bottoms from trapped steam. Aim for a gentle pause of a few minutes, then slide them to a rack for even cooling.
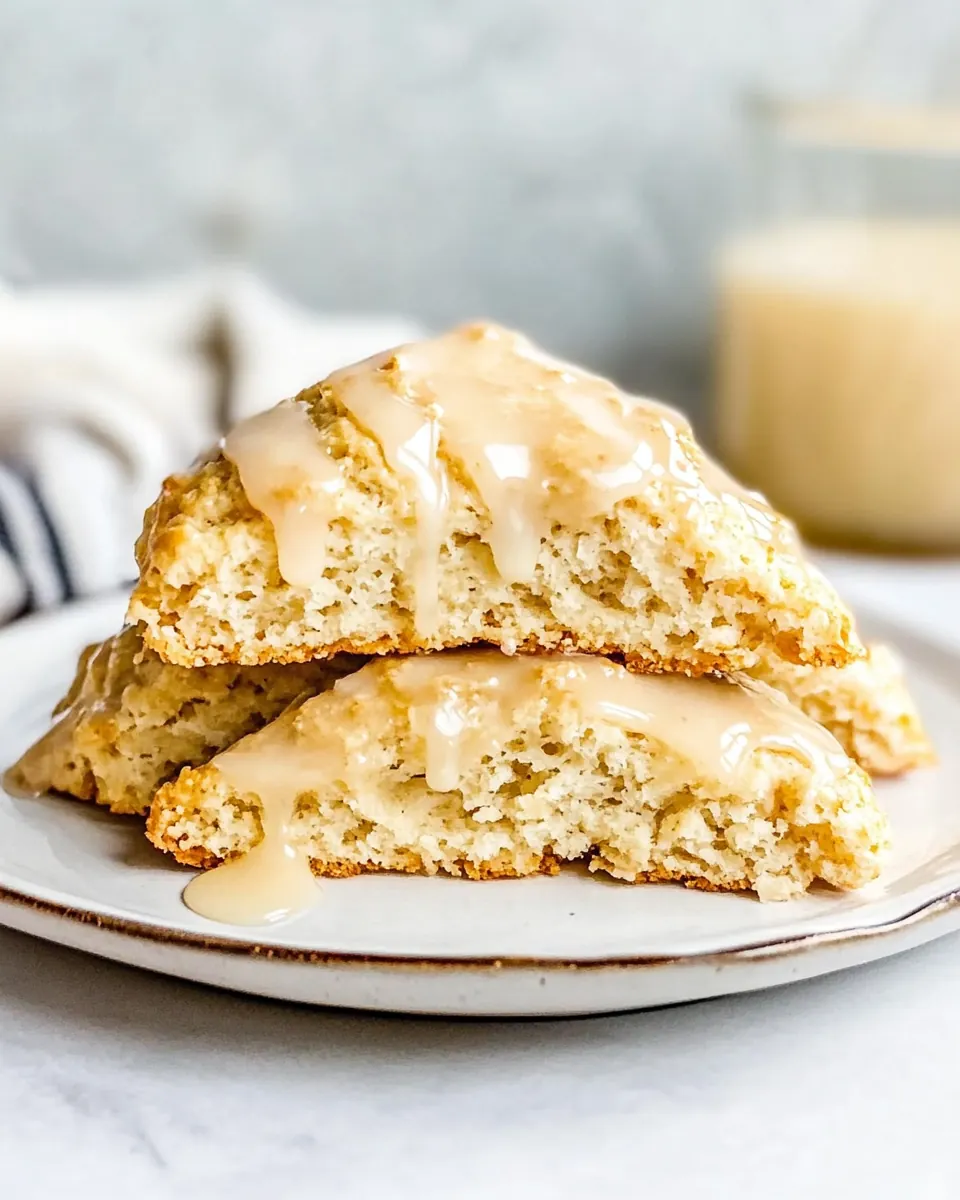
- Sprinkle with powdered sugar or top with maple glaze.: The powdered sugar gives a soft dusting and light sweetness, while the glaze adds shine and a deeper maple note. If you choose glaze, apply while the scones are slightly warm so it sets with a glossy finish. A common slip is adding glaze to piping hot scones, which can make the glaze run excessively. Wait until they are warm rather than hot for the best appearance and texture.
- Sift sugar into a medium-sized mixing bowl. Add maple syrup one tablespoon at a time. Add additional cream 1 teaspoon at a time until the desired consistency is reached.: As you whisk, the confectioners' sugar dissolves and the glaze becomes velvety and reflective. The maple aroma blooms as you incorporate the syrup, and adding cream adjusts viscosity so you can pour or drizzle precisely. If you add too much cream you will thin the glaze excessively, so add small increments and test by lifting a spoon to see how it ribbons. A smooth glaze should flow slowly and coat the back of a spoon without running like water.
Change It Up
There are small swaps and technique nudges that can change the character of these scones without breaking the recipe. Below are practical tips I use to adjust texture, flavor, and presentation when I want a slightly different result.
- Use chilled tools. If your kitchen is warm, chill the mixing bowl and cutter briefly to slow butter melting and preserve flaky pockets.
- Adjust banana intensity. For a stronger banana note, use one very ripe large banana and reduce milk slightly to maintain dough consistency.
- Maple glaze thickness. Add heavy cream 1 teaspoon at a time to reach a pourable glaze, test by letting it drip from a spoon.
- Slice shapes. Cut into wedges for rustic charm or use a biscuit cutter for round scones to control sizes for even baking.
- Make ahead. Shape and freeze the unbaked wedges on a tray, then transfer to a bag. Bake from frozen adding a few minutes to the bake time.
What to Pair With Easy Banana Scones
These scones are versatile at the table, so I usually choose pairings that match the occasion. For a casual breakfast I set out hot coffee and fruit, while for a small gathering I add yogurt and a cheese board for contrast. They work well year round, and the maple glaze gives them a seasonal warmth that pairs nicely with crisp autumn fare or light spring spreads.
- Morning coffee or tea. A bold coffee or a lightly steeped black tea balances the sweet maple glaze and highlights the banana notes.
- Fresh fruit platter. Slices of citrus or berries add brightness and a contrasting texture to the tender scones.
- Yogurt and granola. A bowl of creamy yogurt with crunchy granola makes the scones part of a fuller breakfast plate.
- Picnic friendly. Wrapped in parchment, these hold up well for outdoor meals, easy to share and transport without losing charm.
- Storage tips. Keep at room temperature in an airtight container for up to two days, or freeze unglazed scones for up to one month, then warm and glaze before serving.
FAQ
Conclusion
Easy Banana Scones stand out because they turn humble, ripe bananas and simple pantry staples into warm, flaky delights with minimal effort. The combination of cold butter, a tender crumb, and a glossy maple glaze gives a bakery quality that feels both comforting and special. Give them a try on a lazy morning or bring them to your next gathering; they’re reliable, shareable, and forgiving for home bakers of all levels. I hope these scones become one of those recipes you reach for whenever you want something cozy and impressive without a big time commitment.
Easy Banana Scones
Equipment
- Food Processor
- Baking Sheet
- Parchment Paper or baking mat
- Sharp knife or pizza cutter
- Mixing Bowls
Ingredients
- 2 cups all-purpose flour Provide structure and bulk to the scones by forming the dry base that the wet ingredients bind together with a tender crumb when mixed properly.
- 1/4 cup granulated sugar Add sweetness and help with browning while balancing flavors; disperses evenly in the flour to ensure consistent sweetness throughout the dough.
- 1 tablespoon baking powder Leaven the scones by producing carbon dioxide during baking, creating lift and a light, flaky texture when mixed into the dry ingredients.
- 1 teaspoon ground cinnamon Contribute warm, aromatic flavor that complements banana; sprinkle into the dry mix to add subtle depth without overpowering the pastry.
- 1/2 teaspoons salt Enhance overall flavor by balancing sweetness and strengthening gluten slightly; dissolve into the dough to control taste and chemical reactions.
- 1/4 cup cold unsalted butter cubed Create flaky layers and tenderize the dough by coating flour proteins with fat; keep cold and cubed so it melts gradually during baking for flakiness.
- 1/2 cup mashed ripe bananas about 1 large or 2 medium bananas. For lower carb scones, use 1/2-1 teaspoon banana extract and increase the milk to 1/3 cup. Provide moisture, natural sweetness, and banana flavor while contributing to texture; mashed bananas also add natural sugars and slight density to the scones.
- 1/4 cup milk Moisten the dough and help bring ingredients together while controlling dough consistency; adjust amount for a tender but not sticky dough.
- 1 teaspoon vanilla extract Enhance overall aroma and flavor with a sweet, floral note; stir into wet ingredients to distribute flavor evenly throughout the dough.
- 1 egg lightly beaten Act as a binder and add richness while contributing to structure and color; beat lightly and mix into wet ingredients for uniform incorporation.
- Maple Glaze Drizzle – Create a sweet finishing element that adds shine and extra flavor when drizzled over cooled scones to complement the banana notes.
- 1 cup confectioners’ sugar sifted Provide the base sweetness and body for the glaze, dissolving smoothly when mixed with syrup to create a glossy topping.
- 2 tablespoons real maple syrup Add natural sweetness and maple flavor to the glaze while thinning the confectioners’ sugar into a pourable consistency; mix thoroughly for balance.
- 1 -2 teaspoons heavy cream optional until desired consistency is reached. Adjust glaze texture and add richness; stir in a small amount gradually until the drizzle reaches desired thickness and sheen.
Instructions
- Preheat your oven to 400°F (200°C). Line a baking sheet with parchment paper or a silicone baking mat.: Warmth spreads quickly in the kitchen, and the first sign you are ready is the oven reaching that steady heat, which produces steady browning. You should smell a faint warm scent as the oven comes to temp and the sheet warms. This step matters because a hot oven gives the scones an immediate lift, creating a tender interior and slightly crisp exterior. A common mistake is putting cold dough into an oven that hasn't fully preheated, which can lead to under risen, dense scones. Make sure the temperature is stable before you slide the tray in.
- In a food processor, pulse together the flour, sugar, baking powder, salt, and cinnamon.: As you pulse, the dry mixture takes on a uniform pale color and you can smell the warm cinnamon mingling with the flour. This step helps distribute the leavening and spices evenly so each scone behaves consistently. Pulsing rather than over mixing prevents warming the dry ingredients, which helps the butter remain cold in the next step. If you overprocess here, the mixture can become too fine, which may change how the dough holds together. Stop pulsing once the mix looks even and no large pockets of baking powder remain visible.
- Add the cold cubed butter to the flour mixture. Pulse until the flour mixture resembles coarse crumbs. Place in a large mixing bowl.: You will see pea sized pieces of butter amid the flour, and the texture should look like coarse breadcrumbs. Those little bits are crucial because they melt during baking and create flakiness. If the butter starts to melt and becomes greasy, the air pockets that form during baking will be lost. A common misstep is using room temperature butter; always use cold, cubed butter. Once the mixture looks coarse and slightly granular, transfer it to a bowl so you can finish by hand.
- In a separate bowl, mix the mashed banana, milk, vanilla extract, and beaten egg until well combined.: The mixture should be smooth with a glossy sheen from the egg and milk, and you will smell the ripe banana and vanilla. The wet mixture hydrates the dry ingredients and adds tenderness. Mixing until homogeneous ensures even pockets of moisture so the dough bakes uniformly. Avoid over stirring, which can make the batter too soft and sticky. If the banana is extremely ripe and runny, reduce the milk slightly to avoid overly wet dough.
- Pour the banana mixture into the dry ingredients. Stir until just combined. Do not overmix; the dough should be slightly sticky.: At this point you should hear a soft scraping sound as the spatula moves through the dough and see the dough coming together in irregular clumps. The slight stickiness tells you there is enough moisture to bind without making the scones heavy. This technique preserves flakiness because overmixing develops gluten, which yields toughness instead of tenderness. A common error is to keep stirring until perfectly smooth; stop when there are no large pockets of dry flour, even if the dough looks a little shaggy.
- Turn the dough out onto a lightly floured surface and gently knead it a few times. Add flour as needed until the dough holds together without being too sticky.: As you pat and fold, the dough will feel cool and slightly tacky but manageable. Kneading briefly aligns strands just enough to let the scones keep structure while remaining tender. If you press too hard or knead excessively, the scones will tighten and become dense. Use just a light touch, adding only a dusting of flour if the dough clings excessively to your hands.
- Pat it into an 8-inch circle about 1-inch thick. Cut the circle into 8 wedges and transfer them to the prepared baking sheet.: The dough should show small layers where the butter pockets sit, and when you cut wedges you will feel a slight resistance. Uniform size means even baking and predictable browning. Pressing the circle evenly encourages a consistent rise across wedges. A frequent mistake is making pieces different sizes, which leads to some scones finishing before others. Use a sharp knife or pizza cutter for clean edges so the scones bake with neat, golden sides.
- Bake for 18-20 minutes, or until the scones are golden brown and a toothpick inserted into the center comes out clean.: As they bake, you will notice a buttered, toasty smell and see the tops turning a warm golden hue. The sound is subtle, a soft crackle as edges set. This timing gives a tender center with a crisp top; overbaking dries them out, while underbaking leaves a gummy crumb. If your oven runs hot, check toward the earlier end of the range. Use the toothpick test for confidence that the interior is set.
- Allow the scones to cool on the baking sheet for a few minutes before transferring them to a wire rack to cool completely.: The short resting period lets the structure settle so the scones hold their shape when moved. You will feel residual warmth and smell the intensified banana aroma. Moving them too soon can cause them to fall apart, while leaving them too long on the sheet may produce soggy bottoms from trapped steam. Aim for a gentle pause of a few minutes, then slide them to a rack for even cooling.
- Sprinkle with powdered sugar or top with maple glaze.: The powdered sugar gives a soft dusting and light sweetness, while the glaze adds shine and a deeper maple note. If you choose glaze, apply while the scones are slightly warm so it sets with a glossy finish. A common slip is adding glaze to piping hot scones, which can make the glaze run excessively. Wait until they are warm rather than hot for the best appearance and texture.
- Sift sugar into a medium-sized mixing bowl. Add maple syrup one tablespoon at a time. Add additional cream 1 teaspoon at a time until the desired consistency is reached.: As you whisk, the confectioners' sugar dissolves and the glaze becomes velvety and reflective. The maple aroma blooms as you incorporate the syrup, and adding cream adjusts viscosity so you can pour or drizzle precisely. If you add too much cream you will thin the glaze excessively, so add small increments and test by lifting a spoon to see how it ribbons. A smooth glaze should flow slowly and coat the back of a spoon without running like water.
Notes
- Use chilled tools. If your kitchen is warm, chill the mixing bowl and cutter briefly to slow butter melting and preserve flaky pockets.
- Adjust banana intensity. For a stronger banana note, use one very ripe large banana and reduce milk slightly to maintain dough consistency.
- Maple glaze thickness. Add heavy cream 1 teaspoon at a time to reach a pourable glaze, test by letting it drip from a spoon.
- Slice shapes. Cut into wedges for rustic charm or use a biscuit cutter for round scones to control sizes for even baking.
- Make ahead. Shape and freeze the unbaked wedges on a tray, then transfer to a bag. Bake from frozen adding a few minutes to the bake time.