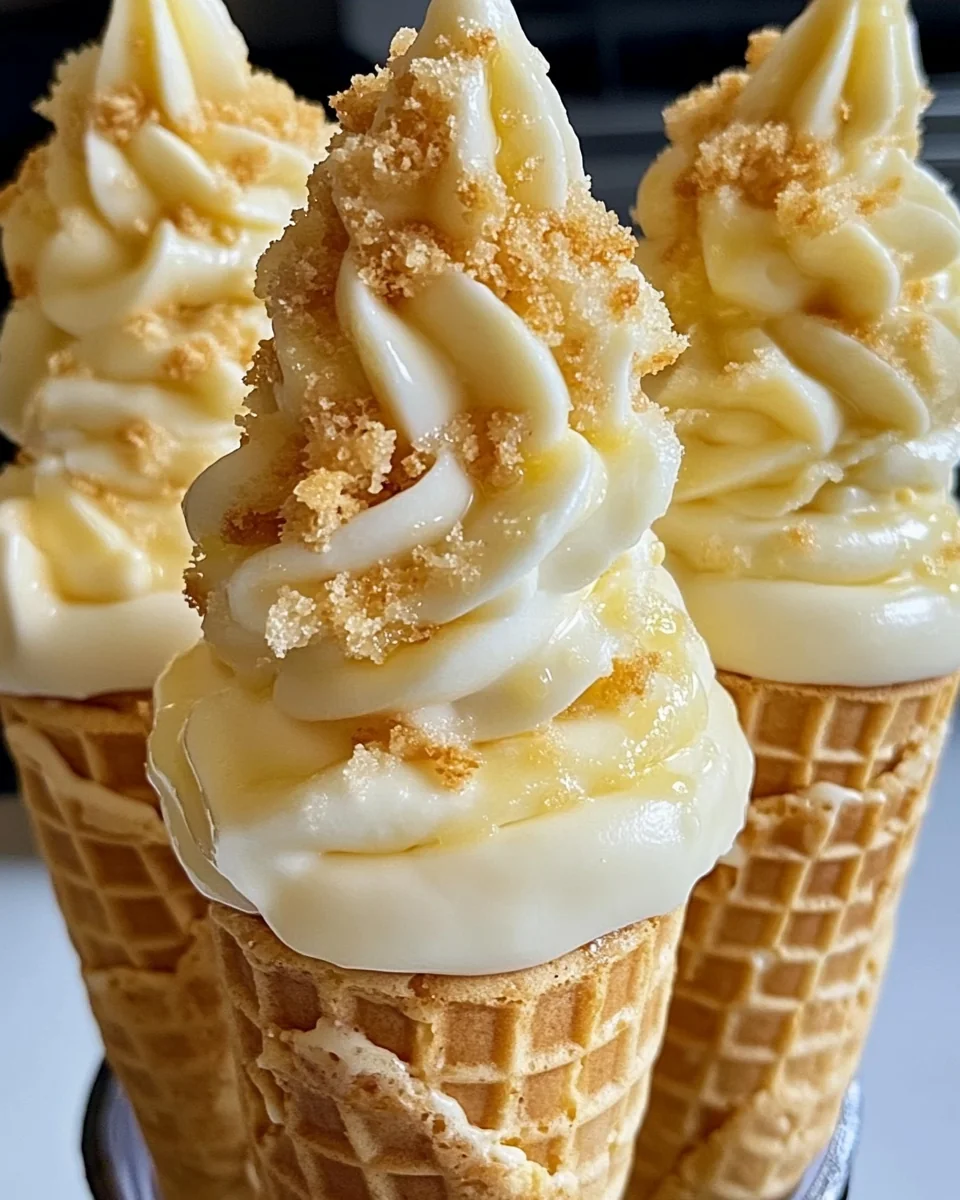
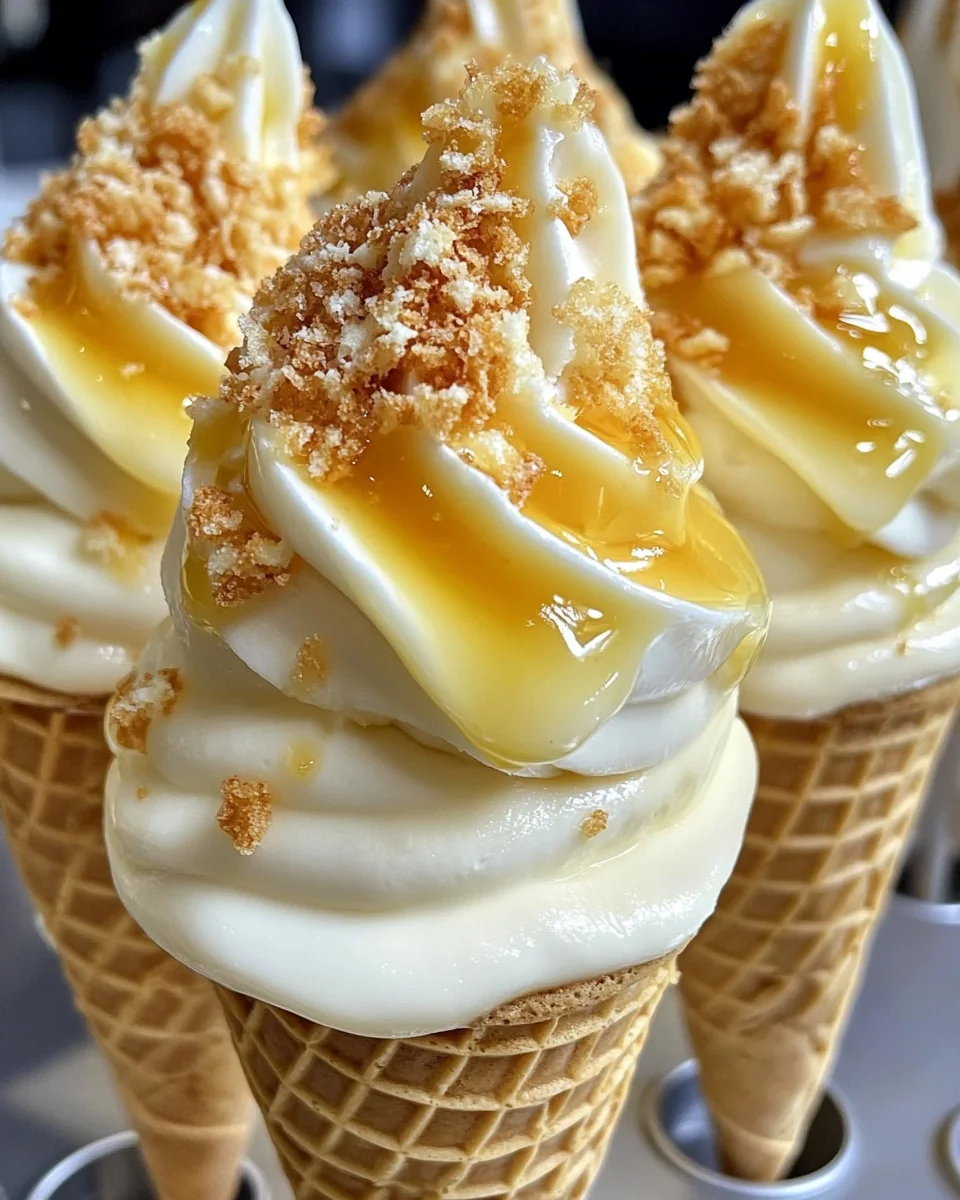
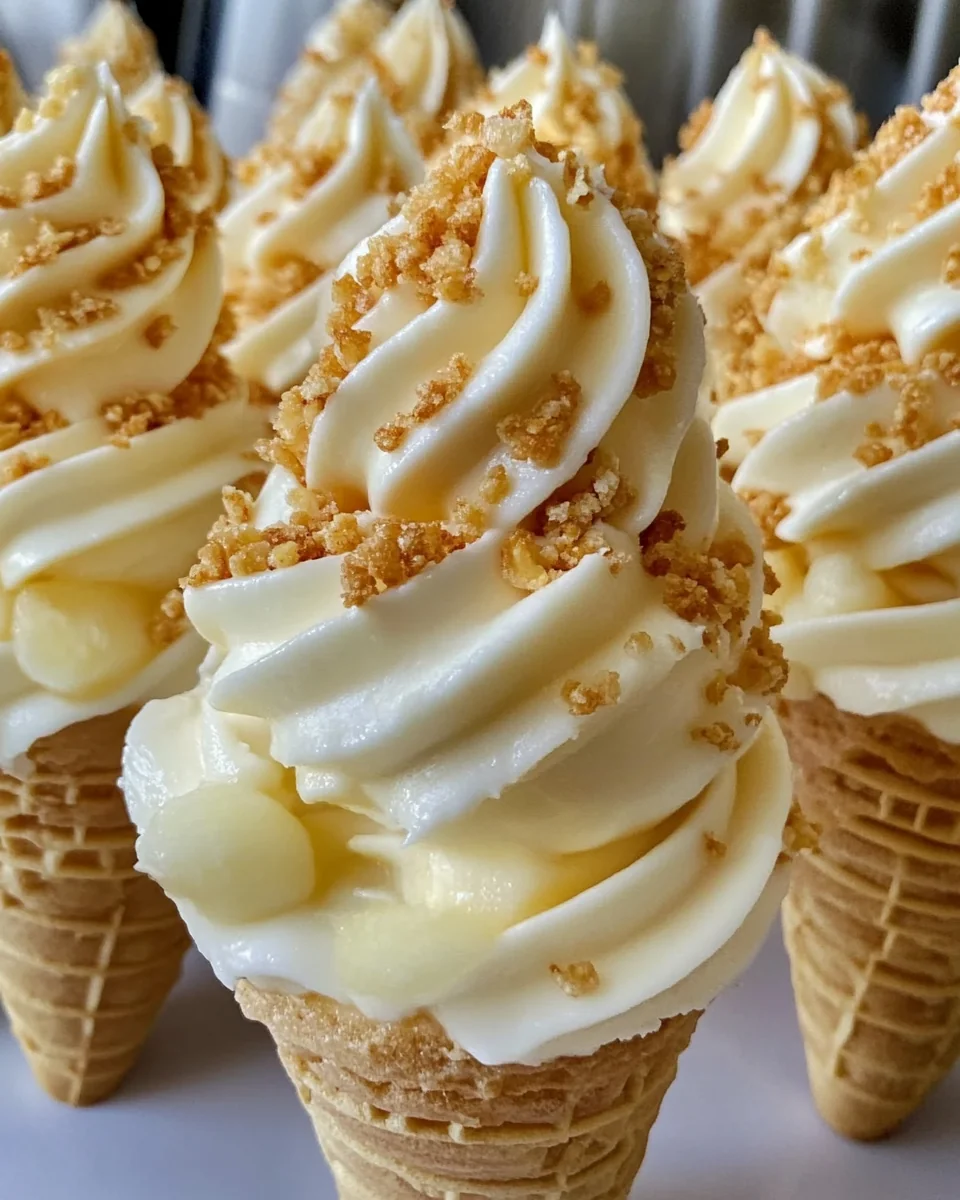
Delicious Homemade Banana Pudding Cheesecake Cones
Delicious Homemade Banana Pudding Cheesecake Cones are the perfect treat for any occasion. This delightful dessert combines the creamy richness of cheesecake with the familiar, comforting flavors of banana pudding, all served in a fun cone shape. Ideal for family gatherings, birthday parties, or simply as a sweet indulgence at home, these cones are sure to impress. Each bite offers a harmonious blend of creamy cheesecake filling, fresh banana slices, and crunchy cone texture, creating a delightful experience for your taste buds. The standout qualities of these cones lie in their easy preparation and the ability to customize each cone according to personal preferences, making them a versatile dessert that appeals to all ages.
Why You’ll Love This Recipe?
There are several reasons why Delicious Homemade Banana Pudding Cheesecake Cones stand out in the world of desserts. First and foremost, the flavor combination is simply irresistible. The smooth and creamy cheesecake filling pairs beautifully with the sweet, ripe bananas, creating a delicious harmony that is hard to resist. Each bite is a comforting reminder of classic banana pudding, elevated by the richness of cheesecake.
Another reason to love this recipe is its simplicity. The process of creating these cones is straightforward and requires minimal ingredients, making it an excellent choice for both novice and experienced bakers. The ease of assembly means you can whip these up in no time, whether for a special occasion or a last-minute treat.
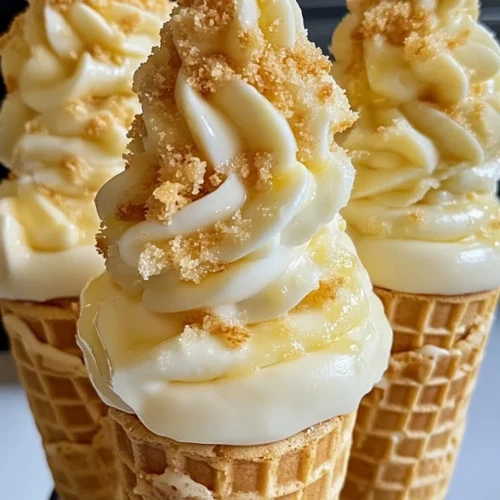
Additionally, the Delicious Homemade Banana Pudding Cheesecake Cones are visually appealing. The vibrant yellow of the banana slices and the creamy filling against the crunchy cone create an attractive presentation that is sure to impress your guests. These cones are not just a dessert; they are a show-stopping centerpiece that adds a touch of elegance to any dessert table.
Ingredients :
To create the perfect Delicious Homemade Banana Pudding Cheesecake Cones, you’ll need a variety of ingredients that come together to form this delightful treat. Each ingredient plays a crucial role in achieving the desired flavor and texture.
- Bananas: Ripe bananas are essential for this recipe. You’ll need about 3-4 medium-sized bananas, which should be soft and sweet but not overly brown. Bananas provide natural sweetness and a creamy texture that complements the cheesecake filling perfectly.
- Cream Cheese: Use 8 ounces of full-fat cream cheese, softened to room temperature. Cream cheese is the star of the cheesecake filling, contributing its rich and creamy texture, as well as its tangy flavor that balances the sweetness of the bananas.
- Granulated Sugar: About 1/2 cup of granulated sugar is required. Sugar sweetens the cheesecake mixture and helps to enhance the overall flavors of the dessert, making it irresistibly sweet and enjoyable.
- Heavy Whipping Cream: You’ll need 1 cup of heavy whipping cream for this recipe. Whipping cream adds airiness to the cheesecake filling, making it light and fluffy. It also helps to create a luscious texture that melts in your mouth.
- Vanilla Bean Paste: 1 teaspoon of vanilla bean paste is recommended for flavor. This ingredient infuses the cheesecake filling with a rich vanilla flavor while adding visual appeal with its flecks of vanilla bean.
- Graham Cracker Cones: Approximately 8-10 graham cracker cones are needed. These cones serve as the base for your dessert, providing a crunchy texture that contrasts beautifully with the creamy filling.
- Chocolate Chips: Optional, but about 1/2 cup of mini chocolate chips can be added. They provide an extra layer of flavor and make the cones even more decadent, enhancing the overall dessert experience.
How to Make Delicious Homemade Banana Pudding Cheesecake Cones?
Creating Delicious Homemade Banana Pudding Cheesecake Cones is a simple yet rewarding process that results in a delightful dessert. Follow these detailed steps to make your own at home.
- Begin by preparing the filling. In a large mixing bowl, combine the softened cream cheese and granulated sugar. Use an electric mixer to beat them together until the mixture is smooth and creamy, about 2-3 minutes. Be sure to scrape down the sides of the bowl to ensure everything is well mixed.
- Next, add the heavy whipping cream to the cream cheese mixture. Beat on medium speed until the mixture thickens and forms soft peaks, about 4-5 minutes. This step is crucial as it adds the light and fluffy texture to the cheesecake filling.
- Once the whipping cream is incorporated, add the vanilla bean paste and mix until evenly distributed. The vanilla adds a rich flavor that enhances the overall taste of the cheesecake.
- Now it’s time to slice the bananas. Peel and slice the ripe bananas into thin rounds, ensuring they are uniform in thickness for even distribution in the cones. This step not only enhances the aesthetics but also ensures every bite has that delicious banana flavor.
- Prepare the graham cracker cones by placing them upright in a sturdy container. This will help stabilize them as you fill them with the cheesecake mixture.
- Using a piping bag or a zip-top bag with the corner snipped off, fill each cone with the cheesecake filling. Start from the bottom and work your way up, ensuring that the filling reaches the top of each cone. This method ensures an even distribution of filling throughout the cone.
- After filling the cones, add a layer of banana slices on top of the cheesecake filling. You can also sprinkle mini chocolate chips on top if desired for added flavor and texture.
- Repeat the filling process for each cone until all the filling is used. Aim to fill about 8-10 cones, depending on the size of your cones.
- To finish, place the filled cones in the refrigerator for at least 30 minutes. This chilling time allows the flavors to meld and gives the cheesecake filling a chance to set, making it easier to enjoy.
- Once chilled, your Delicious Homemade Banana Pudding Cheesecake Cones are ready to be served. Enjoy them as a sweet treat for family and friends!
Tips for Variations:
There are numerous ways to get creative with your Delicious Homemade Banana Pudding Cheesecake Cones. Here are some exciting variation ideas to consider.
- For a tropical twist, consider adding crushed pineapple to the cheesecake filling. This addition will bring a fresh and fruity flavor that complements the bananas beautifully, creating a delightful Hawaiian-inspired dessert.
- Try incorporating different flavored extracts into the cheesecake filling. Almond or coconut extract can add an interesting layer of flavor, enhancing the overall taste profile while still maintaining the classic banana pudding essence.
- If you’re a fan of nuts, consider adding chopped walnuts or pecans to the filling. This will create a delightful crunch that contrasts with the creaminess of the cheesecake, adding texture and flavor.
- For a more sophisticated flavor profile, consider drizzling caramel or chocolate sauce over the top of the filled cones. This not only adds sweetness but also creates a stunning visual appeal that will impress your guests.
- If you want to make these cones a bit healthier, try using Greek yogurt in place of cream cheese. This will reduce the fat content while still providing a creamy texture, making the dessert a bit lighter without sacrificing flavor.
- Experiment with different fruits. While bananas are traditional, you can try using strawberries or blueberries, adding a vibrant pop of color and flavor to your cones. This will also create a beautiful and colorful display.
- Consider serving the cones with a side of whipped cream or additional fruit coulis for dipping. This extra touch elevates the dessert experience and allows for interactive enjoyment.
Serving Suggestions:

When it comes to serving Delicious Homemade Banana Pudding Cheesecake Cones, the possibilities are endless. Here are some suggestions to make your dessert experience even more enjoyable.
- These cones are perfect for summer gatherings and picnics. Serve them as a refreshing dessert after a barbecue or outdoor event, allowing guests to enjoy a light and fruity treat.
- For a fun twist on a traditional dessert table, incorporate the cones into a dessert buffet. They can be paired with other sweet treats, such as cupcakes and cookies, providing a variety of options for guests to choose from.
- If you’re hosting a birthday party or celebration, consider decorating the cones with colorful sprinkles or themed decorations to match the occasion. This added touch will make them even more festive and appealing.
- These cones can also be a delightful surprise for a casual family dinner. Serve them as a fun dessert that everyone can enjoy, creating a relaxed and enjoyable atmosphere.
- For seasonal pairings, consider serving the cones alongside a scoop of vanilla or banana ice cream. This combination will elevate the dessert experience and satisfy any sweet tooth.
- When it comes to storage, keep any leftover cones in an airtight container in the refrigerator. They will stay fresh for up to 2 days, allowing you to savor the deliciousness even after the initial preparation.
FAQ:
How do I store leftovers?
To store leftovers of your Delicious Homemade Banana Pudding Cheesecake Cones, place them in an airtight container in the refrigerator. They will remain fresh for up to 2 days. However, keep in mind that the cones may become slightly soggy over time, so it’s best to enjoy them soon after making.
Can I freeze this recipe?
Freezing Delicious Homemade Banana Pudding Cheesecake Cones is not recommended, as the texture of the cones may become compromised once thawed. However, you can freeze the cheesecake filling separately and assemble the cones fresh when ready to serve.
Can I use other fruits in the cones?
Yes! You can definitely experiment with other fruits in your Delicious Homemade Banana Pudding Cheesecake Cones. Strawberries, blueberries, or even peaches can create delightful variations that add different flavors and textures to your dessert.
How long do these cones last in the fridge?
When stored properly in an airtight container, Delicious Homemade Banana Pudding Cheesecake Cones can last in the refrigerator for up to 2 days. It’s best to enjoy them fresh for the best texture and flavor.
Can I make the filling ahead of time?
Absolutely! You can prepare the cheesecake filling in advance and store it in the refrigerator for up to 24 hours before assembling your Delicious Homemade Banana Pudding Cheesecake Cones. Just be sure to give it a good stir before filling the cones.
Delicious Homemade Banana Pudding Cheesecake Cones
Equipment
- Mixing Bowl
- Electric Mixer
- Piping Bag
Ingredients
Ingredients
- 3-4 medium Bananas Ripe and sliced
- 8 ounces Cream Cheese Softened to room temperature
- 1/2 cup Granulated Sugar
- 1 cup Heavy Whipping Cream
- 1 teaspoon Vanilla Bean Paste
- 8-10 pieces Graham Cracker Cones
- 1/2 cup Mini Chocolate Chips Optional
Instructions
- In a large mixing bowl, combine the softened cream cheese and granulated sugar. Beat until smooth and creamy, about 2-3 minutes.
- Add the heavy whipping cream and beat on medium speed until thickened and soft peaks form, about 4-5 minutes.
- Mix in the vanilla bean paste until evenly distributed.
- Slice the bananas into thin rounds.
- Place the graham cracker cones upright in a sturdy container.
- Fill each cone with the cheesecake filling using a piping bag, starting from the bottom and working up.
- Add a layer of banana slices on top of the cheesecake filling, and sprinkle with mini chocolate chips if desired.
- Repeat the filling process for all cones.
- Chill the filled cones in the refrigerator for at least 30 minutes before serving.
- Serve and enjoy your Delicious Homemade Banana Pudding Cheesecake Cones!