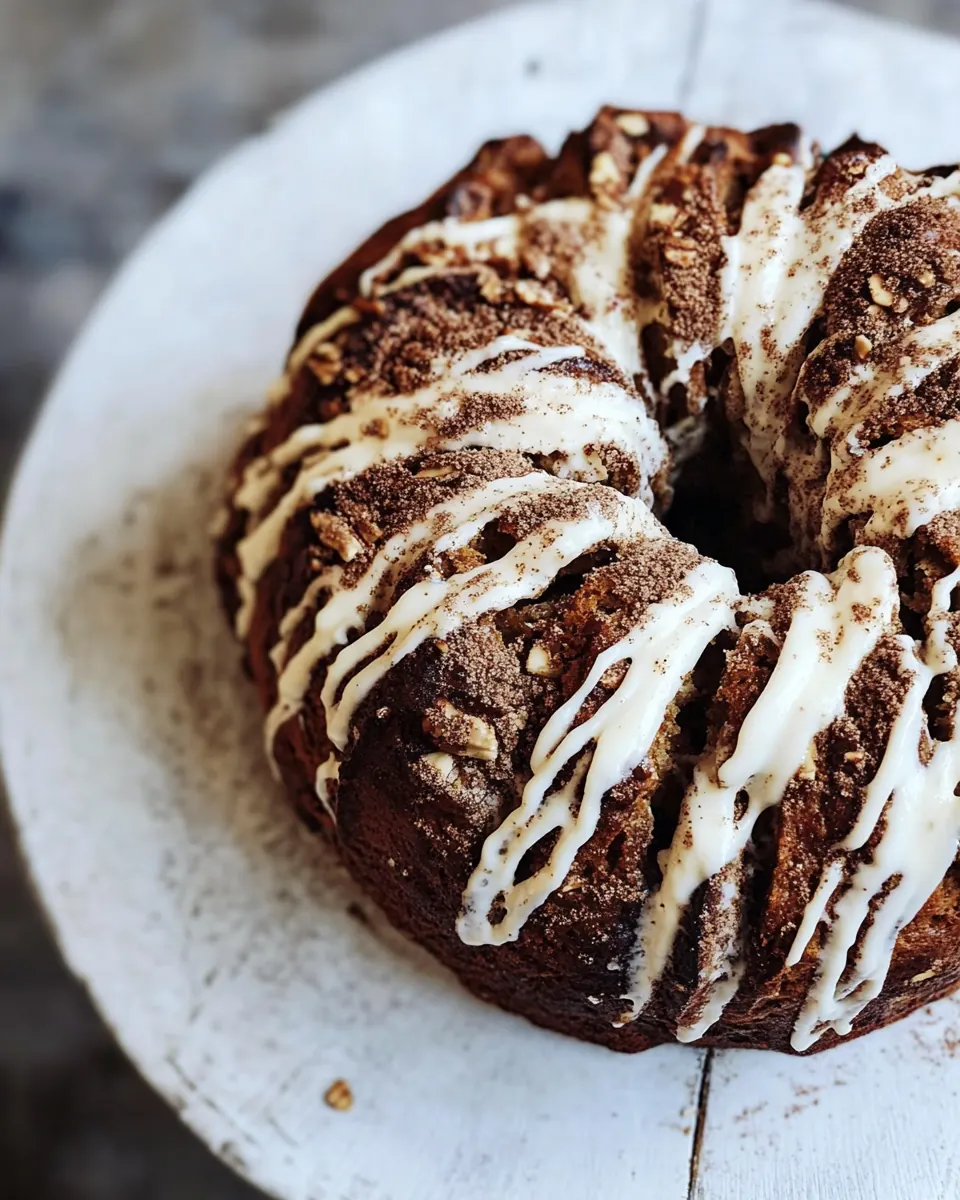
Cinnamon Crunch Bagel Loaf
Cinnamon Crunch Bagel Loaf began as one of those weekend kitchen projects that turned into an instant favorite in my house. The first time I made it I was chasing a memory of bakery mornings, the kind where the air is thick with warm cinnamon and toasted sugar, and I wanted that comfort in a loaf that sliced like bread yet carried the chew and crust of a bagel. I remember laughing at myself as I boiled the dough balls, feeling oddly triumphant when they bobbed and took on that familiar sheen. Baking this felt like turning a ritual into something shareable.
I kept tweaking the recipe across several afternoons, swapping flour blends and adjusting the sugar clusters until the texture hit the sweet spot. The crumb is tender because of the balanced combination of flours, and those crunchy pockets of brown sugar and melted butter make each bite a little surprise. My kids dubbed it “walk around and snack” bread because one slice never stays put for long. When guests come over, I find it doubles as breakfast and dessert, pulled warm with soft butter oozing into the pockets.
Recipe Snapshot
1 hr 5 mins
15 mins
50 mins
Medium
200 kcal
American
Gluten-Free, Low FODMAP
Breakfast
Electric mixer with dough hook, Large pot, Slotted spoon, 9 x 5 inch bread tin, Mixing bowls
Why We Love This Cinnamon Crunch Bagel Loaf
Comfort that Feels Homemade
I love how Cinnamon Crunch Bagel Loaf brings that nostalgic bakery feeling into my kitchen without fuss. The interplay of crisped sugar and soft interior evokes morning routines, yet it is simple enough for a cozy weekend bake. I can hand a slice to visitors, and it feels like I made something genuinely special.
Texture Play
This loaf gives you chew, crumb, and crunch all at once. The brief boil creates that signature bagel chew, while baking in a loaf pan keeps the interior tender. I purposely emphasize the sugar clumps so you get pockets of caramelized crunch in each slice.
Flexible, Friendly Ingredients
I appreciate recipes that welcome swaps, and Cinnamon Crunch Bagel Loaf does just that. Using white whole wheat flour lightens the texture but you can go with regular flour if you prefer a denser crumb. The recipe is forgiving if you need to mix by hand rather than with a mixer, which means it works for every home baker I know.
Great For Gatherings
Because it slices like a loaf, this recipe is brilliant for feeding a small crowd. It presents beautifully, and the crunchy topping looks intentional, not accidental. I often serve it alongside coffee or tea and watch it vanish fast.
Technique That Teaches
Boiling the dough balls before baking is a small extra step that teaches about texture transformation. I enjoy showing friends how a quick dip in boiling water changes the exterior, and once you taste the result, that technique feels like a bakery secret worth knowing.
Ingredients to Make Cinnamon Crunch Bagel Loaf
I think of these ingredients as a team. The flours form the structure, the yeast delivers lift and flavor, and the cinnamon plus brown sugar create those irresistible crunchy pockets. Tiny players like baking soda and malt syrup in the boiling water help achieve bagel like texture and color, while the white chocolate adds subtle sweetness within the crumb.
- 1 1/4 cups warm water: Dissolve and activate yeast by warming to a comfortable temperature; provides hydration and creates the ideal environment for fermentation while helping dough development over time.
- 2 teaspoons active dry yeast: Activate and leaven the dough by converting sugars into gas; adds rise and structure during proofing and contributes to flavor complexity.
- 2 tablespoons honey: Sweeten and feed the yeast to encourage fermentation; adds subtle floral sweetness and improves crust browning and moisture retention in the loaf.
- 2 cups bread flour: Provide strong gluten structure and chew; contributes to a chewy, supporting crumb and helps the loaf hold shape during boiling and baking.
- 1 1/3 cups white whole wheat flour: Add a nuttier, wholesome texture and flavor with moderate gluten; balances the bread's structure while contributing to a tender crumb and brown color.
- 2 teaspoons cinnamon: Season and flavor the dough with warm spice notes; enhances overall aroma and complements the sweet filling and topping components.
- 1/4 teaspoons salt: Regulate dough strength and flavor by tightening gluten and controlling fermentation; balances taste and helps with dough handling.
- 1 teaspoon vanilla extract: Impart aromatic sweetness and depth to the dough; enhances overall flavor profile and pairs with cinnamon for a warm note.
- 2 4 ounces white chocolate shredded: Provide pockets of sweet creaminess dispersed through the loaf; melts slightly in baking to add texture contrast and a sweet finish.
- 1 teaspoon baking soda for boiling: Alkalize the boiling water to set the crust quickly and encourage a shiny, chewy outer layer; contributes to bagel-like texture before baking.
- 1 teaspoon malt syrup or brown sugar for boiling: Sweeten the boiling water to promote caramelization and a glossy finish on the crust; helps develop color and subtle sweetness.
- 1 egg beaten: Provide an egg wash for sheen and color; helps the crust brown evenly and allows any toppings to adhere during baking.
- 3/4 cup brown sugar: Sweeten and contribute moisture to the filling or swirl; adds depth of flavor and pairs well with cinnamon for richness.
- 3 tablespoons cinnamon: Provide concentrated warm spice for the filling or topping; intensifies cinnamon flavor and creates a distinct, crunchy ribbon in the loaf.
- 1 teaspoon vanilla: Enhance and deepen vanilla flavor throughout the filling or dough; adds a familiar sweet aroma that complements cinnamon and chocolate.
- 4 tablespoons butter melted: Add richness and tenderize the crumb by contributing fat and moisture; melts into the dough and filling to improve mouthfeel and flavor.
Cooking Method for Cinnamon Crunch Bagel Loaf
This method blends bread making basics with a simple bagel technique, so you get complex texture without exotic steps. I find the rhythm of mixing, rising, boiling and baking oddly meditative, and the payoff is worth those small moments of attention. Read each step before you begin so you feel confident when the dough moves through its stages.
- In the bowl of your electric mixer fitted with a dough hook, combine water, yeast and honey, stir to combine, then let sit until foamy, about 10 minutes. Once foamy, gradually add the bread flour, white whole wheat flour, cinnamon and salt with the mixer on low speed. After 5 minutes or so, if the dough is still sticky, add 1/4 cup more bread flour at a time until the dough pulls away from the sides of the bowl. Knead for 3 minutes longer and then knead in the white chocolate until evenly distributed. Remove the dough from the bowl and knead a few times with your hands, forming it into a ball.: The moment the mixture becomes foamy you will smell a faint yeasty perfume and see bubbles forming on the surface, a clear visual cue that the yeast is active. This fermentation adds subtle tang and air to the dough, helping the final loaf rise and develop flavor. A common issue here is using water that is too hot which will kill the yeast , so test it on your wrist it should feel warm not hot. If foam fails to appear after 15 minutes, your yeast may be old, and replacing it will save you time later. Gently stirring and leaving it undisturbed helps build that foamy head.
- Brush a large bowl with oil. Place the dough inside, turning to coat. Cover the bowl with a wet towel or plastic wrap. Allow the dough to rise in a warm place until doubled in size – about 1 hour. Once doubled, punch down the dough and place on your counter, using a little more flour if needed to prevent from sticking. Divide dough into 5 balls. Cover the balls and let sit 30 minutes. Grease a large bread tin (mine was 9 x 5 inches) and preheat the oven to 350 degrees. Bring a large pot of salted water to a boil. Add the baking soda and malt syrup.: You will notice the dough begin to look shaggy as the flours hydrate and the aroma of cinnamon becomes more pronounced, warming the kitchen. Low speed lets the ingredients integrate without flinging flour around, and it encourages gluten strands to form slowly. Overworking at this stage can make the dough tight, so keep the speed modest. If the dough seems too dry or too wet, pause and adjust with small additions of water or flour, because dough consistency is key for the right chew.
- Carefully drop one dough ball at a time into the boiling water. Boil 1 minute, flip and boil another minute and then remove from the water with a slotted spoon. Place the dough in the prepared bread pan. Repeat with the remaining dough balls, lining them up against each other in the bread tin as you go.: As the mixer kneads, you should hear a soft, steady thrum and see the dough wrap around the hook, becoming smoother and more elastic. The texture turning from sticky to slightly tacky signals the right hydration level. Adding the extra bread flour in measured increments prevents overshooting and producing a dry loaf. A sticky dough often means underdeveloped gluten or too much hydration, while overly dry dough leads to a dense crumb.
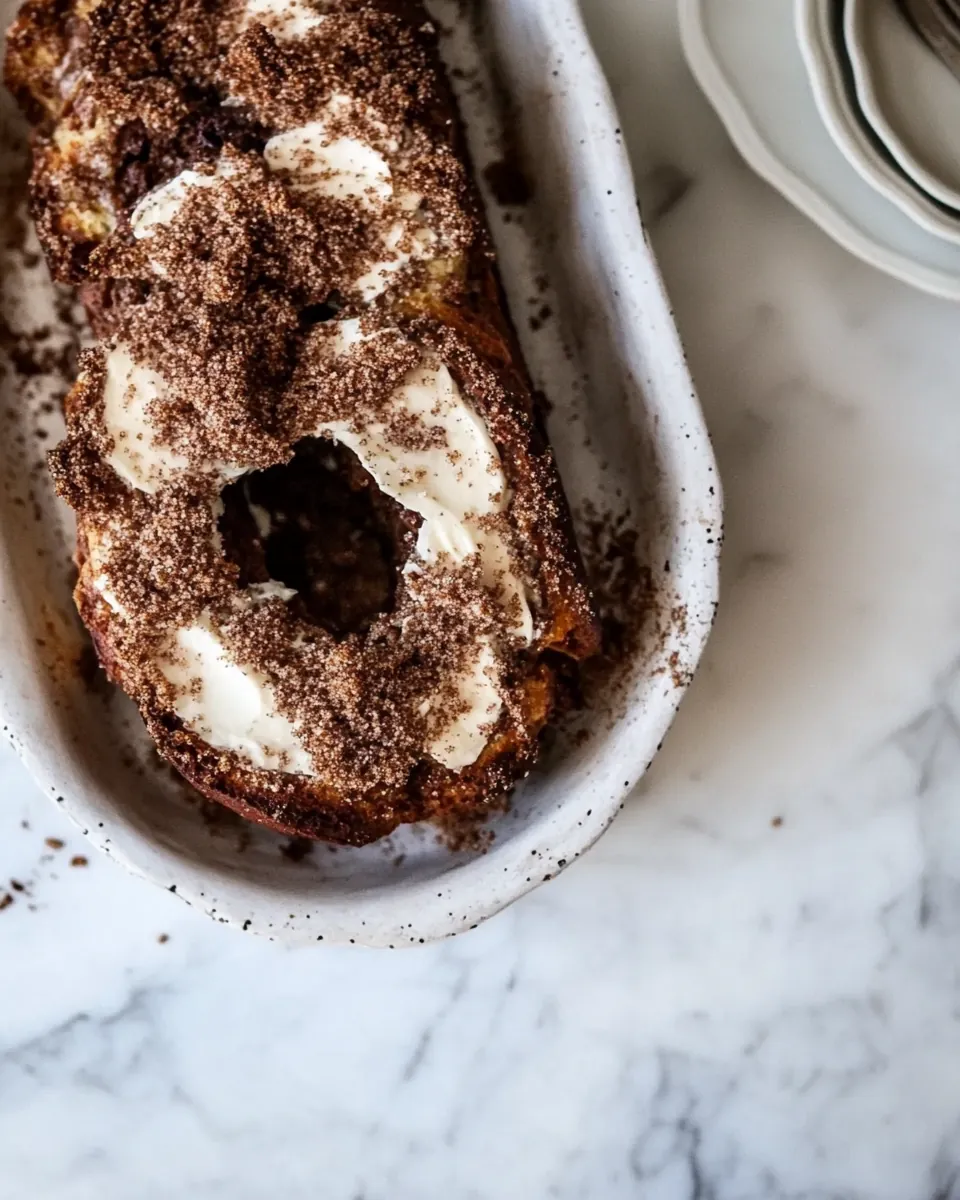
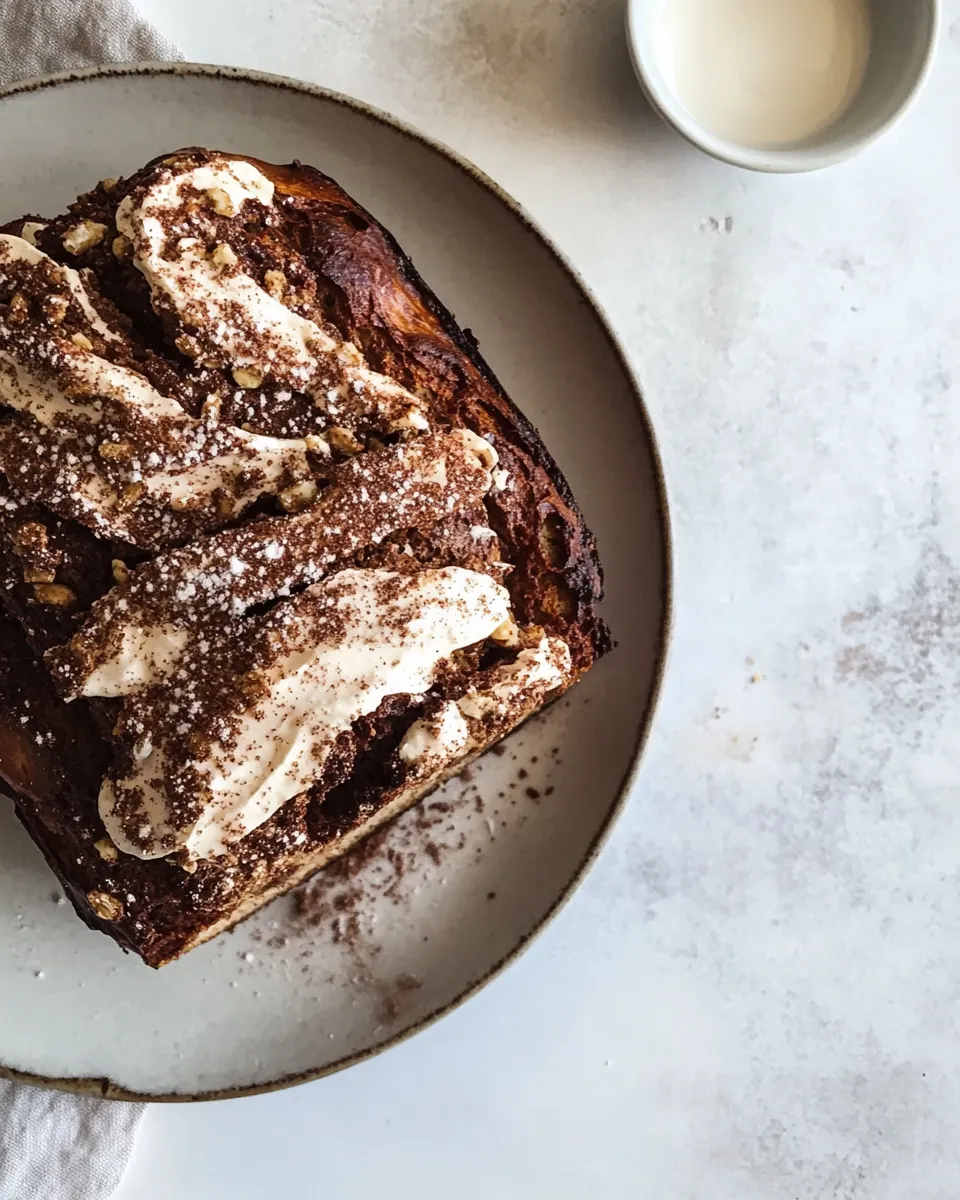
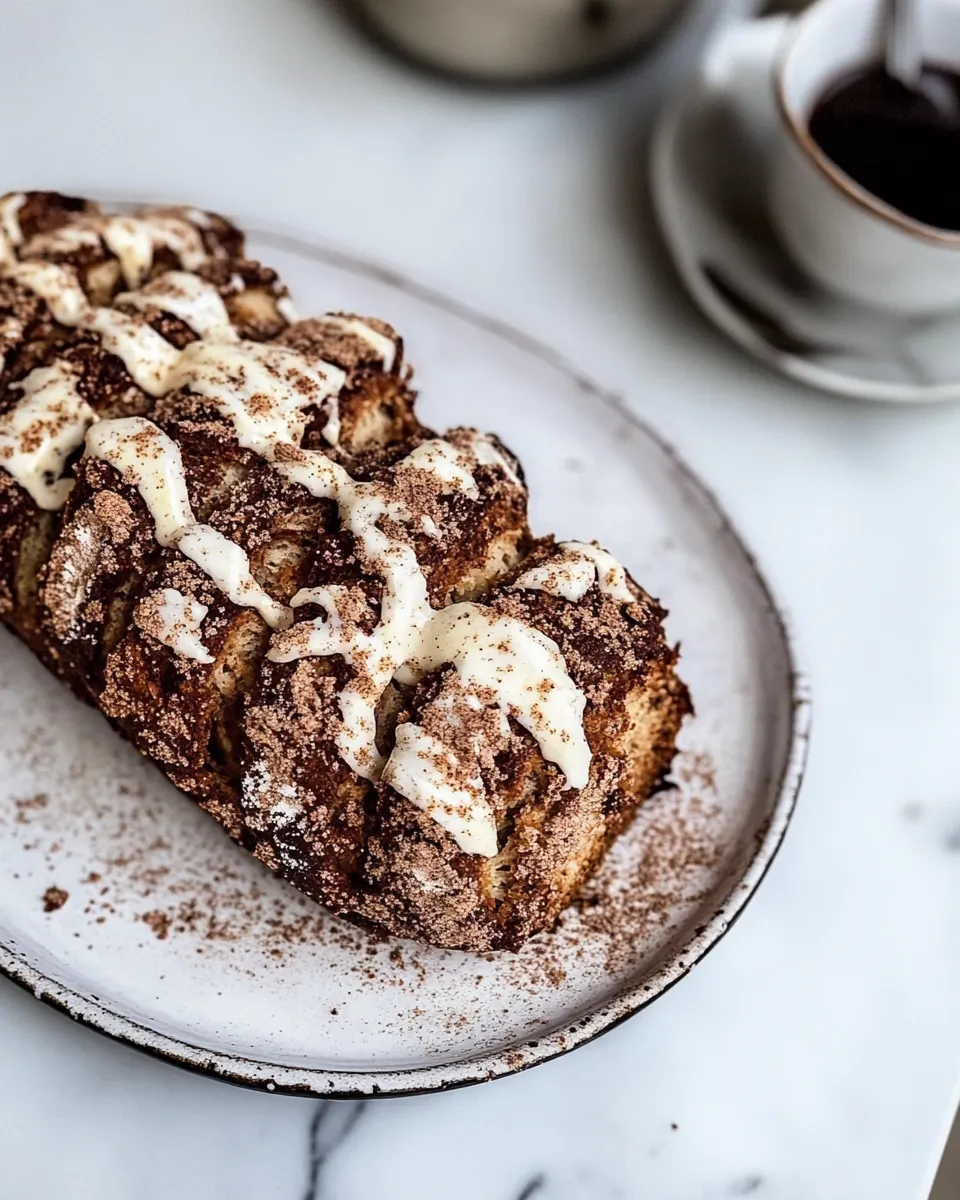
- In a small bowl, combine the brown sugar, cinnamon and vanilla for the topping. Once all the dough balls have been boiled and are in the bread tin, brush the tops, and all down the cracks and sides of the loaf, with a beaten egg. Sprinkle the brown sugar/cinnamon mixture over top. You may not need to use all the mix. Try to leave clumps of sugar, to create nice big crunchy chunks. Drizzle the loaf with the melted butter, mounding some of the sugar mixture together to help create better cinnamon sugar clusters. Bake 35-40 minutes or until the top of the loaf is dark golden brown. If the top starts burning before the loaf is finished cooking, cover the top with foil. Remove the loaf from the oven and leave to cool in the tin for about 5 minutes before turning out onto a cooling rack. Allow to cool completely before slicing… or try to anyway… right.: During these extra minutes the dough will become glossy and more springy, offering a stretch when you pull it. Folding in the shredded white chocolate by hand ensures it disperses in pockets rather than melting into one big mass. You should feel occasional rips as chocolate bits integrate, and the dough may smell sweet and buttery. Overkneading can make the loaf tough, whereas underkneading prevents proper rise, so aim for that supple elasticity.
- Remove the dough from the bowl and knead a few times with your hands, forming it into a ball: The tactile feedback here is important you will feel the dough tighten and smooth under your palm, with a slight tack but not stickiness. Forming a tight ball creates surface tension that helps the dough rise evenly. If the dough sticks too much to your hands, dust lightly with flour; however avoid adding too much which will dry the dough.
- Brush a large bowl with oil: The thin sheen of oil prevents sticking and allows the dough to expand without tearing, which promotes even fermentation. You will notice the dough slide easily when you turn it, leaving the bowl clean. Using too much oil can make the dough slippery to handle, while none at all risks the dough bonding to the bowl during rise.
- Place the dough inside, turning to coat: Turning the dough so all sides are lightly coated with oil ensures a uniform, unblemished surface after rising, and it reduces the chance of a dry skin forming. The dough should begin to puff within 20 to 30 minutes if your kitchen is warm. If the dough develops a dry film, it means the covering was insufficient, so next time use a tighter wrap.
- Cover the bowl with a wet towel or plastic wrap: A moist environment helps the dough rise without drying out, and you will see the dough expand and create a domed silhouette against the bowl. The wet towel traps humidity, producing a consistent surface for fermentation. Leaving it uncovered risks a crust forming which will inhibit full rise.
- Allow the dough to rise in a warm place until doubled in size, about 1 hour: Watching the dough slowly double is one of my favorite parts the surface becomes pillowy and the smell shifts to a gentle tang from fermentation. This rise builds flavor and structure. If it does not double, your room may be cool; find a slightly warmer spot or extend the time. Overproofing can collapse the structure so keep an eye on the volume.
- Once doubled, punch down the dough and place on your counter, using a little more flour if needed to prevent from sticking: The act of punching down redistributes gases and evens out the texture, leaving a pleasantly yeasty scent. Working the dough briefly removes large air pockets and prepares it for portioning. If you see dense, gummy strands, the dough may have been under or overproofed; adjusting proof times next bake will correct this.
- Divide dough into 5 balls: Dividing yields uniform pieces that will bake evenly in the pan, and you will sense each ball has a slight tension from shaping. Aim for consistent sizes so the loaf bakes uniformly. If the pieces vary a lot, the smaller ones can overbake while the larger remain underdone.
- Cover the balls and let sit 30 minutes: A brief bench rest relaxes the gluten and allows the balls to rise slightly, making them easier to shape and resulting in a lighter crumb. You will notice them soften and expand a touch. Skipping this step can make them spring back when you attempt to shape or boil them.
- Grease a large bread tin and preheat the oven to 350 degrees: A well greased tin ensures the loaf releases cleanly after baking, and preheating to 350 degrees builds consistent oven heat so the exterior sets properly as the interior finishes. You want oven heat ready the moment the pan goes in. Putting the loaf into a cold oven will extend the bake time and change the crust color.
- Bring a large pot of salted water to a boil: The pot should be large enough to let the dough balls float and move freely while boiling, and a rolling boil will create that quick seal on the exterior. You will hear a lively, bubbling sound and see steam rising. Under boiling can prevent proper crust formation, while an over boil can be too turbulent and damage the dough balls.
- Add the baking soda and malt syrup: Dissolving baking soda and malt syrup into the water adjusts pH and promotes blistering and browning on the surface during baking, leading to the authentic bagel like crust. You'll notice the water may foam slightly when the baking soda is added. Measure carefully because excess can impart off flavors.
- Carefully drop one dough ball at a time into the boiling water: Lowering the dough in gently prevents splashing and keeps the shape intact, and the brief immersion will create a taut outer skin. You should hear a soft hiss as it hits the water. Dropping them in too forcefully can cause distortion or soggy spots.
- Boil 1 minute, flip and boil another minute and then remove from the water with a slotted spoon: After each minute you will see the exterior take on a slightly glossy, set appearance, and flipping ensures both sides receive equal treatment. The texture will feel firmer to the touch. Under boiling time leaves the exterior underdeveloped, while over boiling can make them dense.
- Place the dough in the prepared bread pan: Arranging the boiled balls snugly in the pan encourages them to bake into a cohesive loaf with pull apart sections. You will hear a soft thud as they settle. Leaving too much space between them can make the loaf look disjointed, while cramming them can prevent even rising.
- Repeat with the remaining dough balls, lining them up against each other in the bread tin as you go: Lining them creates the classic clustered look and helps the sides rise together into soft seams that are fun to pull apart. You will start to smell melting sugar and bread as the pan fills. If sizes vary, rotate positions so larger ones are distributed evenly.
- In a small bowl, combine the brown sugar, cinnamon and vanilla for the topping: Mixing this topping releases warm cinnamon fragrance and the vanilla blends into the brown sugar , forming gritty clusters that will caramelize in the oven. Keep the mix chunky rather than pulverized to encourage crunchy pockets. Overly fine mixing yields a flat, uniform topping with less texture.
- Once all the dough balls have been boiled and are in the bread tin, brush the tops, and all down the cracks and sides of the loaf, with a beaten egg: The egg wash gives a glossy finish and helps the topping adhere, producing that deep golden color as it bakes. Brush thoroughly but gently so the topping stays in place. Skipping the wash reduces shine and topping adhesion.
- Sprinkle the brown sugar slash cinnamon mixture over top: Scatter the topping intentionally leaving clumps to create crunchy islands, and you will see the sugar glint as it catches the light. Those clumps melt and caramelize into delightful pockets. If you distribute the topping too evenly, you lose the texture contrast.
- You may not need to use all the mix: Leaving some of the topping aside ensures you retain texture variety across the loaf, and thicker clusters will stay crunchy while thinner areas caramelize softer. Using it all can create a uniform crust that lacks the desired bite.
- Try to leave clumps of sugar, to create nice big crunchy chunks: Those clumps will crackle and provide textural interest, and you will hear faint crisping as they bake. Encourage clusters when sprinkling, pressing small mounds lightly into the egg wash so they adhere. Too little pressure and they may fall off during baking.
- Drizzle the loaf with the melted butter, mounding some of the sugar mixture together to help create better cinnamon sugar clusters: The warm butter melts the sugar slightly and helps form golden, caramelized pockets that taste almost like toffee. The aroma becomes rich and buttery as it goes into the oven. Be cautious not to pour too much which can lead to soggy spots.
- Bake 35 to 40 minutes or until the top of the loaf is dark golden brown: As the loaf bakes the top will deepen to a rich golden color and the kitchen will fill with toasty cinnamon and caramel notes. The edges should feel set and slightly crisp. If the top begins to darken too much before the inside is done, tent with foil to prevent burning while the interior catches up.
- If the top starts burning before the loaf is finished cooking, cover the top with foil: Shielding the top keeps it from over browning while the interior continues to bake, preserving the crunchy pockets without sacrificing doneness. The foil will dull the direct heat and slow surface color development. Leaving it exposed risks bitterness from burnt sugar.
- Remove the loaf from the oven and leave to cool in the tin for about 5 minutes before turning out onto a cooling rack: Cooling briefly in the tin lets the loaf settle so it releases cleanly, and you will notice steam escaping and the aroma intensifying. Turning it out too soon can cause it to lose shape, while leaving it too long in the tin could trap moisture and soften the crust.
- Allow to cool completely before slicing or try to anyway right: When fully cooled the crumb sets and the texture becomes easier to slice without compressing, and the sugar pockets stabilize. Slicing warm often results in gummy, torn slices, though resisting that warm first taste is the hardest part of all.
Ways to Customize
This loaf is forgiving and eager to be personalized. Below are practical ways I like to tweak texture, sweetness, and presentation without changing the core method. Each tip starts with a bold idea followed by concrete steps so you can experiment with confidence.
- Use regular flour for a denser loaf if you prefer a more rustic, bread like crumb. Swapping the white whole wheat flour for regular all purpose will yield a heartier texture and slightly less chew from the crust. Measure carefully and expect a shorter chew profile. Bake time may be similar, but watch for a deeper overall brown.
- Mix by hand if you do not have a stand mixer, kneading for 5 to 10 minutes until the dough becomes smooth and elastic. Use the palm of your hand to fold and push the dough, rotating as you go. Hand kneading builds feel and connection to the dough, and you will know it is ready when it springs back to the touch. If it tears easily, continue kneading a little longer.
- Adjust white chocolate amount for sweetness control by using 2 ounces for subtle pockets or 4 ounces for pronounced creamy bursts. Fold the shredded white chocolate in gently so it does not clump into one area. Larger pieces create melty pockets that some people adore, while finer shreds disperse sweetness more evenly.
- Create larger or smaller pull apart sections by dividing the dough into fewer or more balls while keeping total dough weight the same. Larger balls produce chunkier pull apart sections, while smaller ones give more portions and an increased crust to crumb ratio per piece. Adjust baking time slightly for size differences.
- Prioritize crunchy clusters by leaving clumps of topping when you sprinkle the brown sugar mixture, pressing some mounds into the egg wash so they adhere. Those chunks will caramelize into delightful toffee like pockets. Evenly distributed sugar will caramelize flatter, so keep some variance for textural interest.
What Complements This Cinnamon Crunch Bagel Loaf
This loaf shines in morning spreads and casual gatherings, pairing well with simple beverages and gentle accompaniments that let the crunchy pockets stand out. Below I outline serving ideas, occasions, and storage notes so you know how to present and keep the loaf at its best.
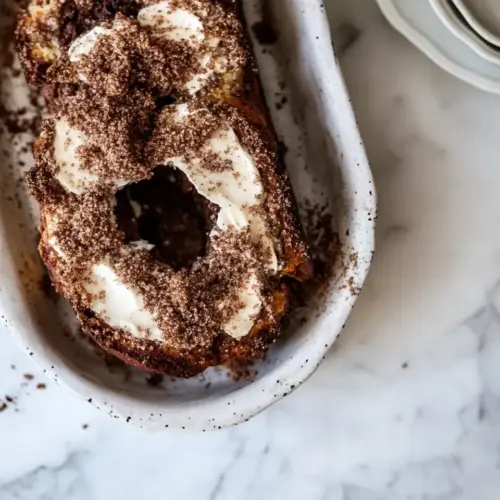
- Serve warm with coffee or tea, placing slices on a platter and letting guests add a pat of butter if they like. The warmth amplifies aroma and softens the crumb while the crunchy sugar pockets remain satisfying.
- Offer as part of a brunch spread alongside fruit and plain yogurt, allowing the loaf to act as a sweet anchor. It is perfect for lazy weekend mornings when people graze over a relaxed meal.
- Bring to small gatherings or potlucks because it slices easily and looks inviting on a board, making it ideal for sharing. The pull apart sections create a communal feel as people tear and pass slices.
- Store at room temperature for up to two days in an airtight container to preserve the crust and crumb. For longer storage, freeze slices individually wrapped, then toast directly from frozen for a revived texture.
- Pair seasonally during fall when cinnamon flavors feel most at home, serving with spiced drinks or simple whipped cream for a cozy touch. It also makes a comforting offering during holiday mornings where warm bakes are welcomed.
- Use as a sweet sandwich base by spreading a thin layer of soft cheese or jam if you want a more elaborate breakfast option, balancing the crunchy sugar pockets against a creamy filling.
FAQ
Conclusion
This Cinnamon Crunch Bagel Loaf stands out for its playful combination of bagel texture and loaf convenience, delivering chewy crumb and crunchy caramelized pockets. If you enjoy hands on baking that rewards patience with distinct textures and warming aromas, I encourage you to give this a try. Pulling a warm slice from the pan, feeling the sugar clusters crackle, and sharing it around the table is a small joy that never gets old.
Cinnamon Crunch Bagel Loaf
Equipment
- Electric mixer with dough hook
- Large Pot
- Slotted Spoon
- 9 x 5 inch bread tin
- Mixing Bowls
Ingredients
- 1 1/4 cups warm water Dissolve and activate yeast by warming to a comfortable temperature; provides hydration and creates the ideal environment for fermentation while helping dough development over time.
- 2 teaspoons active dry yeast Activate and leaven the dough by converting sugars into gas; adds rise and structure during proofing and contributes to flavor complexity.
- 2 tablespoons honey Sweeten and feed the yeast to encourage fermentation; adds subtle floral sweetness and improves crust browning and moisture retention in the loaf.
- 2 cups bread flour Provide strong gluten structure and chew; contributes to a chewy, supporting crumb and helps the loaf hold shape during boiling and baking.
- 1 1/3 cups white whole wheat flour Add a nuttier, wholesome texture and flavor with moderate gluten; balances the bread's structure while contributing to a tender crumb and brown color.
- 2 teaspoons cinnamon Season and flavor the dough with warm spice notes; enhances overall aroma and complements the sweet filling and topping components.
- 1/4 teaspoons salt Regulate dough strength and flavor by tightening gluten and controlling fermentation; balances taste and helps with dough handling.
- 1 teaspoon vanilla extract Impart aromatic sweetness and depth to the dough; enhances overall flavor profile and pairs with cinnamon for a warm note.
- 2 -4 ounces white chocolate shredded Provide pockets of sweet creaminess dispersed through the loaf; melts slightly in baking to add texture contrast and a sweet finish.
- 1 teaspoon baking soda for boiling Alkalize the boiling water to set the crust quickly and encourage a shiny, chewy outer layer; contributes to bagel-like texture before baking.
- 1 teaspoon malt syrup or brown sugar for boiling Sweeten the boiling water to promote caramelization and a glossy finish on the crust; helps develop color and subtle sweetness.
- 1 egg beaten Provide an egg wash for sheen and color; helps the crust brown evenly and allows any toppings to adhere during baking.
- 3/4 cup brown sugar Sweeten and contribute moisture to the filling or swirl; adds depth of flavor and pairs well with cinnamon for richness.
- 3 tablespoons cinnamon Provide concentrated warm spice for the filling or topping; intensifies cinnamon flavor and creates a distinct, crunchy ribbon in the loaf.
- 1 teaspoon vanilla Enhance and deepen vanilla flavor throughout the filling or dough; adds a familiar sweet aroma that complements cinnamon and chocolate.
- 4 tablespoons butter melted Add richness and tenderize the crumb by contributing fat and moisture; melts into the dough and filling to improve mouthfeel and flavor.
Instructions
- In the bowl of your electric mixer fitted with a dough hook, combine water, yeast and honey, stir to combine, then let sit until foamy, about 10 minutes. Once foamy, gradually add the bread flour, white whole wheat flour, cinnamon and salt with the mixer on low speed. After 5 minutes or so, if the dough is still sticky, add 1/4 cup more bread flour at a time until the dough pulls away from the sides of the bowl. Knead for 3 minutes longer and then knead in the white chocolate until evenly distributed. Remove the dough from the bowl and knead a few times with your hands, forming it into a ball.: The moment the mixture becomes foamy you will smell a faint yeasty perfume and see bubbles forming on the surface, a clear visual cue that the yeast is active. This fermentation adds subtle tang and air to the dough, helping the final loaf rise and develop flavor. A common issue here is using water that is too hot which will kill the yeast , so test it on your wrist it should feel warm not hot. If foam fails to appear after 15 minutes, your yeast may be old, and replacing it will save you time later. Gently stirring and leaving it undisturbed helps build that foamy head.
- Brush a large bowl with oil. Place the dough inside, turning to coat. Cover the bowl with a wet towel or plastic wrap. Allow the dough to rise in a warm place until doubled in size – about 1 hour. Once doubled, punch down the dough and place on your counter, using a little more flour if needed to prevent from sticking. Divide dough into 5 balls. Cover the balls and let sit 30 minutes. Grease a large bread tin (mine was 9 x 5 inches) and preheat the oven to 350 degrees. Bring a large pot of salted water to a boil. Add the baking soda and malt syrup.: You will notice the dough begin to look shaggy as the flours hydrate and the aroma of cinnamon becomes more pronounced, warming the kitchen. Low speed lets the ingredients integrate without flinging flour around, and it encourages gluten strands to form slowly. Overworking at this stage can make the dough tight, so keep the speed modest. If the dough seems too dry or too wet, pause and adjust with small additions of water or flour, because dough consistency is key for the right chew.
- Carefully drop one dough ball at a time into the boiling water. Boil 1 minute, flip and boil another minute and then remove from the water with a slotted spoon. Place the dough in the prepared bread pan. Repeat with the remaining dough balls, lining them up against each other in the bread tin as you go.: As the mixer kneads, you should hear a soft, steady thrum and see the dough wrap around the hook, becoming smoother and more elastic. The texture turning from sticky to slightly tacky signals the right hydration level. Adding the extra bread flour in measured increments prevents overshooting and producing a dry loaf. A sticky dough often means underdeveloped gluten or too much hydration, while overly dry dough leads to a dense crumb.
- In a small bowl, combine the brown sugar, cinnamon and vanilla for the topping. Once all the dough balls have been boiled and are in the bread tin, brush the tops, and all down the cracks and sides of the loaf, with a beaten egg. Sprinkle the brown sugar/cinnamon mixture over top. You may not need to use all the mix. Try to leave clumps of sugar, to create nice big crunchy chunks. Drizzle the loaf with the melted butter, mounding some of the sugar mixture together to help create better cinnamon sugar clusters. Bake 35-40 minutes or until the top of the loaf is dark golden brown. If the top starts burning before the loaf is finished cooking, cover the top with foil. Remove the loaf from the oven and leave to cool in the tin for about 5 minutes before turning out onto a cooling rack. Allow to cool completely before slicing... or try to anyway... right.: During these extra minutes the dough will become glossy and more springy, offering a stretch when you pull it. Folding in the shredded white chocolate by hand ensures it disperses in pockets rather than melting into one big mass. You should feel occasional rips as chocolate bits integrate, and the dough may smell sweet and buttery. Overkneading can make the loaf tough, whereas underkneading prevents proper rise, so aim for that supple elasticity.
- Remove the dough from the bowl and knead a few times with your hands, forming it into a ball: The tactile feedback here is important you will feel the dough tighten and smooth under your palm, with a slight tack but not stickiness. Forming a tight ball creates surface tension that helps the dough rise evenly. If the dough sticks too much to your hands, dust lightly with flour; however avoid adding too much which will dry the dough.
- Brush a large bowl with oil: The thin sheen of oil prevents sticking and allows the dough to expand without tearing, which promotes even fermentation. You will notice the dough slide easily when you turn it, leaving the bowl clean. Using too much oil can make the dough slippery to handle, while none at all risks the dough bonding to the bowl during rise.
- Place the dough inside, turning to coat: Turning the dough so all sides are lightly coated with oil ensures a uniform, unblemished surface after rising, and it reduces the chance of a dry skin forming. The dough should begin to puff within 20 to 30 minutes if your kitchen is warm. If the dough develops a dry film, it means the covering was insufficient, so next time use a tighter wrap.
- Cover the bowl with a wet towel or plastic wrap: A moist environment helps the dough rise without drying out, and you will see the dough expand and create a domed silhouette against the bowl. The wet towel traps humidity, producing a consistent surface for fermentation. Leaving it uncovered risks a crust forming which will inhibit full rise.
- Allow the dough to rise in a warm place until doubled in size, about 1 hour: Watching the dough slowly double is one of my favorite parts the surface becomes pillowy and the smell shifts to a gentle tang from fermentation. This rise builds flavor and structure. If it does not double, your room may be cool; find a slightly warmer spot or extend the time. Overproofing can collapse the structure so keep an eye on the volume.
- Once doubled, punch down the dough and place on your counter, using a little more flour if needed to prevent from sticking: The act of punching down redistributes gases and evens out the texture, leaving a pleasantly yeasty scent. Working the dough briefly removes large air pockets and prepares it for portioning. If you see dense, gummy strands, the dough may have been under or overproofed; adjusting proof times next bake will correct this.
- Divide dough into 5 balls: Dividing yields uniform pieces that will bake evenly in the pan, and you will sense each ball has a slight tension from shaping. Aim for consistent sizes so the loaf bakes uniformly. If the pieces vary a lot, the smaller ones can overbake while the larger remain underdone.
- Cover the balls and let sit 30 minutes: A brief bench rest relaxes the gluten and allows the balls to rise slightly, making them easier to shape and resulting in a lighter crumb. You will notice them soften and expand a touch. Skipping this step can make them spring back when you attempt to shape or boil them.
- Grease a large bread tin and preheat the oven to 350 degrees: A well greased tin ensures the loaf releases cleanly after baking, and preheating to 350 degrees builds consistent oven heat so the exterior sets properly as the interior finishes. You want oven heat ready the moment the pan goes in. Putting the loaf into a cold oven will extend the bake time and change the crust color.
- Bring a large pot of salted water to a boil: The pot should be large enough to let the dough balls float and move freely while boiling, and a rolling boil will create that quick seal on the exterior. You will hear a lively, bubbling sound and see steam rising. Under boiling can prevent proper crust formation, while an over boil can be too turbulent and damage the dough balls.
- Add the baking soda and malt syrup: Dissolving baking soda and malt syrup into the water adjusts pH and promotes blistering and browning on the surface during baking, leading to the authentic bagel like crust. You'll notice the water may foam slightly when the baking soda is added. Measure carefully because excess can impart off flavors.
- Carefully drop one dough ball at a time into the boiling water: Lowering the dough in gently prevents splashing and keeps the shape intact, and the brief immersion will create a taut outer skin. You should hear a soft hiss as it hits the water. Dropping them in too forcefully can cause distortion or soggy spots.
- Boil 1 minute, flip and boil another minute and then remove from the water with a slotted spoon: After each minute you will see the exterior take on a slightly glossy, set appearance, and flipping ensures both sides receive equal treatment. The texture will feel firmer to the touch. Under boiling time leaves the exterior underdeveloped, while over boiling can make them dense.
- Place the dough in the prepared bread pan: Arranging the boiled balls snugly in the pan encourages them to bake into a cohesive loaf with pull apart sections. You will hear a soft thud as they settle. Leaving too much space between them can make the loaf look disjointed, while cramming them can prevent even rising.
- Repeat with the remaining dough balls, lining them up against each other in the bread tin as you go: Lining them creates the classic clustered look and helps the sides rise together into soft seams that are fun to pull apart. You will start to smell melting sugar and bread as the pan fills. If sizes vary, rotate positions so larger ones are distributed evenly.
- In a small bowl, combine the brown sugar, cinnamon and vanilla for the topping: Mixing this topping releases warm cinnamon fragrance and the vanilla blends into the brown sugar , forming gritty clusters that will caramelize in the oven. Keep the mix chunky rather than pulverized to encourage crunchy pockets. Overly fine mixing yields a flat, uniform topping with less texture.
- Once all the dough balls have been boiled and are in the bread tin, brush the tops, and all down the cracks and sides of the loaf, with a beaten egg: The egg wash gives a glossy finish and helps the topping adhere, producing that deep golden color as it bakes. Brush thoroughly but gently so the topping stays in place. Skipping the wash reduces shine and topping adhesion.
- Sprinkle the brown sugar slash cinnamon mixture over top: Scatter the topping intentionally leaving clumps to create crunchy islands, and you will see the sugar glint as it catches the light. Those clumps melt and caramelize into delightful pockets. If you distribute the topping too evenly, you lose the texture contrast.
- You may not need to use all the mix: Leaving some of the topping aside ensures you retain texture variety across the loaf, and thicker clusters will stay crunchy while thinner areas caramelize softer. Using it all can create a uniform crust that lacks the desired bite.
- Try to leave clumps of sugar, to create nice big crunchy chunks: Those clumps will crackle and provide textural interest, and you will hear faint crisping as they bake. Encourage clusters when sprinkling, pressing small mounds lightly into the egg wash so they adhere. Too little pressure and they may fall off during baking.
- Drizzle the loaf with the melted butter, mounding some of the sugar mixture together to help create better cinnamon sugar clusters: The warm butter melts the sugar slightly and helps form golden, caramelized pockets that taste almost like toffee. The aroma becomes rich and buttery as it goes into the oven. Be cautious not to pour too much which can lead to soggy spots.
- Bake 35 to 40 minutes or until the top of the loaf is dark golden brown: As the loaf bakes the top will deepen to a rich golden color and the kitchen will fill with toasty cinnamon and caramel notes. The edges should feel set and slightly crisp. If the top begins to darken too much before the inside is done, tent with foil to prevent burning while the interior catches up.
- If the top starts burning before the loaf is finished cooking, cover the top with foil: Shielding the top keeps it from over browning while the interior continues to bake, preserving the crunchy pockets without sacrificing doneness. The foil will dull the direct heat and slow surface color development. Leaving it exposed risks bitterness from burnt sugar.
- Remove the loaf from the oven and leave to cool in the tin for about 5 minutes before turning out onto a cooling rack: Cooling briefly in the tin lets the loaf settle so it releases cleanly, and you will notice steam escaping and the aroma intensifying. Turning it out too soon can cause it to lose shape, while leaving it too long in the tin could trap moisture and soften the crust.
- Allow to cool completely before slicing or try to anyway right: When fully cooled the crumb sets and the texture becomes easier to slice without compressing, and the sugar pockets stabilize. Slicing warm often results in gummy, torn slices, though resisting that warm first taste is the hardest part of all.
Notes
- Use regular flour for a denser loaf if you prefer a more rustic, bread like crumb. Swapping the white whole wheat flour for regular all purpose will yield a heartier texture and slightly less chew from the crust. Measure carefully and expect a shorter chew profile. Bake time may be similar, but watch for a deeper overall brown.
- Mix by hand if you do not have a stand mixer, kneading for 5 to 10 minutes until the dough becomes smooth and elastic. Use the palm of your hand to fold and push the dough, rotating as you go. Hand kneading builds feel and connection to the dough, and you will know it is ready when it springs back to the touch. If it tears easily, continue kneading a little longer.
- Adjust white chocolate amount for sweetness control by using 2 ounces for subtle pockets or 4 ounces for pronounced creamy bursts. Fold the shredded white chocolate in gently so it does not clump into one area. Larger pieces create melty pockets that some people adore, while finer shreds disperse sweetness more evenly.
- Create larger or smaller pull apart sections by dividing the dough into fewer or more balls while keeping total dough weight the same. Larger balls produce chunkier pull apart sections, while smaller ones give more portions and an increased crust to crumb ratio per piece. Adjust baking time slightly for size differences.
- Prioritize crunchy clusters by leaving clumps of topping when you sprinkle the brown sugar mixture, pressing some mounds into the egg wash so they adhere. Those chunks will caramelize into delightful toffee like pockets. Evenly distributed sugar will caramelize flatter, so keep some variance for textural interest.