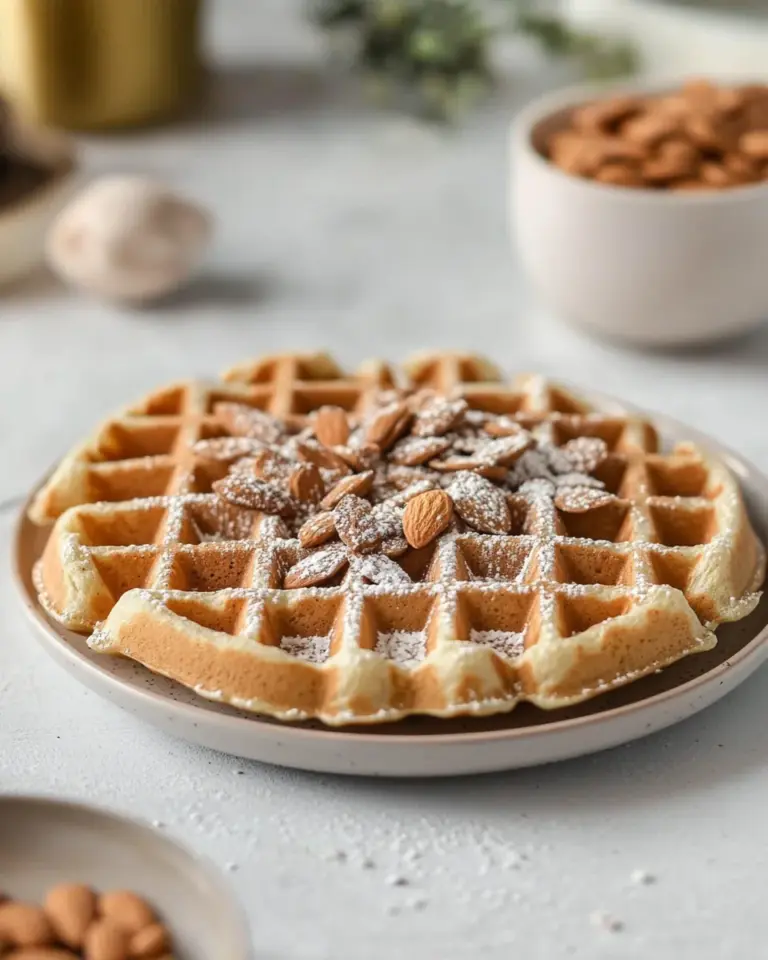
Chocolate Waffles
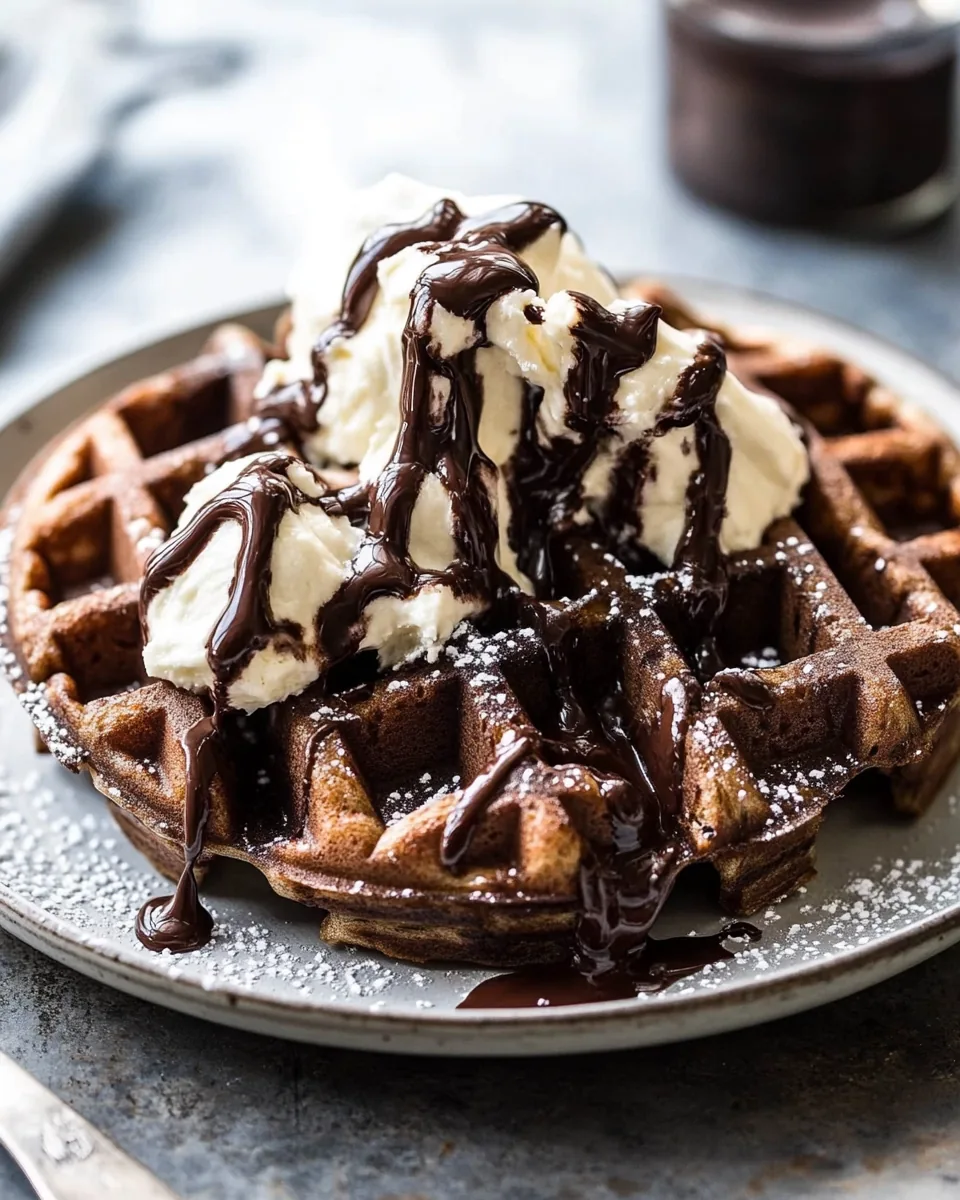
There’s something magical about the smell of fresh Chocolate Waffles wafting through the kitchen. It reminds me of Sunday mornings spent with family, where the day starts with warmth and sweetness. I remember the first time I made these Chocolate Waffles; the anticipation was palpable as I whisked together the ingredients. The sight of the batter transforming into fluffy, golden waffles was a delight! Drenched in syrup or topped with whipped cream, each bite is a burst of chocolatey goodness that feels like a warm hug. Whether you’re surprising a loved one or indulging yourself, these Chocolate Waffles are sure to make any breakfast special.
Recipe Snapshot
20 mins
10 mins
10 mins
Medium
250 kcal
6 g
Gluten-Free, Low FODMAP
10 g
Mixing Bowl, Whisk
Why This Chocolate Waffles Hits Different
Rich Chocolatey Flavor
One of the things that makes these Chocolate Waffles stand out is their rich chocolatey flavor. Using unsweetened cocoa powder gives it that deep, satisfying taste that pairs beautifully with sweet toppings. It’s not just a breakfast; it’s a treat you’ll crave any time of the day.
Simple Ingredients
The ingredients are straightforward, making this recipe accessible for everyone. You likely already have flour, baking powder, and cocoa powder in your pantry. It’s the perfect way to turn your usual breakfast into something extraordinary without a trip to the grocery store!
Family-Friendly Fun
Making Chocolate Waffles can be a family affair. Kids love helping out in the kitchen, and this recipe allows them to get involved. They can mix the batter or add their favorite toppings. It’s not just about the result; it’s about the fun we have together in the process.
Versatile Toppings
The options for toppings are endless! From fresh fruits like strawberries and bananas to creamy whipped cream or even a drizzle of melted chocolate, you can customize each plate to suit your taste. This versatility means everyone at the table can enjoy their Chocolate Waffles just the way they like them.
Perfectly Fluffy
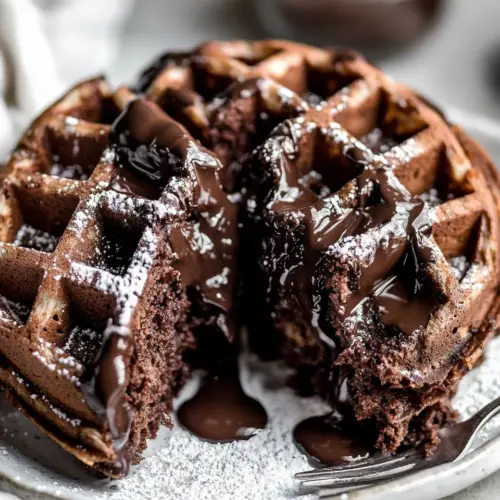
There’s a certain satisfaction in the texture of these Chocolate Waffles. They come out fluffy and light yet crisp on the outside. This perfect balance makes every bite an indulgent experience. You’ll find yourself going back for seconds, and maybe even thirds!
Great for Any Occasion
These waffles aren’t just for breakfast; they’re great for brunches, special occasions, or even a cozy dinner. They can be a fun dessert option too! Just think of how exciting it would be to serve Chocolate Waffles at your next gathering, leaving your guests impressed and satisfied.
Ingredients Required for Chocolate Waffles
When it comes to making Chocolate Waffles, the ingredients play a crucial role in developing the flavor and texture of the dish. Each component complements the others, creating a harmonious blend that delivers both satisfaction and delight. The star ingredient is, of course, the cocoa powder, which gives the waffles their rich chocolate flavor. The combination of flour, baking powder, and salt creates the perfect base for a fluffy texture, while eggs, butter, and milk add moisture and richness.
- All-Purpose Flour: 2 cups. This serves as the base for your waffles, providing structure and a fluffy interior.
- Cocoa Powder: 1/3 cup. Unsweetened to deliver a rich chocolate flavor without added sweetness.
- Brown Sugar: 1/3 cup. Adds sweetness and a hint of molasses flavor that complements the cocoa.
- Baking Powder: 2 teaspoons. This is the leavening agent that helps the waffles rise and become light and airy.
- Salt: 1/2 teaspoon. Balances the sweetness and enhances the flavors.
- Eggs: 2 large, lightly beaten. They bind the ingredients together and contribute to the waffles’ fluffiness.
- Melted Butter: 1/3 cup. Adds richness and a beautiful flavor to the waffles.
- Milk: 1 3/4 cups. Provides moisture for a smooth batter, making sure the waffles are tender and light.
Making This Chocolate Waffles
Creating delicious Chocolate Waffles is an enjoyable process that brings joy to any morning. Once you gather your ingredients, you’ll be whisking up the batter in no time. Just follow these steps for a scrumptious experience.
- Start by gathering all your ingredients and measuring them out. In a large bowl, whisk together flour, cocoa powder, brown sugar, baking powder, and salt until well combined. This mixture is the foundation for your waffles, and it’s important for achieving the right texture.
- Next, create a well in the center of the dry ingredients. Add in the eggs, melted butter (or oil), and milk. This is where the magic begins! Mix together the wet ingredients in the well, gradually incorporating the dry ingredients until you achieve a smooth batter. You want to avoid overmixing, which can lead to dense waffles.
- Get your waffle iron ready by preheating it, following the manufacturer’s instructions. Once it’s hot, grease it lightly with cooking spray or a brush of melted butter. This step is crucial for preventing your waffles from sticking!
- Pour the batter into the center of the hot waffle iron. The amount will vary by appliance; typically, you should use about 3/4 cup of batter. Close the lid and cook according to your waffle iron’s instructions, usually about 5 to 7 minutes, or until the waffles are golden brown and crisp.
- As the first batch of Chocolate Waffles cooks, you can prepare your toppings. I love to whip up some fresh cream or slice up some strawberries to serve alongside. Feel free to get creative with toppings, making sure to have a variety for everyone!
- Once your waffles are finished cooking, carefully remove them from the waffle iron using a fork or tongs. They should come out easily if the iron was properly greased. Let them cool slightly on a wire rack to keep them from getting soggy.
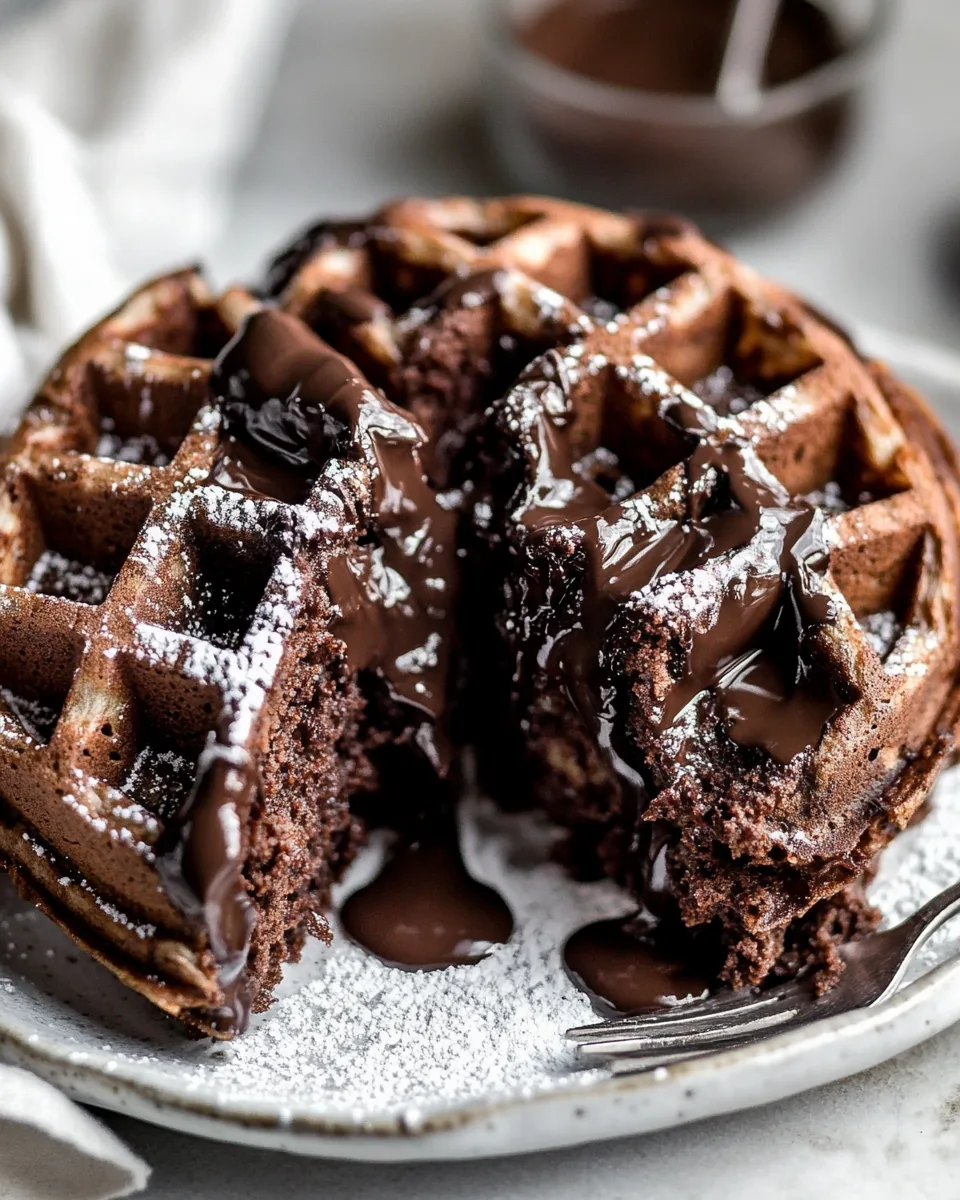
- Serve the waffles warm, dusted with powdered sugar or drizzled with melted Nutella or chocolate. You can also create a fun Nutella ganache by melting Nutella and mixing it with a few tablespoons of milk. Stir until glossy and smooth for an indulgent topping!
- Watch as everyone gathers around for a delicious breakfast! These Chocolate Waffles are sure to be a hit. Enjoy each bite and don’t forget to share the joy of this delightful recipe!
Things Worth Knowing
- Waffle Iron Temperature: Make sure your waffle iron is fully preheated to ensure even cooking. This will help achieve that crispy exterior.
- Don’t Overmix: Mixing your batter too much can lead to tough waffles. Just stir until combined for the fluffiest result.
- Storage: Leftover waffles can be stored in an airtight container in the fridge for up to three days.
- Reheating: Pop your waffles in the toaster for a few minutes to regain their crispiness when reheating.
- Experiment: Don’t be afraid to add in your favorite mix-ins like chocolate chips or nuts for an extra flavor boost!
Change It Up
There’s so much you can do to modify this Chocolate Waffles recipe! Here are some great ideas to get you started:
- Storage: Leftover Chocolate Waffles can be stored in the fridge in an airtight container. They’ll last up to three days. Just reheat in a toaster for the best texture.
- Freezing: You can freeze your cooked waffles! Simply place them in an airtight container with parchment paper in between layers. They’ll be good for up to two months.
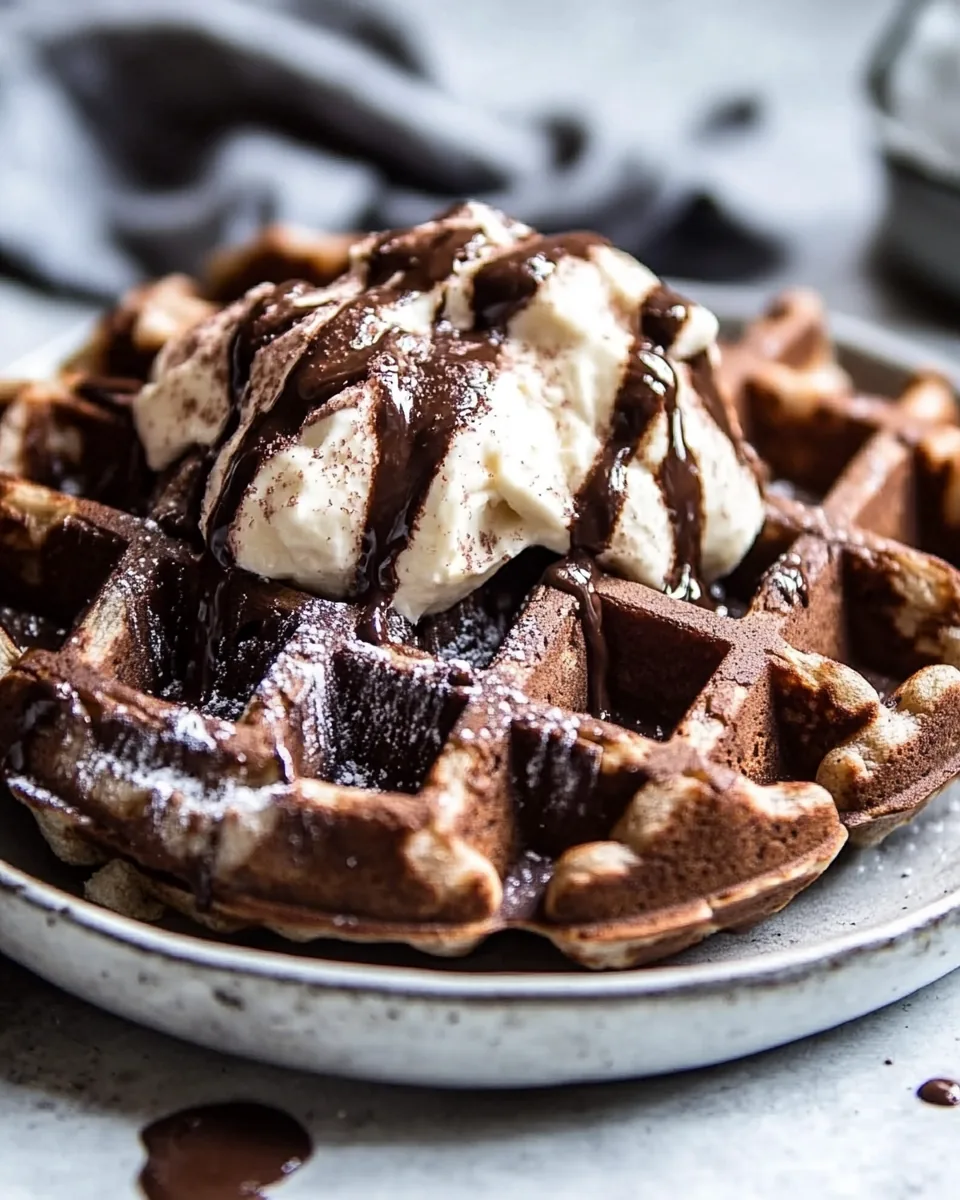
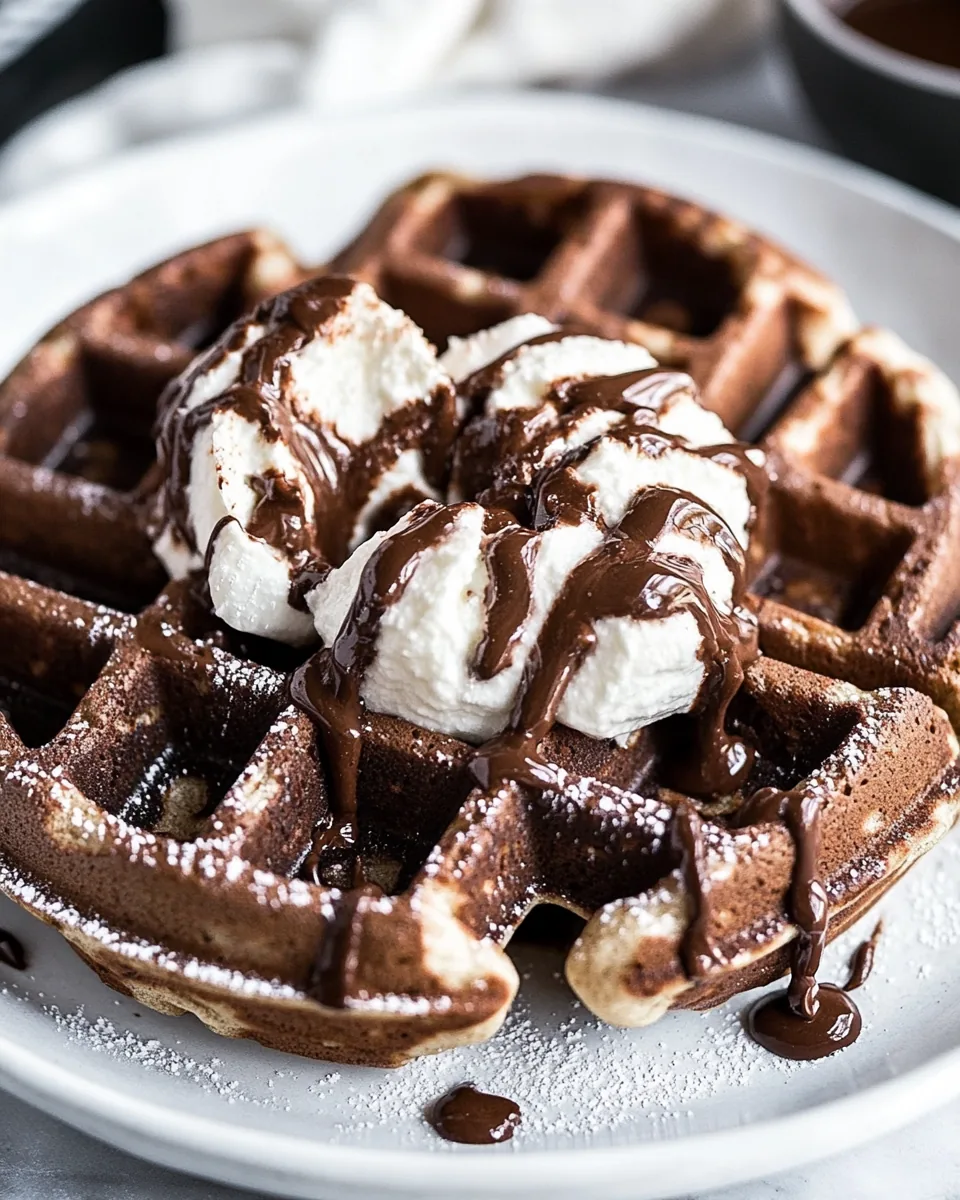
- Pairing: Try serving your waffles with a dollop of vanilla ice cream for a delicious dessert twist!
- Flavor Variations: For a different taste, try adding a teaspoon of cinnamon or a splash of coffee to the batter.
- Serving Style: Make a waffle bar with various toppings! Set out fruits, syrups, whipped cream, and nuts for a fun brunch experience.
Serve This Chocolate Waffles With
When it comes to enjoying your Chocolate Waffles, the serving possibilities are endless! Here’s a list of ideas to elevate your meal:
- Fresh Fruits: Serve with a mix of fresh berries, bananas, or even a fruit compote for a burst of flavor.
- Whipped Cream: A generous dollop of homemade whipped cream takes these waffles to the next level.
- Maple Syrup: Drizzle with pure maple syrup for a classic touch that complements the chocolate.
- Ice Cream: For dessert, top with a scoop of vanilla or chocolate ice cream for an indulgent treat.
- Nutella: Spread a layer of Nutella on top, with extra hazelnuts or chocolate shavings for a luxurious experience.
- Special Occasions: Perfect for brunch gatherings, holidays, or a cozy breakfast date at home.
FAQ
Conclusion
The recipe for Chocolate Waffles captures the joy of indulgence in a simple yet delightful dish. These waffles are not just a treat for breakfast but can transform any meal into a special occasion. I encourage you to gather your ingredients, whip up this recipe, and share the love of homemade waffles with your family and friends. Dive into the sweet world of Chocolate Waffles and make every moment delicious!
Chocolate Waffles
Equipment
- Mixing Bowl
- Whisk
Ingredients
- 2 cups All-Purpose Flour
- 1/3 cup Cocoa Powder
- 1/3 cup Brown Sugar
- 2 teaspoons Baking Powder
- 1/2 teaspoon Salt
- 2 large Eggs
- 1/3 cup Melted Butter
- 1 3/4 cups Milk
Instructions
- Start by gathering all your ingredients and measuring them out. In a large bowl, whisk together flour, cocoa powder, brown sugar, baking powder, and salt until well combined. This mixture is the foundation for your waffles, and it’s important for achieving the right texture.
- Next, create a well in the center of the dry ingredients. Add in the eggs, melted butter (or oil), and milk. This is where the magic begins! Mix together the wet ingredients in the well, gradually incorporating the dry ingredients until you achieve a smooth batter. You want to avoid overmixing, which can lead to dense waffles.
- Get your waffle iron ready by preheating it, following the manufacturer’s instructions. Once it’s hot, grease it lightly with cooking spray or a brush of melted butter. This step is crucial for preventing your waffles from sticking!
- Pour the batter into the center of the hot waffle iron. The amount will vary by appliance; typically, you should use about 3/4 cup of batter. Close the lid and cook according to your waffle iron’s instructions, usually about 5 to 7 minutes, or until the waffles are golden brown and crisp.
- As the first batch of Chocolate Waffles cooks, you can prepare your toppings. I love to whip up some fresh cream or slice up some strawberries to serve alongside. Feel free to get creative with toppings, making sure to have a variety for everyone!
- Once your waffles are finished cooking, carefully remove them from the waffle iron using a fork or tongs. They should come out easily if the iron was properly greased. Let them cool slightly on a wire rack to keep them from getting soggy.
- Serve the waffles warm, dusted with powdered sugar or drizzled with melted Nutella or chocolate. You can also create a fun Nutella ganache by melting Nutella and mixing it with a few tablespoons of milk. Stir until glossy and smooth for an indulgent topping!
- Watch as everyone gathers around for a delicious breakfast! These Chocolate Waffles are sure to be a hit. Enjoy each bite and don’t forget to share the joy of this delightful recipe!
Notes
- Tip 1: Leftover Chocolate Waffles can be stored in the fridge in an airtight container. They’ll last up to three days. Just reheat in a toaster for the best texture.
- Tip 2: You can freeze your cooked waffles! Simply place them in an airtight container with parchment paper in between layers. They’ll be good for up to two months.
- Tip 3: Try serving your waffles with a dollop of vanilla ice cream for a delicious dessert twist!
- Tip 4: For a different taste, try adding a teaspoon of cinnamon or a splash of coffee to the batter.
- Tip 5: Make a waffle bar with various toppings! Set out fruits, syrups, whipped cream, and nuts for a fun brunch experience.