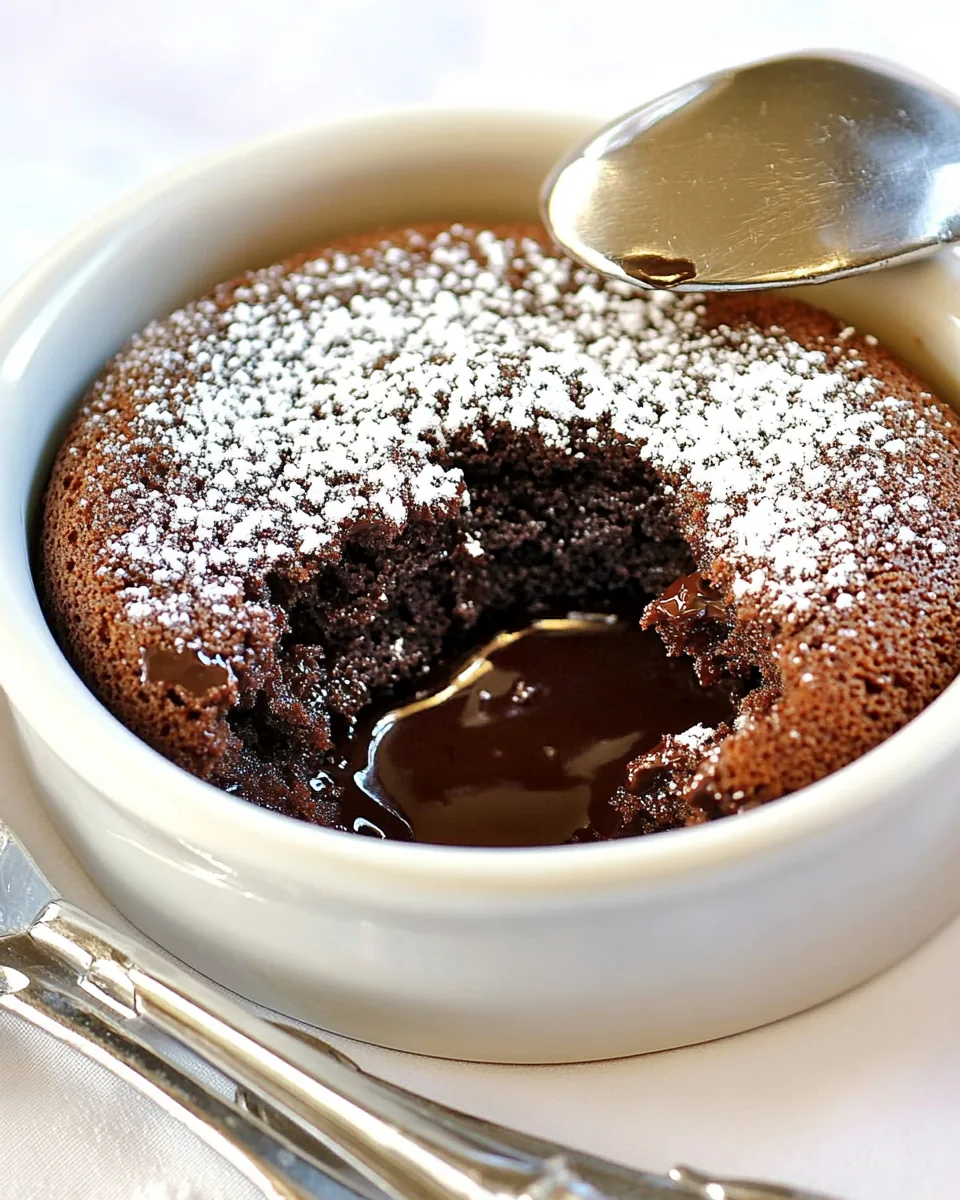
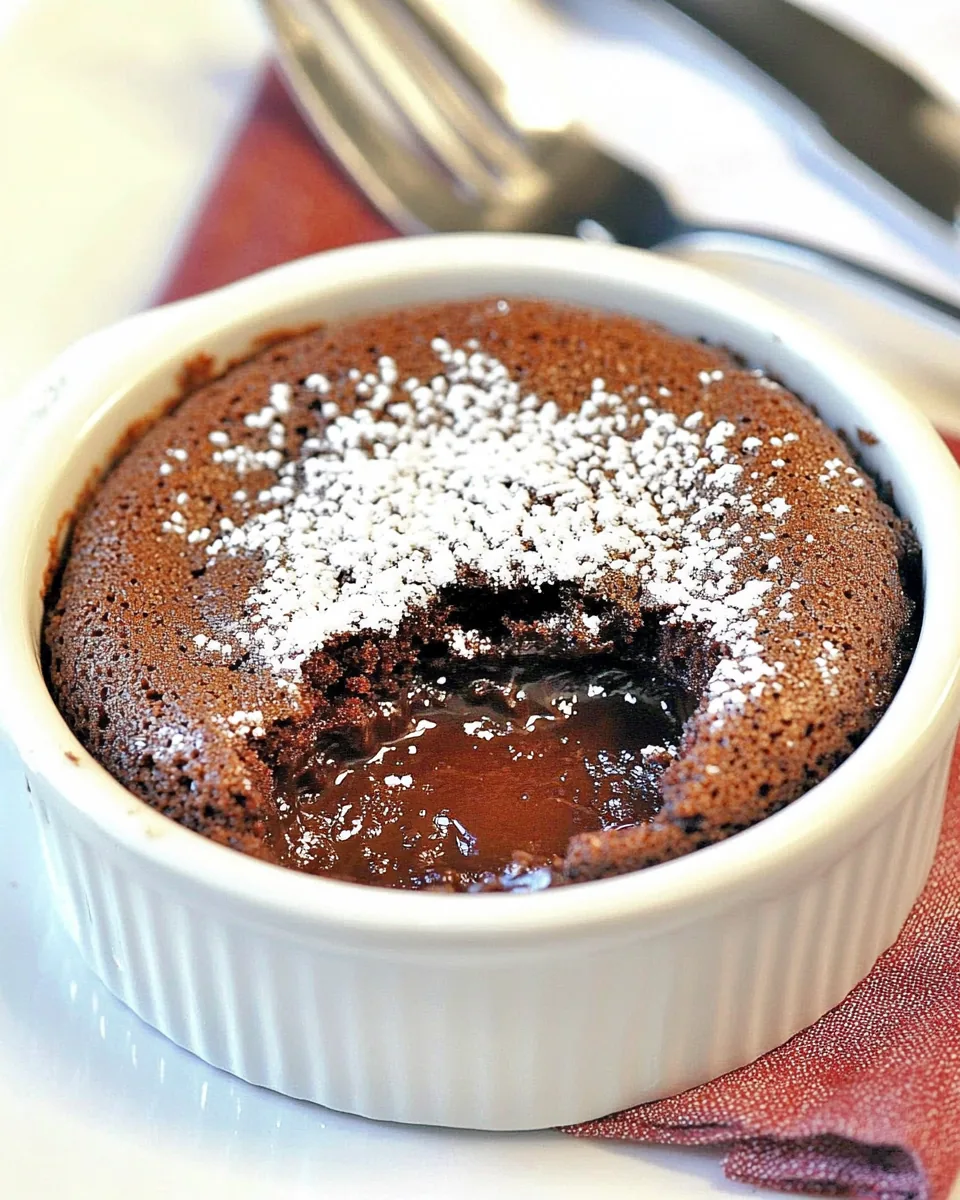
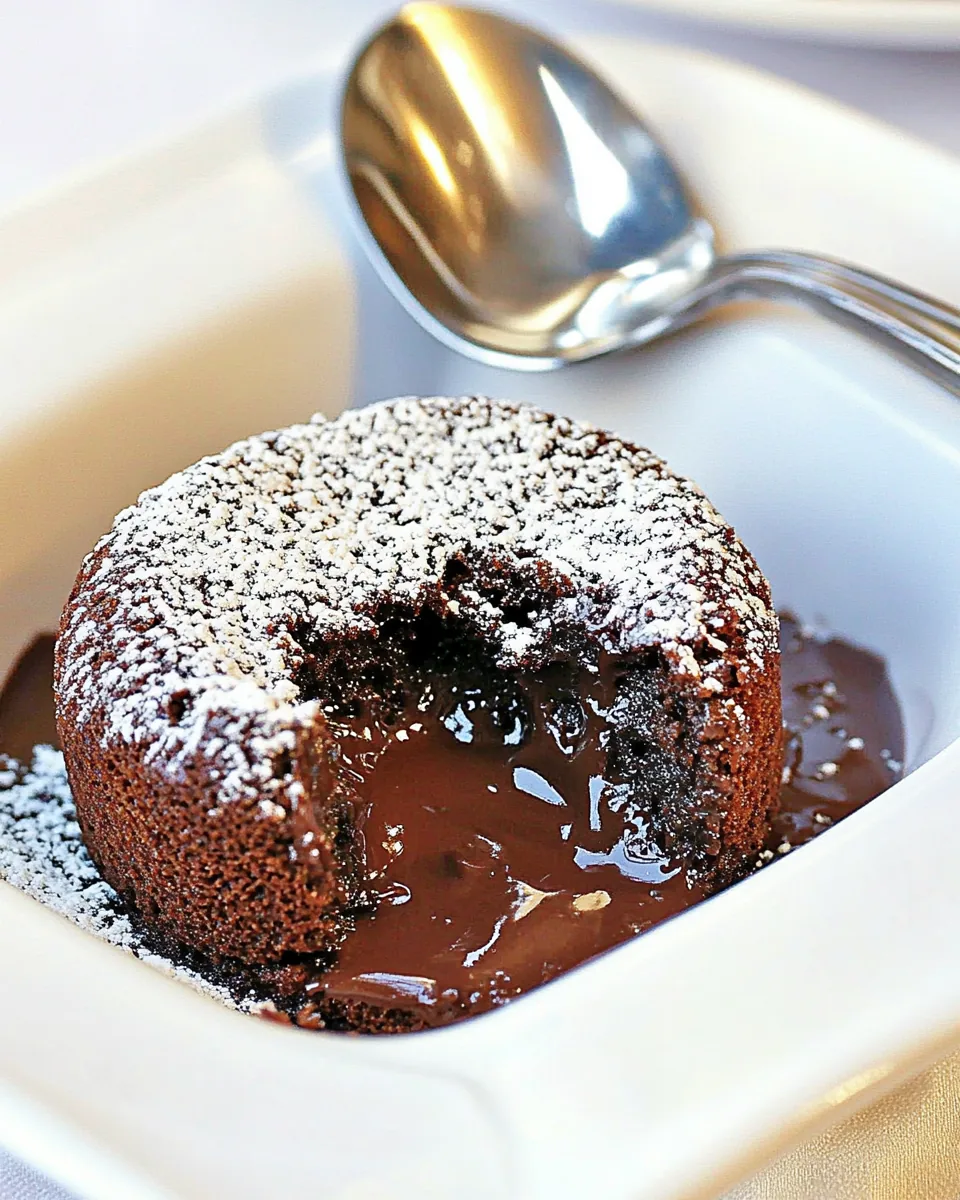
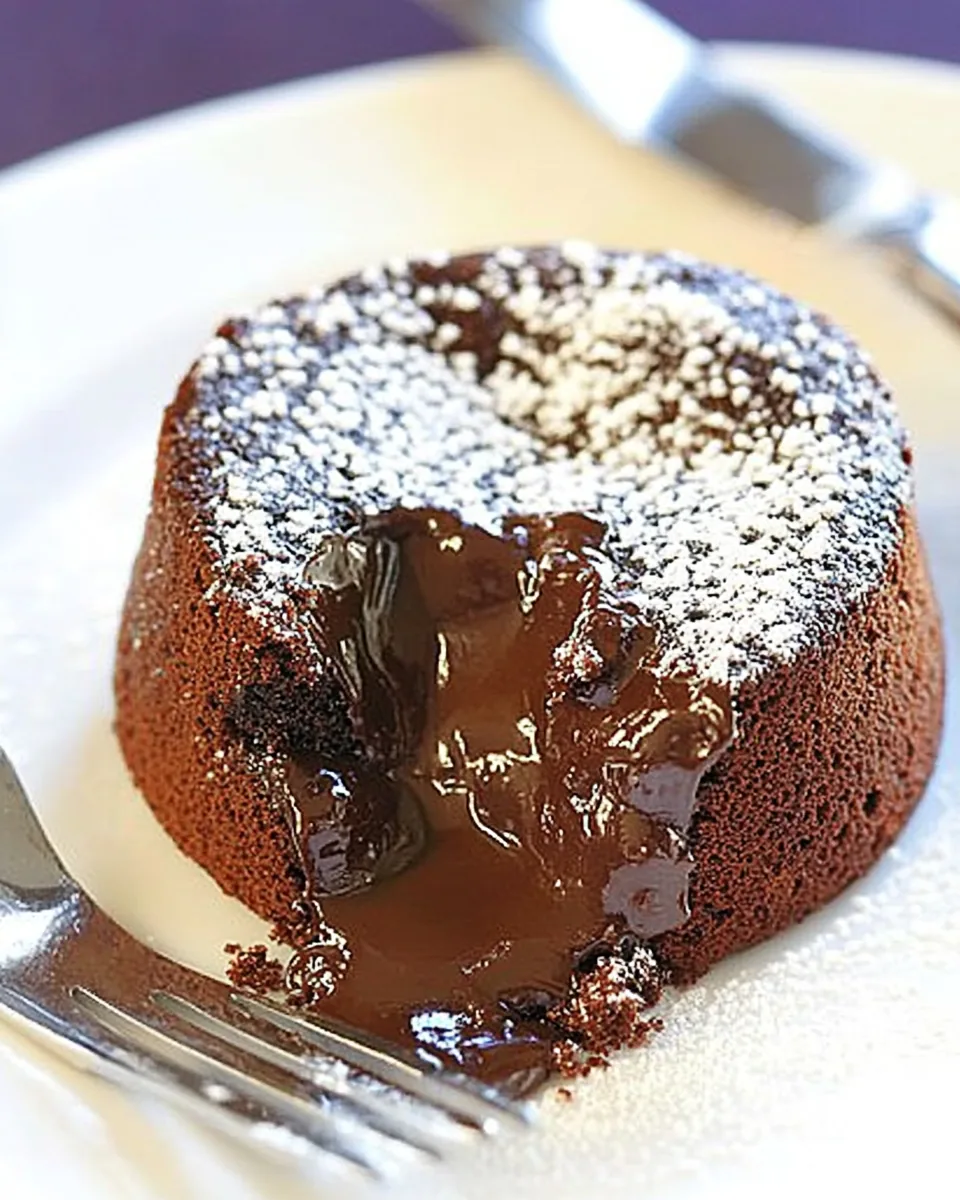
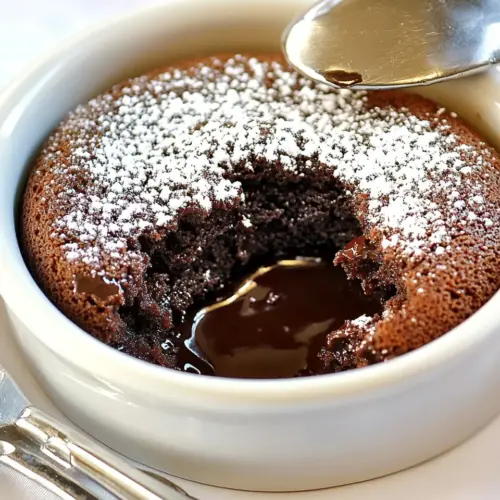
Chocolate Melting Cake
There’s nothing quite like the joy of indulging in a rich, gooey dessert that feels like a warm hug from the inside. That’s why I can’t resist making Chocolate Melting Cake whenever I’m in the mood to treat myself. This delightful dessert has a special way of transforming an ordinary evening into a celebration. Whether it’s a quiet night at home or a gathering with friends, the moment you break into that warm cake and discover the molten chocolate center, smiles are guaranteed. I still remember the first time I tasted it at a charming little bistro. Each forkful was a revelation, and since then, I’ve made it my mission to recreate that magic in my own kitchen. Trust me, once you try this recipe, you’ll find yourself making it over and over again, just to relive that enchanting experience.
Recipe Snapshot
25 mins
10 mins
15 mins
Medium
400 kcal
7 g
Vegan, Gluten-Free, AIP
23 g
Wooden Spoon, Baking Sheet, Mixing Bowl, Whisk
Why This Chocolate Melting Cake Works
It’s Indulgent Yet Simple
One of the reasons I absolutely love Chocolate Melting Cake is its perfect balance of indulgence and simplicity. Despite how fancy it looks, the process is straightforward. With just a few ingredients, you can create something that tastes like it came straight from a gourmet restaurant. I remember impressing my friends with this dessert at a dinner party, and they couldn’t believe how easy it was to make!
Perfect for Any Occasion
This dessert is incredibly versatile. Whether you’re celebrating a special occasion or just looking to satisfy a sweet tooth, Chocolate Melting Cake fits the bill. I’ve served it at birthdays, anniversaries, and even as a comforting end to a long day. Each time, it brings joy and satisfaction to everyone who gets to enjoy it.
A True Crowd-Pleaser
One of the best things about this recipe is that it’s universally loved. I’ve yet to meet anyone who doesn’t get excited at the sight of a Chocolate Melting Cake. The rich chocolate flavor and warm, gooey center draw everyone in. It’s one of those desserts that you can confidently serve to guests, knowing they’ll be impressed!
Customization Opportunities
What I adore about making Chocolate Melting Cake is the ability to customize it. Want to add a hint of espresso? Go for it! How about a dash of orange zest for a citrusy twist? Absolutely! You can experiment with flavors and fillings to create a unique version of this classic dessert, making it fun to serve different variations to friends and family.
Serving It Up
Finally, the way you serve Chocolate Melting Cake adds to the excitement. Whether you choose to top it with a scoop of vanilla ice cream, fresh berries, or a sprinkle of powdered sugar, the presentation is sure to wow your guests.
What You’ll Need for Chocolate Melting Cake
When it comes to making Chocolate Melting Cake, the quality of your ingredients plays a huge role in the final result. Each element contributes to the overall texture and flavor, resulting in the perfect rich, molten cake. Let’s take a closer look at the key players:
- Butter – Essential for greasing the ramekins and adding richness to the batter.
- Baking Chocolate – The star of the show for that deep chocolate flavor; I recommend chocolate that’s at least 60% cacao for a balanced sweetness.
- Eggs – Both whole eggs and yolks help create a luxurious texture that melts in your mouth.
- Sugar – Adds sweetness and assists in creating that delightful crust.
- Vanilla Extract – For a hint of warmth that complements the chocolate perfectly.
- Salt – Just a pinch enhances the overall flavor and cuts the sweetness.
- All-Purpose Flour – Provides structure while still allowing for the delicious melting center.
- Powdered Sugar – For dusting just before serving, adding a lovely finishing touch.
Directions for Chocolate Melting Cake
Making Chocolate Melting Cake is a journey filled with delightful aromas and the promise of a wonderful treat. Let’s dive into the steps to create this luxurious dessert.
- Prepare the ramekins: Start by spreading butter evenly in each ramekin to ensure your cakes release easily after baking. Don’t skimp on this step; a well-greased ramekin is essential for a perfect melt!
- Melt the chocolate: In a microwave-safe bowl, combine baking chocolate and remaining butter. Heat in 30-second intervals, stirring in between, until fully melted. The mixture should be smooth and glossy, enticing you to dive right in.
- Mix the eggs and sugar: In a separate bowl, whisk together the whole eggs, egg yolks, and sugar until the mixture becomes lighter in color and foamy. This aeration is crucial for that airy texture.
- Combine mixtures: Gently fold the melted chocolate into the egg mixture, ensuring it’s well incorporated. The rich chocolate should blend seamlessly with the eggs.
- Add remaining ingredients: Stir in vanilla extract, salt, and flour until combined. You want a smooth batter, free of lumps.
- Fill the ramekins: Divide the batter evenly among the prepared ramekins. Leave a little space at the top for the cake to rise and set properly.
- Chill the batter: Cover the ramekins with plastic wrap and refrigerate for 30 minutes. If you’re preparing in advance, you can leave them in the fridge for up to 4 hours.
- Baking time: Preheat your oven to 350 degrees. Bake the chilled ramekins for approximately 12 to 15 minutes. You’ll want the tops to be firm while the insides remain soft and molten.
- Dust and serve: Once baked, carefully remove the ramekins from the oven. Allow them to cool slightly, then dust with powdered sugar and serve immediately. For a delightful twist, add a scoop of ice cream on top!
Things Worth Knowing
- Chilling is Key: Refrigerating the batter allows the flavors to meld and helps achieve that perfect molten center.
- Watch the Bake Time: Overbaking can turn the center from molten to cake-like, so keep a close eye on your oven.
- Ramekin Size Matters: The size of your ramekins can affect baking time. Smaller ramekins will cook faster, so adjust accordingly.
- Test for Doneness: A toothpick inserted should come out with a few moist crumbs but shouldn’t be wet.
Variations to Try
There are countless ways to make Chocolate Melting Cake your own! Each small tweak can lead to a fun new version of this classic dish.
- Storage: If you have leftovers, cover the ramekins tightly with plastic wrap and store in the fridge. They can be enjoyed within two days.
- Freezing: You can freeze the unbaked batter in ramekins. Just be sure to wrap them well. When ready to bake, increase the baking time by a few minutes.
- Pairing: Serve with fresh berries or a drizzle of caramel sauce for an extra layer of flavor.
- Flavor Additions: Consider adding a teaspoon of espresso powder to the chocolate mixture for a rich mocha flavor.
- Different Chocolates: Experiment with dark or white chocolate for different flavor profiles.
Perfect Pairings for Chocolate Melting Cake
When serving Chocolate Melting Cake, the possibilities are endless! Here are some ideas to enhance your dessert experience:
- Ice Cream: A scoop of vanilla ice cream is a classic pairing that complements the rich chocolate perfectly.
- Fresh Fruit: Serve with strawberries, raspberries, or blueberries for a refreshing contrast to the warm cake.
- Coffee: Pair with a cup of freshly brewed coffee to enhance the chocolate flavors.
- Whipped Cream: Lightly sweetened whipped cream adds a lovely contrast and can be flavored with vanilla or almond.
- Chocolate Sauce: A drizzle of warm chocolate sauce can take the dessert to a whole new level.
- Celebrations: This dessert is perfect for birthdays, anniversaries, or romantic dinners. It’s sure to impress!
FAQ
Conclusion
Chocolate Melting Cake is a special dessert that brings joy and indulgence to any occasion. Its rich chocolate flavor and molten center make it a delightful treat for gatherings or a cozy night in. So why not try making it tonight? I promise it’ll be a hit!
Chocolate Melting Cake
Equipment
- Wooden Spoon
- Baking Sheet
- Mixing Bowl
- Whisk
Ingredients
- 2 teaspoons Butter for ramekins
- 6 ounces Butter
- 6 ounces Baking Chocolate (ideally 60% cacao)
- 2 whole Eggs
- 2 egg yolks Egg Yolks
- 3/4 cup Sugar
- 1/2 teaspoon Vanilla Extract
- 1/4 teaspoon Salt
- 1/4 cup All-Purpose Flour
- 2 tablespoons Powdered Sugar
Instructions
- Spread butter in ramekins to grease the dishes.
- In a small bowl melt together baking chocolate and butter in the microwave. Melt for 30 seconds and stir, and repeat until chocolate and butter are melted.
- Whisk together eggs, egg yolks, and sugar until they are lighter in color and foamy.
- Add melted chocolate to the egg mixture.
- Stir in vanilla extract, salt, and flour.
- Pour batter into the ramekins.
- Cover dishes with plastic and refrigerate for 30 minutes. You can refrigerate these for up to 4 hours.
- Bake at 350 degrees for approximately 12 to 15 minutes. The tops will be firm, but the insides will be melting.
- Dust with powdered sugar and serve with a scoop of ice cream if desired.
Notes
- Tip 1: If you have leftovers, cover the ramekins tightly with plastic wrap and store in the fridge. They can be enjoyed within two days.
- Tip 2: You can freeze the unbaked batter in ramekins. Just be sure to wrap them well. When ready to bake, increase the baking time by a few minutes.
- Tip 3: Serve with fresh berries or a drizzle of caramel sauce for an extra layer of flavor.
- Tip 4: Consider adding a teaspoon of espresso powder to the chocolate mixture for a rich mocha flavor.
- Tip 5: Experiment with dark or white chocolate for different flavor profiles.