Chicken Enchilada Casserole
Chicken Enchilada Casserole is one of those dishes I reach for when the week has been long and I want something that feels like a warm, friendly hug on a plate. The first time I made this it was a rainy evening, and the house smelled like bubbling sauce and melting cheese. I remember carrying the pan to the table, feeling grateful for a recipe that fills the room with comfort and makes everyone instantly quieter as they take their first bite.
Over the years I have adapted this casserole for busy nights, potlucks, and simple family dinners. It has that reliable structure that lets you swap small parts without breaking the whole, though I rarely change much because the balance of creamy sour cream, tangy enchilada sauce, and tender shredded chicken is just right. I love how it reheats, too, so there are usually happy leftovers for lunch the next day.
Recipe Snapshot
60 mins
15 mins
45 mins
Medium
400 kcal
Mexican
Gluten-Free, Low FODMAP
Dinner
Oven, 13 x 9 baking pan, Mixing bowl
What Makes This Chicken Enchilada Casserole Special
Comfort Food That Feels Homemade
I love that this version of Chicken Enchilada Casserole tastes like it came from my grandmother’s kitchen, yet it is straightforward enough for a weeknight. The layers of tortillas, saucy enchilada sauce, and shredded chicken create a cozy mouthfeel that always brings people together. I find that the textures and temperatures come together in a way that feels indulgent without being fussy.
Flexible and Family Friendly
One of the best things about this dish is how adaptable it is. I often use leftover roasted or rotisserie chicken, which makes it fast to pull together. You can dial the spice up or down with the amount of taco seasoning and sauce, so picky eaters and adventurous palates both leave the table satisfied. I appreciate any recipe that survives the real world of family dinners, and this one does.
Make Ahead and Feed a Crowd
I frequently prepare the casserole assembly earlier in the day, cover it, and bake when guests arrive. The dish travels well for potlucks, and because it serves many, it is ideal when feeding a group. I like knowing I can spend time with people instead of hovering over the stove, because the oven does most of the work.
Balanced Flavor and Texture
The creamy sour cream mixture mellows the bright, tangy enchilada sauce, while the melted cheese provides richness and that irresistible pull when you scoop a portion. Layers of slightly saucy tortillas soak up juices but keep structure so each bite is satisfying. I value techniques that reward patience, and the short bake time here gives the best melded flavors.
Reliable Leftovers
I often make this casserole with the plan of enjoying leftovers. Reheated portions remain moist and flavorful, making lunches and second-night dinners something I actually look forward to. The flavors deepen after a day in the fridge, so sometimes I prefer it the next day. That reliability makes it a go to for busy seasons when I want one good, dependable recipe.
What You Need for Chicken Enchilada Casserole
These ingredients are straightforward and purposeful, each playing a specific role to build layers of flavor and texture. The chicken provides protein and a tender bite, while the enchilada sauce anchors everything with savory depth. Tortillas form the structure, and the creamy sour cream plus melted cheese create the luscious, cohesive mouthfeel. Together they make a comforting, crowd pleasing casserole.
- 4 cooked chicken breasts or thighs pre-made rotisserie chicken works well: Shredded or chopped to bite-sized pieces and used as the primary protein, adding savory richness and body to the casserole; pre-cooked options like rotisserie save time and infuse extra flavor.
- 186 inch corn tortillas, torn in half: Torn into halves and layered to create the casserole’s structure, providing tender corn texture and absorbing sauce; tearing helps pieces fit evenly and meld with other layers.
- 128 oz can green Chile enchilada sauce: Poured generously between layers and over the top to deliver a tangy, mildly spicy sauce that moistens the casserole and binds components together for cohesive servings.
- 16 oz shredded cheese Monterey Jack, Cheddar, Mexican Blend or Colby work well: Sprinkled in between layers and melted on top to contribute creamy, gooey richness and a melty, golden finish; choose a blend that complements the enchilada sauce for balanced flavor.
- 8 oz sour cream: Folded into the filling or dolloped between layers to introduce creamy tang and to mellow spiciness, helping create a luscious, cohesive texture throughout the casserole.
- 1 2 tbsp taco seasoning this can be to taste, if your family likes big flavor, go for 2 full tbsp.: Seasoned into the shredded chicken or mixed into the sauce to add bold Mexican-inspired flavors; adjust quantity for desired heat and depth of seasoning.
Chicken Enchilada Casserole Instructions
These steps are simple, and with a bit of rhythm the assembly comes together quickly. I like to have everything prepped and within reach so the layering feels effortless. The oven does the finishing work, giving you time to set the table and relax a little before serving.
- Preheat oven to 350 degrees F. Spray a 13 x 9 baking pan with non-stick cooking spray.: As the oven warms, you will notice a slight dry warmth in the kitchen, a sign the environment is ready to transform the assembled casserole. This step ensures even baking and prevents sticking, helping the bottom layer of tortillas to crisp slightly at the edges while staying tender in the center. If your pan is not well greased, the bottom can cling and tear when serving, so make sure to coat corners and sides. A metal pan heats more quickly than a glass pan, so watch for color differences when it bakes.
- In a medium size bowl, combine sour cream and taco seasoning and mix well. Chop or shred chicken into small pieces. Add to sour cream mixture and stir to combine.: The first sensory cue is the spicy scent of the taco seasoning blooming into the cool tang of the sour cream , creating a fragrant, creamy base. Mixing the chicken in helps the flavors marry so each bite is seasoned, not just the surface. This technique ensures even distribution rather than pockets of blandness. A frequent mistake is using very large chicken pieces, which prevents uniform flavor in every forkful, so shred or chop to small, consistent sizes.
- Pour approximately 1/2 inch of enchilada sauce into the baking dish, making sure to fully cover the bottom of the dish.: When you pour the enchilada sauce you should see a glossy red or green sheen settle across the base, which protects the bottom tortillas from drying and creates a saucy foundation. This coating also helps distribute heat so the bottom layer cooks evenly. Pouring too little can cause sticking and dryness, while too much may make the casserole soupy. Aim for a thin, even coat to strike the right balance.
- Place a layer of tortillas onto the enchilada sauce to cover the bottom of the pan. This will be approximately 6 enchilada pieces.: The visual cue is rectangles overlapping slightly, forming a mostly covered surface. The tortillas should be somewhat saucy but not saturated; they will soften during baking and bind the layers. Proper placement avoids gaps that can lead to uneven structure. If you crowd them or leave big holes, the filling can bubble up and make slices fragile when serving.
- Top with 1/2 the chicken and sour cream mixture, then sprinkle 1/3 of the shredded cheese on top, followed by 1/3 of the remaining enchilada sauce. Repeat for a second layer.: At this moment you will notice the creaminess of the sour cream mix contrasting with the shredded chicken . The cheese adds a salty, fatty note that melts into a cohesive blanket, while the sauce ties everything together. Layering in this order builds balanced bites that are not overloaded with sauce or dry spots. A common misstep is piling too much filling in one layer which makes cutting neat portions difficult, so measure roughly as you go.
- Dip or coat the remaining tortillas with enchilada sauce, then place a final layer on top. If there is any enchilada sauce remaining, drizzle over top. Top with remaining cheese.: When you coat the top tortillas , listen for the soft slosh of sauce as it clings, and see the sauce sheen that will help the final cheese melt into a golden finish. This top layer seals moisture inside and creates a pleasing contrasting texture between the creamy interior and the browned topping. Avoid drowning the top in sauce which can prevent a nicely browned cheese crust; aim for an even light drizzle.
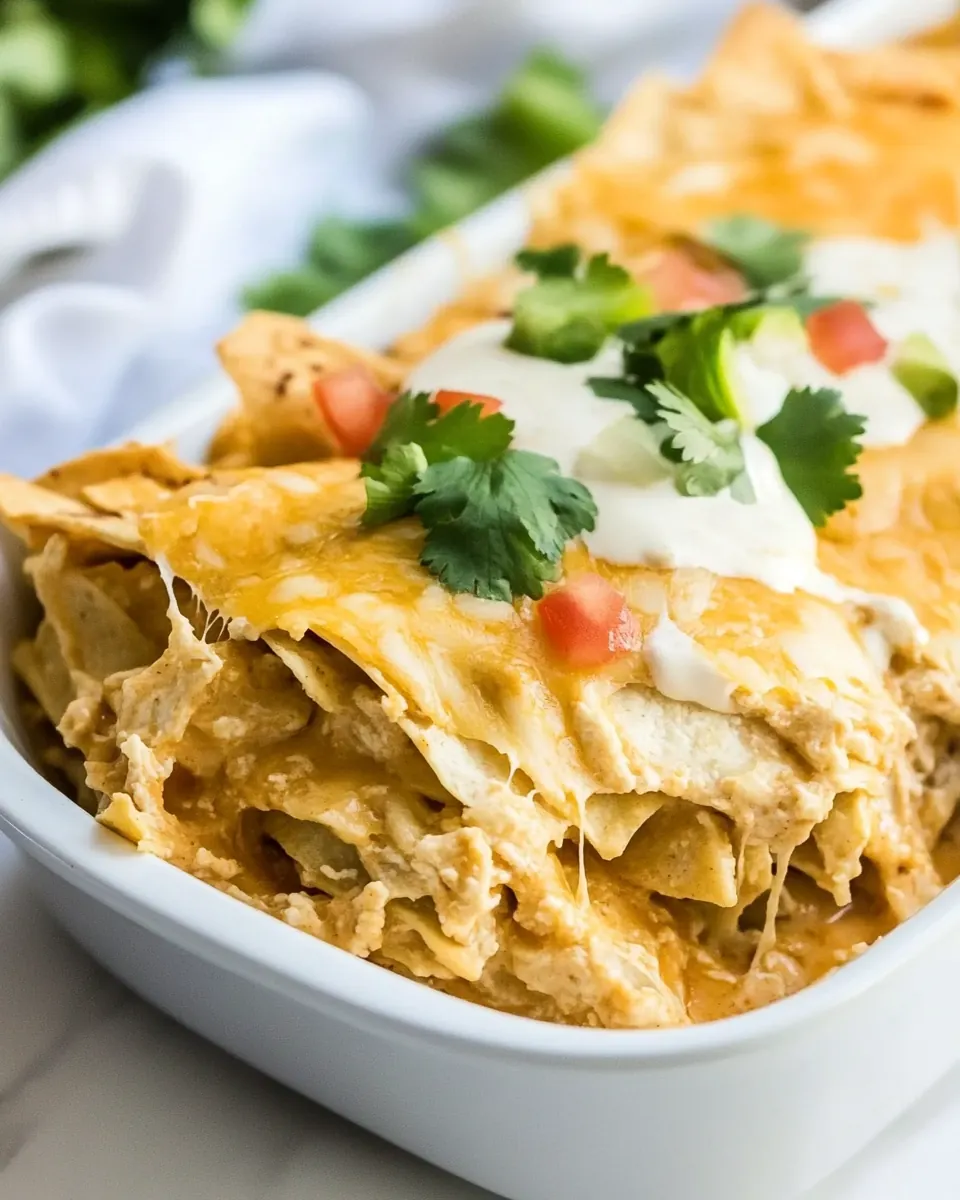
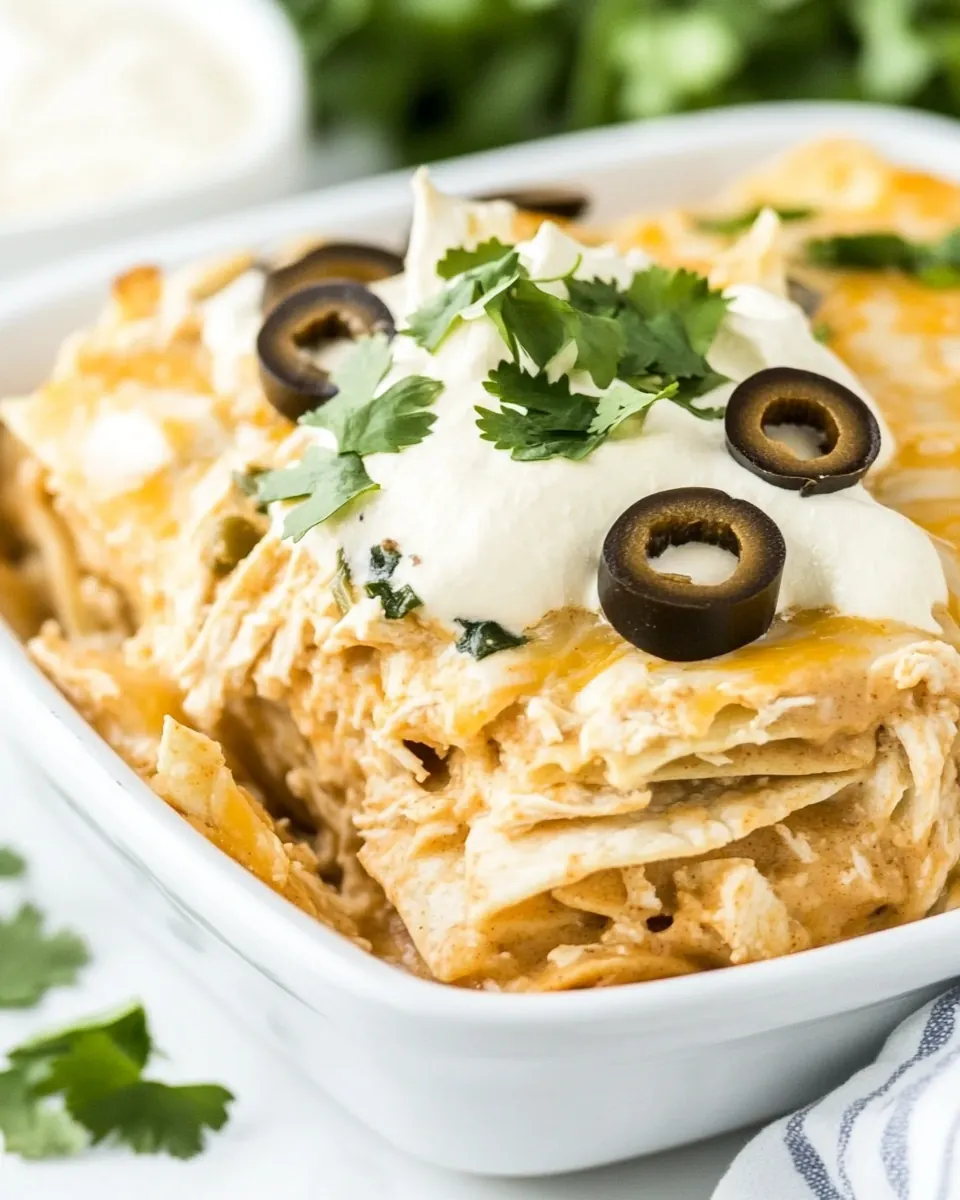
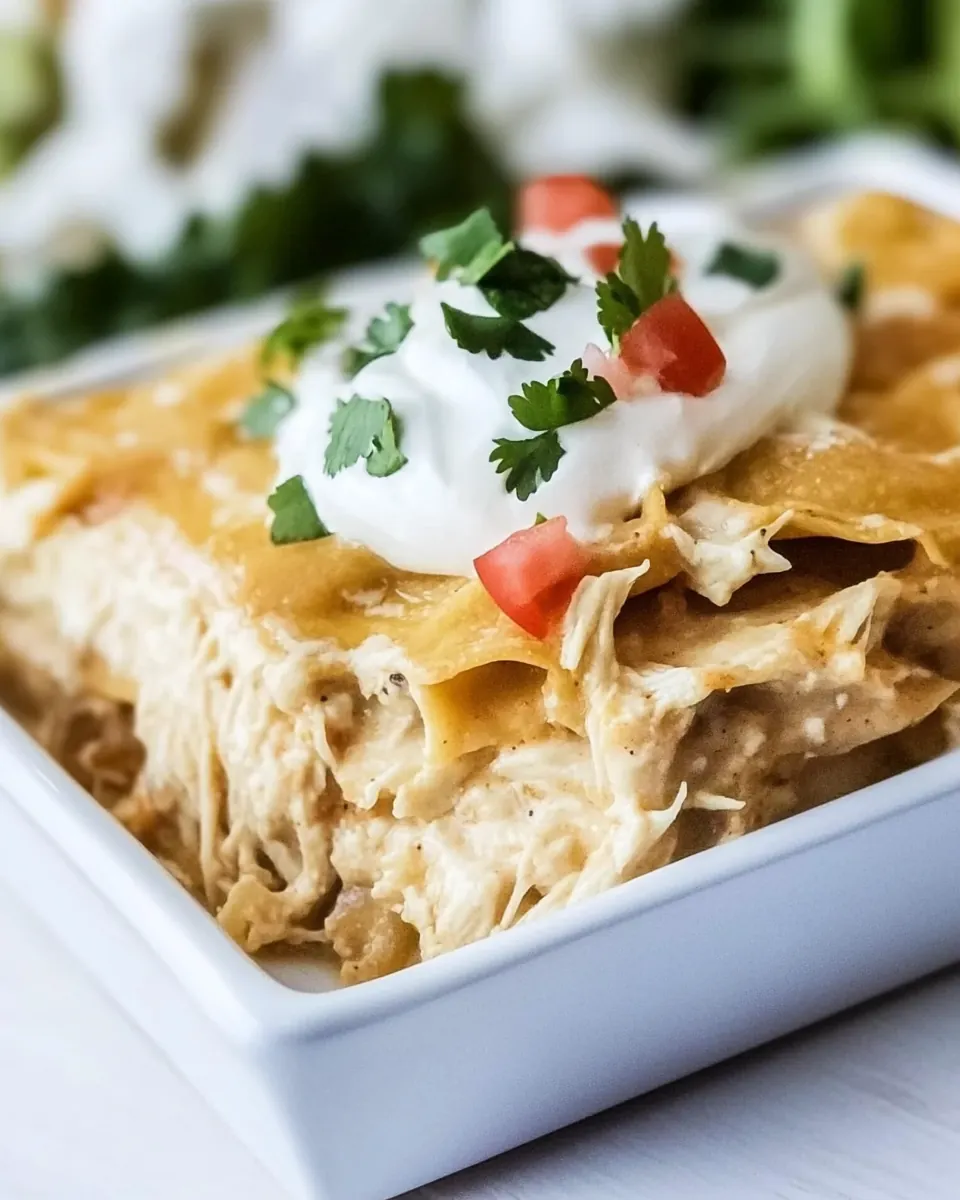
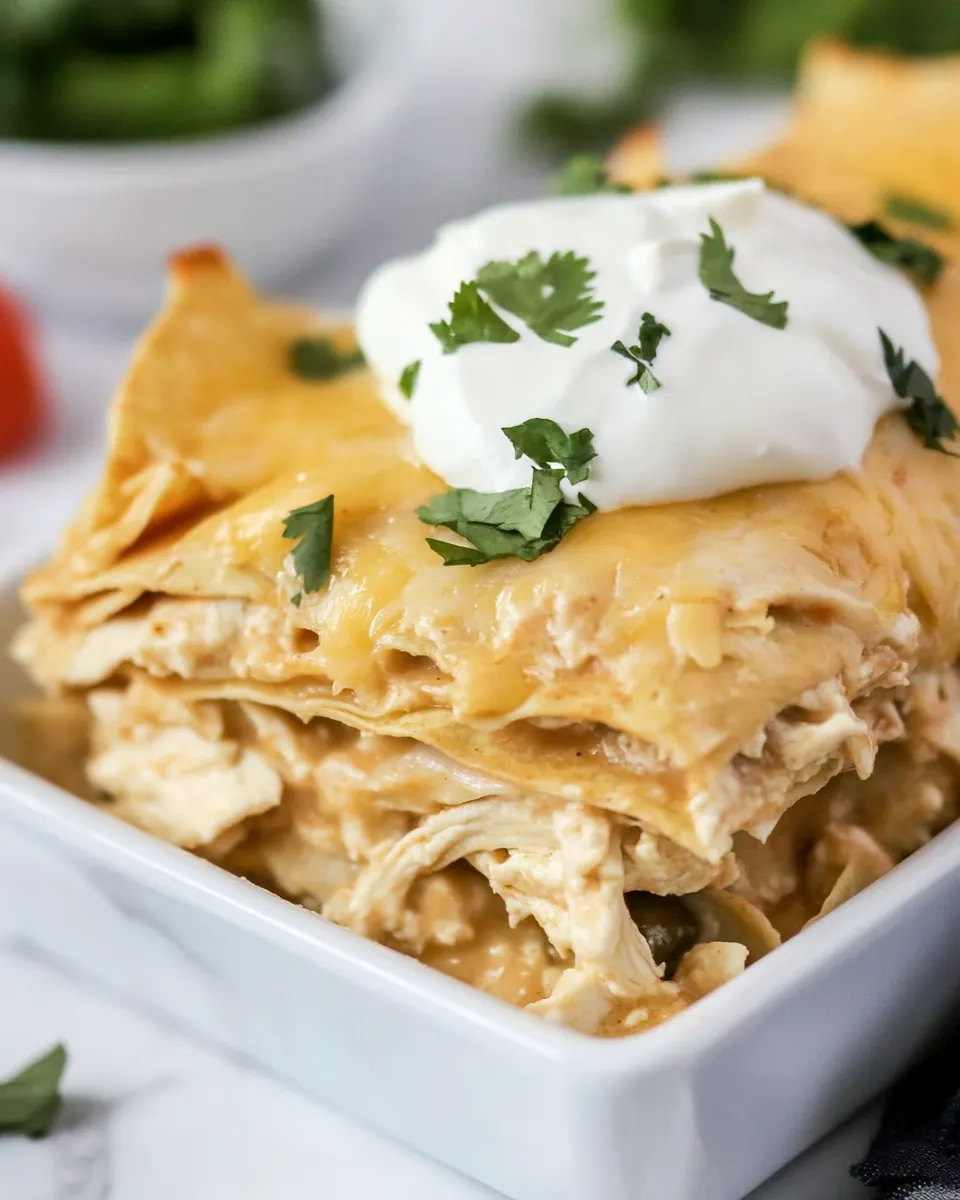
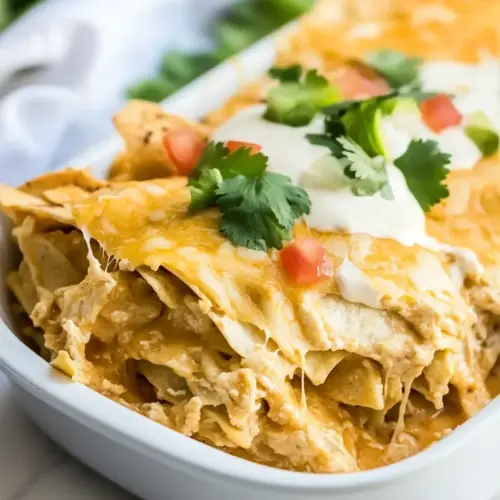
- Cover baking pan with foil and bake for 45 minutes. Allow to cool for approximately five minutes prior to serving. If desired, garnish with tomatoes, green onions, black olives and additional sour cream.: While baking the kitchen will fill with the savory perfume of enchilada sauce and melting cheese . The foil traps steam and helps the layers meld without drying. Letting it rest for about five minutes after baking allows the layers to set so slices hold together cleanly. A typical error is cutting immediately which leads to sloppy portions; be patient and let it rest. If you over bake, the edges may crisp too much, so check for bubbling and golden cheese rather than relying only on the timer.
Tips and Variations
I like to keep a handful of simple variations in my back pocket so the casserole can adapt to what I have on hand and who I am feeding. These tips make assembly easier and enhance flavor without complicating the process.
- Speed Tip: Use rotisserie chicken to cut prep time dramatically and still deliver full flavor, especially on busy weeknights.
- Cheese Choice: Mixing Monterey Jack and Cheddar gives a great melt and flavor contrast, use a Mexican blend if you want a more traditional profile.
- Sauce Balance: Taste your enchilada sauce before assembling, and adjust the taco seasoning in the sour cream mixture so the filling complements rather than competes.
- Assembly Hack: Tear the 6 inch corn tortillas in half for easier layering and more uniform slices when serving.
- Make Ahead: Assemble the casserole and refrigerate unbaked up to 24 hours, then bake covered while guests arrive, it saves time and often improves flavor melding.
- Leftover Strategy: Store baked portions in an airtight container for up to four days, reheat covered in the oven to preserve moisture and texture.
What to Pair With Chicken Enchilada Casserole
This casserole stands well on its own, yet a few simple sides can round out the meal depending on the occasion. For casual family dinners I aim for fresh, crunchy contrasts and a light vegetable to balance the richness. For gatherings I focus on warm, shareable sides that people can graze on alongside the main dish.
- Crisp Green Salad: A simple salad with crisp lettuce and a light vinaigrette brings brightness and textural contrast to the creamy casserole.
- Rice Side: Plain or cilantro lime rice pairs well and helps stretch the meal for larger gatherings, absorbing extra sauce from the casserole.
- Fresh Veggies: Sliced tomatoes, diced onions or a quick pico provide acidity and freshness when served as a topping station next to the casserole.
- Chips and Salsa: Tortilla chips with fresh salsa or guacamole make a fun starter and echo the flavors of the casserole for a cohesive menu.
- Occasion Fit: This dish works for weeknight dinners, potlucks, or any casual celebration, and it reheats reliably for next day meals.
- Storage Tips: Refrigerate leftovers in an airtight container for up to four days, or freeze portions for up to three months, thaw in the fridge overnight before reheating.
- Seasonal Pairing: In cooler months serve with warm sides and hearty salads, while in warmer months opt for lighter, chilled accompaniments to balance the richness.
FAQ
Conclusion
This Chicken Enchilada Casserole stands out for its comforting layers of tender shredded chicken, tangy enchilada sauce, and gooey melted cheese, all held together by corn tortillas. It is dependable for weeknight dinners, great for feeding a crowd, and even better as flavorful leftovers. Give it a try the next time you need a simple, crowd pleasing meal that feels special with minimal effort. I think you will come back to it again and again when you want something warm, satisfying, and reliably delicious.
Chicken Enchilada Casserole
Equipment
- Oven
- 13 x 9 baking pan
- Mixing Bowl
Ingredients
- 4 cooked chicken breasts or thighs pre-made rotisserie chicken works well Shredded or chopped to bite-sized pieces and used as the primary protein, adding savory richness and body to the casserole; pre-cooked options like rotisserie save time and infuse extra flavor.
- 186 inch corn tortillas, torn in half Torn into halves and layered to create the casserole’s structure, providing tender corn texture and absorbing sauce; tearing helps pieces fit evenly and meld with other layers.
- 128 oz can green Chile enchilada sauce Poured generously between layers and over the top to deliver a tangy, mildly spicy sauce that moistens the casserole and binds components together for cohesive servings.
- 16 oz shredded cheese Monterey Jack, Cheddar, Mexican Blend or Colby work well Sprinkled in between layers and melted on top to contribute creamy, gooey richness and a melty, golden finish; choose a blend that complements the enchilada sauce for balanced flavor.
- 8 oz sour cream Folded into the filling or dolloped between layers to introduce creamy tang and to mellow spiciness, helping create a luscious, cohesive texture throughout the casserole.
- 1 -2 tbsp taco seasoning this can be to taste, if your family likes big flavor, go for 2 full tbsp. Seasoned into the shredded chicken or mixed into the sauce to add bold Mexican-inspired flavors; adjust quantity for desired heat and depth of seasoning.
Instructions
- Preheat oven to 350 degrees F. Spray a 13 x 9 baking pan with non-stick cooking spray.: As the oven warms, you will notice a slight dry warmth in the kitchen, a sign the environment is ready to transform the assembled casserole. This step ensures even baking and prevents sticking, helping the bottom layer of tortillas to crisp slightly at the edges while staying tender in the center. If your pan is not well greased, the bottom can cling and tear when serving, so make sure to coat corners and sides. A metal pan heats more quickly than a glass pan, so watch for color differences when it bakes.
- In a medium size bowl, combine sour cream and taco seasoning and mix well. Chop or shred chicken into small pieces. Add to sour cream mixture and stir to combine.: The first sensory cue is the spicy scent of the taco seasoning blooming into the cool tang of the sour cream , creating a fragrant, creamy base. Mixing the chicken in helps the flavors marry so each bite is seasoned, not just the surface. This technique ensures even distribution rather than pockets of blandness. A frequent mistake is using very large chicken pieces, which prevents uniform flavor in every forkful, so shred or chop to small, consistent sizes.
- Pour approximately 1/2 inch of enchilada sauce into the baking dish, making sure to fully cover the bottom of the dish.: When you pour the enchilada sauce you should see a glossy red or green sheen settle across the base, which protects the bottom tortillas from drying and creates a saucy foundation. This coating also helps distribute heat so the bottom layer cooks evenly. Pouring too little can cause sticking and dryness, while too much may make the casserole soupy. Aim for a thin, even coat to strike the right balance.
- Place a layer of tortillas onto the enchilada sauce to cover the bottom of the pan. This will be approximately 6 enchilada pieces.: The visual cue is rectangles overlapping slightly, forming a mostly covered surface. The tortillas should be somewhat saucy but not saturated; they will soften during baking and bind the layers. Proper placement avoids gaps that can lead to uneven structure. If you crowd them or leave big holes, the filling can bubble up and make slices fragile when serving.
- Top with 1/2 the chicken and sour cream mixture, then sprinkle 1/3 of the shredded cheese on top, followed by 1/3 of the remaining enchilada sauce. Repeat for a second layer.: At this moment you will notice the creaminess of the sour cream mix contrasting with the shredded chicken . The cheese adds a salty, fatty note that melts into a cohesive blanket, while the sauce ties everything together. Layering in this order builds balanced bites that are not overloaded with sauce or dry spots. A common misstep is piling too much filling in one layer which makes cutting neat portions difficult, so measure roughly as you go.
- Dip or coat the remaining tortillas with enchilada sauce, then place a final layer on top. If there is any enchilada sauce remaining, drizzle over top. Top with remaining cheese.: When you coat the top tortillas , listen for the soft slosh of sauce as it clings, and see the sauce sheen that will help the final cheese melt into a golden finish. This top layer seals moisture inside and creates a pleasing contrasting texture between the creamy interior and the browned topping. Avoid drowning the top in sauce which can prevent a nicely browned cheese crust; aim for an even light drizzle.
- Cover baking pan with foil and bake for 45 minutes. Allow to cool for approximately five minutes prior to serving. If desired, garnish with tomatoes, green onions, black olives and additional sour cream.: While baking the kitchen will fill with the savory perfume of enchilada sauce and melting cheese . The foil traps steam and helps the layers meld without drying. Letting it rest for about five minutes after baking allows the layers to set so slices hold together cleanly. A typical error is cutting immediately which leads to sloppy portions; be patient and let it rest. If you over bake, the edges may crisp too much, so check for bubbling and golden cheese rather than relying only on the timer.
Notes
- Speed Tip: Use rotisserie chicken to cut prep time dramatically and still deliver full flavor, especially on busy weeknights.
- Cheese Choice: Mixing Monterey Jack and Cheddar gives a great melt and flavor contrast, use a Mexican blend if you want a more traditional profile.
- Sauce Balance: Taste your enchilada sauce before assembling, and adjust the taco seasoning in the sour cream mixture so the filling complements rather than competes.
- Assembly Hack: Tear the 6 inch corn tortillas in half for easier layering and more uniform slices when serving.
- Make Ahead: Assemble the casserole and refrigerate unbaked up to 24 hours, then bake covered while guests arrive, it saves time and often improves flavor melding.
- Leftover Strategy: Store baked portions in an airtight container for up to four days, reheat covered in the oven to preserve moisture and texture.