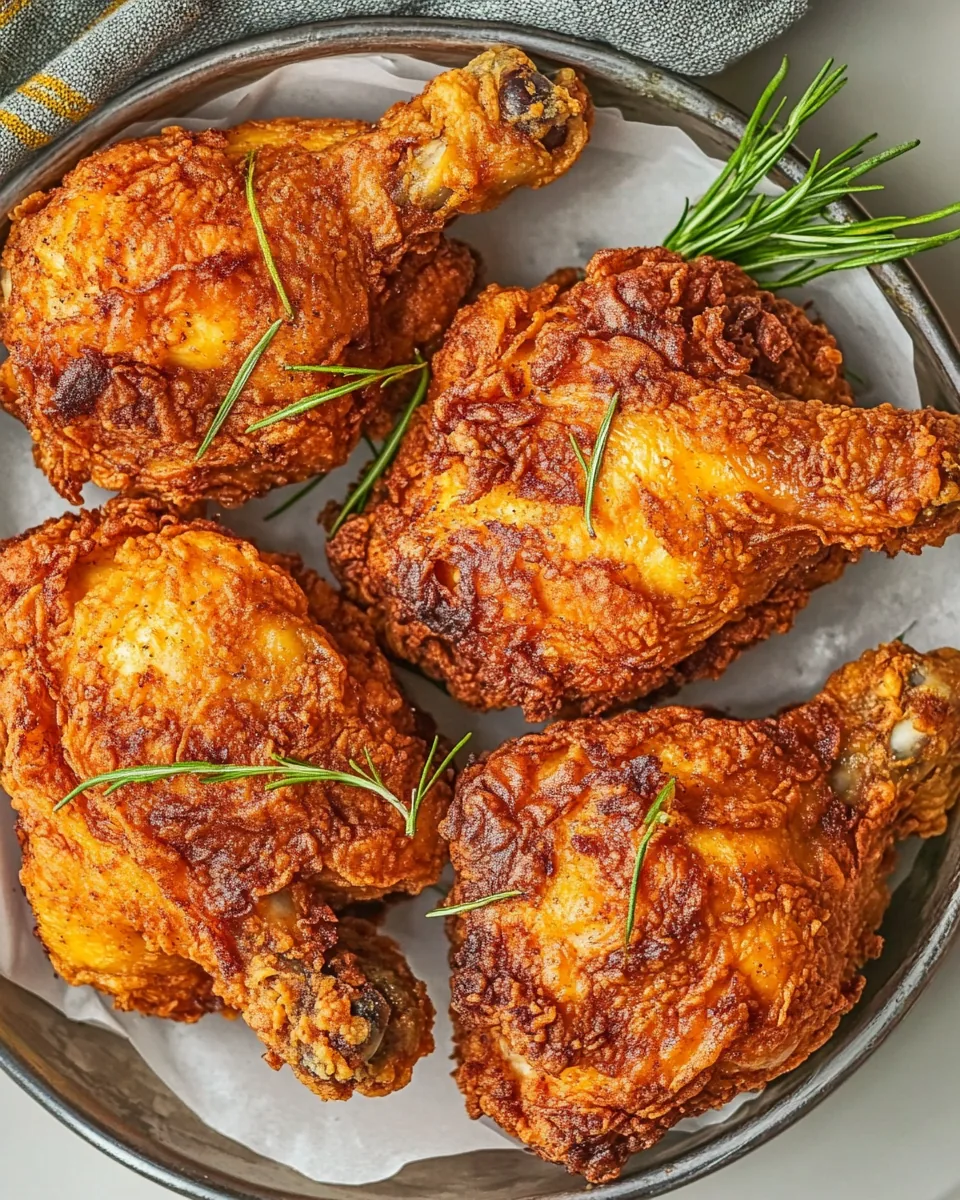
Buttermilk Fried Chicken
There’s something truly magical about a well-made Buttermilk Fried Chicken. Growing up, my Sundays were often filled with the aroma of crispy chicken wafting through the house, teasing my taste buds long before dinner was served. It was a time when the family gathered, laughter echoed, and stories were shared over the table, all while indulging in this incredibly delicious dish. The secret? A buttermilk brine that infuses the chicken with rich flavor and results in that signature crispy skin. When I decided to recreate this cherished memory, I knew I was embarking on a culinary adventure that would not only bring joy to my family but also remind me of the warmth of togetherness.
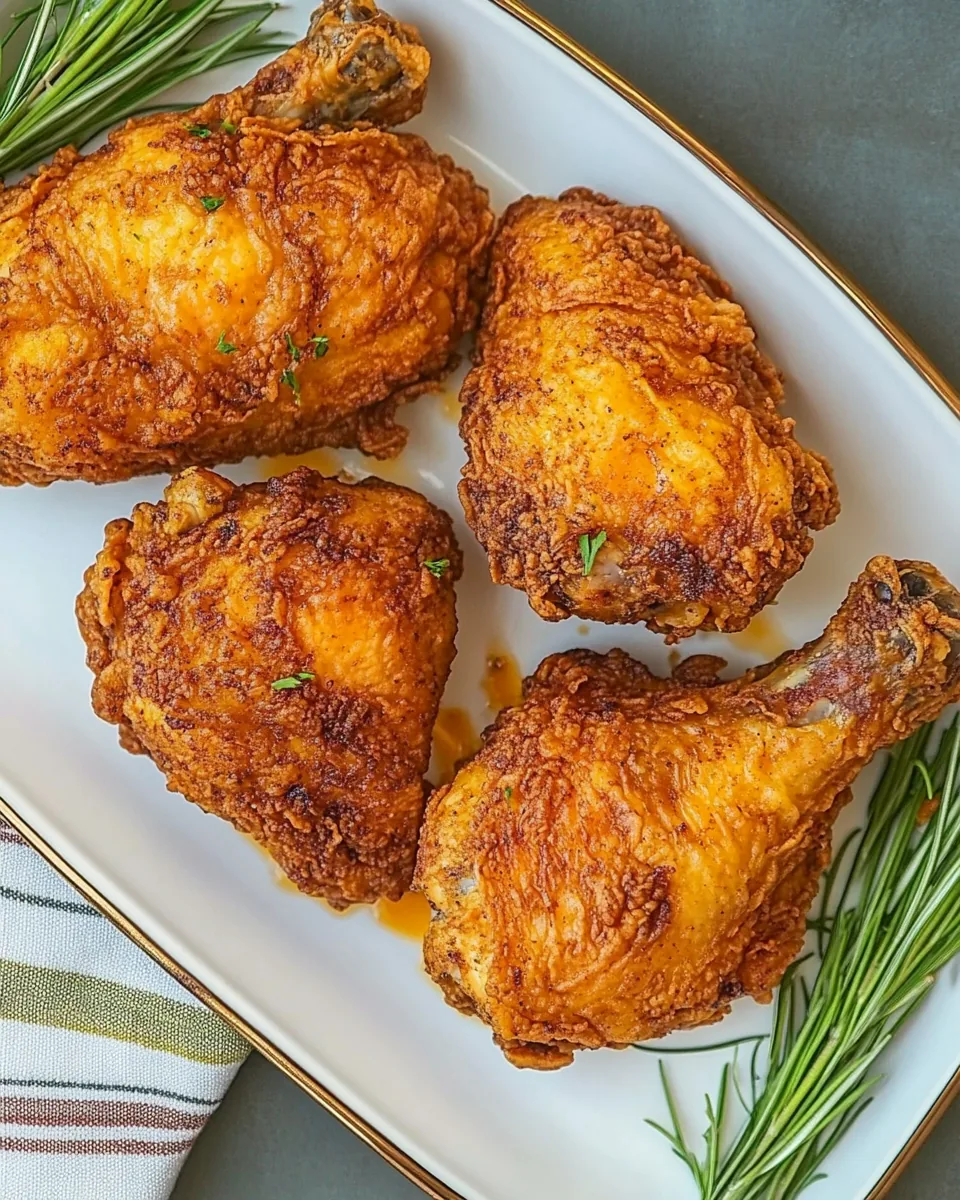
Each bite of Buttermilk Fried Chicken transports me back to those sunny afternoons, where my grandma would share her tips and tricks with me, ensuring I mastered the art of frying chicken. The golden-brown exterior, a testament to patience and care, provides a satisfying crunch, while the tender meat inside reveals the magic of the brine. It’s not just a meal; it’s a tradition infused with love, and I can’t wait for you to experience it too.
Whether it’s a family gathering, a picnic, or just a simple dinner at home, Buttermilk Fried Chicken is an easy crowd-pleaser that never fails to impress. So roll up those sleeves, gather your ingredients, and let’s dive into creating something truly special together. You’ll find that this dish not only fills your stomach but also nourishes your soul.
Recipe Snapshot
60 mins
30 mins
30 mins
Medium
460 kcal
32 g
Paleo, Whole30, Vegan
29 g
Grater, Mixing Bowl, Skillet, Chef’s Knife, Large Pot, Food Processor, Oven
Why This Buttermilk Fried Chicken Shines
Flavorful Brine
The brining process is essential for achieving that juicy flavor in Buttermilk Fried Chicken. By soaking the chicken in a mixture of buttermilk and spices, you allow the flavors to penetrate deep into the meat, ensuring every bite is infused with deliciousness.
Perfectly Crispy Texture
Frying the chicken to golden perfection results in a satisfying crunch that contrasts beautifully with the tender meat inside. The double-dipping technique in flour creates an extra layer that enhances the overall eating experience.
Tradition and Comfort
This dish is steeped in tradition, often making its way to family gatherings and celebrations. It’s not just about the food; it’s about the memories created around the table as loved ones enjoy a meal together.
Versatile Serving Options
Buttermilk Fried Chicken can be served in numerous ways – as the star of a juicy sandwich, alongside classic sides like mashed potatoes, or as part of a picnic spread. Its versatility makes it suitable for any occasion.
Healthier Cooking Options
While frying is traditional, this recipe can easily be adapted to healthier cooking methods, such as baking or air frying, without sacrificing too much of that crispy goodness.
Family Bonding
Cooking Buttermilk Fried Chicken can be a wonderful bonding experience with family. Involve your kids in the process, from marinating the chicken to frying it up; it’s a great way to teach them kitchen skills while creating lasting memories.
What You’ll Need for Buttermilk Fried Chicken
Gathering the right ingredients is pivotal in creating a memorable Buttermilk Fried Chicken. Each component plays a critical role in building flavor and texture. The star, of course, is the chicken, which benefits immensely from the buttermilk brine. The spices and herbs not only enhance the taste but also create an aromatic experience that fills the kitchen. Let’s take a look at what you’ll need to bring this dish to life!
- 8 cups cold water – Provides the base for the brine.
- ½ cup kosher salt – Essential for seasoning and brining.
- 1 lemon, grated zest & sliced – Adds a bright, fresh flavor to the brine.
- 6 bay leaves – Introduces a subtle herbal note.
- 1 tablespoon black peppercorns – Enhances the dish with a peppery kick.
- ¼ cup flat-leaf parsley – Fresh herbiness for a vibrant touch.
- 2 sprigs rosemary – Adds a fragrant, woody aroma.
- 4 sprigs thyme – Complements the other herbs and enriches the brine.
- 3 tablespoons honey – Balances the saltiness with a hint of sweetness.
- 1 head garlic, skin left on and cloves smashed – Infuses deep, savory flavor.
- 10 pieces chicken, skin-on and bone-in (whole breast cut in half) – The main ingredient for frying.
- 2 cups all-purpose flour – Forms the crispy coating.
- 1½ tablespoons garlic powder – Adds depth of flavor to the flour mixture.
- 1½ tablespoons onion powder – Enhances the savory profile.
- 1½ teaspoons sweet paprika – Provides color and a touch of sweetness.
- 1½ teaspoons cayenne pepper – Adds a nice kick.
- 1 teaspoon kosher salt – To season the flour mixture.
- ½ teaspoon freshly ground black pepper – For additional seasoning.
- 1 quart buttermilk – Essential for marinating and flavoring the chicken.
- 10 cups peanut oil – Required for frying, ensuring a crispy finish.
How to Prepare Buttermilk Fried Chicken
Now that we have our ingredients ready, it’s time to dive into the cooking process. Making Buttermilk Fried Chicken is a labor of love that requires attention to detail, but the results are absolutely worth it. Follow these steps closely for the best outcome!
- First, in a large pot, combine the cold water, kosher salt, lemon zest and slices, bay leaves, black peppercorns, parsley, rosemary, thyme, honey, and smashed garlic. Bring this mixture to a boil over medium heat, stirring occasionally to dissolve the salt completely. This brine will keep your chicken juicy.
- Once the brine has come to a boil, let it boil for one minute, then remove it from the heat and allow it to chill completely. You can speed up the chilling process by placing it in the refrigerator.
- When the brine is chilled, add the chicken pieces, ensuring they are fully submerged. Cover the pot and let the chicken brine for up to 8 hours. Remember, do not brine longer than this to avoid overly salty chicken!
- After 8 hours, carefully transfer the chicken pieces to a paper towel-lined plate. Pat them completely dry with additional paper towels to remove excess moisture; this step is crucial for crispiness.
- Allow the chicken to rest at room temperature for about 1 hour. This helps to bring it to a more even temperature and aids in frying.
- While the chicken is resting, prepare your dredging station. In one bowl, mix together the all-purpose flour, garlic powder, onion powder, paprika, cayenne, kosher salt, and freshly ground black pepper. Divide this mixture into two bowls for double-dipping later.
- In a third bowl, pour in the buttermilk. Set this bowl between the two bowls of flour mixture for easy access.
- Next, in a large Dutch oven, heat the peanut oil over medium-high heat until it reaches 330 degrees Fahrenheit. Use a thermometer to monitor the temperature closely, as this is vital for frying.
- Before frying, dip the chicken legs and thighs first into the flour mixture, then into the buttermilk, and back into the second bowl of flour mixture. This double-dipping technique creates that famed crispy crust.
- Carefully place only 3-4 pieces of chicken into the hot oil at a time, ensuring not to overcrowd the pot. Fry the chicken for about 10 to 13 minutes, or until it reaches a golden brown color and the internal temperature registers between 175 to 180 degrees Fahrenheit. Keep an eye on the oil temperature, adjusting the heat as necessary to maintain around 325 degrees Fahrenheit.
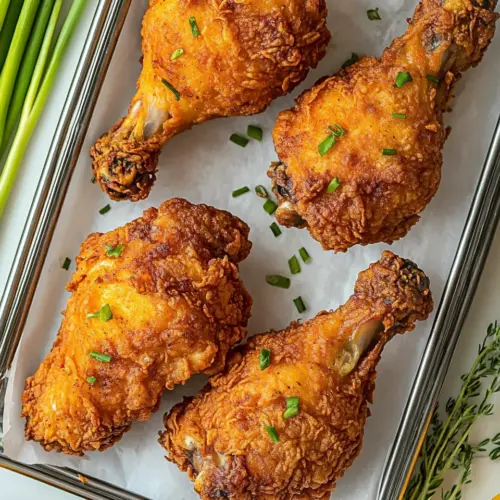
- Once the dark meat is cooked, transfer it skin-side up to a cooling rack placed over a baking sheet. Lightly sprinkle with coarse salt to enhance the flavor.
- Repeat the frying process with the chicken wings and breasts, frying them for about 7 minutes or until they reach an internal temperature of 170 degrees Fahrenheit. Transfer to the cooling rack and again sprinkle lightly with salt.
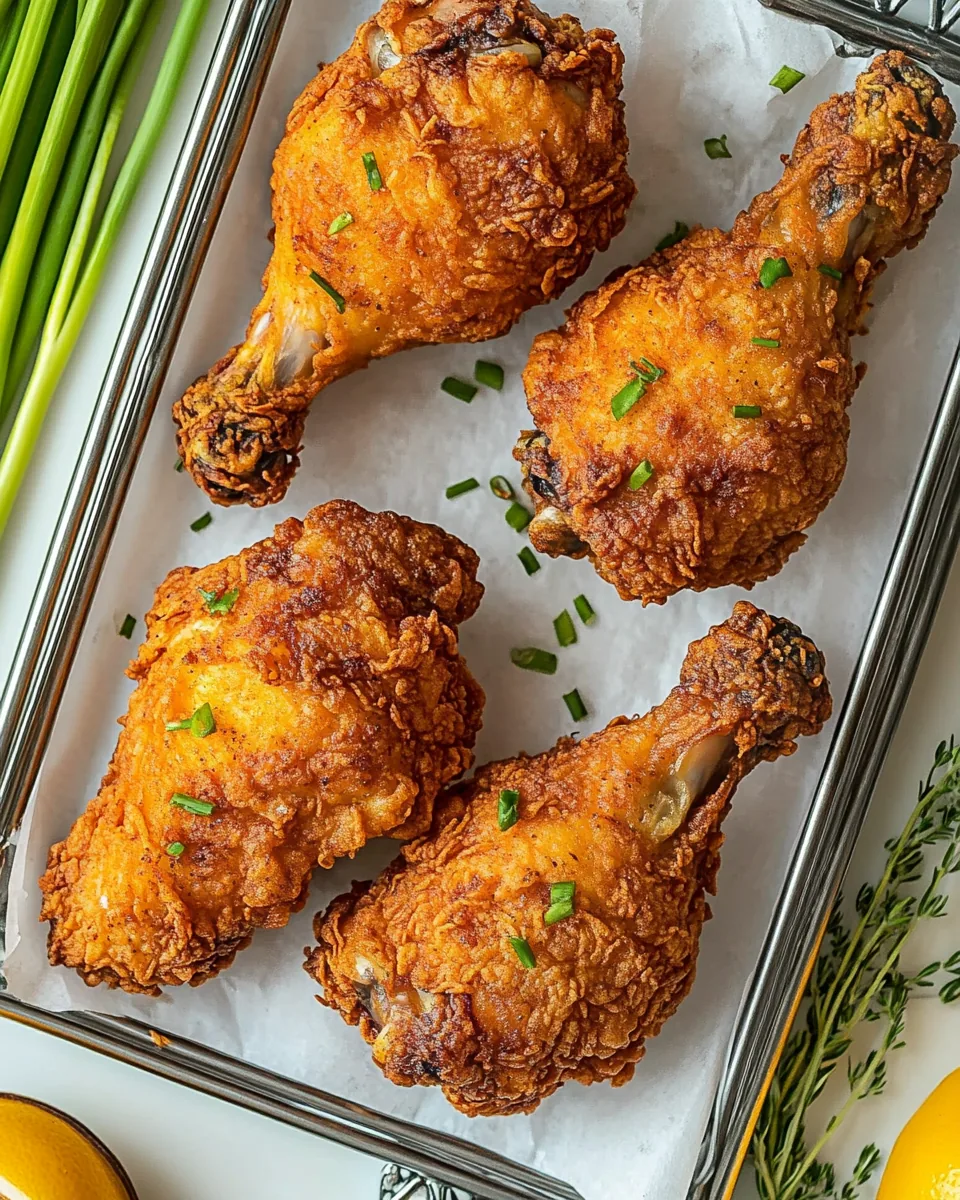
- For an added touch, toss the herb sprigs into the hot oil and cook until they are crisp. This will serve as a beautiful garnish.
- Finally, serve the Buttermilk Fried Chicken on a large tray with the crispy herbs on top. Enjoy the best fried chicken of your life!
Things Worth Knowing
- Brining is Key: The brining process not only enhances flavor but also ensures the chicken remains juicy during frying.
- Oil Temperature: Maintaining the right oil temperature is crucial for achieving a crispy exterior without burning the chicken.
- Don’t Overcrowd: Frying in small batches prevents the oil temperature from dropping, leading to a better fry.
- Resting Time: Allowing the chicken to rest after frying helps the juices redistribute for optimal tenderness.
Helpful Hints
Cooking Buttermilk Fried Chicken can be a fun and rewarding experience. Here are some helpful tips to ensure your chicken turns out perfectly every time:
- Storage: Store leftovers in an airtight container in the fridge for up to three days. Reheat in the oven to keep the skin crispy.
- Freezing: You can freeze leftover fried chicken for up to three months. Make sure to wrap it tightly to avoid freezer burn.
- Pairing: Serve your fried chicken with classic sides like coleslaw, mashed potatoes, and cornbread for a complete meal.
- Serving: Buttermilk Fried Chicken is perfect for summer barbecues, picnics, or family gatherings.
- Variations: Experiment with different spices and herbs in your brine or flour mixture to create unique flavors.
How to Enjoy Buttermilk Fried Chicken
Enjoying your homemade Buttermilk Fried Chicken can be as delightful as making it. Here are some ideas for serving and enjoying this dish:
- Picnic Perfection: Pack the chicken for a fun day out. It tastes great cold or at room temperature, making it perfect for outdoor gatherings.
- Family Dinners: Serve the fried chicken with sides like collard greens, cornbread, or baked mac and cheese for a comforting meal.
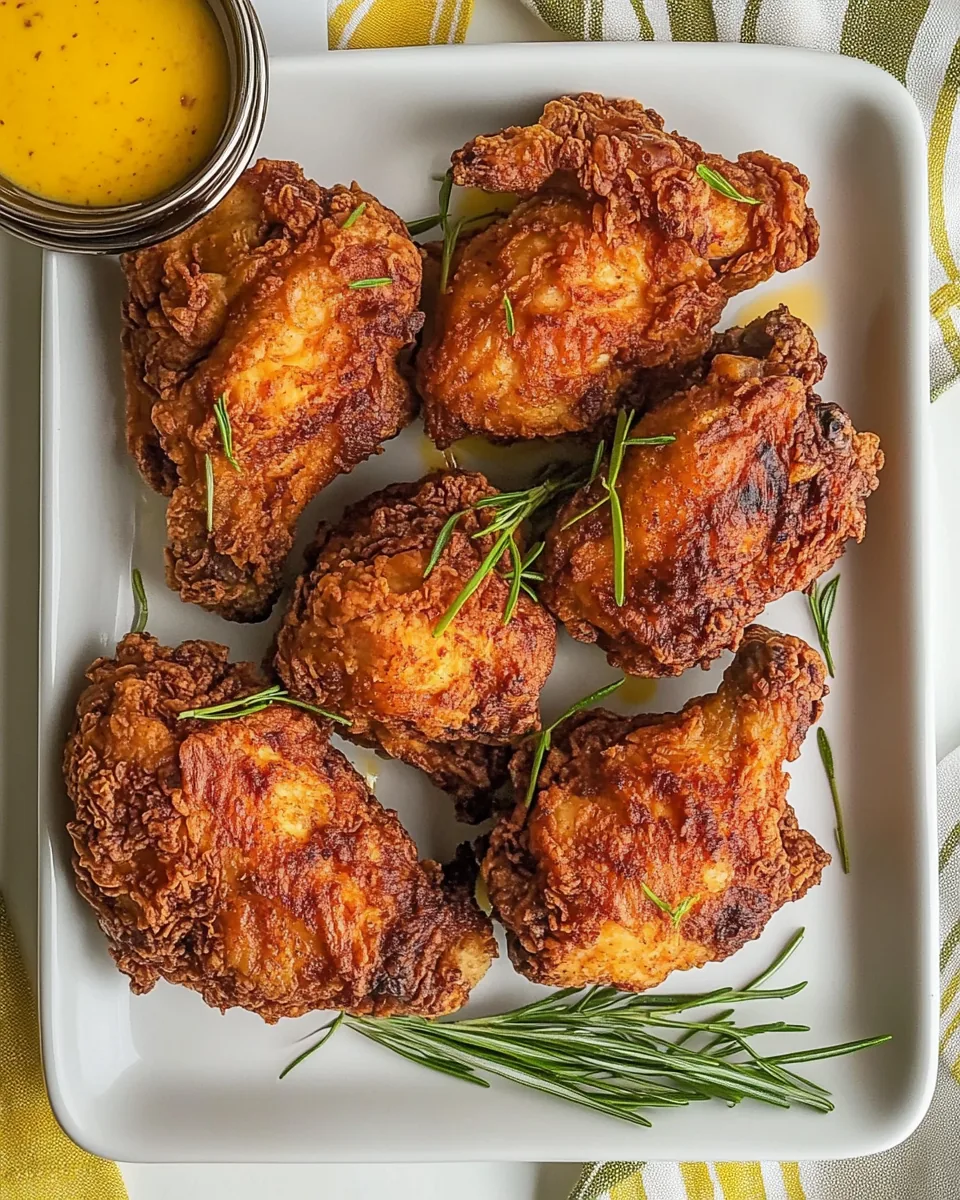
- Party Platter: Create a platter with pieces of fried chicken alongside dipping sauces, fresh veggies, and biscuits for an impressive appetizer spread.
- Casual Lunch: Make a fried chicken sandwich with fresh lettuce, tomato, and your favorite sauce for a quick and satisfying lunch.
- Seasonal Sides: Pair the chicken with seasonal vegetables like roasted corn in the summer or creamy mashed potatoes in the winter.
FAQ
Conclusion
The Buttermilk Fried Chicken recipe is truly special because it encapsulates a sense of home and togetherness, delivering a dish that is both comforting and delicious. I encourage you to try making this recipe and experience the joy it brings to your kitchen and your loved ones. It’s not just about the food; it’s about creating memories that last a lifetime.
Buttermilk Fried Chicken
Equipment
- Grater
- Mixing Bowl
- Skillet
- Chef's Knife
- Large Pot
- Food Processor
- Oven
Ingredients
- 8 cups cold water
- ½ cup kosher salt
- 1 lemon, grated zest & sliced
- 6 bay leaves
- 1 tablespoon black peppercorns
- ¼ cup flat-leaf parsley
- 2 sprigs rosemary
- 4 sprigs thyme
- 3 tablespoons honey
- 1 head garlic, skin left on and cloves smashed
- 10 pieces chicken, skin-on and bone-in (whole breast cut in half)
- 2 cups all-purpose flour
- 1½ tablespoons garlic powder
- 1½ tablespoons onion powder
- 1½ teaspoons sweet paprika
- 1½ teaspoons cayenne pepper
- 1 teaspoon kosher salt
- ½ teaspoon freshly ground black pepper
- 1 quart buttermilk
- 10 cups peanut oil
Instructions
- Place all brine ingredients in a pot and bring to a boil. Boil 1 minute or until the salt dissolves, then chill completely.
- When the mixture has chilled, add the chicken pieces and brine for 8 hours. Do NOT brine more than 8 hours or the chicken could be too salty.
- After 8 hours, transfer the chicken pieces to a paper towel-lined plate and pat completely dry with other paper towels. Allow the chicken to rest at room temperature for 1 hour before deep frying and while prepping to cook.
- Mix together flour, garlic powder, onion powder, paprika, cayenne, salt & pepper. Divide the flour mixture into 2 bowls.
- Place the buttermilk in a third bowl and set it between the bowls with the flour mixture.
- Preheat the oil, in a large Dutch oven, to 330 degrees F. Immediately before frying, dip the chicken legs and thighs (dark meat) into the flour mixture, the buttermilk and then the 2nd flour mixture.
- Fry 10-13 minutes until golden brown, and the internal temperature is 175-180 degrees F. (The temperature of the oil will decrease so adjust the heat to keep the oil at 325.)
- Place only 3-4 chicken pieces in the pot – do NOT overcrowd the pot. The chicken will be cooked in batches.
- When chicken is cooked through, transfer it (skin-side up) to a cooling rack placed over a baking sheet and sprinkle lightly with coarse salt.
- Repeat the process with the wings and breasts (white meat). Fry 7 minutes (depending on the size of the breasts) until internal temperature is 170 degrees F. Transfer the chicken to a cooling rack and sprinkle it lightly with coarse salt.
- While the chicken rests, add the herb sprigs to the hot oil and cook until crisp. Serve the chicken on a large tray and garnish it with crisp herbs.
- Per Thomas Keller (and me), ENJOY the best fried chicken of your life!
Notes
- Tip: For best result, if buying a whole fryer chicken, buy one smaller than 4 lbs to ensure the pieces don’t get too brown before cooking through.