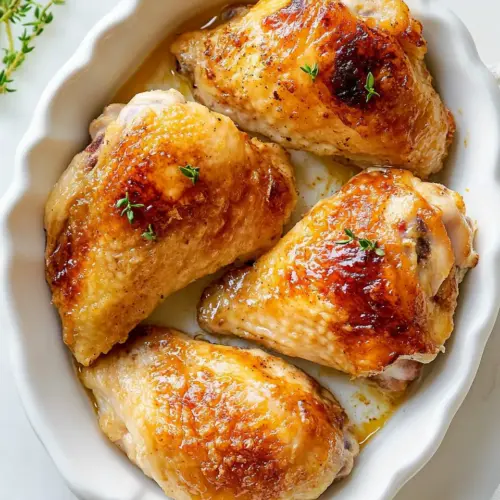
Butter Baked Chicken
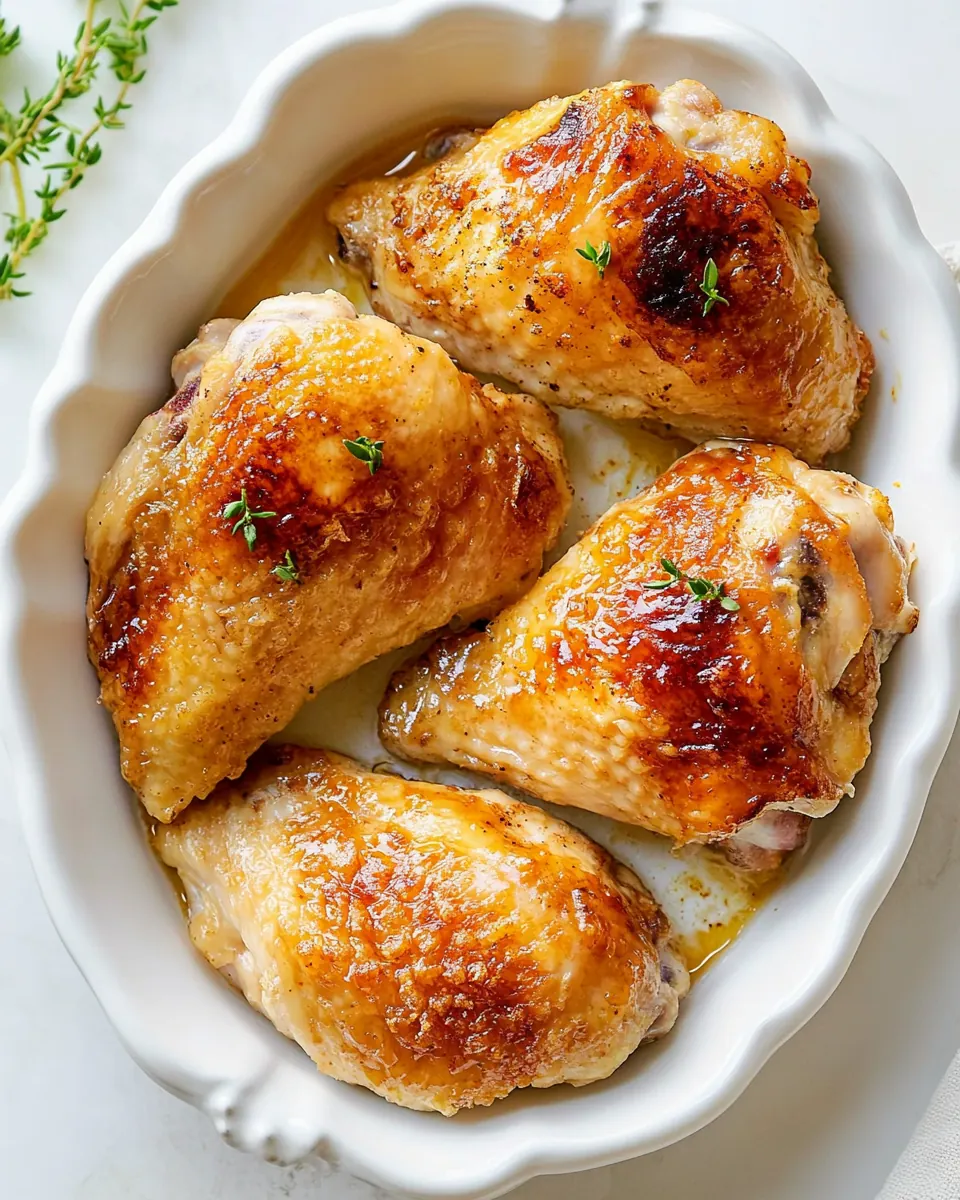
Butter Baked Chicken has been one of those recipes I reach for when I want comfort with very little fuss. The first time I made it I was running late for dinner and had a craving for something rich, homey, and reliably tender, and this simple approach delivered exactly that: juicy chicken finished in a buttery pool that kept each bite unctuous and satisfying. I remember the soft hiss as the butter melted, the warm savory aroma filling the kitchen, and how everyone at the table paused for that first mouthful.
Over the years I have tweaked nothing more than my timing and the size of the butter pieces, because the beauty of Butter Baked Chicken is its friendly straightforwardness. It doesn’t demand exotic ingredients, and it rewards patience in the oven. I often make it on chilly evenings when the house begs for a cozy meal that feels like a small celebration. Once, when a friend arrived unexpectedly, I slid the dish into the oven and we had dinner before we knew it, talking until the last forkful was gone.
I like how this recipe encourages you to trust simple techniques. A light flour coating and the addition of a milk solution around the chicken create a moist environment that produces a tender interior and a delicately seasoned crust. The butter on top melts and bastes the meat while the oven does the rest, yielding both flavor and comfort. I love serving it with plain steamed vegetables or a quick salad so the buttery juices can shine.
Recipe Snapshot
60 mins
15 mins
45 mins
Medium
400 kcal
American
Gluten-Free, Low FODMAP
Dinner
Baking dish, Mixing bowl, Instant read thermometer, Aluminum foil
Why This Butter Baked Chicken Is a Winner
Simple but dramatic results
I adore that Butter Baked Chicken turns pantry staples into a dish that feels elevated. With minimal hands on time you get a result that looks and tastes like you spent hours preparing it. That contrast between ease and impact is a reason I cook it when I want food that impresses without stress.
Reliably tender texture
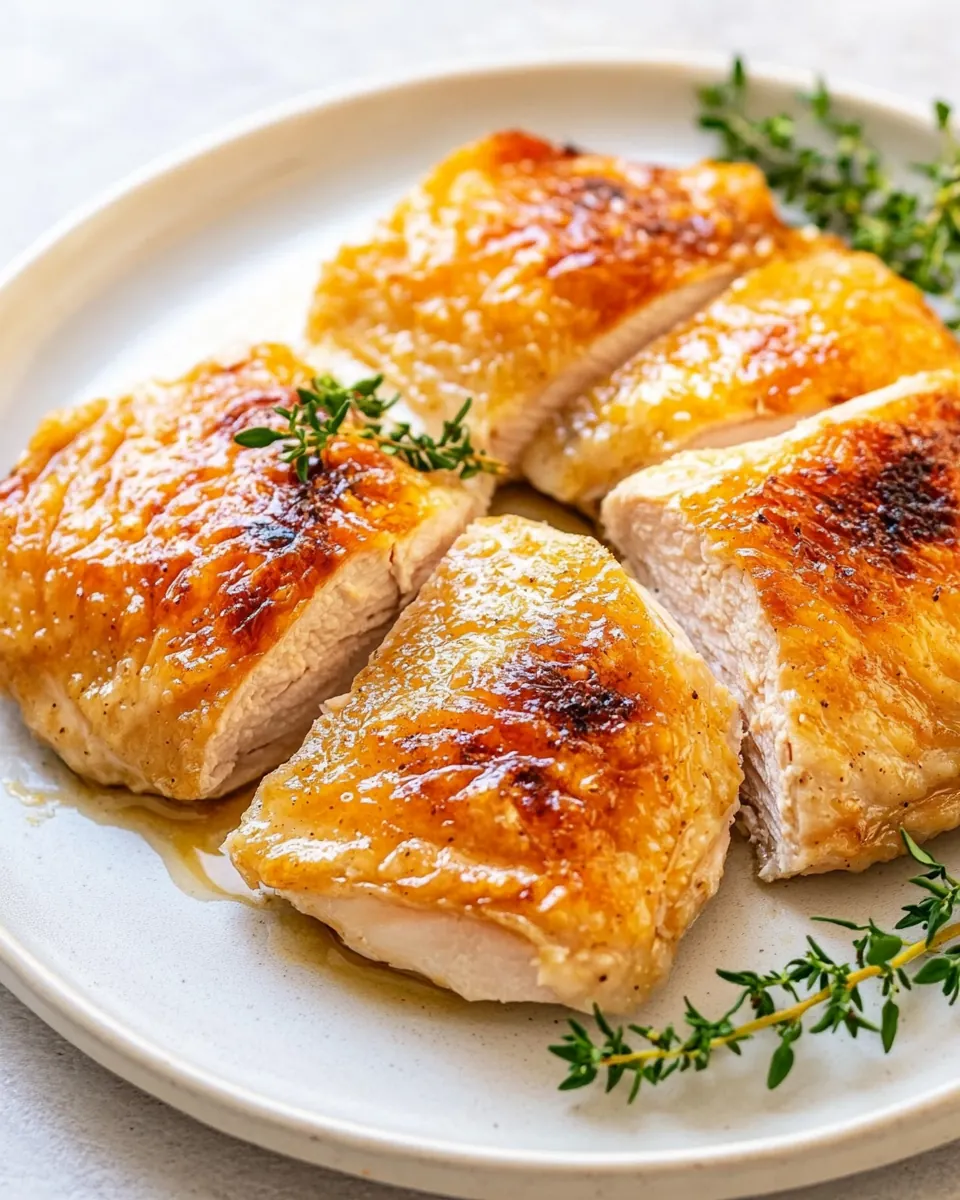
One reason this recipe stands out is how the combination of a light flour coating and the added milk solution creates a humid bake environment. I can always count on the chicken to come out moist, never dry. The butter on top helps baste the meat as it cooks, yielding tender, juicy slices that hold together well for plating.
Comforting buttery flavor
The flavor profile leans on the rich, familiar taste of butter, complemented by simple seasonings like paprika and black pepper. I find that these tastes are universally appealing, making it a reliable crowd pleaser. I often get requests to bring it to potlucks because it satisfies without being fussy.
Accessible ingredients and technique
I love recommending recipes people can actually make tonight. The ingredients are things most cooks have on hand, so there is no need for a special grocery run. The technique is forgiving, which is great for busy weeknights or cooks who are new to roasting. If you follow temperature cues and timing, the method practically sets you up for success.
Adaptable to different meals
Finally, Butter Baked Chicken fits many occasions. It works for a simple family dinner or a slightly elevated weekend supper. I often tweak the serving accompaniments to suit the season, and the core method remains unchanged, which makes it one of my most versatile recipes.
Ingredients to Make Butter Baked Chicken
These ingredients form a tight, purposeful ensemble, each playing a clear role in texture and flavor. The light dusting of flour creates a subtle coating that helps seasoning cling, while the seasonings themselves add savory depth. The butter is the star for richness and basting, and the dry milk with hot water forms a milky bath that keeps the meat moist. Together they produce a tender, flavorful bake that is simple yet satisfying.
- 1 pound boneless skinless chicken breasts(*): Tenderize and provide the main protein base for the dish; chicken breasts cook quickly and absorb surrounding flavors. Slice or pound to even thickness for uniform baking and ensure internal temperature reaches 165°F for safety. Pair with butter and seasonings to keep meat moist and flavorful throughout baking.
- 1/2 cup all-purpose flour: Create a light coating that helps seasonings and butter adhere while promoting a crisp outer texture when baked. Flour also helps thicken any pan juices into a subtle sauce as it combines with melted butter. Use even dredging and shake off excess to avoid a heavy, gummy crust.
- 1 1/2 teaspoons kosher salt: Season the chicken and flour coating to enhance natural flavors and provide balanced savory notes. Kosher salt draws out moisture from the surface to help create a better sear and improved texture during baking. Adjust to taste but keep consistent distribution for even seasoning.
- 1/2 teaspoon ground paprika: Contribute a warm, slightly sweet peppery note that complements savory elements and adds color to the crust. Paprika helps round out the spice profile without adding heat, working well with butter to create an appealing browned surface. Use sparingly to avoid overpowering delicate chicken flavor.
- 1/4 teaspoon herbs de Provence: Introduce a fragrant, aromatic blend of dried Provencal herbs that adds floral and savory complexity to the dish. Herbs de Provence pairs with butter to create a nuanced herbaceous crust and enhances roasted chicken aroma. Sprinkle evenly to distribute subtle Mediterranean notes throughout.
- 1/4 teaspoon ground black pepper: Provide a sharp, earthy undertone that enhances overall seasoning depth and balances richer ingredients like butter. Ground black pepper adds mild heat and complexity when combined with salt and paprika. Use freshly ground for best aroma and a brighter flavor profile.
- 1/4 cup unsalted butter(**): Contribute richness and moisture, melting into the flour coating to create a tender, luscious texture and golden-brown crust. Unsalted butter allows precise control over final seasoning while adding a creamy, slightly nutty flavor when baked. Ensure butter is distributed or melted evenly to baste chicken during baking.
- 1/2 cup dry milk powder(***): Add concentrated dairy solids that boost creaminess and body in the pan sauce while contributing mild milky flavor and slight thickening. Dry milk powder helps create a richer mouthfeel when rehydrated by hot water and combined with melted butter. Sprinkle into the flour mixture or dissolve to integrate smoothly.
- 1 1/2 cups hot water: Rehydrate dry milk powder and help create a cohesive sauce or glaze that melds butter and seasonings into a basting liquid. Hot water activates powdered dairy and loosens pan ingredients, aiding even coating and moisture retention during baking. Use carefully to avoid making the mixture too thin.
Recipe Steps for Butter Baked Chicken
This method is straightforward and comforting, and the oven does most of the work. I find that taking a few measured actions up front, like coating and placing butter squares, improves the final texture and presence of the finished dish. Below I expand each direction into detailed, sensory rich guidance so you know exactly what to look and listen for while cooking.
- Preheat oven to 350℉ and lightly grease a baking dish.: You will notice the smell of warm metal as the oven comes to temperature, and preheating ensures even cooking throughout the chicken . Using a lightly greased dish helps the crust release cleanly when plated, avoid sticking that can tear the meat. If the oven is not fully preheated you may face uneven cooking and a longer overall time, so always wait until it reaches 350℉ before inserting the dish. A common mistake is placing the pan into a lukewarm oven, which changes timing and texture.
- Dip the chicken breasts in water and shake off the excess.: The water helps the flour and seasoning adhere, and you should hear a faint slap as excess drips away before coating. This creates a thin layer that binds the flour mixture to the surface, improving crust formation. If too much water remains, the flour can clump and create a pasty coating, so shake well. Avoid leaving the breasts soaking, which can dilute seasoning and alter texture.
- Combine the flour and seasonings, then coat the chicken with the flour mixture.: When you mix the all purpose flour , kosher salt, paprika, herbs de Provence, and black pepper you will smell the spice medley come alive, and the pale flour will take on warm hues. Coating each breast evenly ensures every bite gets flavor and a pleasant exterior texture. Tap off excess flour so the coating is light, this prevents a gummy crust. A typical error is overcoating which results in a heavy, chalky exterior rather than a delicate crust.
- Place chicken breasts into the prepared baking dish.: Arrange the breasts with space around each piece so heat circulates and the surface can brown slightly. You might hear a soft sizzle as the warm pan accepts the meat, and visually the coated breasts will glisten faintly from the water left in the coating. Crowding leads to steaming and uneven browning, so give them room. If one breast is much thicker than another, it may need extra time or light pounding to even thickness.
- Cut the butter into small squares and arrange on top of the chicken.: As the butter melts it will baste the top of each breast, producing glossy, golden pockets of flavor. Small squares melt more evenly than one large slab, and the aroma of butter warming against the seasoned flour is deeply appealing. If you place the pieces too close together they may pool excessively in one area, so space them for even distribution. Using cold, hard butter without softening slightly can make cutting difficult; let it sit briefly to ease slicing.
- Bake in the preheated oven for 15 minutes.: After this initial bake you will notice the butter beginning to melt and the edges of the coated surface starting to firm and take on a faint golden tone. This short burst begins the cooking process and helps set the exterior before adding the milk solution. Opening the oven prematurely can drop temperature and extend cook time, so try to avoid peeking. A common misstep here is assuming the meat is done after this phase, it is only the first stage of cooking.
- Combine dry milk powder and hot water in a bowl. Pour the milk around the chicken.: Stir until the powder disappears and you have a smooth, warm milky liquid, which will steam in the oven and keep the chicken moist. You should see a gentle swirl as you pour the liquid around the breasts, not over them, creating a shallow bath that will simmer quietly. If the powder is not fully dissolved you may feel a gritty texture on tasting, so whisk thoroughly. Avoid pouring too much liquid on top of the breasts, which can wash away the coating instead of surrounding it.
- Cover with aluminum foil and return to oven.: Covering traps steam and encourages gentle, thorough cooking, which maintains tenderness. As the foil seals, you may hear faint bubbling from the milk bath and smell the meld of butter and seasonings intensify. Leaving it uncovered at this stage risks drying the tops and burning the butter, so tent the foil securely. A common error is sealing too tightly and not allowing any steam escape, which can lead to an overly soggy texture in some ovens.
- Bake at 350℉ for 30-40 more minutes, or until internal temperature reaches 165℉. Enjoy!: During this longer baking window the kitchen fills with a deep savory aroma and the milk bath will barely shimmer as it simmers. Use an instant read thermometer to confirm the thickest part of the chicken reads 165 degrees for safe, juicy results. If you skip the thermometer you risk undercooking or overcooking; visual clues like clear juices and a firm but springy texture help, but the check with temp is best. Avoid letting it go much beyond the target temperature, which can dry the meat and dull the buttery finish.
Tips and Variations
This dish responds well to small adjustments while keeping the core technique intact. Below are practical tips and variations that I use to tailor the meal for taste, timing, and presentation.
- Space and size matter, arrange the breasts with room between them so heat circulates, which promotes even cooking and avoids steaming the surface.
- Butter portions, cut the butter into uniform small squares so each piece melts at the same pace and bastes the meat evenly, creating balanced flavor.
- Seasoning distribution, mix the dry seasonings into the flour thoroughly so every bite contains an even amount of salt and spice, preventing pockets of blandness or over seasoning.
- Milk bath consistency, dissolve the dry milk powder fully in hot water until smooth to form a gentle steamy environment, which helps maintain moisture and tenderness.
- Check temperature, rely on an instant read thermometer for precision timing and juicy results, rather than guessing by color alone, which can be unreliable.
- Foil tenting, cover the dish after adding the milk to trap steam, then remove near the end if you want a slightly drier top, balancing moisture and texture.
What Goes Well With This Butter Baked Chicken
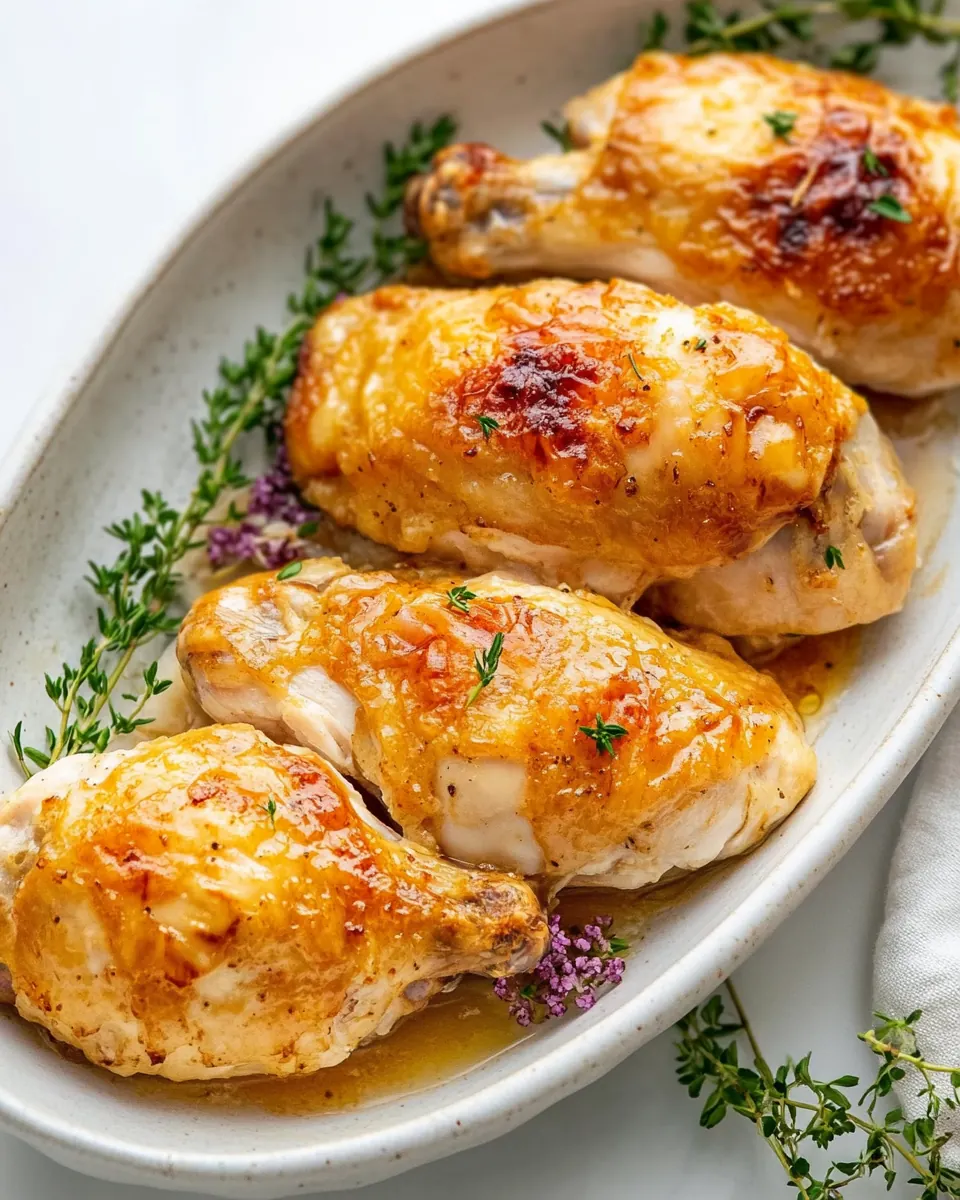
This recipe pairs easily with simple sides and suits both casual dinners and small celebrations. I like to match textures and flavors that let the buttery pan juices shine, and to choose sides that contrast with the rich meat. Below are serving ideas, storage tips, and occasion suggestions that help present this dish at its best.
- Steamed vegetables, such as green beans or broccoli, offer a fresh, crisp contrast to the rich, buttery chicken, balancing the plate with bright color and light texture.
- Simple rice or couscous, grains absorb the buttery pan juices beautifully and make an easy, comforting accompaniment for weeknight dinners or casual gatherings.
- Light green salad, a salad with a tangy vinaigrette cuts through the richness and refreshes the palate, especially when you want a lighter meal.
- Occasions, this dish suits winter dinners, cozy family meals, or a low fuss weekend supper when you want something satisfying without elaborate prep.
- Storage, refrigerate leftovers in an airtight container for up to three days, and reheat gently in a low oven to preserve moisture; avoid high heat which can dry the meat.
- Seasonal pairings, in winter I serve heartier sides like roasted root vegetables, while in milder months I choose brighter salads to complement the buttery flavors.
FAQ
Conclusion
Butter Baked Chicken is special because it uses simple pantry ingredients and an easy technique to produce reliably tender, buttery chicken that feels like comfort food with minimal effort. The method balances a light seasoned crust with a milky butter bath so each bite stays moist and flavorful. Give it a try on a busy weeknight or a relaxed weekend supper, and notice how little fuss delivers big, satisfying results. I hope it becomes one of your go to meals when you want something approachable yet impressive.
Butter Baked Chicken
Equipment
- Baking Dish
- Mixing Bowl
- Instant read thermometer
- Aluminum Foil
Ingredients
- 1 pound boneless skinless chicken breasts(*) Tenderize and provide the main protein base for the dish; chicken breasts cook quickly and absorb surrounding flavors. Slice or pound to even thickness for uniform baking and ensure internal temperature reaches 165°F for safety. Pair with butter and seasonings to keep meat moist and flavorful throughout baking.
- 1/2 cup all-purpose flour Create a light coating that helps seasonings and butter adhere while promoting a crisp outer texture when baked. Flour also helps thicken any pan juices into a subtle sauce as it combines with melted butter. Use even dredging and shake off excess to avoid a heavy, gummy crust.
- 1 1/2 teaspoons kosher salt Season the chicken and flour coating to enhance natural flavors and provide balanced savory notes. Kosher salt draws out moisture from the surface to help create a better sear and improved texture during baking. Adjust to taste but keep consistent distribution for even seasoning.
- 1/2 teaspoon ground paprika Contribute a warm, slightly sweet peppery note that complements savory elements and adds color to the crust. Paprika helps round out the spice profile without adding heat, working well with butter to create an appealing browned surface. Use sparingly to avoid overpowering delicate chicken flavor.
- 1/4 teaspoon herbs de Provence Introduce a fragrant, aromatic blend of dried Provencal herbs that adds floral and savory complexity to the dish. Herbs de Provence pairs with butter to create a nuanced herbaceous crust and enhances roasted chicken aroma. Sprinkle evenly to distribute subtle Mediterranean notes throughout.
- 1/4 teaspoon ground black pepper Provide a sharp, earthy undertone that enhances overall seasoning depth and balances richer ingredients like butter. Ground black pepper adds mild heat and complexity when combined with salt and paprika. Use freshly ground for best aroma and a brighter flavor profile.
- 1/4 cup unsalted butter(**) Contribute richness and moisture, melting into the flour coating to create a tender, luscious texture and golden-brown crust. Unsalted butter allows precise control over final seasoning while adding a creamy, slightly nutty flavor when baked. Ensure butter is distributed or melted evenly to baste chicken during baking.
- 1/2 cup dry milk powder(***) Add concentrated dairy solids that boost creaminess and body in the pan sauce while contributing mild milky flavor and slight thickening. Dry milk powder helps create a richer mouthfeel when rehydrated by hot water and combined with melted butter. Sprinkle into the flour mixture or dissolve to integrate smoothly.
- 1 1/2 cups hot water Rehydrate dry milk powder and help create a cohesive sauce or glaze that melds butter and seasonings into a basting liquid. Hot water activates powdered dairy and loosens pan ingredients, aiding even coating and moisture retention during baking. Use carefully to avoid making the mixture too thin.
Instructions
- Preheat oven to 350℉ and lightly grease a baking dish.: You will notice the smell of warm metal as the oven comes to temperature, and preheating ensures even cooking throughout the chicken . Using a lightly greased dish helps the crust release cleanly when plated, avoid sticking that can tear the meat. If the oven is not fully preheated you may face uneven cooking and a longer overall time, so always wait until it reaches 350℉ before inserting the dish. A common mistake is placing the pan into a lukewarm oven, which changes timing and texture.
- Dip the chicken breasts in water and shake off the excess.: The water helps the flour and seasoning adhere, and you should hear a faint slap as excess drips away before coating. This creates a thin layer that binds the flour mixture to the surface, improving crust formation. If too much water remains, the flour can clump and create a pasty coating, so shake well. Avoid leaving the breasts soaking, which can dilute seasoning and alter texture.
- Combine the flour and seasonings, then coat the chicken with the flour mixture.: When you mix the all purpose flour , kosher salt, paprika, herbs de Provence, and black pepper you will smell the spice medley come alive, and the pale flour will take on warm hues. Coating each breast evenly ensures every bite gets flavor and a pleasant exterior texture. Tap off excess flour so the coating is light, this prevents a gummy crust. A typical error is overcoating which results in a heavy, chalky exterior rather than a delicate crust.
- Place chicken breasts into the prepared baking dish.: Arrange the breasts with space around each piece so heat circulates and the surface can brown slightly. You might hear a soft sizzle as the warm pan accepts the meat, and visually the coated breasts will glisten faintly from the water left in the coating. Crowding leads to steaming and uneven browning, so give them room. If one breast is much thicker than another, it may need extra time or light pounding to even thickness.
- Cut the butter into small squares and arrange on top of the chicken.: As the butter melts it will baste the top of each breast, producing glossy, golden pockets of flavor. Small squares melt more evenly than one large slab, and the aroma of butter warming against the seasoned flour is deeply appealing. If you place the pieces too close together they may pool excessively in one area, so space them for even distribution. Using cold, hard butter without softening slightly can make cutting difficult; let it sit briefly to ease slicing.
- Bake in the preheated oven for 15 minutes.: After this initial bake you will notice the butter beginning to melt and the edges of the coated surface starting to firm and take on a faint golden tone. This short burst begins the cooking process and helps set the exterior before adding the milk solution. Opening the oven prematurely can drop temperature and extend cook time, so try to avoid peeking. A common misstep here is assuming the meat is done after this phase, it is only the first stage of cooking.
- Combine dry milk powder and hot water in a bowl. Pour the milk around the chicken.: Stir until the powder disappears and you have a smooth, warm milky liquid, which will steam in the oven and keep the chicken moist. You should see a gentle swirl as you pour the liquid around the breasts, not over them, creating a shallow bath that will simmer quietly. If the powder is not fully dissolved you may feel a gritty texture on tasting, so whisk thoroughly. Avoid pouring too much liquid on top of the breasts, which can wash away the coating instead of surrounding it.
- Cover with aluminum foil and return to oven.: Covering traps steam and encourages gentle, thorough cooking, which maintains tenderness. As the foil seals, you may hear faint bubbling from the milk bath and smell the meld of butter and seasonings intensify. Leaving it uncovered at this stage risks drying the tops and burning the butter, so tent the foil securely. A common error is sealing too tightly and not allowing any steam escape, which can lead to an overly soggy texture in some ovens.
- Bake at 350℉ for 30-40 more minutes, or until internal temperature reaches 165℉. Enjoy!: During this longer baking window the kitchen fills with a deep savory aroma and the milk bath will barely shimmer as it simmers. Use an instant read thermometer to confirm the thickest part of the chicken reads 165 degrees for safe, juicy results. If you skip the thermometer you risk undercooking or overcooking; visual clues like clear juices and a firm but springy texture help, but the check with temp is best. Avoid letting it go much beyond the target temperature, which can dry the meat and dull the buttery finish.
Notes
- Space and size matter, arrange the breasts with room between them so heat circulates, which promotes even cooking and avoids steaming the surface.
- Butter portions, cut the butter into uniform small squares so each piece melts at the same pace and bastes the meat evenly, creating balanced flavor.
- Seasoning distribution, mix the dry seasonings into the flour thoroughly so every bite contains an even amount of salt and spice, preventing pockets of blandness or over seasoning.
- Milk bath consistency, dissolve the dry milk powder fully in hot water until smooth to form a gentle steamy environment, which helps maintain moisture and tenderness.
- Check temperature, rely on an instant read thermometer for precision timing and juicy results, rather than guessing by color alone, which can be unreliable.
- Foil tenting, cover the dish after adding the milk to trap steam, then remove near the end if you want a slightly drier top, balancing moisture and texture.