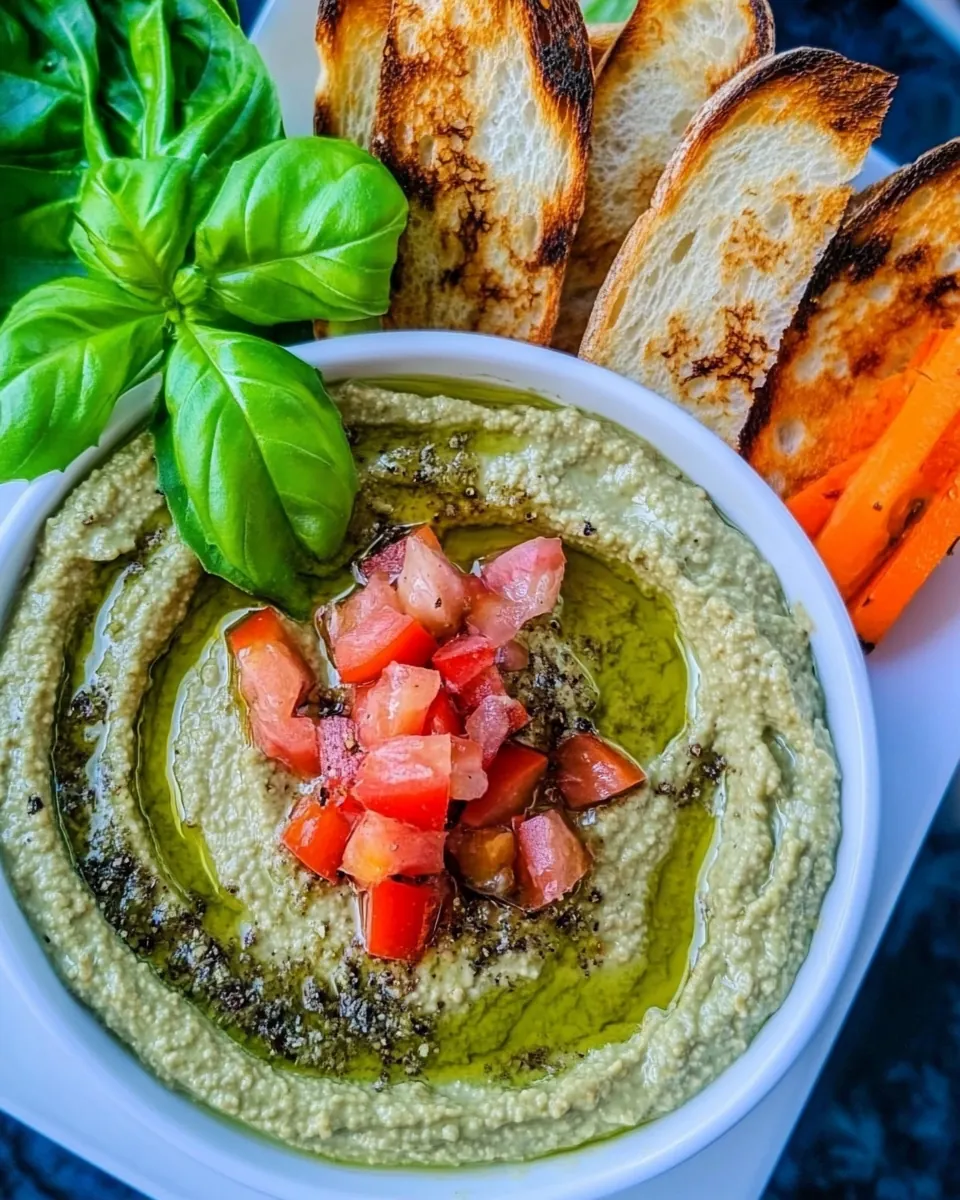
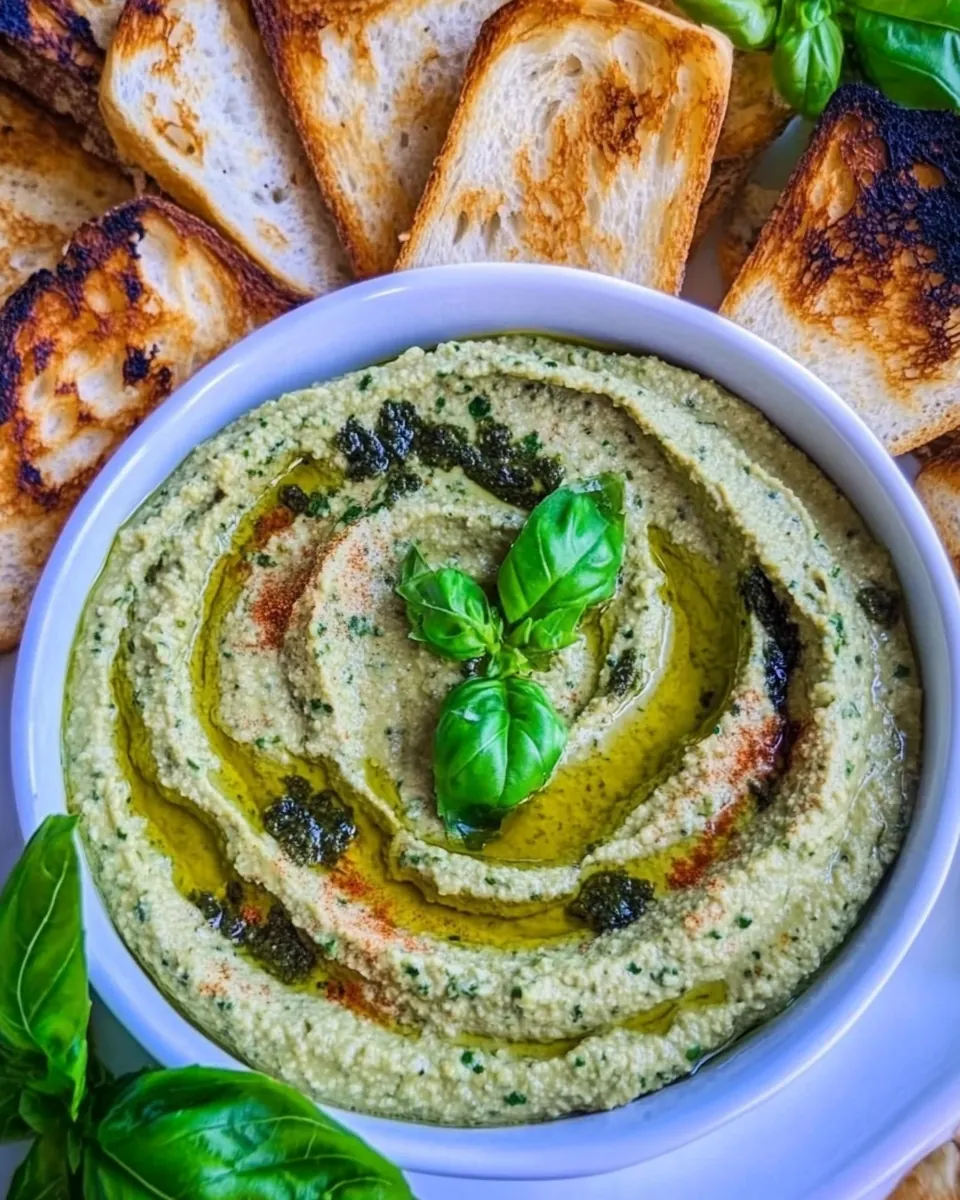
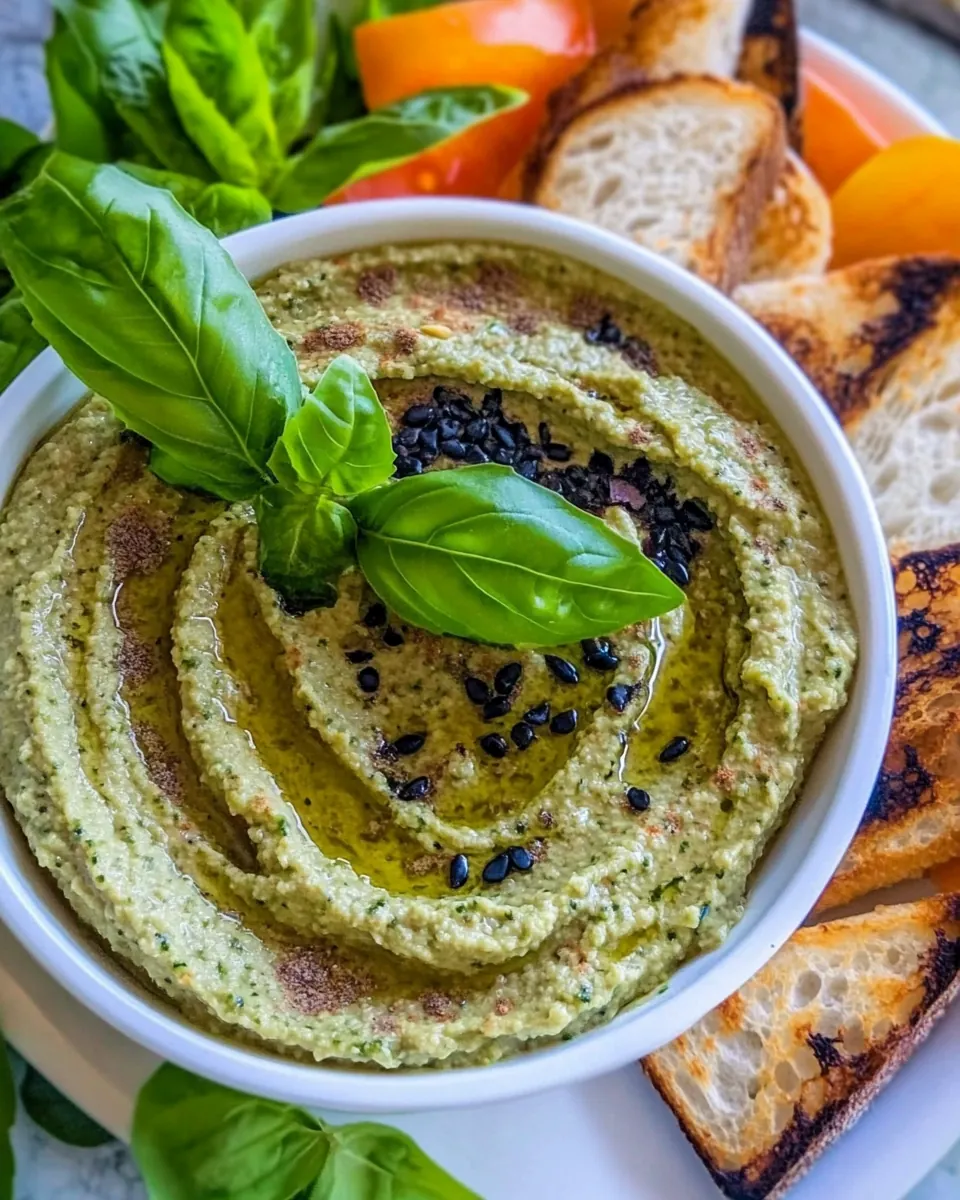
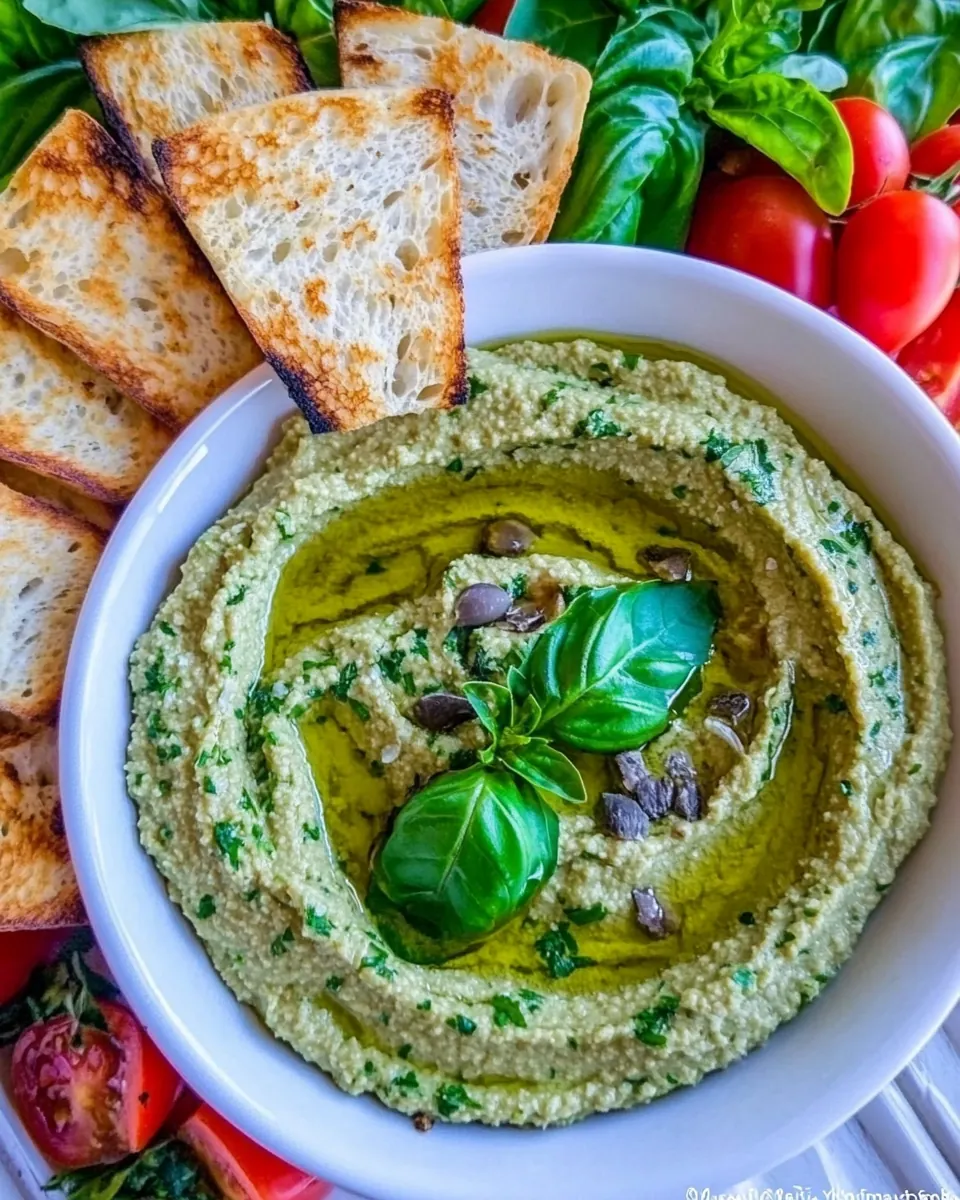
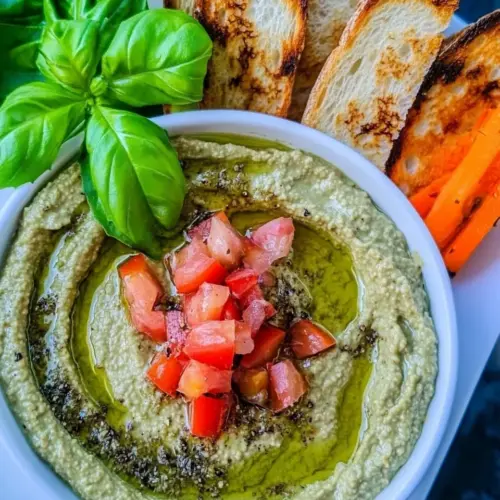
Basil Hummus Platter With Toasts
Basil Hummus Platter With Toasts has been one of my favorite easy hosts-in-a-hurry tricks ever since I first tossed basil into chickpea purée and realized how bright and herbal the spread could get.
I remember the first time I made this, I was running late for a casual Friday potluck. I grabbed a can of chickpeas, a handful of basil leaves, and the few pantry staples I always keep on hand. While waiting for friends to arrive, I roasted some garlic in a skillet, toasted walnuts until they were fragrant, and crisped slices of bread into quick toasts. The whole apartment smelled alive, herbaceous, and mildly nutty, and the platter disappeared in minutes.
What I love about this version is how flexible it feels, like a blank canvas you can polish in minutes. The creamy texture from the tahini and the olive oil, the citrus lift from the lemon juice and zest, and the subtle crunch from sesame seeds and whole chickpeas make every bite layered. I often bring this to a picnic, arrange it casually on a platter with cut carrots and celery for dipping, and call it a day.
Recipe Snapshot
17 mins
15 mins
2 mins
Medium
300 kcal
Mediterranean
Vegan, Gluten-Free
Appetizers
Skillet, Food Processor, Grill Pan
Why You Need This Basil Hummus Platter With Toasts
Bright herb flavor that elevates hummus
I adore how the Basil Hummus Platter With Toasts turns ordinary hummus into something green and fragrant. The basil leaves give an aromatic top note that lifts the creamy chickpeas and tahini base, creating a spread that tastes fresh rather than heavy. I find that using fresh basil rather than dried makes the difference between good and memorable.
Texture play keeps everyone interested
I like dishes that offer contrast, and this platter delivers. Silky whipped hummus, a scattering of reserved whole chickpeas, crunchy toasted walnuts, and sesame seeds make each mouthful engaging. When I serve this, people reach for different elements, and the combination of creamy and crunchy keeps the platter irresistible.
Speedy to assemble for last minute entertaining
One of my favorite reasons to keep this recipe in my rotation is how fast it comes together. Between rinsing canned chickpeas, roasting quick garlic, and grilling bread to toasts, the whole thing feels like a chef trick that you can pull off in less than an hour. I love that I can still chat with guests while finishing the platter.
Versatile and shareable presentation
I often change the layout depending on the crowd. The hummus becomes the star in the middle of a platter, dotted with lemon wedges and a drizzle of olive oil, while the toasts, carrot sticks, and celery sticks become casual companions. This makes the recipe excellent for picnics, light dinners, or snacky gatherings where people graze and talk.
Simple pantry ingredients, big payoff
What keeps me coming back is the modest shopping list. A can of chickpeas, a jar of tahini, a lemon, and a bunch of basil leaves are often already in my kitchen. When you pair those with toasted bread, the result feels thoughtful without being fussy. For busy weeknights or easy weekend hosting, this platter is one of my most reliable wins.
Basil Hummus Platter With Toasts Ingredients
These ingredients are chosen to balance creaminess, brightness, and crunch. The base players like chickpeas and tahini create the smooth body, while basil leaves and lemon brighten the flavor. Small touches such as toasted walnuts and sesame seeds introduce texture, and the grilled bread provides a warm, toasty vehicle for the hummus.
- 15 oz can of chickpeas: Drained and rinsed to provide a creamy, protein-rich base for the hummus while keeping the texture smooth when blended.
- 5 cloves garlic minced (about 1 tbsp): Minced finely to infuse pungent, aromatic heat throughout the hummus, enhancing depth of flavor and balancing the richness of tahini.
- 2 tbsp olive oil: Used for emulsifying the hummus and adding fruity richness; added during blending to achieve a silky consistency and gloss.
- 2 tbsp walnuts full sized, or chopped: Toasted or chopped and blended for earthy crunch and nutty undertones, complementing the basil and adding textural interest to the spread.
- 1/2 cup tahini: Whisked in to contribute a creamy, slightly bitter backbone that creates the classic hummus mouthfeel and helps bind the mixture.
- 1/2 lemon juice and zest: Zested and juiced to introduce bright acidity and lift the flavors, cutting through richness and bringing freshness to the dip.
- 2 cups basil leaves: Torn or packed and blended to impart a fresh, herbaceous character and vivid green color, transforming traditional hummus into a basil-forward version.
- 2 tbsp water: Added sparingly during blending to adjust thickness and ensure the hummus reaches a smooth, scoopable consistency without thinning too much.
- 1/2 tsp salt: Measured precisely to season and enhance other flavors while controlling sodium levels for a balanced savory profile.
- 1/8 tsp pepper: Freshly ground to provide a subtle peppery bite that rounds out the flavor profile without overpowering the herbs and lemon.
- 1 tbsp olive oil: Drizzled over the finished hummus for sheen and fruity flavor, and used to dress toasts or vegetables on the platter for extra richness.
- 1 tbsp chickpeas take from can: Reserved whole to garnish the center of the hummus, offering visual contrast and a textural pop that hints at the dish’s chickpea base.
- 1 tsp sesame seeds: Toasted briefly and sprinkled as a finishing crunch with nutty sesame flavor that complements both tahini and olive oil notes.
- 1/2 lemon wedges: Quartered to serve alongside the platter for squeezing over hummus and toasts, adding bright citrus bursts when desired by guests.
- 1 sprig basil leaves: Left as a small sprig for garnish to provide a fragrant, decorative touch that signals the basil flavor within the hummus.
- 1/2 loaf bread sliced and cut into toasts: Sliced and toasted to serve as the primary vehicle for scooping the hummus, offering crunchy contrast to the creamy dip.
- 1/2 tsp garlic powder: Sprinkled lightly on toasts to provide a subtle leftover garlic accent and echo the fresh garlic used in the hummus for continuity of flavor.
- 1/2 tsp salt: Used to season the toasts or vegetables, reinforcing saltiness and enhancing overall taste while maintaining consistency between components.
- 2 tbsp olive oil: Brushed on toasts to create a crisp, golden surface and contribute additional olive oil flavor that pairs well with the hummus.
- 2 medium celery sticks: Sliced into sticks to offer a fresh, crunchy dippable vegetable that complements the creamy hummus and adds visual variety to the platter.
- 2 medium carrots sticks: Peeled and cut into sticks to provide sweet, crisp dipping options that balance the savory hummus while adding color to the board.
Making Basil Hummus Platter With Toasts
I love the rhythm of assembling this platter, from glazing the skillet with olive oil to the final drizzle on the hummus. The directions below are written to help you sense the right moments by smell and sight, so you never have to guess. Keep tasting and adjusting as you go.
- Prepare canned chickpeas for hummus. Drain and rinse the chickpeas from the can in cold water. If desired, pull off thin white skin on as many beans as possible. The hummus will be creamier without white skins from chickpeas.: The bowl of rinsed chickpeas should look clean and smell neutral, free of the metallic can scent. Rinsing under cold water removes excess brine, and if you have time removing some of the white skins yields a silkier mouthfeel. You'll notice a creamier result when the skins are removed, because there are fewer fibrous bits. A common mistake is skipping the rinse, which can leave a tinny flavor in the final hummus.
- Roast garlic for hummus. (This step of roasting garlic for hummus isn’t required but in my opinion, tastes better than using raw garlic which can be bitter.) Heat a small skillet on the stove to medium heat. Slowly add garlic and olive oil and stir regularly for about 3 minutes while garlic roasts in the pan. Remove from the heat and transfer to a small bowl before garlic starts to brown. Garlic will be translucent and fragrant. Reserve the garlic oil pan for the next step.: As the garlic sweats gently in the pan with olive oil , the kitchen will fill with a warm, mellow scent that is far less sharp than raw cloves. Stop cooking just before any browning appears, the cloves should be translucent and fragrant, not bitter. This approach softens the garlic's bite and integrates more smoothly into the hummus. Avoid letting the garlic brown, as burnt garlic will lend an acrid taste to the spread.
- Toast walnuts. To the same pan the garlic roasted in, add the walnuts. Turn heat to medium and stir walnuts regularly as they toast for about 2 minutes, before they burn. Turn off heat and set aside.: When the walnuts hit the same skillet, the first audible change is a soft crackle and the aroma becomes nutty and toasty within moments. Stir frequently so they toast evenly and do not develop bitter burnt spots. Toasting enhances their flavor and helps them break down more easily during blending. The usual error here is leaving them unattended, which can quickly lead to an unpleasant char.
- Blend chickpeas. Set aside 1 tbsp of fresh chickpeas to garnish the hummus platter with later. Add drained chickpeas and garlic olive oil to bowl of a food processor and process for 2 minutes, pausing every 30 seconds to scrape down the hummus from the side of the food processor.: As you pulse the rinsed chickpeas with the reserved garlic oil in the food processor, you should see a coarse paste gradually forming, with a faint nutty scent from the canned beans and the garlic oil. Pausing to scrape down the sides ensures everything processes evenly and prevents dry pockets. This step lays the groundwork for a creamy texture, so don’t rush it; a common oversight is under-processing, which leaves the hummus grainy.
- Blend all basil hummus ingredients. Add walnuts, tahini and lemon juice and zest then process for 30 seconds, scraping down the hummus, then process for another 30 seconds. Add to the food processor: basil leaves, water, salt and pepper. Blend 1-2 minutes more, scraping down the hummus from the sides every 30 seconds, until smooth. Taste test and check the consistency. If basil hummus is too thick, add 1/2 tbsp more water at a time and process again until it’s your desired consistency.: Adding the toasted walnuts , tahini , and lemon juice and zest will make the mixture smell bright and slightly nutty. When you include the basil leaves , a green, herbal perfume will rise from the processor. Process in bursts and scrape often, watching for a glossy, pipeable consistency. If it seems stiff, add water a half tablespoon at a time until it loosens. Over-thinning is the typical mistake, which makes the hummus runny rather than spreadable.
- Plate and garnish hummus. Transfer to a large serving bowl and use a spoon to carve wells into hummus. Drizzle with olive oil, sprinkle with extra chickpeas and sesame seeds, and top with lemon wedges and basil leaves.: Spoon the hummus into a shallow bowl and use the back of a spoon to create wells, which catch olive oil and make the platter look abundant. When you sprinkle reserved whole chickpeas and sesame seeds , and place lemon wedges and a basil leaves sprig, the platter becomes visually inviting. A drizzle of extra olive oil enhances mouthfeel. One mistake is over-garnishing, which can distract from the hummus’s texture and flavor.
- Set a burner on the stove to medium or medium high heat. If using a large double grill pan, turn on two burners. Add grill pan or cast iron skillet or frying pan to burner(s).: The pan should shimmer slightly when it's hot enough, but not smoke. Using the right temperature ensures the bread crisps quickly without burning. If the pan is too cool the bread will dry rather than brown, and if too hot the crust will char before the interior warms through.
- Either brush the olive oil directly on the pan, then add toasts, or brush bread with olive oil on both sides then add toasts to the pan. Mix together garlic powder and salt and sprinkle on top of olive-oil coated toasts.: Whether you brush the olive oil directly on the pan or on the bread , the surface should look glossy but not greasy. Sprinkle the garlic powder and salt evenly so each toast has balanced seasoning. This step adds flavor pockets that complement the hummus. Avoid soaking the bread in oil, which makes it limp instead of crisp.
- Every 1-2 minutes, flip toasts until they turn golden brown on both sides. Some will be done faster than others, so move them to a cooling plate. Continue flipping toasts until done grilling.: As the toasts sizzle, the edges will darken and the aroma of cooked bread will emerge, signaling readiness. Turn the slices every minute or two to achieve even color, and move finished pieces to a cooling plate so they stay crisp. A frequent misstep is leaving pieces in the pan too long, which can cause uneven charring.
- Add the bowl of hummus to the center of a large serving platter. Add celery and carrot sticks and finish plating with grilled bread. Serve with a large spoon and enjoy.: Place the bowl of hummus at the center of a large platter, arrange the grilled bread , and tuck in the celery sticks and carrot sticks around the edges. The final platter should feel abundant and textured. Serve with a large spoon so guests can scoop and build bites. A common error is overcrowding the platter, which makes it hard to reach components comfortably.
Make It Your Own
This platter is forgiving and invites personalization. Below are practical tips I use each time I make the Basil Hummus Platter With Toasts, written so you can tweak flavor, texture, and presentation with confidence.
- Use fresher basil for brighter flavor The aroma of fresh basil leaves transforms the hummus into something herbaceous and lively rather than flat. I recommend picking basil on the day you make the hummus and packing the leaves loosely into the processor so they chop evenly.
- Control garlic intensity by roasting Roasting the minced garlic in olive oil mellows sharpness and avoids that raw, sometimes bitter edge. Keep the heat moderate and remove the garlic when translucent for the best balance.
- Toast nuts for deeper aroma Toasting the walnuts briefly releases oils and adds complexity. Use a dry pan or the leftover garlic oil, and stir constantly to prevent burning, which can lead to off flavors.
- Adjust texture with water and oil If the hummus feels dense, add small amounts of water or a touch more olive oil until it spreads easily. Add in increments, because it is easy to overshoot and make the hummus too thin.
- Season gradually and taste The canned chickpeas and tahini can vary in salt level, so season in steps and taste after blending. A final pinch of salt can brighten the whole batch.
- Make ahead and rest If you make the hummus a few hours ahead, the flavors meld and the basil leaves integrate nicely. Store covered in the fridge and bring to room temperature before serving for the best texture.
- Garnish for contrast Scatter the reserved whole chickpeas, sesame seeds, and a drizzle of olive oil right before serving to maintain crunch and shine.
Great Combinations for Basil Hummus Platter With Toasts
The platter works well across casual and slightly more formal occasions. Below are serving ideas, pairings, and storage suggestions to help you decide how and when to bring this hummus to the table.
- Casual gatherings Serve the platter at a relaxed get together with friends as an appetizer or grazing item. The toasts, carrot sticks, and celery sticks create variety so people can nibble while chatting.
- Weeknight dinner starter Use the hummus as a starter for a light evening meal. Offer a simple salad alongside and allow guests to build their own bites from the platter, making dinner feel social and easy.
- Picnic or outdoor spread Pack the hummus in a shallow container and tuck the toasts and vegetables in a separate box to maintain crunch. Keep the platter chilled until just before serving for freshness.
- Ramadan iftar or shared fast-breaking The platter provides a nourishing, easy to digest option to start a meal. The protein in the chickpeas and the quick carbs from the bread help replenish energy gently.
- Seasonal pairings In spring, lean into lighter sides: fresh salads with lemon vinaigrette pair nicely with the herbal hummus. The bright basil leaves echo the season’s fresh produce.
- Storage tips Store leftover hummus in an airtight container for up to four days in the fridge. Keep the toasts separate; they will lose crispness if stored together with the hummus.
- Presentation touch Serve the hummus in a shallow bowl and create wells for olive oil and a final sprinkle of sesame seeds to make the platter look restaurant-ready.
FAQ
Conclusion
This Basil Hummus Platter With Toasts stands out for its bright basil lift, creamy tahini base, and satisfying textural contrasts. It is approachable to make, adaptable to different occasions, and reliable when you want something impressive without fuss. Give it a try at your next gathering or on a quiet weekend evening, and enjoy how quickly it becomes a favorite on the table. The simplicity of pantry staples transformed by a handful of fresh basil makes this platter both comforting and delightfully fresh.
Basil Hummus Platter With Toasts
Equipment
- Skillet
- Food Processor
- Grill pan
Ingredients
- 15 oz can of chickpeas Drained and rinsed to provide a creamy, protein-rich base for the hummus while keeping the texture smooth when blended.
- 5 cloves garlic minced (about 1 tbsp) Minced finely to infuse pungent, aromatic heat throughout the hummus, enhancing depth of flavor and balancing the richness of tahini.
- 2 tbsp olive oil Used for emulsifying the hummus and adding fruity richness; added during blending to achieve a silky consistency and gloss.
- 2 tbsp walnuts full sized, or chopped Toasted or chopped and blended for earthy crunch and nutty undertones, complementing the basil and adding textural interest to the spread.
- 1/2 cup tahini Whisked in to contribute a creamy, slightly bitter backbone that creates the classic hummus mouthfeel and helps bind the mixture.
- 1/2 lemon juice and zest Zested and juiced to introduce bright acidity and lift the flavors, cutting through richness and bringing freshness to the dip.
- 2 cups basil leaves Torn or packed and blended to impart a fresh, herbaceous character and vivid green color, transforming traditional hummus into a basil-forward version.
- 2 tbsp water Added sparingly during blending to adjust thickness and ensure the hummus reaches a smooth, scoopable consistency without thinning too much.
- 1/2 tsp salt Measured precisely to season and enhance other flavors while controlling sodium levels for a balanced savory profile.
- 1/8 tsp pepper Freshly ground to provide a subtle peppery bite that rounds out the flavor profile without overpowering the herbs and lemon.
- 1 tbsp olive oil Drizzled over the finished hummus for sheen and fruity flavor, and used to dress toasts or vegetables on the platter for extra richness.
- 1 tbsp chickpeas take from can Reserved whole to garnish the center of the hummus, offering visual contrast and a textural pop that hints at the dish’s chickpea base.
- 1 tsp sesame seeds Toasted briefly and sprinkled as a finishing crunch with nutty sesame flavor that complements both tahini and olive oil notes.
- 1/2 lemon wedges Quartered to serve alongside the platter for squeezing over hummus and toasts, adding bright citrus bursts when desired by guests.
- 1 sprig basil leaves Left as a small sprig for garnish to provide a fragrant, decorative touch that signals the basil flavor within the hummus.
- 1/2 loaf bread sliced and cut into toasts Sliced and toasted to serve as the primary vehicle for scooping the hummus, offering crunchy contrast to the creamy dip.
- 1/2 tsp garlic powder Sprinkled lightly on toasts to provide a subtle leftover garlic accent and echo the fresh garlic used in the hummus for continuity of flavor.
- 1/2 tsp salt Used to season the toasts or vegetables, reinforcing saltiness and enhancing overall taste while maintaining consistency between components.
- 2 tbsp olive oil Brushed on toasts to create a crisp, golden surface and contribute additional olive oil flavor that pairs well with the hummus.
- 2 medium celery sticks Sliced into sticks to offer a fresh, crunchy dippable vegetable that complements the creamy hummus and adds visual variety to the platter.
- 2 medium carrots sticks Peeled and cut into sticks to provide sweet, crisp dipping options that balance the savory hummus while adding color to the board.
Instructions
- Prepare canned chickpeas for hummus. Drain and rinse the chickpeas from the can in cold water. If desired, pull off thin white skin on as many beans as possible. The hummus will be creamier without white skins from chickpeas.: The bowl of rinsed chickpeas should look clean and smell neutral, free of the metallic can scent. Rinsing under cold water removes excess brine, and if you have time removing some of the white skins yields a silkier mouthfeel. You'll notice a creamier result when the skins are removed, because there are fewer fibrous bits. A common mistake is skipping the rinse, which can leave a tinny flavor in the final hummus.
- Roast garlic for hummus. (This step of roasting garlic for hummus isn’t required but in my opinion, tastes better than using raw garlic which can be bitter.) Heat a small skillet on the stove to medium heat. Slowly add garlic and olive oil and stir regularly for about 3 minutes while garlic roasts in the pan. Remove from the heat and transfer to a small bowl before garlic starts to brown. Garlic will be translucent and fragrant. Reserve the garlic oil pan for the next step.: As the garlic sweats gently in the pan with olive oil , the kitchen will fill with a warm, mellow scent that is far less sharp than raw cloves. Stop cooking just before any browning appears, the cloves should be translucent and fragrant, not bitter. This approach softens the garlic's bite and integrates more smoothly into the hummus. Avoid letting the garlic brown, as burnt garlic will lend an acrid taste to the spread.
- Toast walnuts. To the same pan the garlic roasted in, add the walnuts. Turn heat to medium and stir walnuts regularly as they toast for about 2 minutes, before they burn. Turn off heat and set aside.: When the walnuts hit the same skillet, the first audible change is a soft crackle and the aroma becomes nutty and toasty within moments. Stir frequently so they toast evenly and do not develop bitter burnt spots. Toasting enhances their flavor and helps them break down more easily during blending. The usual error here is leaving them unattended, which can quickly lead to an unpleasant char.
- Blend chickpeas. Set aside 1 tbsp of fresh chickpeas to garnish the hummus platter with later. Add drained chickpeas and garlic olive oil to bowl of a food processor and process for 2 minutes, pausing every 30 seconds to scrape down the hummus from the side of the food processor.: As you pulse the rinsed chickpeas with the reserved garlic oil in the food processor, you should see a coarse paste gradually forming, with a faint nutty scent from the canned beans and the garlic oil. Pausing to scrape down the sides ensures everything processes evenly and prevents dry pockets. This step lays the groundwork for a creamy texture, so don’t rush it; a common oversight is under-processing, which leaves the hummus grainy.
- Blend all basil hummus ingredients. Add walnuts, tahini and lemon juice and zest then process for 30 seconds, scraping down the hummus, then process for another 30 seconds. Add to the food processor: basil leaves, water, salt and pepper. Blend 1-2 minutes more, scraping down the hummus from the sides every 30 seconds, until smooth. Taste test and check the consistency. If basil hummus is too thick, add 1/2 tbsp more water at a time and process again until it’s your desired consistency.: Adding the toasted walnuts , tahini , and lemon juice and zest will make the mixture smell bright and slightly nutty. When you include the basil leaves , a green, herbal perfume will rise from the processor. Process in bursts and scrape often, watching for a glossy, pipeable consistency. If it seems stiff, add water a half tablespoon at a time until it loosens. Over-thinning is the typical mistake, which makes the hummus runny rather than spreadable.
- Plate and garnish hummus. Transfer to a large serving bowl and use a spoon to carve wells into hummus. Drizzle with olive oil, sprinkle with extra chickpeas and sesame seeds, and top with lemon wedges and basil leaves.: Spoon the hummus into a shallow bowl and use the back of a spoon to create wells, which catch olive oil and make the platter look abundant. When you sprinkle reserved whole chickpeas and sesame seeds , and place lemon wedges and a basil leaves sprig, the platter becomes visually inviting. A drizzle of extra olive oil enhances mouthfeel. One mistake is over-garnishing, which can distract from the hummus’s texture and flavor.
- Set a burner on the stove to medium or medium high heat. If using a large double grill pan, turn on two burners. Add grill pan or cast iron skillet or frying pan to burner(s).: The pan should shimmer slightly when it's hot enough, but not smoke. Using the right temperature ensures the bread crisps quickly without burning. If the pan is too cool the bread will dry rather than brown, and if too hot the crust will char before the interior warms through.
- Either brush the olive oil directly on the pan, then add toasts, or brush bread with olive oil on both sides then add toasts to the pan. Mix together garlic powder and salt and sprinkle on top of olive-oil coated toasts.: Whether you brush the olive oil directly on the pan or on the bread , the surface should look glossy but not greasy. Sprinkle the garlic powder and salt evenly so each toast has balanced seasoning. This step adds flavor pockets that complement the hummus. Avoid soaking the bread in oil, which makes it limp instead of crisp.
- Every 1-2 minutes, flip toasts until they turn golden brown on both sides. Some will be done faster than others, so move them to a cooling plate. Continue flipping toasts until done grilling.: As the toasts sizzle, the edges will darken and the aroma of cooked bread will emerge, signaling readiness. Turn the slices every minute or two to achieve even color, and move finished pieces to a cooling plate so they stay crisp. A frequent misstep is leaving pieces in the pan too long, which can cause uneven charring.
- Add the bowl of hummus to the center of a large serving platter. Add celery and carrot sticks and finish plating with grilled bread. Serve with a large spoon and enjoy.: Place the bowl of hummus at the center of a large platter, arrange the grilled bread , and tuck in the celery sticks and carrot sticks around the edges. The final platter should feel abundant and textured. Serve with a large spoon so guests can scoop and build bites. A common error is overcrowding the platter, which makes it hard to reach components comfortably.
Notes
- Use fresher basil for brighter flavor The aroma of fresh basil leaves transforms the hummus into something herbaceous and lively rather than flat. I recommend picking basil on the day you make the hummus and packing the leaves loosely into the processor so they chop evenly.
- Control garlic intensity by roasting Roasting the minced garlic in olive oil mellows sharpness and avoids that raw, sometimes bitter edge. Keep the heat moderate and remove the garlic when translucent for the best balance.
- Toast nuts for deeper aroma Toasting the walnuts briefly releases oils and adds complexity. Use a dry pan or the leftover garlic oil, and stir constantly to prevent burning, which can lead to off flavors.
- Adjust texture with water and oil If the hummus feels dense, add small amounts of water or a touch more olive oil until it spreads easily. Add in increments, because it is easy to overshoot and make the hummus too thin.
- Season gradually and taste The canned chickpeas and tahini can vary in salt level, so season in steps and taste after blending. A final pinch of salt can brighten the whole batch.
- Make ahead and rest If you make the hummus a few hours ahead, the flavors meld and the basil leaves integrate nicely. Store covered in the fridge and bring to room temperature before serving for the best texture.
- Garnish for contrast Scatter the reserved whole chickpeas, sesame seeds, and a drizzle of olive oil right before serving to maintain crunch and shine.