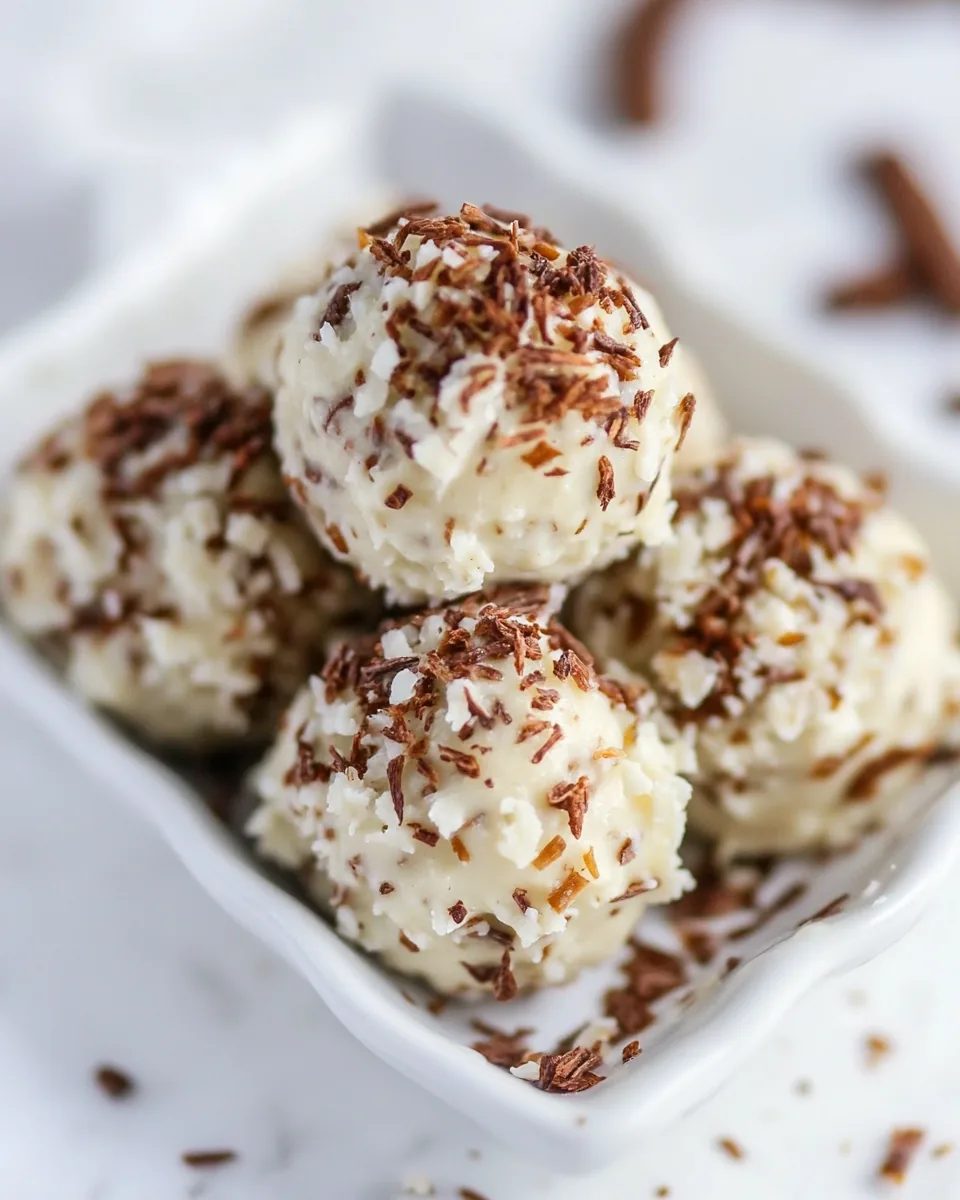
Vanilla Creme Balls
There’s something about indulging in a sweet treat that brings a smile to my face, and that’s precisely what Vanilla Creme Balls do for me. I still remember the first time I tasted them at a family gathering. My aunt brought a plate piled high with these delightful little bites, and I was instantly captivated by their creamy filling and rich chocolate coating. As I took my first bite, the soft and smooth texture melted in my mouth, making it hard to resist reaching for another. It’s a memory that’s forever etched in my heart, and now, I’m thrilled to share this recipe with you.
These little gems are perfect for all occasions. Whether it’s a birthday, holiday party, or simply a cozy night in with friends, Vanilla Creme Balls steal the show every time. They’re surprisingly easy to make and can be prepared ahead of time, which is always a plus in my book. I love how they can be customized with various toppings or served as a delightful after-dinner treat. Every time I make them, I’m reminded of the joy they bring, not just to my taste buds but to everyone around me.
Creating Vanilla Creme Balls is a journey in itself. From mixing the creamy filling to rolling the balls and coating them in chocolate, each step is filled with excitement. And let’s not forget the heavenly aroma that fills the kitchen as the chocolate melts! I often find myself sharing the process with friends, turning the experience into a fun, communal activity. So, grab your apron and let’s dive into making these delectable morsels!
Recipe Snapshot
8 hr 15 mins
15 mins
480 mins
Hard
150 kcal
2 g
Gluten-Free, Low FODMAP
8 g
Wooden Spoon, Mixing Bowl, Frying Pan, Skillet, Chef’s Knife
Why We Love This Vanilla Creme Balls
Irresistible Flavor Combination
The combination of creamy and crunchy makes Vanilla Creme Balls a standout. The smooth filling, made from unsalted butter and sweetened condensed milk, creates a luscious flavor that’s perfectly complemented by the rich chocolate shell and crunchy sliced almonds. Each bite is a delightful contrast that keeps you coming back for more.
Customizable Treats
One of the best things about Vanilla Creme Balls is their versatility. You can easily switch up the toppings or adapt the filling to suit your taste. Add a pinch of cinnamon for a warm spice kick or roll them in crushed nuts instead of sliced almonds. This adaptability means you can create a unique version each time you make them!
Perfect for Any Occasion
Whether you’re celebrating a special occasion or just want to treat yourself, Vanilla Creme Balls fit the bill perfectly. They’re an excellent addition to dessert trays, birthday parties, or even as a sweet indulgence after dinner. Their bite-sized nature makes them easy to share, making them a crowd-pleaser for all.
Make Ahead and Store Well
These cream-filled delights can be made ahead of time and stored in the freezer. This means you can prepare them when you have time and enjoy them fresh whenever a craving strikes. Plus, they can last in the freezer for weeks, so you always have a tasty treat on hand!
Fun to Make with Friends
Making Vanilla Creme Balls can be a fun cooking project with friends or family. The process of rolling the filling into balls and dipping them in chocolate is not only satisfying but also a great way to bond. It’s always a blast to share laughter and create delicious memories in the kitchen.
Kid-Friendly Activity
If you’re looking for a baking project to do with kids, look no further! Vanilla Creme Balls are simple enough for children to help with. They’ll love rolling the balls and decorating them, making it a fun family activity that ends in a tasty reward.
What’s In This Vanilla Creme Balls
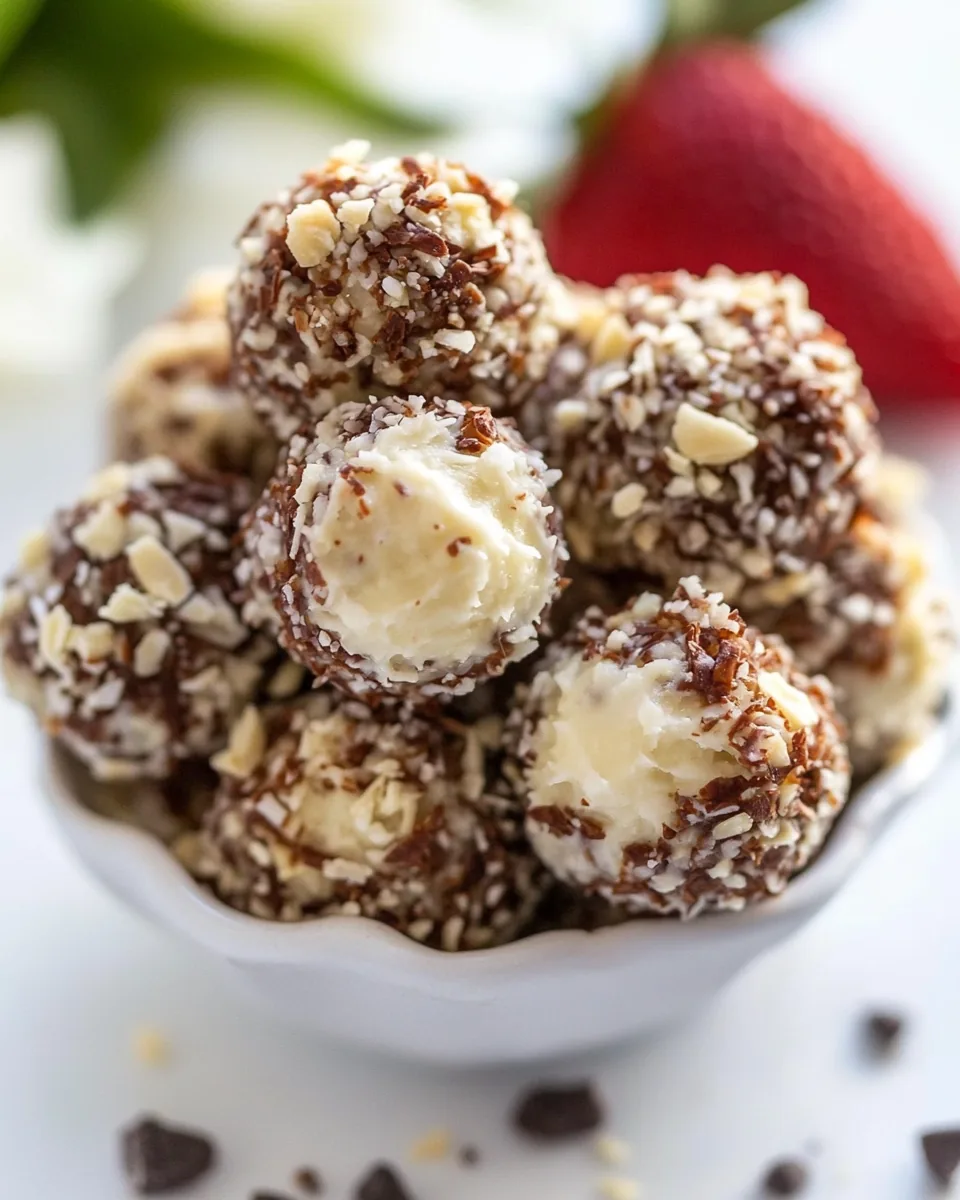
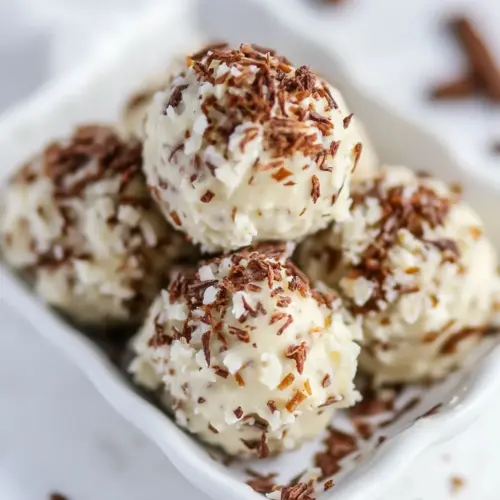
The ingredients for Vanilla Creme Balls are a harmonious blend that create a delightful treat. Each component plays a crucial role in building the layers of flavor and texture. The unsalted butter and sweetened condensed milk form a creamy base, while the chocolate coating adds a rich finish. And let’s not forget the sliced almonds that provide a nice crunch, elevating each bite.
- Unsalted Butter: 1 cup, softened. This creamy base adds richness and helps to achieve a smooth filling.
- Sweetened Condensed Milk: 1 (14 ounce) can. This ingredient sweetens the filling and gives it a luscious texture.
- Powdered Sugar: 4 cups. Used to sweeten and thicken the filling, it creates the perfect creamy consistency.
- Dash of Salt: Enhances the flavors and balances the sweetness in the filling.
- High-Quality Chocolate: 1 pound. This is essential for the outer coating, providing a rich, indulgent layer.
- Sliced Almonds: 1 pound, toasted and finely chopped. These add a delightful crunch and nutty flavor to the finished treat.
Step by Step Instructions for Vanilla Creme Balls
Making Vanilla Creme Balls is a fun and rewarding process. You’ll want to start by gathering all your ingredients and tools to ensure a smooth experience. As you follow the steps, embrace the delightful aromas and textures that come together to create these amazing treats. Let’s get started!
- In a mixing bowl, combine the unsalted butter, sweetened condensed milk, vanilla extract, powdered sugar, and a dash of salt. Use a spatula or mixer to blend until well combined and creamy. The mixture should resemble a thick frosting, making it easy to work with.
- Once well mixed, cover the bowl with plastic wrap and refrigerate for at least 30 minutes. This chilling process will make the filling firm enough to handle, allowing you to roll it into balls easily.
- After the filling has chilled, take it out of the refrigerator. Use a teaspoon or small cookie scoop to portion out the filling. Roll each portion into small balls, about ½ teaspoon in size. It’s a good idea to grease your hands with cooking spray to prevent sticking.
- Place the rolled balls on a lined baking sheet, leaving some space between them. This will help them maintain their shape when freezing.
- Cover the baking sheet with plastic wrap and freeze the cream balls overnight, or for at least 8 hours. This is crucial as it solidifies the filling, ensuring a smooth coating later.
- While the cream balls are freezing, prepare the sliced almonds. Heat a large non-stick skillet over medium heat. Add the sliced almonds and cook, tossing gently until they begin to toast golden brown. This should only take a few minutes, so keep an eye on them to prevent burning.
- Once toasted, remove the almonds from the heat and allow them to cool. After cooling, finely chop them and set aside for later use.
- Next, melt your high-quality chocolate. I recommend using a microwave-safe bowl and melting the chocolate on low power in 15-second intervals, stirring after each interval until smooth and melted. Be patient, as it can burn easily.
- Once the cream balls are frozen, take them out of the freezer. Using a fork or dipping tool, dip each frozen ball into the melted chocolate, making sure to coat them evenly. Allow any excess chocolate to drip off.
- Immediately roll the chocolate-coated balls in the toasted sliced almonds, ensuring they are well coated. Place them back on the lined baking sheet and repeat until all cream balls are coated.
- Finally, refrigerate the finished Vanilla Creme Balls until ready to serve. They can be stored in an airtight container for several weeks, but I doubt they’ll last that long!
Things Worth Knowing
- Chilling is Key: Allowing the filling to chill makes rolling easier and helps the balls hold their shape.
- Quality Ingredients Matter: Using high-quality chocolate and fresh ingredients ensures the best flavor and texture in your Vanilla Creme Balls.
- Make Ahead: These can be made ahead of time and stored in the freezer, making them perfect for last-minute gatherings.
- Toasting Nuts: Toasting the sliced almonds enhances their flavor, making the coating even more delicious.
Making Adjustments

There are plenty of ways to customize your Vanilla Creme Balls to suit your taste preferences. Whether you’re looking to create a unique flavor profile or adapt the recipe for dietary needs, here are some tips to consider:
- Storage: Keep leftover Vanilla Creme Balls in an airtight container in the refrigerator for up to 2 weeks, or freeze for longer storage.
- Freezing: You can freeze the cream balls before coating them in chocolate. Just remember to thaw slightly before dipping for easier coating.
- Flavor Variations: Experiment by adding different flavor extracts such as almond or coconut, or mix in some crushed cookies for texture.
- Nut-Free Option: If you want a nut-free version, simply omit the sliced almonds and roll the balls in sprinkles or crushed cereal instead.
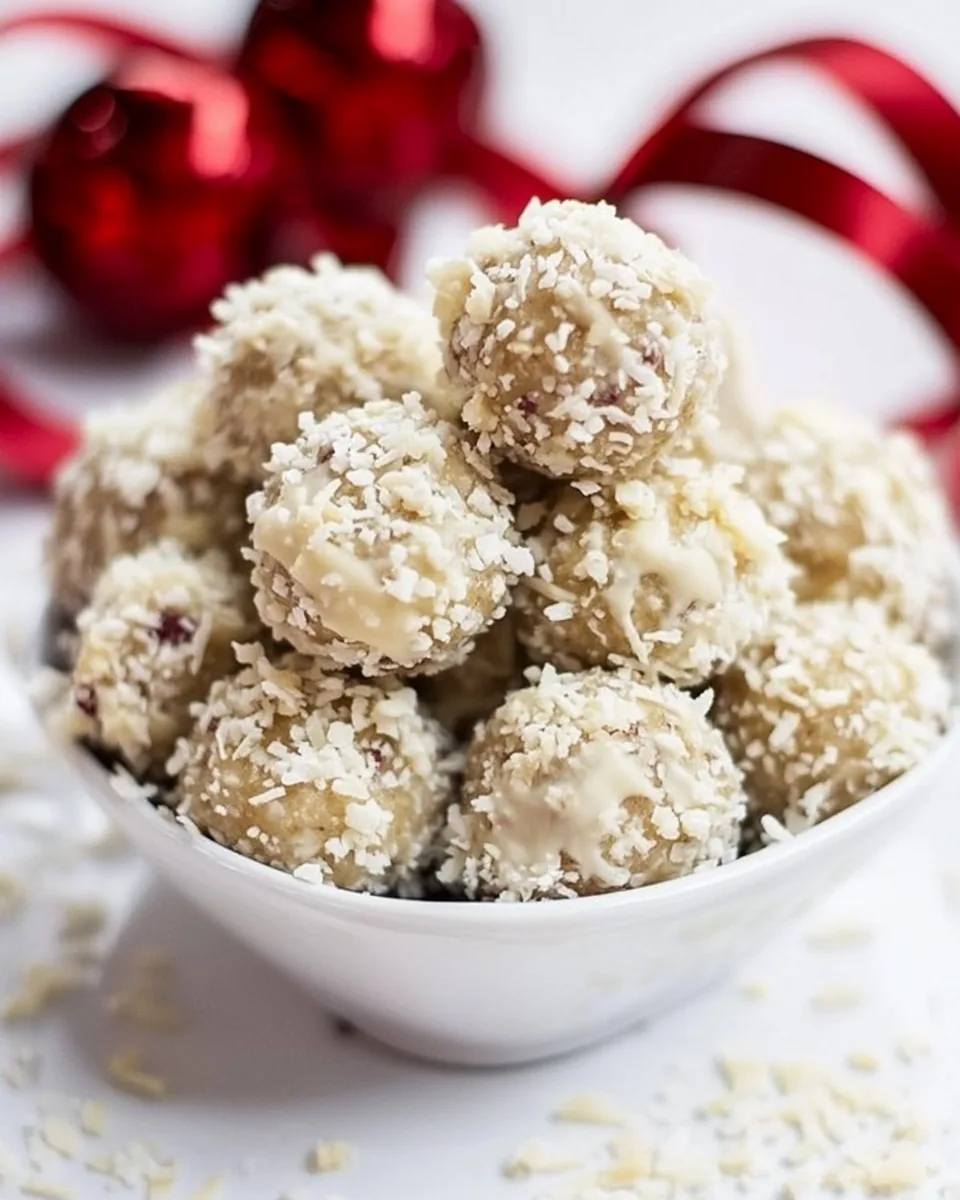
- Chocolate Variety: Switch up the chocolate coating with white chocolate or flavored melts for a fun twist.
Serving Ideas for Vanilla Creme Balls
When it comes to serving Vanilla Creme Balls, there are countless delicious possibilities that will impress your friends and family. Here are some ideas to elevate your serving game:
- On a Dessert Platter: Arrange Vanilla Creme Balls on a beautiful platter alongside fresh fruit, cookies, and other treats for a stunning dessert table.
- As Party Favors: Package individual balls in cute boxes or bags and give them as party favors at birthdays or celebrations.
- With Coffee or Tea: Serve these sweet bites alongside your favorite warm beverages—perfect for an afternoon treat.
- For Special Occasions: Consider making them for holidays like Christmas or Valentine’s Day. They make a thoughtful gift or a sweet ending to festive meals.
- Seasonal Themes: Customize the toppings with seasonal sprinkles or colors to match holidays like Easter or Halloween.
- With Ice Cream: Serve Vanilla Creme Balls alongside a scoop of vanilla or chocolate ice cream for a delightful dessert experience.
FAQ
Conclusion
Vanilla Creme Balls are truly a delightful treat that brings joy to any occasion. With their creamy filling, rich chocolate coating, and the perfect crunch from the almonds, they’re hard to resist. I hope you give this recipe a try and share the joy with your loved ones. Whether for a celebration or just because, these sweet bites are sure to bring smiles all around!
Vanilla Creme Balls
Equipment
- Wooden Spoon
- Mixing Bowl
- Frying Pan
- Skillet
- Chef's Knife
Ingredients
- 1 cup Unsalted Butter softened
- 1 14 ounce can Sweetened Condensed Milk
- 1/2 teaspoon Vanilla Extract
- 4 cups Powdered Sugar
- dash Salt
- 1 pound High Quality Chocolate I use Ghirardelli or Hershey's bars
- 1 pound Sliced Almonds toasted and finely chopped
Instructions
- In a mixing bowl, combine the unsalted butter, sweetened condensed milk, vanilla extract, powdered sugar, and a dash of salt. Use a spatula or mixer to blend until well combined and creamy. The mixture should resemble a thick frosting, making it easy to work with.
- Once well mixed, cover the bowl with plastic wrap and refrigerate for at least 30 minutes. This chilling process will make the filling firm enough to handle, allowing you to roll it into balls easily.
- After the filling has chilled, take it out of the refrigerator. Use a teaspoon or small cookie scoop to portion out the filling. Roll each portion into small balls, about ½ teaspoon in size. It’s a good idea to grease your hands with cooking spray to prevent sticking.
- Place the rolled balls on a lined baking sheet, leaving some space between them. This will help them maintain their shape when freezing.
- Cover the baking sheet with plastic wrap and freeze the cream balls overnight, or for at least 8 hours. This is crucial as it solidifies the filling, ensuring a smooth coating later.
- While the cream balls are freezing, prepare the sliced almonds. Heat a large non-stick skillet over medium heat. Add the sliced almonds and cook, tossing gently until they begin to toast golden brown. This should only take a few minutes, so keep an eye on them to prevent burning.
- Once toasted, remove the almonds from the heat and allow them to cool. After cooling, finely chop them and set aside for later use.
- Next, melt your high-quality chocolate. I recommend using a microwave-safe bowl and melting the chocolate on low power in 15-second intervals, stirring after each interval until smooth and melted. Be patient, as it can burn easily.
- Once the cream balls are frozen, take them out of the freezer. Using a fork or dipping tool, dip each frozen ball into the melted chocolate, making sure to coat them evenly. Allow any excess chocolate to drip off.
- Immediately roll the chocolate-coated balls in the toasted sliced almonds, ensuring they are well coated. Place them back on the lined baking sheet and repeat until all cream balls are coated.
- Finally, refrigerate the finished Vanilla Creme Balls until ready to serve. They can be stored in an airtight container for several weeks, but I doubt they’ll last that long!
Notes
- Tip 1: Keep leftover Vanilla Creme Balls in an airtight container in the refrigerator for up to 2 weeks, or freeze for longer storage.
- Tip 2: You can freeze the cream balls before coating them in chocolate. Just remember to thaw slightly before dipping for easier coating.
- Tip 3: Experiment by adding different flavor extracts such as almond or coconut, or mix in some crushed cookies for texture.
- Tip 4: If you want a nut-free version, simply omit the sliced almonds and roll the balls in sprinkles or crushed cereal instead.
- Tip 5: Switch up the chocolate coating with white chocolate or flavored melts for a fun twist.