Vanilla Cheesecake
There’s something magical about a well-made Vanilla Cheesecake. It brings people together, sparks joy, and leaves a lasting impression. I remember the first time I made this dessert for my family. The aroma filled the kitchen, and as we gathered around the table, anticipation was palpable. Each creamy slice, with its rich texture and sweet flavor, caused smiles all around. It wasn’t just a dessert; it was a heartfelt moment shared among loved ones. Whether it’s a birthday celebration or a quiet evening treat, this Vanilla Cheesecake is sure to make any occasion memorable.
Recipe Snapshot
1 hr 20 mins
5 mins
75 mins
Medium
425 kcal
7 g
Gluten-Free, Low FODMAP
27 g
Mixing Bowl, Frying Pan, Chef’s Knife, Blender, Baking Sheet, Food Processor, Oven
What Sets This Vanilla Cheesecake Apart
1. Timeless Flavor
The allure of a Vanilla Cheesecake is undeniable. The creamy texture, combined with the richness of its flavor, makes it a classic that resonates across generations. It’s a comforting dessert that pleases both the young and the old.
2. Versatile Dessert
This cheesecake can be dressed up or down. Want to make it more festive? Add some seasonal fruits or chocolate drizzle on top. Craving something simple? Serve it plain with a dollop of whipped cream. The Vanilla Cheesecake adapts to any occasion.
3. Make-Ahead Delight
One of the best parts about this dessert is that it can be made a day ahead. Just let it chill overnight, and it’s ready to serve when you are. This means less stress for you and more time to enjoy the company of friends and family.
4. Perfect for Sharing
There’s a sense of joy that comes from sharing a delicious dessert. The Vanilla Cheesecake is perfect for gatherings, as it can easily serve multiple people. Each slice creates an opportunity for laughter, conversation, and cherished memories.
5. Rich in Tradition
For many, making cheesecake is a family tradition passed down through generations. Each family may have their unique twist, but the core remains the same: love, flavor, and togetherness. The Vanilla Cheesecake embodies this heartwarming sentiment, making it more than just a dessert but a part of family history.
6. Custody of Ingredients
This recipe boasts simple but quality ingredients. Each component—the cream cheese, sour cream, and graham crackers—plays a vital role in creating that creamy texture and rich taste that we all crave. Trust me, using high-quality ingredients makes all the difference!
Shopping List for Vanilla Cheesecake
When making a Vanilla Cheesecake, it’s essential to choose the right ingredients to create the best possible flavor and texture. The harmonious blend of creamy, sweet, and slightly tangy elements all come together beautifully. Here’s what you’ll need:
- 9 graham crackers: These will serve as the base of your cheesecake crust, offering a subtle sweetness and crunchy texture.
- 5 tablespoons melted butter: This holds the crust together and adds richness.
- 2 tablespoons granulated sugar: A touch of sweetness to balance the flavors in the crust.
- 4 (8-ounce) packages cream cheese at room temperature: The star of the show, providing that creamy and rich filling.
- 2 tablespoons all-purpose flour: Helps stabilize the filling for a perfect texture.
- 1/4 teaspoon salt: Enhances the flavors of the cheesecake.
- 1 1/4 cups granulated sugar: Sweetens the filling, making it irresistibly delicious.
- 1/2 cup sour cream: Adds tanginess and creaminess to the filling.
- 1 tablespoon vanilla extract: Infuses the cheesecake with rich vanilla flavor.
- 3 eggs at room temperature: Provides structure and creaminess to the filling.
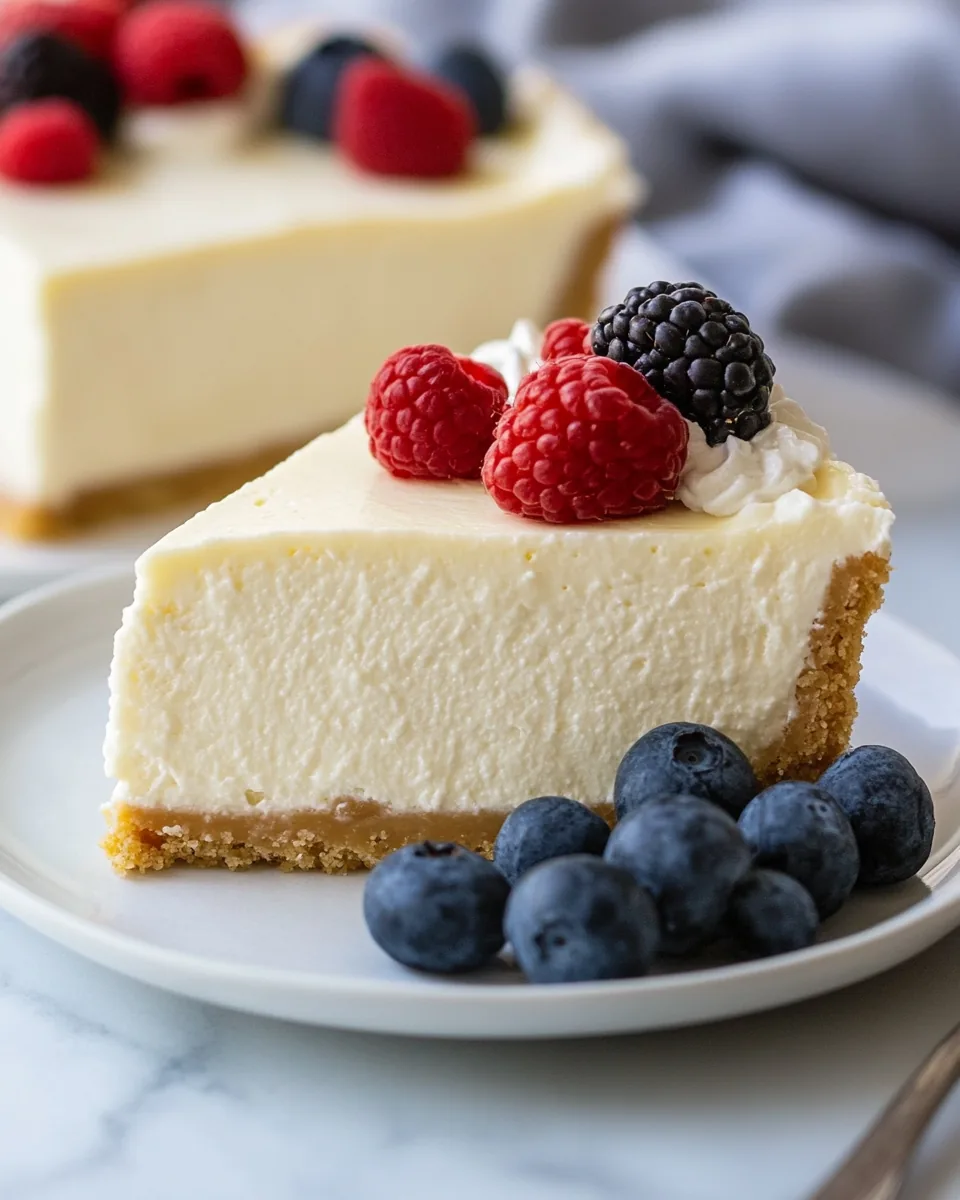
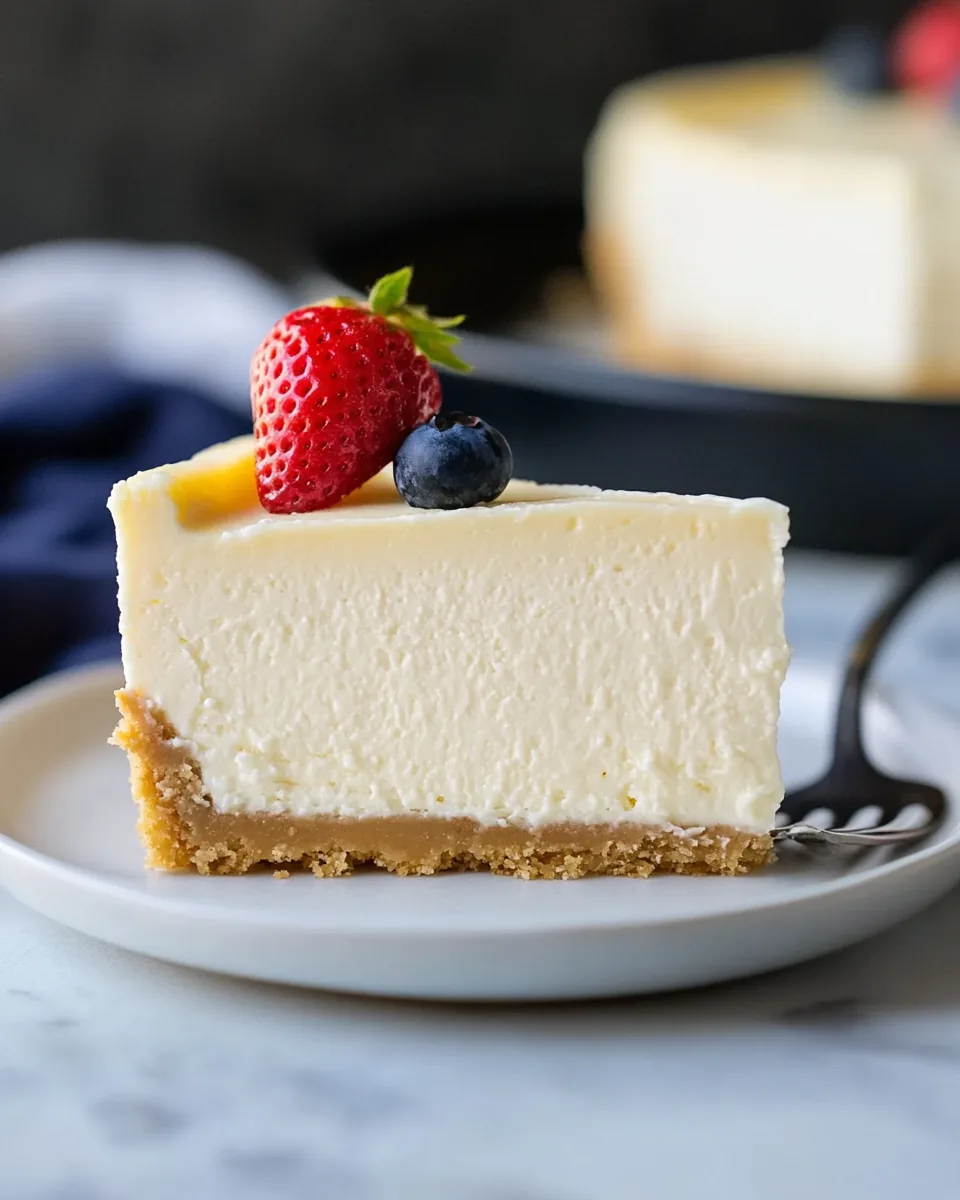
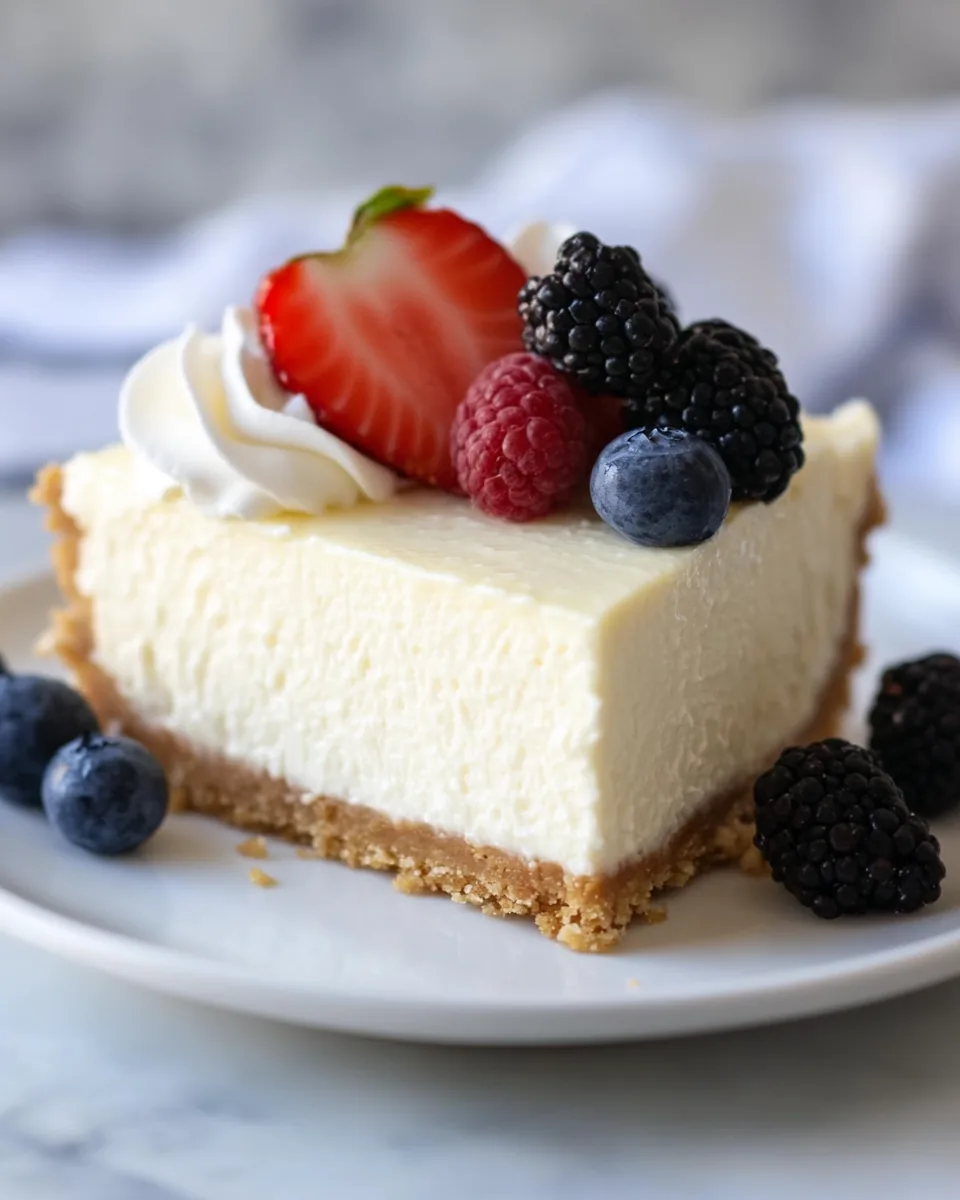
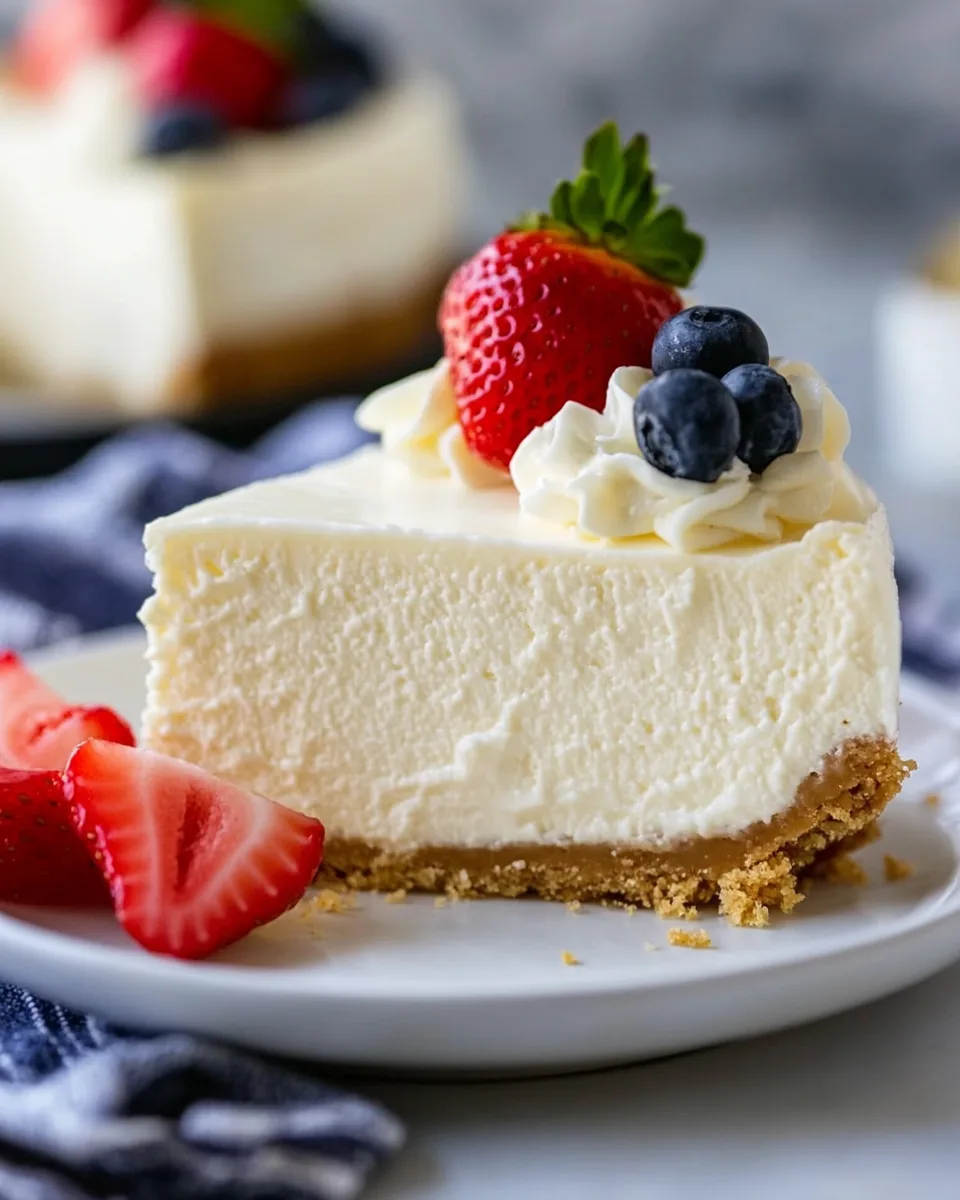
- Whipped cream: Optional, for serving on top.
- Fresh berries: Optional, for garnish and added flavor.
How to Prepare Vanilla Cheesecake
Preparing a Vanilla Cheesecake is an enjoyable process that allows you to create something wonderful from scratch. Follow these detailed steps to ensure a perfect cheesecake that will impress everyone:
- Preheat your oven to 325 degrees. This initial step is crucial for ensuring an even bake. While the oven warms up, gather your ingredients and tools. It’s essential to have everything ready!
- Start by finely crushing the graham crackers. You can use a food processor, blender, or even place them in a plastic bag and crush them with a rolling pin. Aim for about 1 ½ cups of crumbs to create a solid crust.
- In a medium bowl, combine the graham cracker crumbs, butter, and granulated sugar. Mix until everything is evenly coated with the butter, which will help bind the crust together.
- Press the crumb mixture into a 9-inch springform pan. Use the bottom of a measuring cup to firmly pack the crust into the bottom and slightly up the sides of the pan. This helps create a stable base for your cheesecake.
- Bake the crust for about 15 to 20 minutes, or until it’s golden brown and fragrant. The aroma of warm graham crackers will fill your kitchen! Once done, remove it from the oven and let it cool on a wire rack. Reduce the oven temperature to 300 degrees.
- In a stand mixer fitted with the paddle attachment (or using a hand mixer), beat together the cream cheese, flour, and salt until smooth and fluffy. Make sure to scrape the sides of the bowl regularly to ensure everything is well mixed.
- Add the granulated sugar, sour cream, and vanilla to the mixture. Beat until just combined. Be careful not to overmix, as this can incorporate too much air into the filling.
- Add the eggs one at a time, mixing well after each addition. This ensures a smooth, creamy texture. Be sure not to overbeat.
- Pour the cheesecake filling into the prepared crust and smooth the top using a spatula. It’s essential to have an even surface for a beautiful final presentation.
- Bake until the filling is set but still jiggles slightly in the center, about 60 to 75 minutes. As it cools, the filling will firm up. The edges should be slightly puffed, which is a good sign!
- Once baked, let the cheesecake cool on a wire rack until it reaches room temperature. Afterward, cover it and chill in the refrigerator until it’s cold, preferably overnight for the best flavor and texture.
- When ready to serve, unclasp the sides of the springform pan. Run a long, thin spatula between the bottom of the pan and the crust to loosen it. Gently slide the cheesecake onto a serving platter.
- Using a thin-bladed knife, cut the cheesecake into slices. To make cleaner cuts, dip the knife in hot water and wipe it dry before each cut. Serve with whipped cream and fresh berries if desired. Enjoy every creamy bite!
Things Worth Knowing
- Room Temperature Ingredients: Ensure that your cream cheese and eggs are at room temperature before mixing. This helps in achieving a smooth filling without lumps.
- Don’t Overmix: Be cautious not to overmix the batter after adding the eggs. Overmixing can lead to cracks in your cheesecake.
- Water Bath Method: For a creamier texture, consider baking your cheesecake in a water bath. This helps maintain even baking and prevents cracking.
- Cooling Process: Allow the cheesecake to cool slowly. Rapid temperature changes can cause cracks as the cheesecake sets.
Pro Tips and Tweaks
Making the perfect Vanilla Cheesecake can be an art, and there are several tips to enhance your preparation. Here they are:
- Storage: Store leftovers covered in the refrigerator for up to one week to maintain freshness and flavor.
- Freezing: You can freeze the cheesecake, but it’s best enjoyed fresh. If necessary, wrap it tightly and freeze for up to three months.
- Variations: Experiment with different flavors! Add orange zest for a citrus twist or mix in chocolate chips for added decadence.
- Garnishing: Fresh fruits, chocolate shavings, or a berry compote can elevate your cheesecake presentation.
- Serving Temperature: Cheesecake is best served chilled, as it enhances the flavors and gives it a firmer texture.
What Complements This Vanilla Cheesecake
When it comes to serving Vanilla Cheesecake, there are endless possibilities. Here’s how to elevate your dessert experience:
- Seasonal Fruits: Pair with fresh berries or sliced fruits for a refreshing balance against the creaminess of the cheesecake.
- Coffee: Serve with a cup of coffee or espresso. The bitter notes complement the cheesecake beautifully.
- Special Occasions: This cheesecake makes a stunning centerpiece for events like birthdays, anniversaries, or holiday gatherings.
- Storage Tips: If you have leftovers, keep them in an airtight container in the refrigerator to preserve their creamy texture.
- Chocolate Sauce: For chocolate lovers, drizzle some chocolate sauce on top before serving for an indulgent touch.
FAQ
Conclusion
This Vanilla Cheesecake recipe is truly special, blending simplicity with rich, indulgent flavors that make it a crowd favorite. I encourage you to try making it for your next gathering or as a treat for yourself. Every bite will remind you of the joy of creating something delicious, and I promise it will become a cherished recipe in your home!

Vanilla Cheesecake
Equipment
- Mixing Bowl
- Frying Pan
- Chef's Knife
- Blender
- Baking Sheet
- Food Processor
- Oven
Ingredients
- 9 pieces Graham crackers
- 5 tablespoons Butter melted
- 2 tablespoons Granulated sugar
- 4 packages Cream cheese at room temperature
- 2 tablespoons All-purpose flour
- 1/4 teaspoon Salt
- 1 1/4 cups Granulated sugar
- 1/2 cups Sour cream
- 1 tablespoon Vanilla extract
- 3 pieces Eggs at room temperature
- Whipped cream
- Fresh berries
Instructions
- Preheat your oven to 325 degrees. This initial step is crucial for ensuring an even bake. While the oven warms up, gather your ingredients and tools. It’s essential to have everything ready!
- Start by finely crushing the graham crackers. You can use a food processor, blender, or even place them in a plastic bag and crush them with a rolling pin. Aim for about 1 ½ cups of crumbs to create a solid crust.
- In a medium bowl, combine the graham cracker crumbs, butter, and granulated sugar. Mix until everything is evenly coated with the butter, which will help bind the crust together.
- Press the crumb mixture into a 9-inch springform pan. Use the bottom of a measuring cup to firmly pack the crust into the bottom and slightly up the sides of the pan. This helps create a stable base for your cheesecake.
- Bake the crust for about 15 to 20 minutes, or until it’s golden brown and fragrant. The aroma of warm graham crackers will fill your kitchen! Once done, remove it from the oven and let it cool on a wire rack. Reduce the oven temperature to 300 degrees.
- In a stand mixer fitted with the paddle attachment (or using a hand mixer), beat together the cream cheese, flour, and salt until smooth and fluffy. Make sure to scrape the sides of the bowl regularly to ensure everything is well mixed.
- Add the granulated sugar, sour cream, and vanilla to the mixture. Beat until just combined. Be careful not to overmix, as this can incorporate too much air into the filling.
- Add the eggs one at a time, mixing well after each addition. This ensures a smooth, creamy texture. Be sure not to overbeat.
- Pour the cheesecake filling into the prepared crust and smooth the top using a spatula. It’s essential to have an even surface for a beautiful final presentation.
- Bake until the filling is set but still jiggles slightly in the center, about 60 to 75 minutes. As it cools, the filling will firm up. The edges should be slightly puffed, which is a good sign!
- Once baked, let the cheesecake cool on a wire rack until it reaches room temperature. Afterward, cover it and chill in the refrigerator until it’s cold, preferably overnight for the best flavor and texture.
- When ready to serve, unclasp the sides of the springform pan. Run a long, thin spatula between the bottom of the pan and the crust to loosen it. Gently slide the cheesecake onto a serving platter.
- Using a thin-bladed knife, cut the cheesecake into slices. To make cleaner cuts, dip the knife in hot water and wipe it dry before each cut. Serve with whipped cream and fresh berries if desired. Enjoy every creamy bite!
Notes
- Graham crackers: Honey-flavored, cinnamon, or even chocolate graham crackers all work well. If graham crackers aren’t available in your part of the world, you can substitute 1 ½ cups crushed digestive biscuits.
- Sugar: Or substitute 2 tablespoons brown sugar or omit sugar from the crust entirely.
- Cream cheese: You’ll want four 8-ounce blocks of plain, full-fat cream cheese for this homemade cheesecake recipe. Slice into cubes to speed up their softening time.
- Sour cream: A ½ cup is all you need for just enough tang to balance out the sugar in the filling. Again, full fat is my top pick for the best flavor and texture.
- Storage: Store leftovers covered in the refrigerator for up to 1 week.
- Make ahead: After baking, cool the Vanilla Cheesecake completely and then store covered in the refrigerator up to 3 days in advance.
- Freezer: While the cheesecake filling is best prepared just before baking, you can freeze the prepared crust up to 3 months in advance. Thaw before using.