Tuna Melt
There’s something undeniably comforting about a warm Tuna Melt. I remember the first time I tried one at a cozy diner down the road. The aroma of toasted bread and melted cheese filled the air, and I was instantly hooked. This dish has a way of bringing back memories of lazy afternoons spent with family, sharing stories and laughter over plates of this classic. The combination of flaky tuna, creamy mayonnaise, and crispy bread, all topped off with a slice of cheese, creates a melty masterpiece that warms your soul. It’s not just a meal; it’s a hug on a plate. Whether it’s for a quick lunch or a comforting dinner, making a Tuna Melt is all about the love you pour into it. You can customize it with your favorite ingredients or keep it simple for that nostalgic taste. Let’s dive into why this dish is a must-try!
Recipe Snapshot
20 mins
10 mins
10 mins
Medium
350 kcal
25 g
Paleo, Gluten-Free, Low FODMAP
18 g
Wooden Spoon, Mixing Bowl, Skillet, Chef’s Knife, Cutting Board, Oven
Why This Tuna Melt Is So Good
It’s Comfort Food at Its Finest
The Tuna Melt is the epitome of comfort food. It combines familiar flavors that many of us grew up with, creating a dish that feels like home. The warm, crispy bread paired with creamy tuna and melted cheese is a winning combination that makes any day better.
Easy to Make
One of the best parts about this recipe is its simplicity. Even if you’re not an experienced cook, you can whip up a Tuna Melt in a matter of minutes. It’s perfect for busy weekdays when you want something quick yet satisfying.
Versatile Options
You can easily customize your Tuna Melt to suit your taste. Add some tomato slices or spicy jalapeños for an extra kick, or switch up the cheese to your preference. The possibilities are endless!
Perfect for Any Occasion
Whether you’re hosting a casual gathering or cooking for a family meal, the Tuna Melt always impresses. It’s a dish that brings people together, and you can serve it up with a side salad or chips for a complete meal.
Great for Meal Prep
Another reason to love this recipe is that it’s ideal for meal prepping. You can prepare the tuna mixture ahead of time and keep it in the fridge. When you’re ready to eat, just assemble and toast your sandwich. It’s a lifesaver on those hectic days!
Recipe Ingredients for Tuna Melt
When it comes to the ingredients for this Tuna Melt, simplicity is key. The power of this dish lies in how well the ingredients complement each other. The tuna provides the rich, savory base, while the mayonnaise adds creaminess. Fresh celery and red onion introduce texture and brightness, while cheese binds everything together with its gooey goodness. Here’s what you’ll need:
- 4 cans 5 oz tuna packed in water, drained
- ¼ cup celery finely diced
- 2 Tablespoons red onion finely minced
- 1 teaspoon flat-leaf parsley finely minced
- ¾ cup mayonnaise (add a little at a time)
- 1 teaspoon mustard (dijon or stone ground)
- 1 Tablespoon freshly squeezed lemon juice
- Salt and pepper to taste
- 8 pieces Bread (your favorite)
- 4 Cheese Slices (your favorite)
- Butter for bread, to toast
- 4 Tomato Slices
Directions for Tuna Melt
Making a Tuna Melt is a delightful experience that aligns perfectly with the idea of comfort cooking. The steps are straightforward, and you’ll find yourself enjoying the process as much as the result. Now, let’s get into the nitty-gritty of how to create this delicious masterpiece:
- Start by draining and flaking the tuna into a large bowl. You want small, manageable pieces that will mix easily with the other ingredients.
- Add the finely diced celery, minced red onion, and chopped flat-leaf parsley to the bowl and stir until thoroughly combined. The mixture should be vibrant and colorful, with the fresh vegetables adding crunch.
- Next, incorporate the mayonnaise, mustard, and lemon juice into the tuna mixture. Stir gently until everything is well combined. Taste and season with salt and pepper to your liking. This tuna salad should be creamy but not overwhelming, so adjust the mayonnaise as needed.
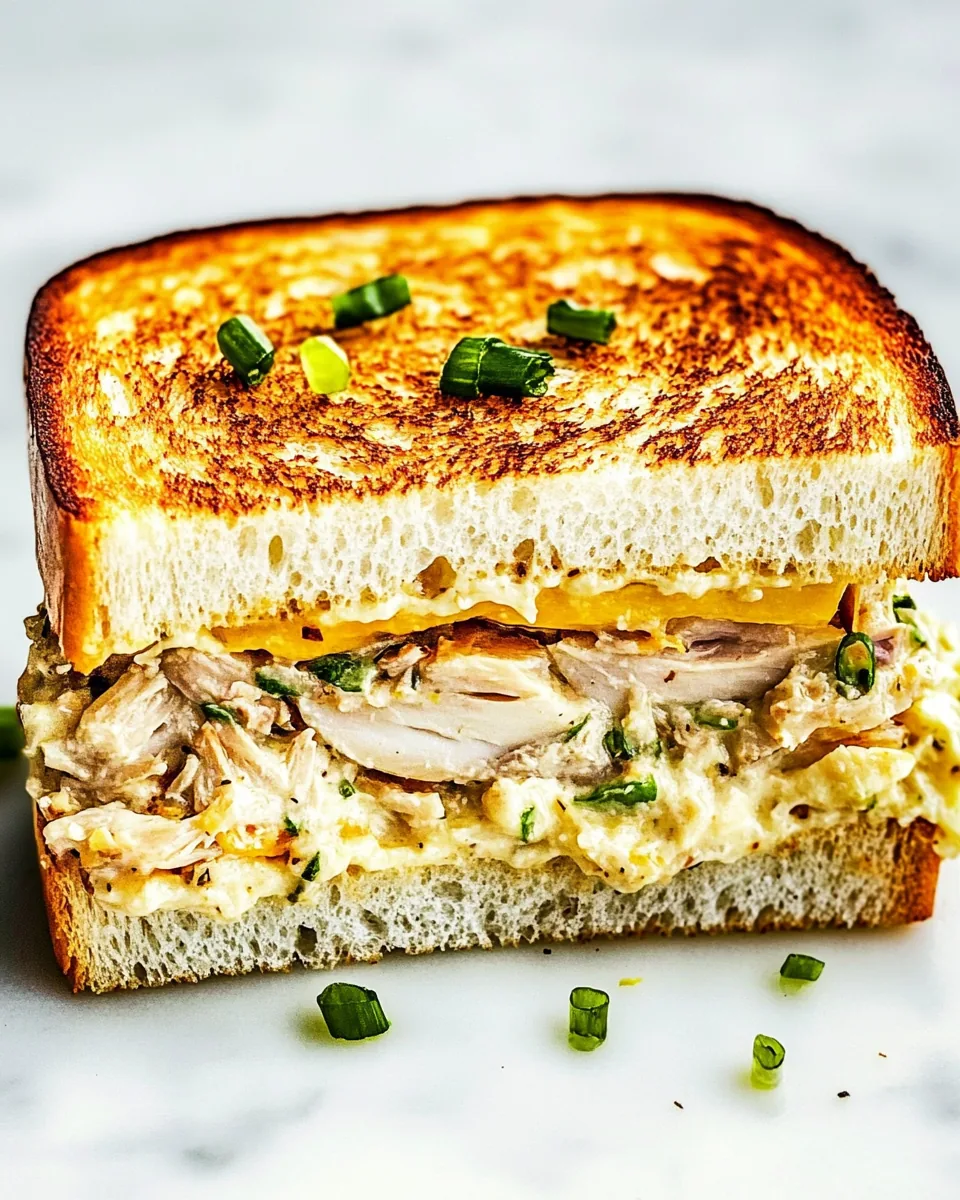
- Now, take your favorite slices of bread and butter one side of each slice. The buttered side will give you that golden, crispy texture when toasted.
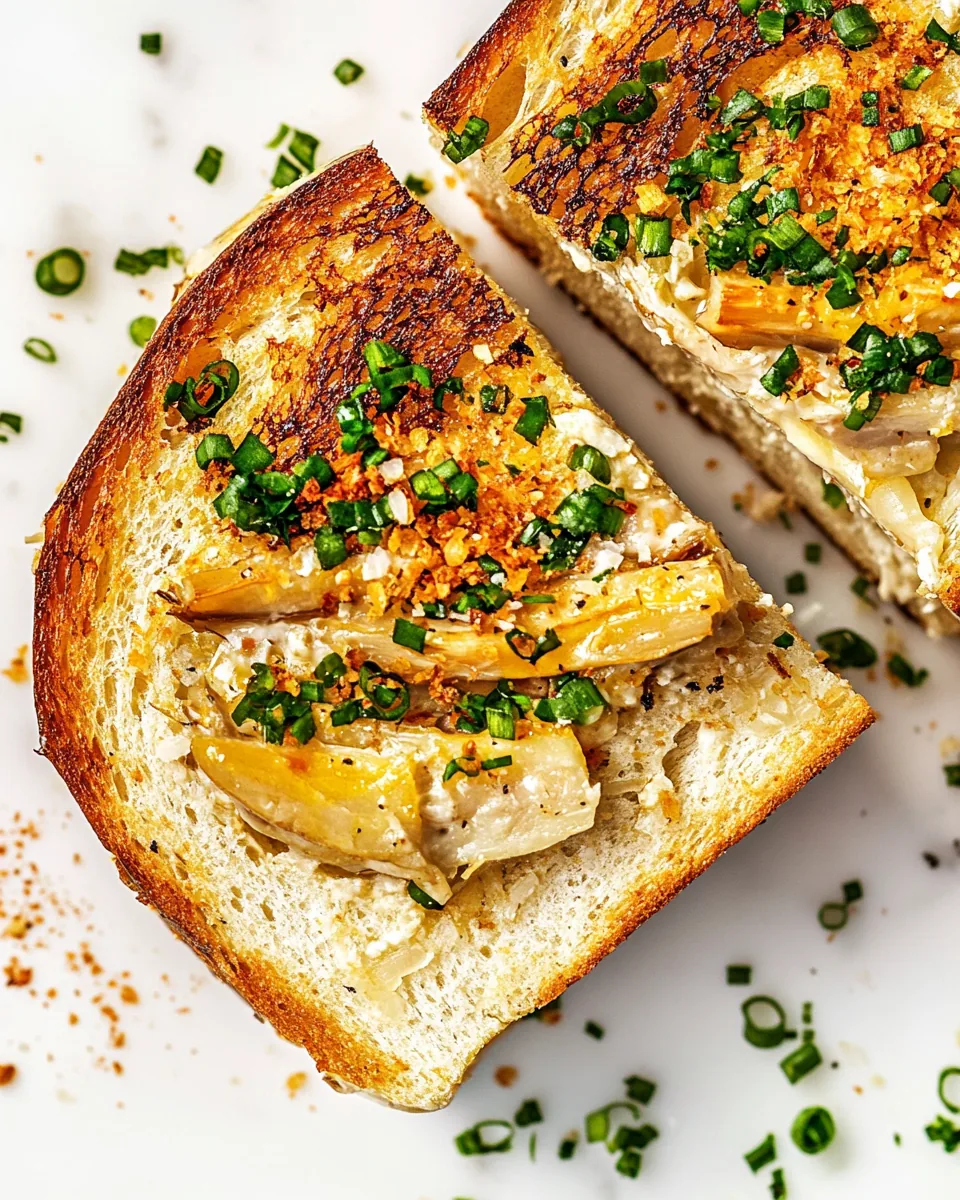
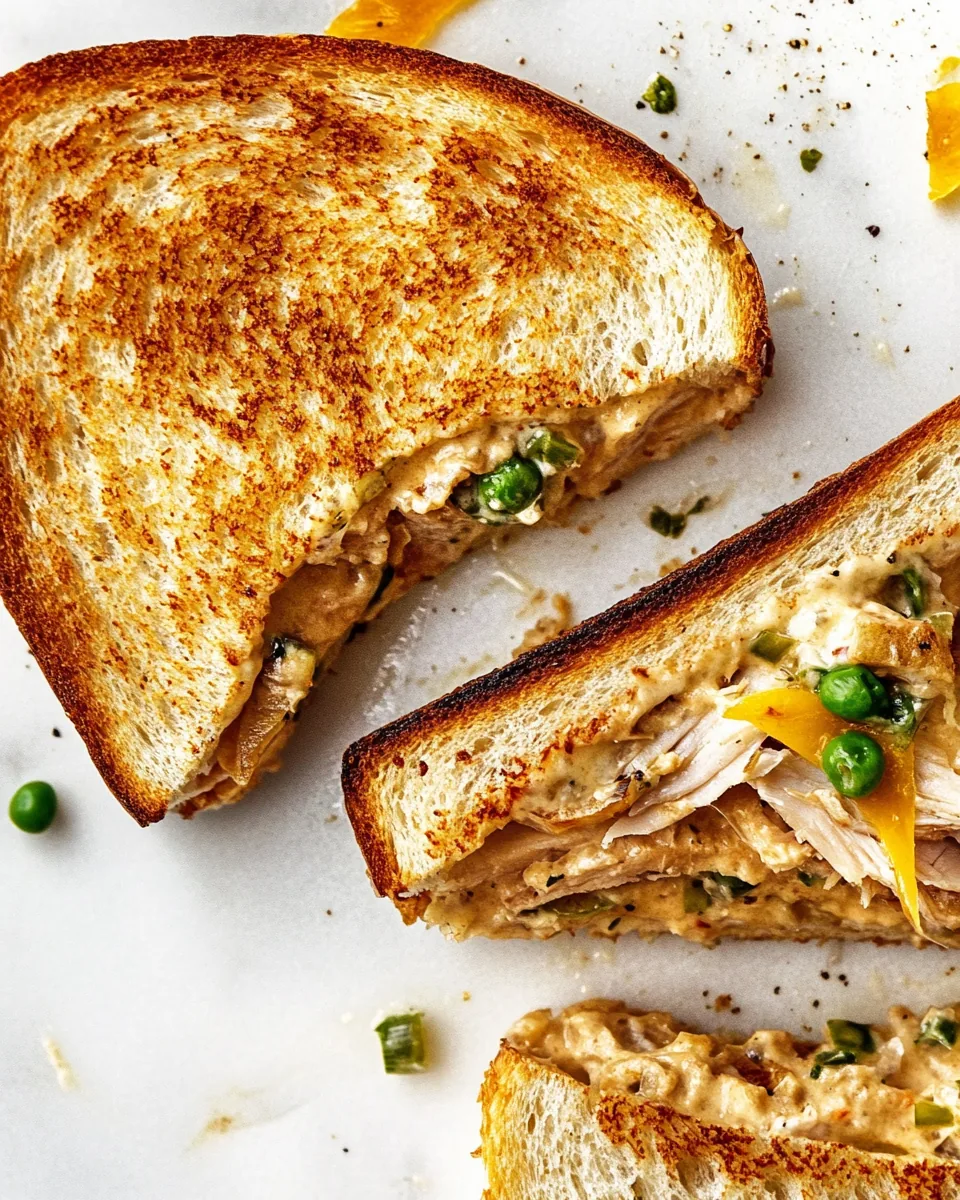
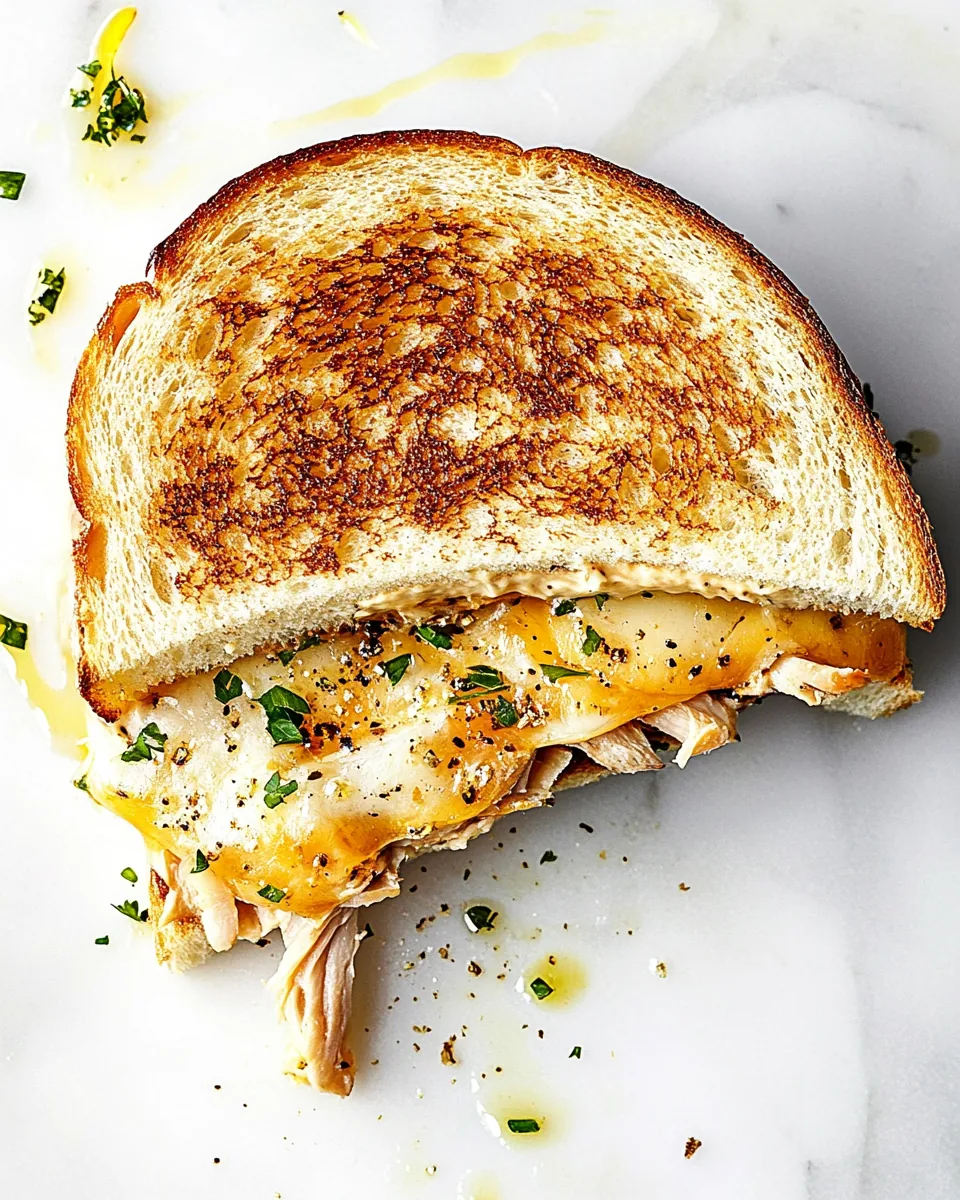
- On the unbuttered side of one slice, layer on a generous amount of the tuna mixture. Top it off with your preferred cheese slices and any additional toppings you desire, like tomato slices.
- Place another slice of bread on top, butter side up. Press down gently to create a sandwich. You can also serve it open-faced if you prefer.
- Heat a skillet over medium-low heat. Once hot, carefully place the sandwich in the skillet. Cook until the bottom slice of bread is golden brown and crispy, and the cheese is starting to melt, about 3 to 4 minutes. You’ll want to keep an eye on it to avoid burning.
- Flip the sandwich carefully using a spatula and cook the other side similarly until golden brown and the cheese is fully melted, about another 3 to 4 minutes.
- Once cooked, remove from the skillet and let it cool slightly before cutting. This allows your cheese and tuna filling to settle.
- Serve immediately, either as a sandwich or open-faced, garnishing with additional tomato slices if desired. Enjoy every bite of your homemade Tuna Melt!
Things Worth Knowing
- Don’t Rush the Toasting: Ensure your skillet isn’t too hot. You want the bread to toast evenly while the cheese melts thoroughly.
- Experiment with Cheeses: Try different cheese varieties like sharp cheddar, Swiss, or pepper jack for a twist.
- Fresh Ingredients Matter: Use fresh vegetables for the best flavor and texture in your Tuna Melt.
- Monitor Seasoning: Season gradually. Taste your mixture before adding too much salt or pepper.
Pro Tips and Tweaks
Every good dish comes with its share of tips and tweaks. Here’s what I’ve learned from making my Tuna Melt multiple times:
- Storage: Store any leftover tuna mixture in an airtight container in the fridge for up to three days.
- Freezing: While it’s best to consume fresh, you can freeze the tuna mixture in a tightly sealed container for up to two months. Just thaw it before using.
- Pairing: Serve with a crisp green salad or sweet potato fries for a complete meal.
- Variations: Add sliced olives, jalapeños, or pickles for an extra flavor boost.
- Use Different Breads: Try sourdough, rye, or whole-grain breads for different textures and flavors.
- Cheese Melting Tip: For a gooey melt, place the sandwich in the oven for a few minutes after pan-frying.
Serving This Tuna Melt
Serving a Tuna Melt can elevate your meal to an entirely new level. It’s not just about what’s on the plate; it’s also about the experience. Here’s how to do it right:
- Lunch Delight: This dish shines as a quick lunch option. Pair it with a light salad or some crunchy chips for a satisfying mid-day break.
- Casual Dinner: It’s perfect for informal family dinners or a quick bite after a long day. Serve it with roasted vegetables for a heartier meal.
- Party Serving: Consider serving Tuna Melts as part of a buffet or gathering. Cut them into smaller portions, so guests can enjoy a taste without overindulging.
- Seasonal Pairing: In warmer months, accompany your Tuna Melt with fresh fruit or a chilled soup for a refreshing twist.
- Creative Toppings: Offer toppings on the side, such as avocado slices or different types of cheese, allowing everyone to customize their sandwich.
- Open-Faced Option: Serve your Tuna Melt open-faced for a more elegant presentation. Just layer everything beautifully and omit the top slice of bread.
FAQ
Conclusion
The Tuna Melt stands out as a quintessential comfort food that brings warmth and joy to any table. With its simple yet satisfying flavors, it’s a dish that’s perfect for casual lunches or cozy dinners at home. I encourage you to try making this delightful sandwich yourself. You won’t be disappointed!
Tuna Melt
Equipment
- Wooden Spoon
- Mixing Bowl
- Skillet
- Chef's Knife
- Cutting Board
- Oven
Ingredients
- 4 cans tuna packed in water, drained
- ¼ cup celery finely diced
- 2 Tablespoons red onion finely minced
- 1 teaspoon flat-leaf parsley finely minced
- ¾ cup mayonnaise
- 1 teaspoon mustard (dijon or stone ground)
- 1 Tablespoon freshly squeezed lemon juice
- to taste salt
- to taste pepper
- 8 pieces Bread (your favorite)
- 4 Slices Cheese (your favorite)
- to taste Butter for bread, to toast
- 4 Slices Tomato
Instructions
- Drain and flake tuna, add to large bowl.
- Add celery, red onion, and parsley to bowl and stir to combine.
- Add mayonnaise, mustard and lemon juice to tuna mixture and stir until well combined.
- Season with salt and pepper to taste.
- Butter the outside of the bread slices, layer tuna mixture on the inside of one bread slice, top with cheese and desired toppings, then place another piece of bread, butter side up, on top.
- Heat skillet over medium-low heat and cook until bottom bread is toasted and cheese is warm, flip and cook on the other side until bread is toasted.
- Serve open-faced or add another slice of toast for a sandwich.
Notes
- Tip: The amount of mayo will depend on how creamy you want your tuna salad.