Tres Leches Cake
There’s something magical about a Tres Leches Cake. Growing up, this cake was the centerpiece of every family celebration, from birthdays to graduations. The moment you sink your fork into the light, fluffy layers, you’re greeted by the sweet, creamy goodness that fills each bite. It’s not just a dessert; it’s a nostalgic journey back to warm gatherings and laughter shared with friends and family. My first attempt at making a Tres Leches Cake was a delightful experience, watching the simple ingredients transform into something so luxurious and indulgent. I can still remember the heavenly aroma of the cake baking in the oven, filling my kitchen with warmth and excitement. The secret lies in the three types of milk that soak into the cake, creating a moist and rich texture that’s simply irresistible.
Recipe Snapshot
60 mins
20 mins
40 mins
Medium
380 kcal
6 g
Gluten-Free, Low FODMAP
20 g
Mixing Bowl, Frying Pan, Whisk, Baking Sheet, Oven
Why We Love This Tres Leches Cake
It’s Incredibly Moist
The key to a perfect Tres Leches Cake is the soaking process. The combination of evaporated milk, condensed milk, and heavy whipping cream gives the cake a unique moistness that sets it apart from other desserts. Each slice is bursting with flavor and creaminess, making it a delightful treat that lingers on your palate.
Perfect for Any Occasion
Whether it’s a birthday party, a holiday gathering, or just a sweet craving, this cake fits right in. It’s versatile enough to be dressed up with fresh berries or a sprinkle of cinnamon for a festive touch. I love making it when I have guests over, as it’s always a crowd-pleaser.
Easy to Make Ahead
One of the best things about this Tres Leches Cake is that you can prepare it in advance. It actually tastes better when made a day ahead, allowing the flavors to meld beautifully. This makes it a convenient option for busy hosts!
Rich in Flavor
The balance of the three milks creates a rich flavor profile that’s simply irresistible. Each bite is a luscious experience, and the whipped cream topping adds a lightness that complements the cake perfectly. I could indulge in this dessert every day!
Endless Customization
Feel free to get creative with your Tres Leches Cake. You can add flavors like lime zest or even a hint of coffee in the soaking mixture. The options are endless, and it’s just as fun to experiment as it is to enjoy the traditional version.
What’s In This Tres Leches Cake
The ingredients in this Tres Leches Cake work together to create a harmonious blend of flavors and textures. The main components include a moist cake base, a trio of milks, and a fluffy whipped cream topping. Each ingredient plays a vital role, ensuring that the cake comes out perfectly every time.
-
All-Purpose Flour: 2 ½ cups
This forms the base of the cake, giving it structure and a soft crumb. -
Baking Powder: 1 tablespoon
This leavening agent helps the cake rise, contributing to its fluffy texture. -
Salt: 1 teaspoon
A pinch of salt enhances the flavor and balances the sweetness of the cake. -
Eggs: 8
Eggs provide richness and stability to the cake, helping it hold its moisture. -
Sugar: 1 ½ cups
Sweetness is crucial in a Tres Leches Cake, and sugar adds to the delightful flavor. -
Vegetable Oil: ¾ cup
This keeps the cake moist and tender, ensuring it doesn’t dry out. -
Evaporated Milk: 12 oz can
One of the three milks, providing creaminess and richness to the cake. -
Condensed Sweetened Milk: 12 oz can
This sweet milk adds a luscious flavor and moisture to the cake. -
Heavy Whipping Cream: 1 cup
This is whipped and spread on top, adding an airy texture that complements the dense cake. - Cinnamon, Cocoa Powder, and Berries: for optional garnish
Preparation Steps for Tres Leches Cake
Making a Tres Leches Cake is an enjoyable process that invites you into the world of baking. Follow these steps, and you’ll have a wonderful dessert that will impress anyone!
- Preheat your oven to 350 degrees. This ensures that your cake will bake evenly and rise perfectly.
- In a large bowl, sift together the all-purpose flour, baking powder, and salt. Sifting helps to aerate the flour and removes any lumps, creating a smoother batter.
- In another bowl, combine the eggs and sugar. Using a stand mixer with a whisk attachment, mix on high speed for 10 to 12 minutes, or until the mixture is light and fluffy. You want it to double in size and turn a pale yellow.
- While mixing on high speed, slowly pour in the vegetable oil and continue mixing until well combined.
- Remove the mixing bowl from the mixer and gently fold in the sifted dry ingredients in two batches using a rubber spatula. Be careful not to overmix; you just want everything combined.
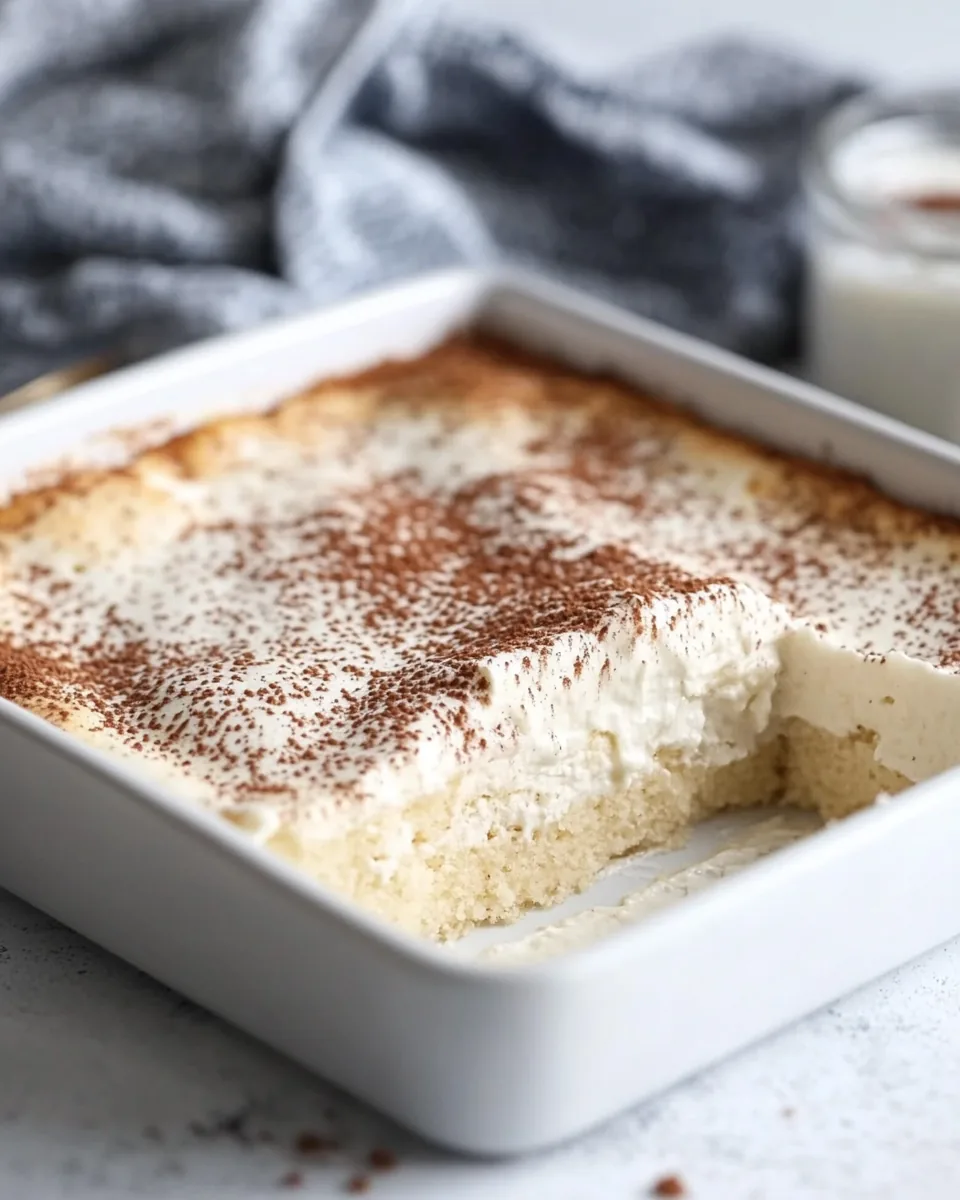
- Transfer the batter to a greased 13×9 casserole dish, spreading it evenly. Bake for 35 to 40 minutes, or until the top is golden brown and a toothpick inserted into the center comes out clean.
- Once baked, allow the pan to cool completely to room temperature. This is essential because you want to add the milk mixture without it being too hot.
- Meanwhile, in a separate large bowl, whisk together the evaporated milk, condensed milk, and heavy whipping cream until fully combined. This rich mixture will soak into the cake.
- Once the cake has cooled, use a fork to pierce it all over, allowing the soaking mixture to penetrate the cake deeply. Pour the milk mixture evenly over the cake and let it sit until fully absorbed, which usually takes about an hour.
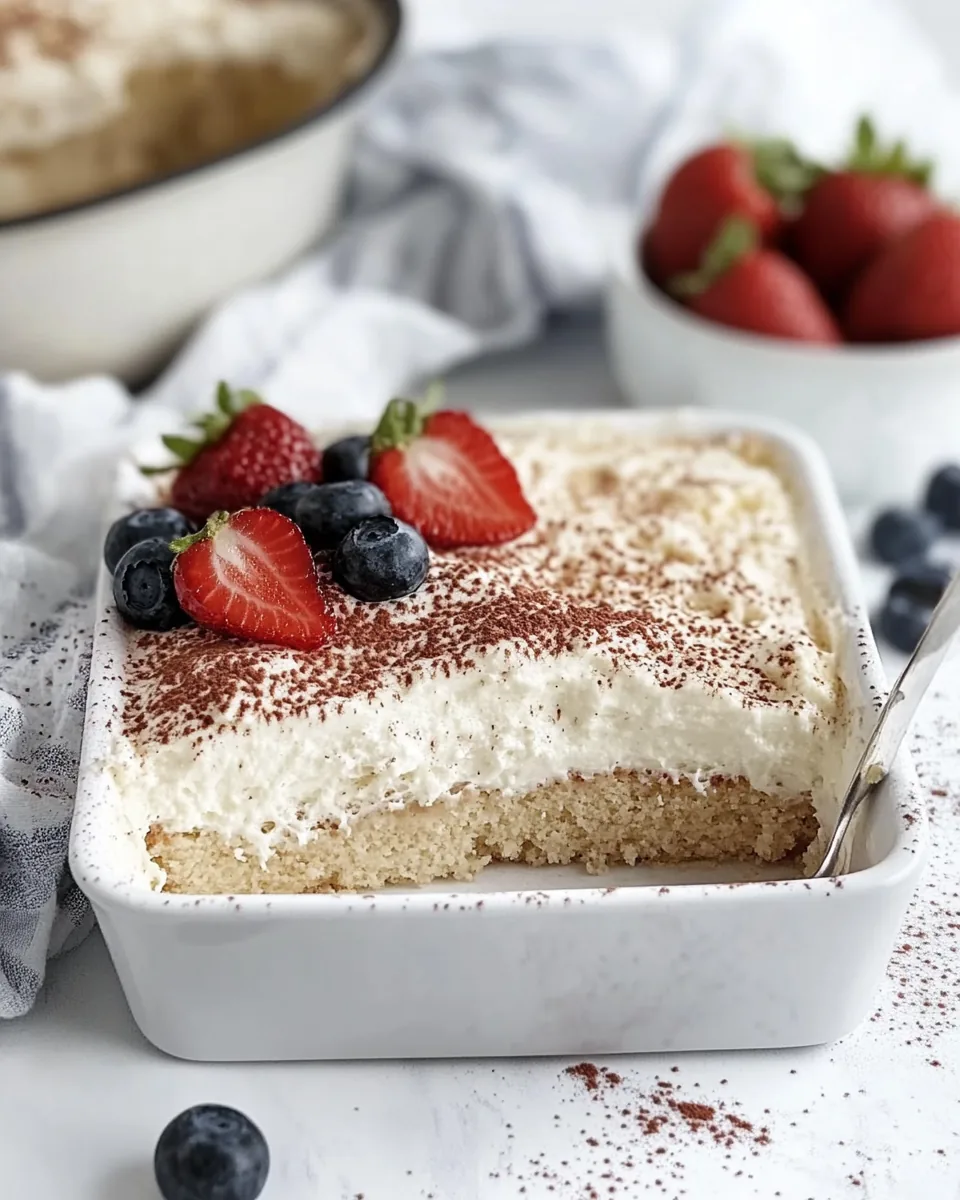
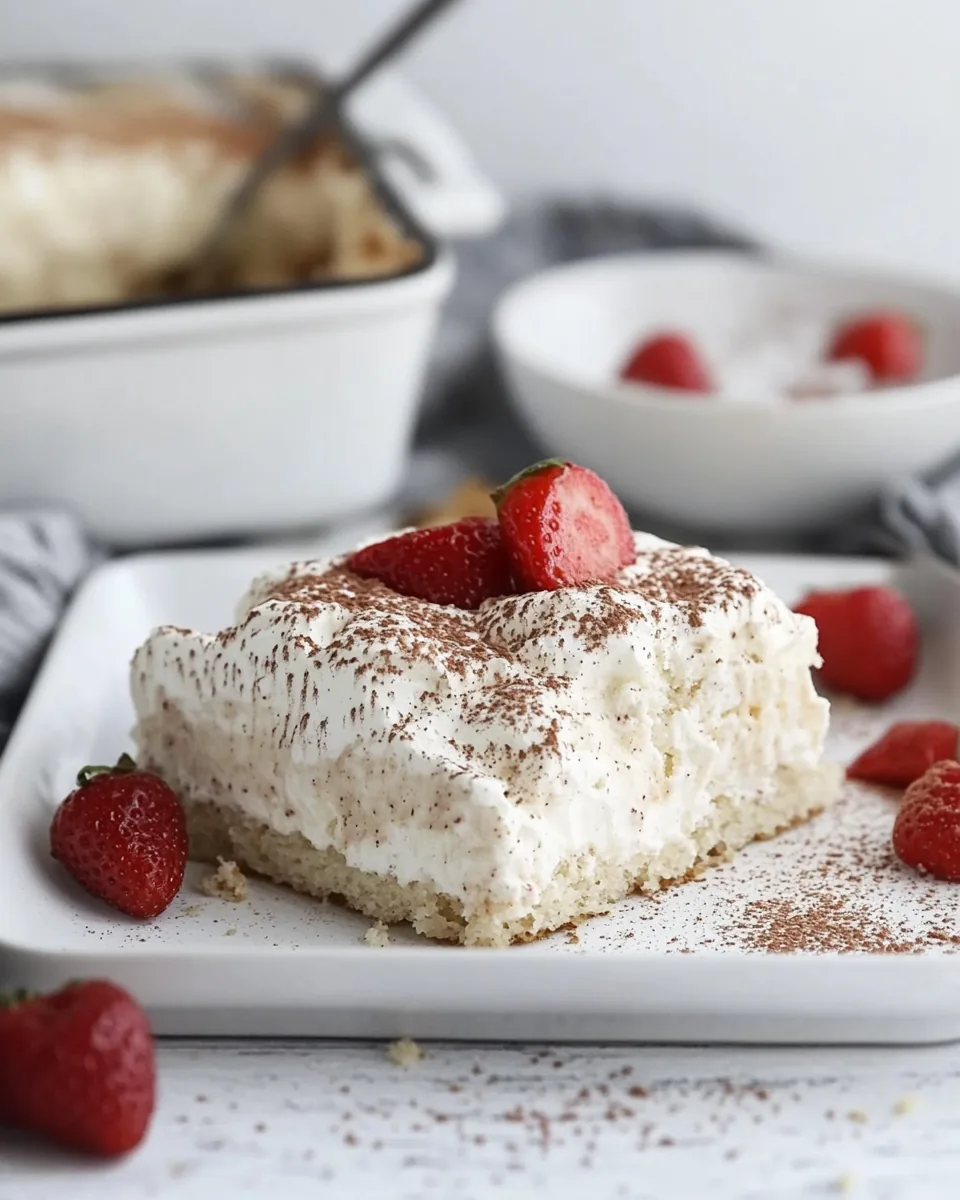
- Top the cake with whipped cream and spread it evenly. For an optional garnish, dust the top with cinnamon and cocoa powder, and serve with fresh berries.
Things Worth Knowing
- Humidity Matters: If you live in a more humid climate, consider reducing the amount of milk slightly to avoid overly soggy cake.
- Whipping Technique: When whipping your cream, make sure it’s cold for the best volume and texture.
- Let It Chill: Allowing the cake to chill in the refrigerator for a few hours enhances the flavor and texture.
- Experiment with Flavors: Don’t hesitate to add your favorite flavors like almond or coconut to the milk mixture for a twist.
Recipe Notes about Tres Leches Cake
Here are some useful tips to ensure your Tres Leches Cake turns out perfect every time.
- Make-Ahead: You can prepare this cake up to two days in advance. Store it in the refrigerator to let the flavors develop.
- Storage: Keep leftovers covered in the refrigerator for up to five days. For longer storage, freeze for up to three months.
- Thawing: If frozen, allow the cake to thaw in the refrigerator for one day before serving for the best texture.
- Whipped Cream Tips: If you prefer a firmer topping, you can use stabilized whipped cream instead of regular whipped cream.
- Serving Suggestions: Pair your Tres Leches Cake with fresh fruits or a scoop of vanilla ice cream for a delightful dessert experience.
- Texture Check: A well-made cake will feel firm but not dry; it should spring back when lightly pressed.
Serving Options for Tres Leches Cake
When it comes to serving your Tres Leches Cake, there are so many delightful options to consider:
- Fresh Fruits: Serve with a side of fresh berries like strawberries, blueberries, or raspberries for a burst of flavor.
- Ice Cream: Pair with a scoop of vanilla or coconut ice cream to complement the cake’s sweetness.
- Occasion: This cake is perfect for celebrations, making it a great choice for birthdays, anniversaries, and holidays.
- Coffee Pairing: Enjoy with a cup of coffee or a latte for a delightful afternoon treat.
- Festive Garnish: Consider topping the cake with edible flowers or additional whipped cream for special occasions.
FAQ
Conclusion
The Tres Leches Cake is truly a dessert that brings joy and comfort to any table. Its unique blend of three milks creates a moist, flavorful experience that is simply unforgettable. I encourage you to give this recipe a try—you won’t regret it! Once you take that first bite, you’ll understand why this cake holds such a special place in the hearts of so many.

Tres Leches Cake
Equipment
- Mixing Bowl
- Frying Pan
- Whisk
- Baking Sheet
- Oven
Ingredients
- 2 ½ cups All-Purpose Flour
- 1 tablespoon Baking Powder
- 1 teaspoon Salt
- 8 large Eggs
- 1 ½ cups Sugar
- ¾ cup Vegetable Oil
- 12 oz Evaporated Milk
- 12 oz Condensed Sweetened Milk
- 1 cup Heavy Whipping Cream
- 1 recipe Whipped Cream
- to taste Cinnamon, Cocoa Powder, and Berries for optional garnish
Instructions
- Preheat your oven to 350 degrees. This ensures that your cake will bake evenly and rise perfectly.
- In a large bowl, sift together the all-purpose flour, baking powder, and salt. Sifting helps to aerate the flour and removes any lumps, creating a smoother batter.
- In another bowl, combine the eggs and sugar. Using a stand mixer with a whisk attachment, mix on high speed for 10 to 12 minutes, or until the mixture is light and fluffy. You want it to double in size and turn a pale yellow.
- While mixing on high speed, slowly pour in the vegetable oil and continue mixing until well combined.
- Remove the mixing bowl from the mixer and gently fold in the sifted dry ingredients in two batches using a rubber spatula. Be careful not to overmix; you just want everything combined.
- Transfer the batter to a greased 13x9 casserole dish, spreading it evenly. Bake for 35 to 40 minutes, or until the top is golden brown and a toothpick inserted into the center comes out clean.
- Once baked, allow the pan to cool completely to room temperature. This is essential because you want to add the milk mixture without it being too hot.
- Meanwhile, in a separate large bowl, whisk together the evaporated milk, condensed milk, and heavy whipping cream until fully combined. This rich mixture will soak into the cake.
- Once the cake has cooled, use a fork to pierce it all over, allowing the soaking mixture to penetrate the cake deeply. Pour the milk mixture evenly over the cake and let it sit until fully absorbed, which usually takes about an hour.
- Top the cake with whipped cream and spread it evenly. For an optional garnish, dust the top with cinnamon and cocoa powder, and serve with fresh berries.
Notes
- Make-Ahead: You can prepare this cake up to two days in advance. Store it in the refrigerator to let the flavors develop.
- Storage: Keep leftovers covered in the refrigerator for up to five days. For longer storage, freeze for up to three months.
- Thawing: If frozen, allow the cake to thaw in the refrigerator for one day before serving for the best texture.
- Whipped Cream Tips: If you prefer a firmer topping, you can use stabilized whipped cream instead of regular whipped cream.
- Serving Suggestions: Pair your Tres Leches Cake with fresh fruits or a scoop of vanilla ice cream for a delightful dessert experience.
- Texture Check: A well-made cake will feel firm but not dry; it should spring back when lightly pressed.