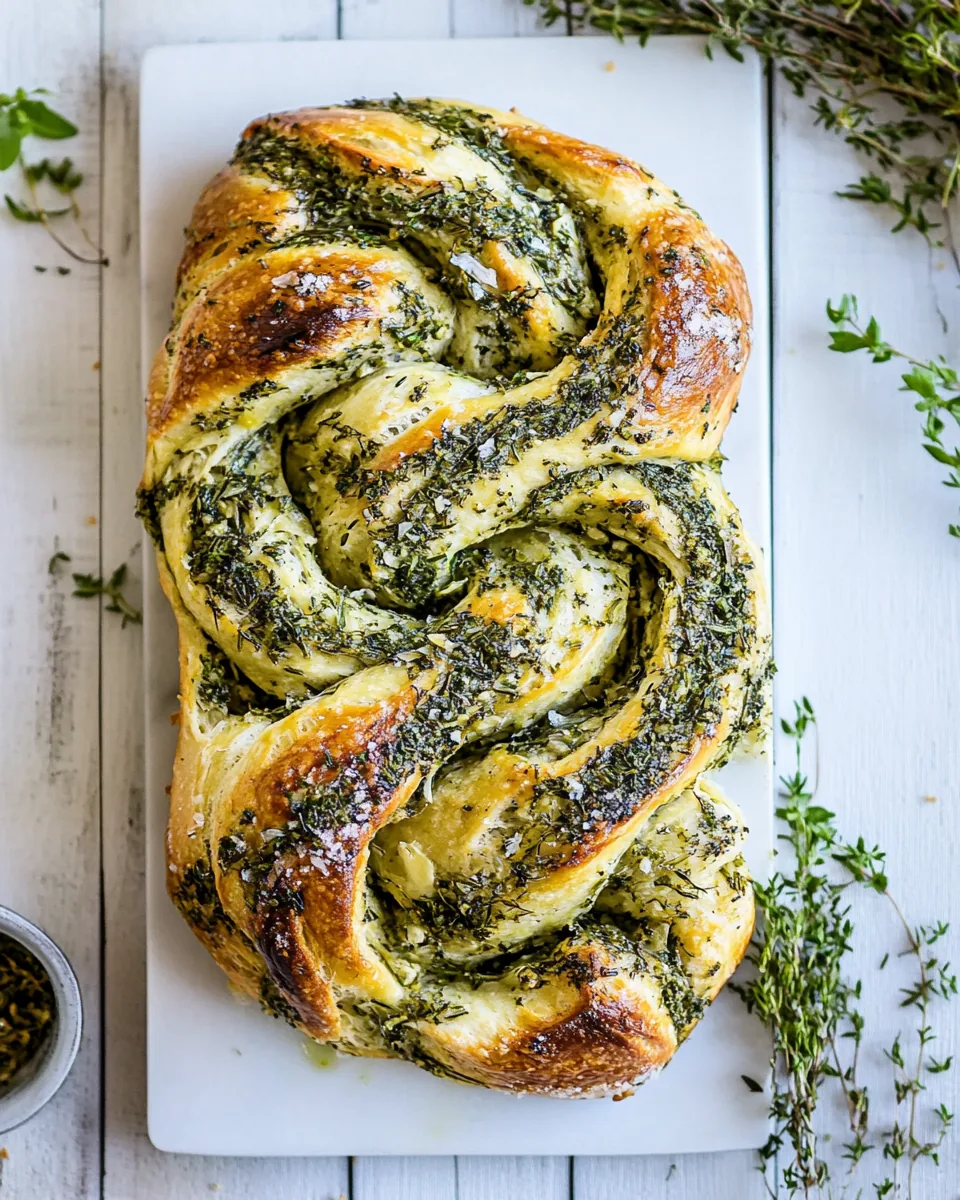
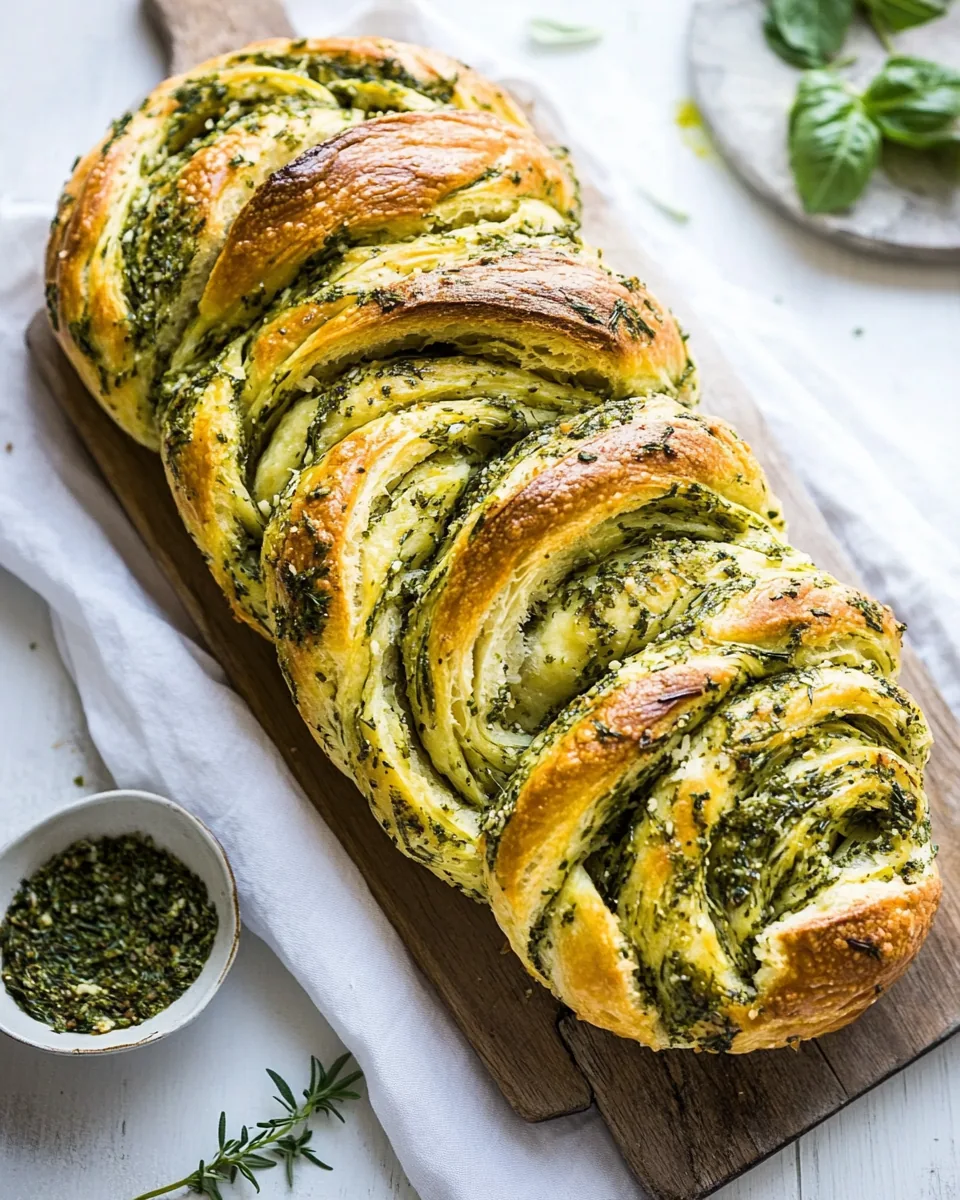
Swirled Garlic Herb Bread
There’s something truly magical about baking bread at home, and my favorite creation is this Swirled Garlic Herb Bread. It fills the kitchen with an irresistible aroma that can make anyone’s mouth water. Picture this: it’s a chilly evening, and you’re welcoming friends or family over. As they walk through the door, the smell of warm, freshly baked bread greets them, instantly making them feel at home. This bread isn’t just a side dish; it’s an experience, a conversation starter, and a reason for everyone to gather around the table. I remember the first time I made this bread; the joy on my family’s faces when they took that first warm slice, slathered in butter, was priceless. It’s perfect for dinner parties, cozy family meals, or even just a simple evening at home. Trust me, once you’ve made this Swirled Garlic Herb Bread, you won’t want to go back to store-bought again!
Recipe Snapshot
50 mins
20 mins
30 mins
Medium
210 kcal
5 g
Gluten-Free, Low FODMAP
9 g
Grater, Mixing Bowl, Chef’s Knife, Baking Sheet, Oven
Why This Swirled Garlic Herb Bread Stands Out
Homemade Delight
There’s nothing quite like the satisfaction of creating something from scratch, especially bread. When you bake the Swirled Garlic Herb Bread, you’re not just following a recipe; you’re crafting a piece of art that will tantalize your taste buds. The combination of fresh herbs and garlic creates a flavor profile that is both rich and aromatic, elevating your dining experience.
Perfectly Versatile
This bread is incredibly versatile. Whether you’re serving it alongside a hearty soup or as a base for a delicious sandwich, it fits seamlessly into any meal. It even makes for a delightful breakfast when toasted and topped with a bit of jam. You can enjoy it at any time of day!
Impressive Yet Simple
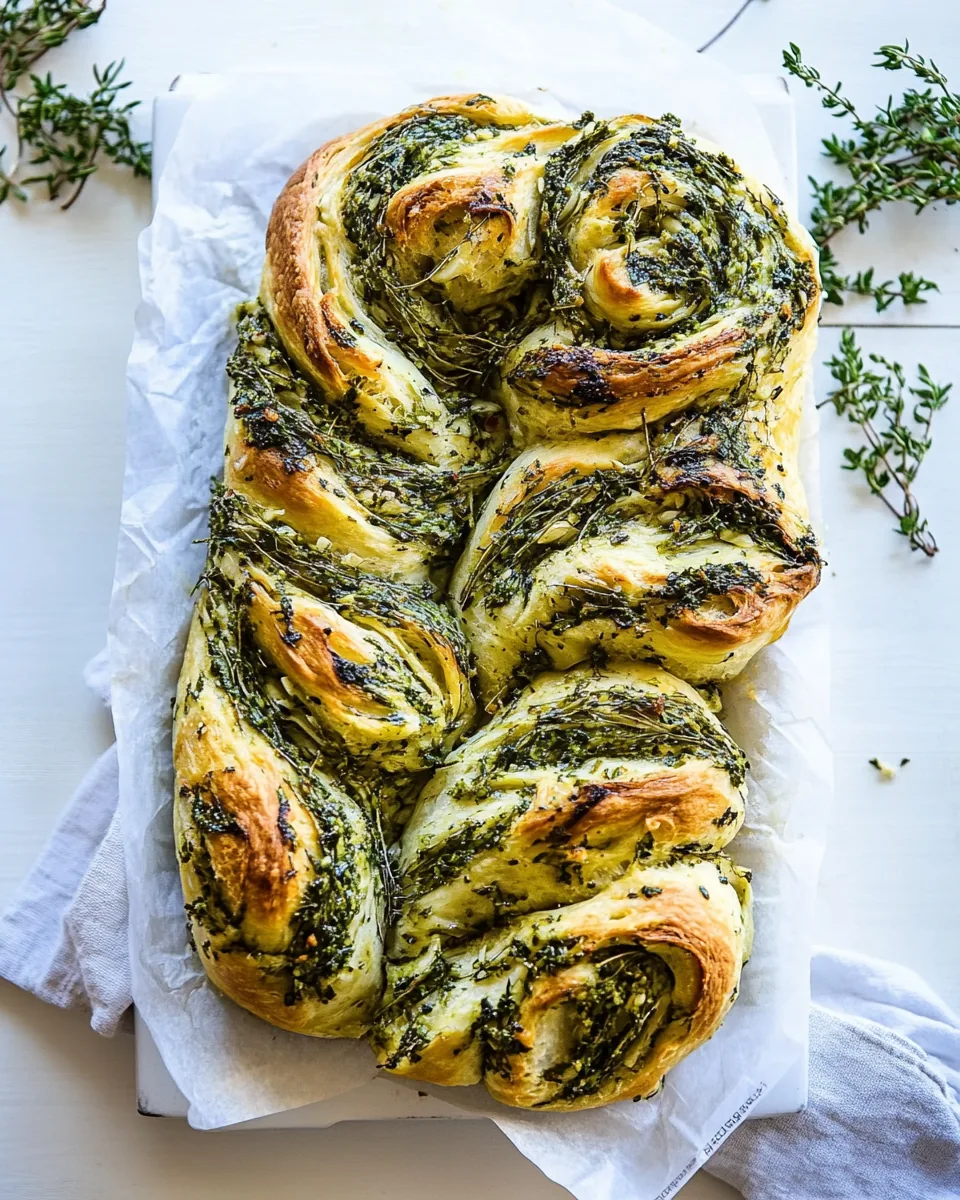
The Swirled Garlic Herb Bread looks stunning when you pull it out of the oven, with its beautiful twists and swirls. But don’t let its impressive appearance fool you; it’s surprisingly simple to make! With just a few ingredients and some time to let the dough rise, you’ll have a show-stopping bread that you can be proud of.
Great for Sharing
There’s an undeniable joy in sharing homemade bread with loved ones. The Swirled Garlic Herb Bread is a perfect centerpiece for gatherings, allowing everyone to break off pieces and enjoy together. It’s the kind of bread that sparks conversation and warmth, making it ideal for celebrations and family dinners.
A Family Tradition
Many of us have fond memories associated with baking bread, and this recipe can easily become a family tradition. Imagine passing down this recipe through generations, each time adding a bit of your personal touch. It’s not just bread; it’s about creating memories.
Healthier Alternative
Making your own bread gives you control over the ingredients, allowing you to use fresh herbs and quality dairy products. The Swirled Garlic Herb Bread is a healthier alternative to store-bought varieties, containing no preservatives or additives. You can enjoy every slice without guilt, knowing what went into it.
Main Ingredients for Swirled Garlic Herb Bread
When it comes to baking the Swirled Garlic Herb Bread, the ingredients play a crucial role in achieving that perfect texture and flavor. Each component works harmoniously to create a delicious loaf that is soft on the inside with a crispy crust. The key players in this recipe include fresh herbs, warm milk, and aromatic garlic, all of which contribute to a mouthwatering experience.
- 3/4 cup warm whole milk – The warm milk helps activate the yeast, giving the bread a soft and tender crumb.
- 2 1/4 teaspoons instant yeast – This ingredient is essential for leavening the bread, allowing it to rise beautifully.
- 2 tablespoons honey – A touch of sweetness balances the savory flavors and aids in browning.
- 3 large eggs – Adding eggs enriches the dough, resulting in a richer flavor and texture.
- 3 1/2 to 4 cups all-purpose flour – This is the backbone of the bread, providing the necessary structure.
- 1 teaspoon kosher salt – Salt enhances the overall flavor and controls yeast fermentation.
- 6 tablespoons salted butter, at room temperature – Butter adds richness and flavor to the dough.
- 1 to 2 cloves garlic, grated or finely chopped – Garlic infuses the bread with a deliciously aromatic flavor.
- 1/4 cup freshly grated parmesan cheese – This adds a savory depth to the filling, making each bite irresistible.
- 1/2 cup fresh basil, finely chopped – Fresh basil brings a bright, herby note to the bread.
- 2 tablespoons chopped fresh thyme – Thyme complements the basil, adding an earthy flavor.
- 1 tablespoon chopped fresh sage – Sage adds a unique and fragrant touch to the filling.
Instructions for Swirled Garlic Herb Bread
Baking the Swirled Garlic Herb Bread is a rewarding process that fills your kitchen with delightful aromas. Follow these simple steps, and you’ll be enjoying warm slices of this delicious bread in no time. Let’s get started!
- In the bowl of a stand mixer, combine the warm whole milk, instant yeast, honey, eggs, 3 1/2 cups of flour, and kosher salt. Using the dough hook, mix until the flour is completely incorporated, about 4 to 5 minutes. The dough should be silky and slightly sticky but not overly wet. If it feels too sticky, you can gradually add some of the additional flour to achieve a smooth texture.
- Cover the bowl with plastic wrap and let the dough sit at room temperature for about 1 hour or until it has doubled in size. You’ll notice it has puffed up nicely, which means the yeast is doing its job. This step is crucial for achieving the best texture.
- Meanwhile, in a small bowl, combine the remaining 4 tablespoons of butter, grated garlic, parmesan cheese, fresh basil, sage, and thyme. Mix everything until well combined, creating a beautiful garlic herb butter that will elevate the flavor of your bread.
- Once the dough has risen, punch it down gently to release the air. Roll it out onto a lightly floured surface, forming a large rectangle approximately 12 x 18 inches. This is where the magic happens; you’ll soon be swirling those delicious flavors together!
- Spread the garlic herb butter evenly over the rolled-out dough, ensuring that every inch is covered. Starting with the long edge closest to you, carefully roll the dough into a tight log, pinching the edge to seal it as you go. It should look beautiful and inviting!
- Using a sharp knife, cut the log of dough in half lengthwise, leaving a small portion at one end intact. This helps to create that stunning swirl effect. Turn the halves to expose the delicious filling.
- Cross the dough ropes over each other, twisting them until you have a long, twisted loaf. This step is not only for aesthetics but also helps to mix the flavors as they bake.
- Coil the twisted dough half up like a snake, stopping halfway. Then, coil the second half in the opposite direction. Carefully transfer this coiled beauty to a parchment-lined baking sheet. Cover and let rise in a warm place for about 45 minutes, allowing it to puff up again.
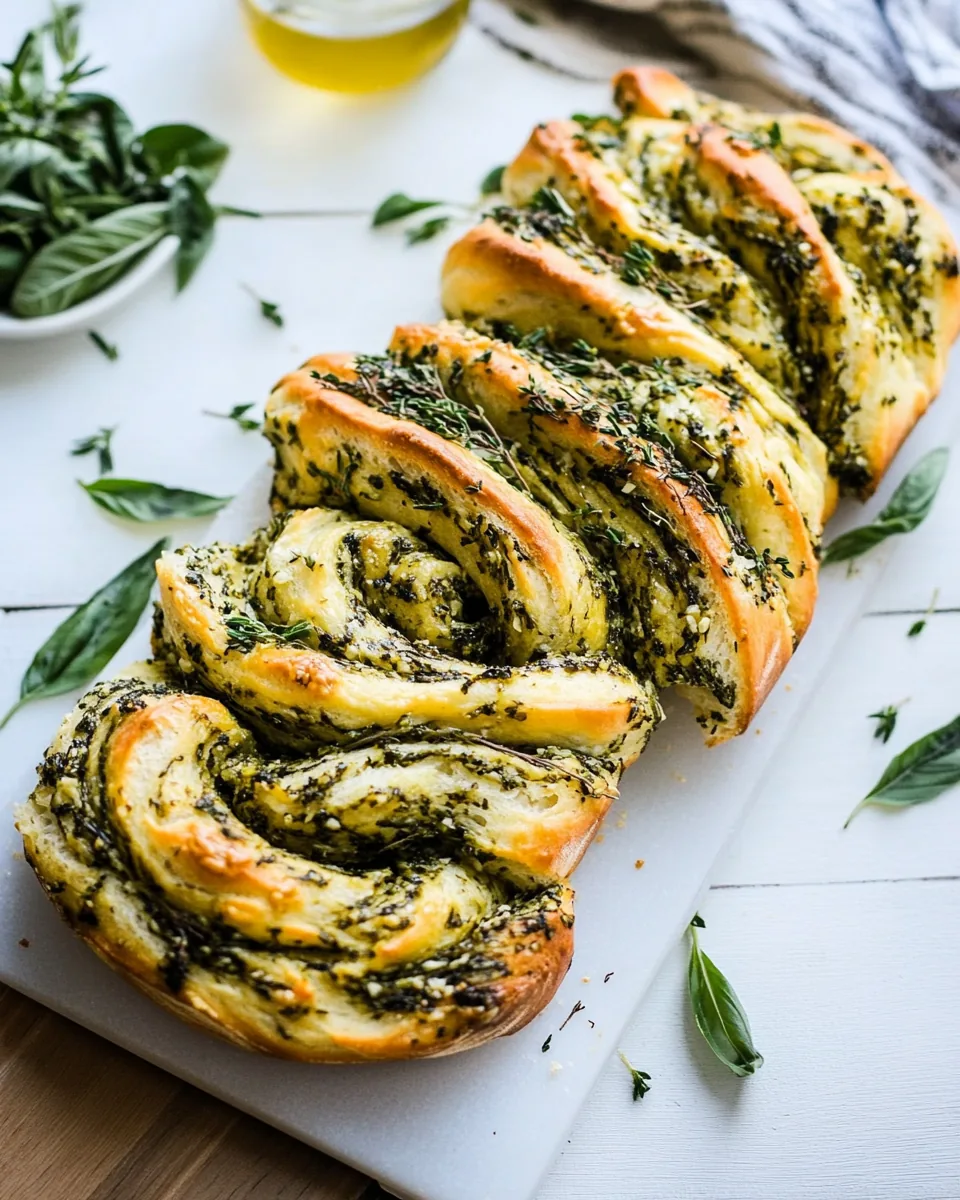
- Preheat the oven to 350 degrees F (175 degrees C). Once your dough has risen, transfer the bread to the oven and bake for 30 to 35 minutes. It should turn golden brown and make your kitchen smell heavenly. Brush the top of the loaf with any remaining melted butter for added richness.
- Slice the bread once it’s cool enough to handle, and serve warm. You can enjoy it on its own or with a bit more butter on top, making it even more indulgent.
Things Worth Knowing
- Watch your dough: The rising time can vary based on temperature; look for the dough to double in size.
- Use fresh herbs: Fresh herbs like basil, thyme, and sage yield the best flavor in the Swirled Garlic Herb Bread.
- Butter is key: Adding butter to the dough not only enriches the flavor but also contributes to a tender crumb.
- Twist it right: The way you twist the dough can affect the final look; keep it tight for beautiful swirls.
Change It Up
Don’t be afraid to experiment with your Swirled Garlic Herb Bread. Here are some ideas to customize this recipe!
- Herbs: Feel free to mix and match herbs! Try adding dill or oregano for a different flavor profile.
- Cheese: Instead of parmesan, experiment with feta or mozzarella for a creamy and savory twist.
- Spices: Add crushed red pepper flakes for a little heat or smoked paprika for a smoky flavor.
- Mix-ins: Consider adding sun-dried tomatoes or olives for a Mediterranean flair.
- Garlic: If you love garlic, increase the amount for a more intense flavor in the filling.
Serving Suggestions
When it comes to serving the Swirled Garlic Herb Bread, the options are endless. Here are some ideas:
- Pair with soups: This bread is perfect alongside hearty soups or stews, soaking up all those delicious flavors.
- Use for sandwiches: Slice it thick and use it as a base for gourmet sandwiches filled with your favorite ingredients.
- Great for gatherings: Serve it at parties, family gatherings, or holiday dinners; it’s sure to impress your guests.
- Toast it: Enjoy it toasted with butter for breakfast or as a snack; it’s delightful!
- Storage: Store any leftovers wrapped in foil or in an airtight container at room temperature for up to 3 days.
- Freezing: You can freeze the bread for up to 3 months. Just let it thaw and reheat in the oven for the best texture.
FAQ
Conclusion
The Swirled Garlic Herb Bread is truly a delightful addition to any meal. Its combination of fresh flavors and comforting warmth makes it a staple that you’ll want to return to time and time again. I encourage you to try baking this bread; I promise it will become a beloved recipe in your kitchen. So gather your ingredients and get ready for a baking adventure that will fill your home with joy!

Swirled Garlic Herb Bread
Equipment
- Grater
- Mixing Bowl
- Chef's Knife
- Baking Sheet
- Oven
Ingredients
- 3/4 cup warm whole milk
- 2 1/4 teaspoons instant yeast
- 2 tablespoons honey
- 3 large eggs
- 3 1/2 to 4 cups all-purpose flour
- 1 teaspoon kosher salt
- 6 tablespoons salted butter, at room temperature
- 1 to 2 cloves garlic, grated or finely chopped
- 1/4 cup freshly grated parmesan cheese
- 1/2 cup fresh basil, finely chopped
- 2 tablespoons chopped fresh thyme
- 1 tablespoon chopped fresh sage
Instructions
- In the bowl of a stand mixer, combine the warm whole milk, instant yeast, honey, eggs, 3 1/2 cups of flour, and kosher salt. Using the dough hook, mix until the flour is completely incorporated, about 4 to 5 minutes. The dough should be silky and slightly sticky but not overly wet. If it feels too sticky, you can gradually add some of the additional flour to achieve a smooth texture.
- Cover the bowl with plastic wrap and let the dough sit at room temperature for about 1 hour or until it has doubled in size. You’ll notice it has puffed up nicely, which means the yeast is doing its job. This step is crucial for achieving the best texture.
- Meanwhile, in a small bowl, combine the remaining 4 tablespoons of butter, grated garlic, parmesan cheese, fresh basil, sage, and thyme. Mix everything until well combined, creating a beautiful garlic herb butter that will elevate the flavor of your bread.
- Once the dough has risen, punch it down gently to release the air. Roll it out onto a lightly floured surface, forming a large rectangle approximately 12 x 18 inches. This is where the magic happens; you’ll soon be swirling those delicious flavors together!
- Spread the garlic herb butter evenly over the rolled-out dough, ensuring that every inch is covered. Starting with the long edge closest to you, carefully roll the dough into a tight log, pinching the edge to seal it as you go. It should look beautiful and inviting!
- Using a sharp knife, cut the log of dough in half lengthwise, leaving a small portion at one end intact. This helps to create that stunning swirl effect. Turn the halves to expose the delicious filling.
- Cross the dough ropes over each other, twisting them until you have a long, twisted loaf. This step is not only for aesthetics but also helps to mix the flavors as they bake.
- Coil the twisted dough half up like a snake, stopping halfway. Then, coil the second half in the opposite direction. Carefully transfer this coiled beauty to a parchment-lined baking sheet. Cover and let rise in a warm place for about 45 minutes, allowing it to puff up again.
- Preheat the oven to 350 degrees F (175 degrees C). Once your dough has risen, transfer the bread to the oven and bake for 30 to 35 minutes. It should turn golden brown and make your kitchen smell heavenly. Brush the top of the loaf with any remaining melted butter for added richness.
- Slice the bread once it’s cool enough to handle, and serve warm. You can enjoy it on its own or with a bit more butter on top, making it even more indulgent.
Notes
- To Make Ahead: Prepare the bread through step 6. Once the bread is shaped, place it on a parchment lined baking sheet, cover, and place in the fridge for up to 2 days. When ready to bake, remove the bread from the fridge 1 hour prior to baking, then bake as directed.
- To Freeze: Bake the bread as directed and allow to cool completely. Once cool, wrap the bread tightly with plastic wrap, then transfer to a freezer safe container. Freeze for up to 3 months. Thaw on the counter and warm or toast before serving.
- Leftovers: The bread is best served warm after baking, but the leftover bread is delicious when lightly toasted or served at room temperature.