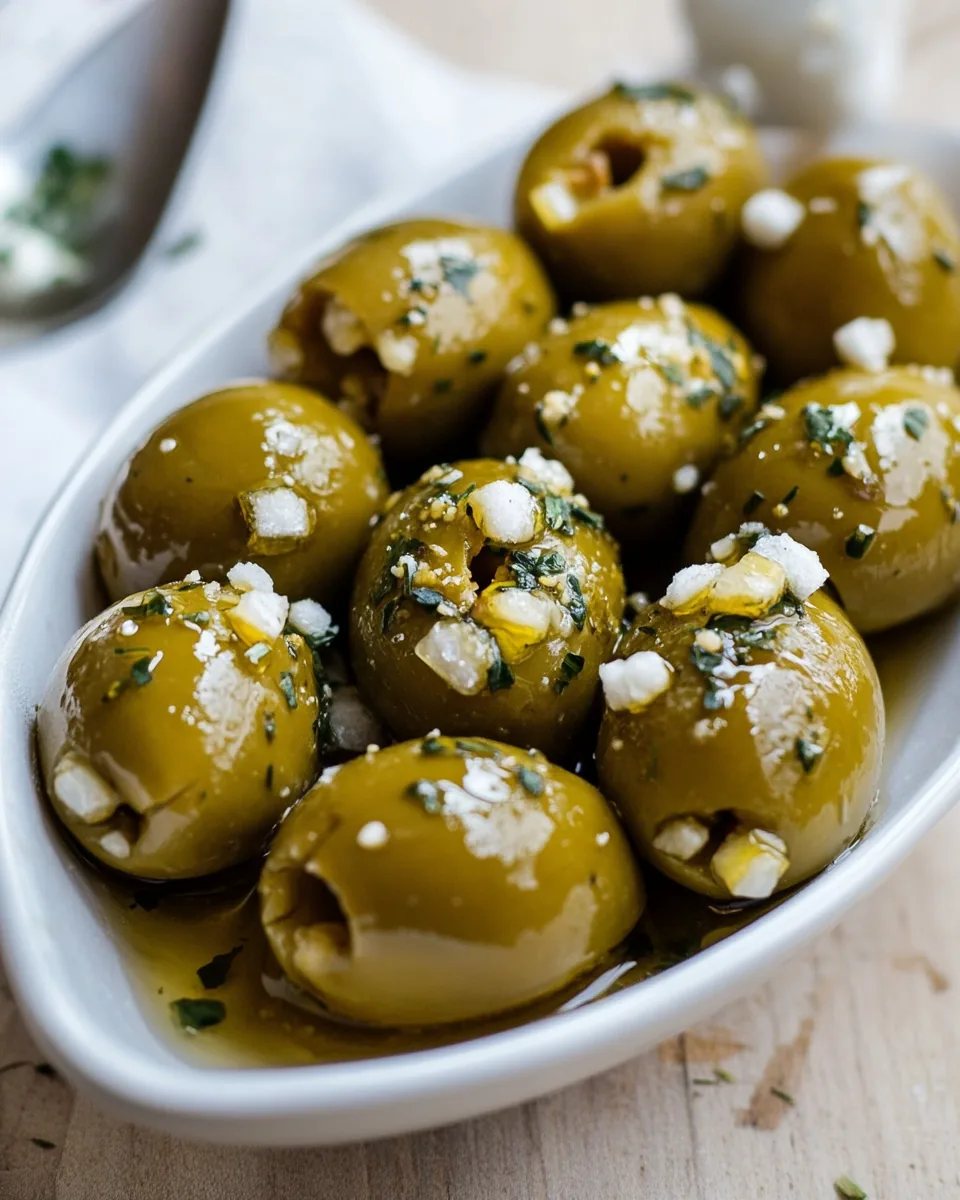
Stuffed Olives
Whenever I think about hosting a gathering with friends or family, I can’t help but get excited about making Stuffed Olives. This dish has a special place in my heart, as it brings back memories of sunny afternoons spent on the terrace, surrounded by laughter and the delightful aroma of good food. I remember the first time I made these olives; I was skeptical about how my guests would react. But to my surprise, they were a hit! They’re vibrant and inviting, and the best part is that they’re incredibly easy to make.
These Stuffed Olives are not just a treat for the taste buds; they’re a conversation starter! Each bite is filled with a luscious blend of flavors, making them an excellent appetizer for any occasion. Whether you’re celebrating a birthday, hosting a casual dinner, or simply enjoying a weekend with family, these olives will elevate your spread. I love to serve them alongside a refreshing drink, and they always disappear quickly. My friends are always asking for the recipe, and it warms my heart to share it.
So, gather your ingredients and get ready to impress your guests with this simple yet flavorful dish that embodies the joy of togetherness. I promise, once you try making Stuffed Olives, they’ll become a staple at all of your gatherings.
Recipe Snapshot
20 mins
20 mins
0 mins
Medium
120 kcal
2 g
Keto, Gluten-Free, Low FODMAP
11 g
Chef’s Knife, Saucepan, Mixing Bowl, Frying Pan
Why This Stuffed Olives Shines
Delicious Flavors
One of the reasons I absolutely adore these Stuffed Olives is the incredible blend of flavors. The combination of rich olive oil, zesty garlic, and fragrant herbs creates a tantalizing experience for your palate. Each olive is a burst of flavor that enhances your taste buds and leaves you craving more!
Easy to Prepare
When hosting, I value recipes that are simple yet impressive. These Stuffed Olives come together effortlessly! With just a few ingredients and minimal prep time, you can whip up a batch without breaking a sweat. All you need is to fill the olives, and they’re ready to shine on your table.
Customizable to Your Taste
What I love about this recipe is its flexibility. You can easily adjust the spice levels by adding more or fewer red chili flakes. Want to try something different? You could incorporate various cheeses or herbs to suit your preferences. The possibilities are endless!
Perfect for Any Occasion
Whether it’s a cozy family dinner or a festive celebration, these Stuffed Olives fit right in. They’re the ideal appetizer to kick off any gathering, and their vibrant appearance adds a beautiful touch to your spread. I love how they can complement so many dishes!
Great for Meal Prep
If you’re like me and enjoy planning ahead, these olives are fantastic for meal prep. They can be made in advance and stored in the refrigerator for up to a week. Just be sure to give them a little time to marinate so that the flavors deepen. You can enjoy them at a moment’s notice!
A Crowd-Pleaser
Last but not least, these Stuffed Olives are a guaranteed crowd-pleaser. I’ve served them at numerous gatherings, and they never fail to impress. It’s always rewarding to see friends and family enjoy something I’ve prepared with love.
Ingredients to Make Stuffed Olives
Each ingredient in these Stuffed Olives plays a crucial role in creating a harmonious blend of flavors and textures. From the savory olives to the creamy Boursin cheese, each element complements the others beautifully. Let’s dive into the key players that make this dish irresistible!
- 35 oz Castelvetrano olives, pitted, drained (about 45 count large green olives): These olives are known for their sweet and mild flavor, perfect for stuffing.
- ⅔ cup extra virgin olive oil: This fragrant oil enhances the overall richness of the dish and helps the olives marinate.
- 6 garlic cloves, minced: Fresh garlic adds a zesty kick that pairs perfectly with the olives.
- 1 tsp dried parsley leaves: This herb brings a pop of color and a fresh taste to the olives.
- ¼ tsp to ½ tsp red chili flakes, or added to taste: The chili flakes provide a delightful heat, customizable to your preference.
- ¼ tsp dried thyme leaves: Thyme contributes an earthy flavor that complements the other ingredients.
- ¼ tsp dried rosemary: Rosemary adds a fragrant aroma and a pine-like flavor.
- ¼ tsp fine sea salt: Salt is essential to enhance the flavors of the ingredients.
- 5.3 oz Garlic and Herb Boursin cheese, at room temperature: This creamy cheese is the heart of the stuffing, adding richness and flavor.
Making This Stuffed Olives
Let’s get started on making these delightful Stuffed Olives. This process is as enjoyable as it is satisfying. Follow these simple steps to create a dish that will undoubtedly impress!
- In a small saucepan, combine olive oil, garlic cloves, and the dried herbs. Set the heat to medium and allow the mixture to sizzle gently. As soon as it starts bubbling, let it simmer for about a minute, stirring occasionally. You’ll notice a beautiful fragrance filling your kitchen as the garlic becomes aromatic. Once done, remove it from the heat and season with salt. Let it cool down while you prepare the olives.
- Drain the olives carefully and, if they aren’t already pitted, use an olive pitter to remove the pits. If the olives contain any filling, you can use a skewer or chopstick to take it out. This step is crucial to ensure you can stuff them nicely!
- In a bowl, mash the Boursin cheese with a fork until it’s creamy. Transfer it into a piping bag or a large zip-top bag. If using the zip-top bag, snip off one corner to create a small opening, allowing you to easily pipe the cheese into the olives.
- Now it’s time to stuff the olives! Take each olive and carefully fill it with the cheese, starting from the bottom and working your way to the top. Make sure it’s filled generously, as this is where the magic happens!
- Once all the olives are stuffed, place them into a quart-sized jar. You can even use the original jar the olives came in, which is a great way to repurpose it!
- Pour the cooled olive oil mixture over the stuffed olives in the jar. Make sure they’re completely submerged. Cover the jar and refrigerate the olives for at least 30 minutes or up to a week to let the flavors meld together.
- Before serving, give the jar a gentle turn a few times to ensure the olives are evenly coated with oil and herbs. If you notice the olive oil has solidified in the fridge, let the jar come to room temperature before serving.
- To serve, arrange the Stuffed Olives on a platter in a single layer. Drizzle a bit of the olive oil mixture over them, and don’t forget to provide toothpicks!
- Enjoy your creation with friends and family. Watch as they indulge in the delightful flavors and textures!
Things Worth Knowing
- Choosing the Right Olives: Opt for Castelvetrano olives for a sweet and mild flavor. They hold up well during the stuffing process.
- Infusing Flavors: Allowing the olives to marinate in the olive oil mixture enhances their flavor. The longer they sit, the better!
- Serving Temperature: These olives can be served cold or at room temperature, making them versatile for any gathering.
- Variations: Feel free to experiment with different cheese or herbs in the stuffing for a unique twist on the classic recipe.
Substitutions and Tips

Here are some helpful tips to make your experience with Stuffed Olives even better!
- Storage: Keep leftover olives in an airtight container in the fridge. They’ll stay fresh for a week.
- Freezing: While I recommend enjoying them fresh, you can freeze stuffed olives. Just ensure they are in a suitable container, and they should last for up to three months.
- Pairing: Stuffed Olives pair wonderfully with cheeses, charcuterie boards, or a light salad for a complete meal.
- Garnishing: Consider garnishing the olives with fresh herbs or citrus zest for an additional flavor boost.
- Experimenting: Feel free to play around with different cheese varieties or herbs to create your own spin on this classic!
Serving Ideas for Stuffed Olives
When it comes to serving Stuffed Olives, the possibilities are endless! Here are some ideas to help you create an impressive spread:
- Appetizer Platter: Serve the olives on a beautiful platter alongside an assortment of cheeses and crackers for a stunning appetizer display.
- Wine Pairing: Pair your olives with a crisp white wine or a refreshing sparkling drink to complement their flavor.
- Picnic Treat: Bring them along for a picnic! They are easy to transport and make for a flavorful treat outdoors.
- Snack Time: These olives are perfect for a quick snack. Serve them with toothpicks for easy munching.
- Holiday Gatherings: Add these olives to your holiday spread as a festive addition that everyone will love.
- Game Day Snacks: Perfect for game day, they’ll be a hit among friends and family. Set up a snack station with various dips!
FAQ
Conclusion
The beauty of Stuffed Olives lies in their simplicity and the burst of flavor in each bite. They’re perfect for gatherings and add a touch of elegance to any table. I encourage you to try making them soon—you won’t be disappointed! Transform your next meal with these delightful olives, and watch as they become a favorite among friends and family.
Stuffed Olives
Equipment
- Chef's Knife
- Saucepan
- Mixing Bowl
- Frying Pan
Ingredients
- 35 oz Castelvetrano olives pitted, drained (about 45 count large green olives)
- ⅔ cup extra virgin olive oil
- 6 cloves garlic minced
- 1 tsp dried parsley leaves
- ¼ tsp red chili flakes or added to taste
- ¼ tsp dried thyme leaves
- ¼ tsp dried rosemary
- ¼ tsp fine sea salt
- 5.3 oz Garlic and Herb Boursin cheese at room temperature
Instructions
- In a small saucepan, combine olive oil, garlic cloves, and the dried herbs. Set the heat to medium and allow the mixture to sizzle gently. As soon as it starts bubbling, let it simmer for about a minute, stirring occasionally. You’ll notice a beautiful fragrance filling your kitchen as the garlic becomes aromatic. Once done, remove it from the heat and season with salt. Let it cool down while you prepare the olives.
- Drain the olives carefully and, if they aren't already pitted, use an olive pitter to remove the pits. If the olives contain any filling, you can use a skewer or chopstick to take it out. This step is crucial to ensure you can stuff them nicely!
- In a bowl, mash the Boursin cheese with a fork until it’s creamy. Transfer it into a piping bag or a large zip-top bag. If using the zip-top bag, snip off one corner to create a small opening, allowing you to easily pipe the cheese into the olives.
- Now it’s time to stuff the olives! Take each olive and carefully fill it with the cheese, starting from the bottom and working your way to the top. Make sure it’s filled generously, as this is where the magic happens!
- Once all the olives are stuffed, place them into a quart-sized jar. You can even use the original jar the olives came in, which is a great way to repurpose it!
- Pour the cooled olive oil mixture over the stuffed olives in the jar. Make sure they’re completely submerged. Cover the jar and refrigerate the olives for at least 30 minutes or up to a week to let the flavors meld together.
- Before serving, give the jar a gentle turn a few times to ensure the olives are evenly coated with oil and herbs. If you notice the olive oil has solidified in the fridge, let the jar come to room temperature before serving.
- To serve, arrange the Stuffed Olives on a platter in a single layer. Drizzle a bit of the olive oil mixture over them, and don’t forget to provide toothpicks!
- Enjoy your creation with friends and family. Watch as they indulge in the delightful flavors and textures!
Notes
- Add the chili flakes: Depending on how spicy you prefer your olives, adjust the amount. I prefer ½ tsp for a spicier kick.