Struffoli
When I think of cherished family traditions, Struffoli always comes to mind. These delightful little Italian honey balls aren’t just a treat; they are a symbol of celebration, happiness, and nostalgia. My grandmother used to make them every holiday season, filling the kitchen with a sweet aroma that would beckon everyone to gather around the table. Watching her work was a dance of love and skill as she mixed, rolled, and fried each piece to perfection. The best part? The way she would drizzle warm honey over the golden dough balls, transforming them into a sticky, sweet masterpiece. Struffoli are more than just a dessert; they are a celebration of life’s best moments.
Recipe Snapshot
2 hr
60 mins
60 mins
Medium
150 kcal
2g g
Vegan, Gluten-Free, AIP
7g g
Wooden Spoon, Skillet, Mixing Bowl
Why You’ll Love This Struffoli
There’s something truly special about Struffoli that makes them stand out from other treats. Here are a few reasons why I love this recipe:
Tradition Meets Flavor
Struffoli is steeped in Italian tradition, often made during festive occasions. Each bite bursts with sweetness, layering honey and citrus zest that is unmistakably festive.
Versatility at Its Best
While they’re often served during holidays, they can be enjoyed any time of year. You can customize them with different sprinkles or toppings to suit any occasion!
A Family Affair
Making Struffoli becomes a fun family activity. Everyone can pitch in, from mixing ingredients to shaping the dough. It’s a great way to bond and create lasting memories.
Perfectly Bite-sized
These honey balls are easy to pop in your mouth, making them a crowd-pleaser at any gathering. Their small size means you can enjoy a few without feeling guilty!
Simple Yet Satisfying
The recipe, while it may seem intricate, is actually quite simple. With just a few ingredients, you can create a treat that impresses everyone.
Visual Appeal
The way Struffoli is presented adds to its charm. Arranging them in a festive wreath or a tower makes for a stunning centerpiece that’s just as pleasing to the eyes as it is to the palate.
Ingredient List for Struffoli
The magic of Struffoli lies in its simple yet essential ingredients. Each one works harmoniously to create that perfect bite. The key players in this recipe are the dough ingredients, primarily the all-purpose flour, which forms the base, and the honey, which brings everything together with its sweet, sticky goodness.
- All Purpose Flour: 2 1/2 cups, divided – This is the foundation of your Struffoli. It gives the dough structure and texture.
- Granulated Sugar: 2 tablespoons – A touch of sweetness to balance the flavors.
- Lemon Zest: 2 teaspoons – Adds brightness and a fresh flavor that elevates the dish.
- Salt: 1/2 teaspoon – Enhances the overall flavor profile.
- Baking Powder: 1/2 teaspoon – Helps to create a light and airy texture in the dough.
- Salted Butter: 2 tablespoons, softened – Adds richness and moisture to the dough.
- Eggs: 3 medium size, room temperature – Essential for binding the ingredients together.
- Pure Vanilla: 1 teaspoon – Infuses a lovely aroma and flavor to the Struffoli.
- Canola Oil: 4 cups – Used for frying the dough balls until golden brown and crisp.
- Honey: 1 cup – The star of the show; it coats the fried dough in sweet goodness.
- Granulated Sugar: 2 teaspoons – To sprinkle over the finished Struffoli for added sweetness and texture.
- Lemon Juice: 1 teaspoon – Adds a hint of acidity to balance the sweetness.
- Assorted Sprinkles: 1 tablespoon – For a festive finish that makes the Struffoli visually appealing.
Recipe Directions for Struffoli
Making Struffoli is a journey filled with anticipation and joy. Follow these steps closely to create your own batch of delicious honey balls. You’ll see how each step contributes to the delicious end result.
- In a large bowl, combine 2 cups of all-purpose flour, granulated sugar, lemon zest, salt, and baking powder. Mix these dry ingredients until well combined. The flour should be light and fluffy, without any lumps.
- Cut butter into small chunks and add to the flour mixture. Use your hands or a pastry cutter to mix until the texture resembles coarse crumbs. This step is key for achieving that perfect dough consistency.
- Add the eggs and vanilla to the mixture. Stir until just combined. The mixture should be slightly sticky, but not overly wet. If it’s too dry, you can add a splash of water.
- Remove the dough from the mixing bowl and transfer it onto a lightly floured surface. Knead the dough for about 2-3 minutes until it becomes smooth and elastic. Keep your hands and the surface dusted with flour to prevent sticking.
- Shape the kneaded dough into a ball and cover it with a clean towel or plastic wrap. Allow it to rest at room temperature for 1 hour. This resting time is crucial as it helps to relax the gluten.
- After one hour, roll out the dough on a floured surface to about 1/2 inch thickness. You want to create a nice sheet that you can then cut into strips.
- Cut the rolled-out dough into strips about the width of your index finger. Roll each strip into ropes approximately 1/4 inch thick. Then cut these ropes into small pieces, about the size of marbles. Make sure to separate them on the cutting board so they don’t stick together while cooking.
- In a large deep pot, heat the canola oil to 375 degrees F. It should be hot enough that the dough pieces fry quickly without absorbing too much oil. A thermometer is highly recommended for this step.
- Fry the dough balls in small batches to avoid overcrowding the pot. They should turn golden brown in just a couple of minutes. Use a slotted spoon to turn them occasionally to ensure even cooking.
- As each batch is cooked, remove them to a plate lined with paper towels to absorb excess oil. This helps maintain their crispy texture.
- In a large pot, combine honey, granulated sugar, and lemon juice. Heat this mixture over low heat until melted and smooth. Stir to combine, ensuring there are no granulated bits left.
- Once the honey mixture is ready, remove the pot from the heat. Gently add the fried dough balls to the pot and stir carefully until they are evenly coated with the honey glaze.
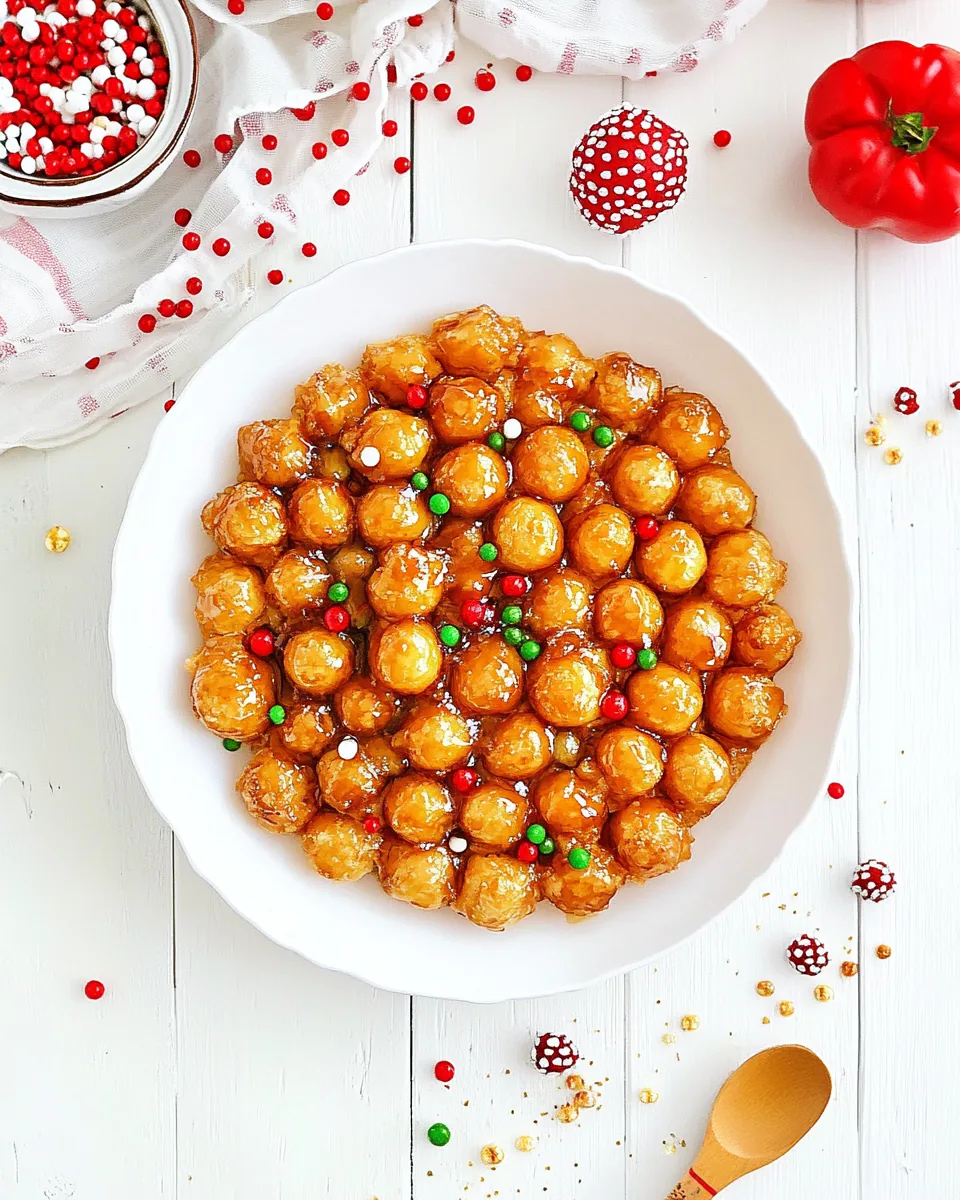
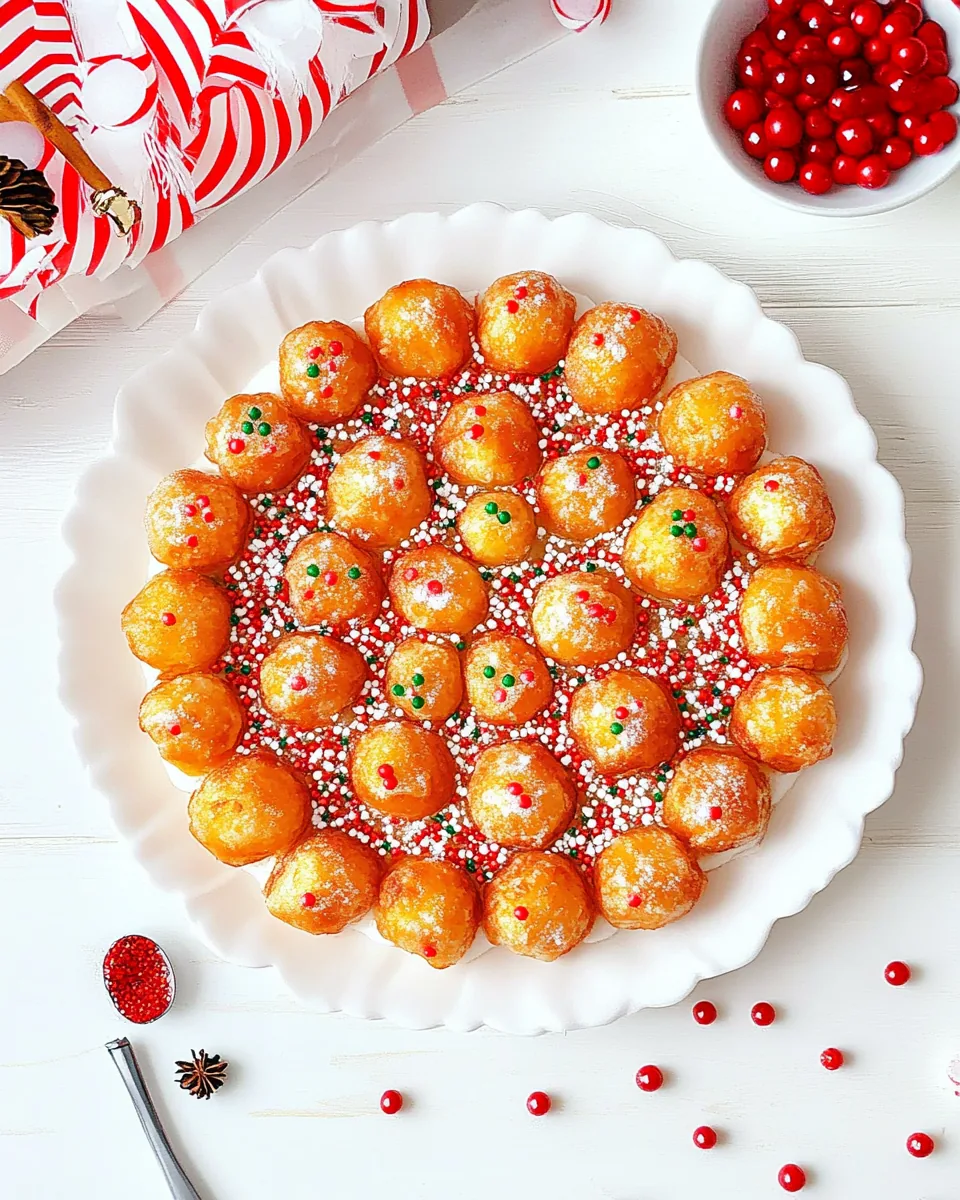
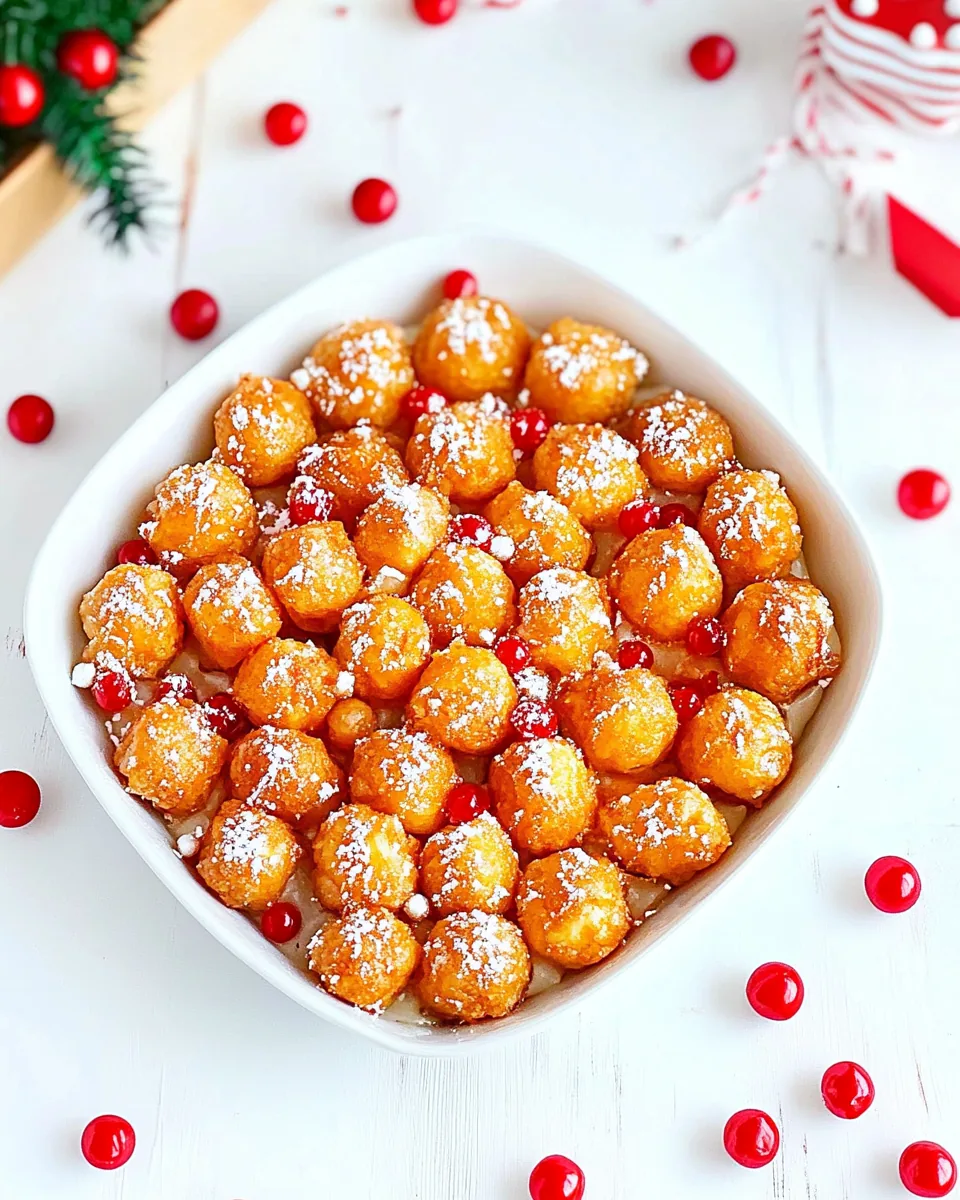
- To serve, arrange the Struffoli into a festive wreath shape or mound them up like a Christmas tree on a serving plate. Lightly cover them with colorful sprinkles for that final touch of sweetness and celebration.
Things Worth Knowing
- Frying Temperature: It’s crucial to maintain the oil temperature at 375 degrees F. Too hot, and your Struffoli will burn; too cool, and they will absorb excess oil.
- Resting Time: Don’t skip the resting period for the dough. It allows the gluten to relax, making the dough easier to work with.
- Coating Technique: Stir gently when coating the Struffoli in the honey mixture to prevent them from breaking apart.
- Serving Suggestions: Struffoli can be served warm or at room temperature. They make a beautiful centerpiece for holiday gatherings!
Substitutions and Tips
While making Struffoli, here are some tips and substitutions that can enhance your experience:
- Storage: Store any leftovers in an airtight container at room temperature to keep them fresh for up to three days.
- Freezing: While it’s best fresh, you can freeze Struffoli without the honey for up to one month. Just reheat and coat with honey before serving.
- Pairing: These sweet treats pair wonderfully with coffee or tea, making them a lovely addition to afternoon snacks.
- Variations: Feel free to add nuts or dried fruits into the honey mixture for added texture and flavors.
- Presentation: Use different colored sprinkles or edible glitter to make your Struffoli even more festive and eye-catching.
What to Serve Alongside Struffoli
- Coffee or Tea: Pairing Struffoli with a rich espresso or a comforting tea enhances the flavors beautifully.
- Seasonal Fruits: Fresh fruits, like berries or citrus, provide a refreshing contrast to the sweetness of the Struffoli.
- Cheese Plate: A selection of mild cheeses can be a delightful complement, balancing the sweetness.
- Festive Desserts: Serve alongside other holiday desserts like panettone or tiramisu during celebrations.
- Picnic Treats: Bring Struffoli to picnics or outdoor gatherings. Their portability makes them an easy dessert option.
- Ice Cream: A scoop of vanilla or lemon sorbet can make for a delightful pairing that contrasts the chewy Struffoli.
FAQ
Conclusion
In conclusion, Struffoli is a delightful dessert that encapsulates the warmth and joy of Italian traditions. Whether you’re celebrating a holiday or just wanting to enjoy a sweet treat, these honey-coated dough balls are sure to bring smiles to everyone around the table. I invite you to try making Struffoli at home; the experience of creating and sharing them with loved ones is truly special. So gather your family and enjoy this scrumptious recipe tonight!

Struffoli
Equipment
- Wooden Spoon
- Skillet
- Mixing Bowl
Ingredients
- 2 1/2 cups All Purpose Flour
- 2 tablespoons Granulated Sugar
- 2 teaspoons Lemon Zest
- 1/2 teaspoon Salt
- 1/2 teaspoon Baking Powder
- 2 tablespoons Salted Butter softened
- 3 medium size Eggs room temperature
- 1 teaspoon Pure Vanilla
- 4 cups Canola Oil
- 1 cup Honey
- 2 teaspoons Granulated Sugar
- 1 teaspoon Lemon Juice
- 1 tablespoon Assorted Sprinkles
Instructions
- In a large bowl, combine 2 cups of all-purpose flour, granulated sugar, lemon zest, salt, and baking powder. Mix these dry ingredients until well combined. The flour should be light and fluffy, without any lumps.
- Cut butter into small chunks and add to the flour mixture. Use your hands or a pastry cutter to mix until the texture resembles coarse crumbs. This step is key for achieving that perfect dough consistency.
- Add the eggs and vanilla to the mixture. Stir until just combined. The mixture should be slightly sticky, but not overly wet. If it’s too dry, you can add a splash of water.
- Remove the dough from the mixing bowl and transfer it onto a lightly floured surface. Knead the dough for about 2-3 minutes until it becomes smooth and elastic. Keep your hands and the surface dusted with flour to prevent sticking.
- Shape the kneaded dough into a ball and cover it with a clean towel or plastic wrap. Allow it to rest at room temperature for 1 hour. This resting time is crucial as it helps to relax the gluten.
- After one hour, roll out the dough on a floured surface to about 1/2 inch thickness. You want to create a nice sheet that you can then cut into strips.
- Cut the rolled-out dough into strips about the width of your index finger. Roll each strip into ropes approximately 1/4 inch thick. Then cut these ropes into small pieces, about the size of marbles. Make sure to separate them on the cutting board so they don’t stick together while cooking.
- In a large deep pot, heat the canola oil to 375 degrees F. It should be hot enough that the dough pieces fry quickly without absorbing too much oil. A thermometer is highly recommended for this step.
- Fry the dough balls in small batches to avoid overcrowding the pot. They should turn golden brown in just a couple of minutes. Use a slotted spoon to turn them occasionally to ensure even cooking.
- As each batch is cooked, remove them to a plate lined with paper towels to absorb excess oil. This helps maintain their crispy texture.
- In a large pot, combine honey, granulated sugar, and lemon juice. Heat this mixture over low heat until melted and smooth. Stir to combine, ensuring there are no granulated bits left.
- Once the honey mixture is ready, remove the pot from the heat. Gently add the fried dough balls to the pot and stir carefully until they are evenly coated with the honey glaze.
- To serve, arrange the Struffoli into a festive wreath shape or mound them up like a Christmas tree on a serving plate. Lightly cover them with colorful sprinkles for that final touch of sweetness and celebration.
Notes
- Tip 1: Always use caution when frying foods. Review the USDA’s recommended safety guidelines for frying.
- Tip 2: You don’t need to roll the dough pieces into balls after cutting them; the little pieces round out while cooking.
- Tip 3: To make in the shape of a wreath, place a glass in the middle of the serving plate. Then, place the glazed balls around it. Remove the glass when ready to serve.
- Tip 4: I find that spraying the glass lightly with non-stick cooking spray helps it pop right out.