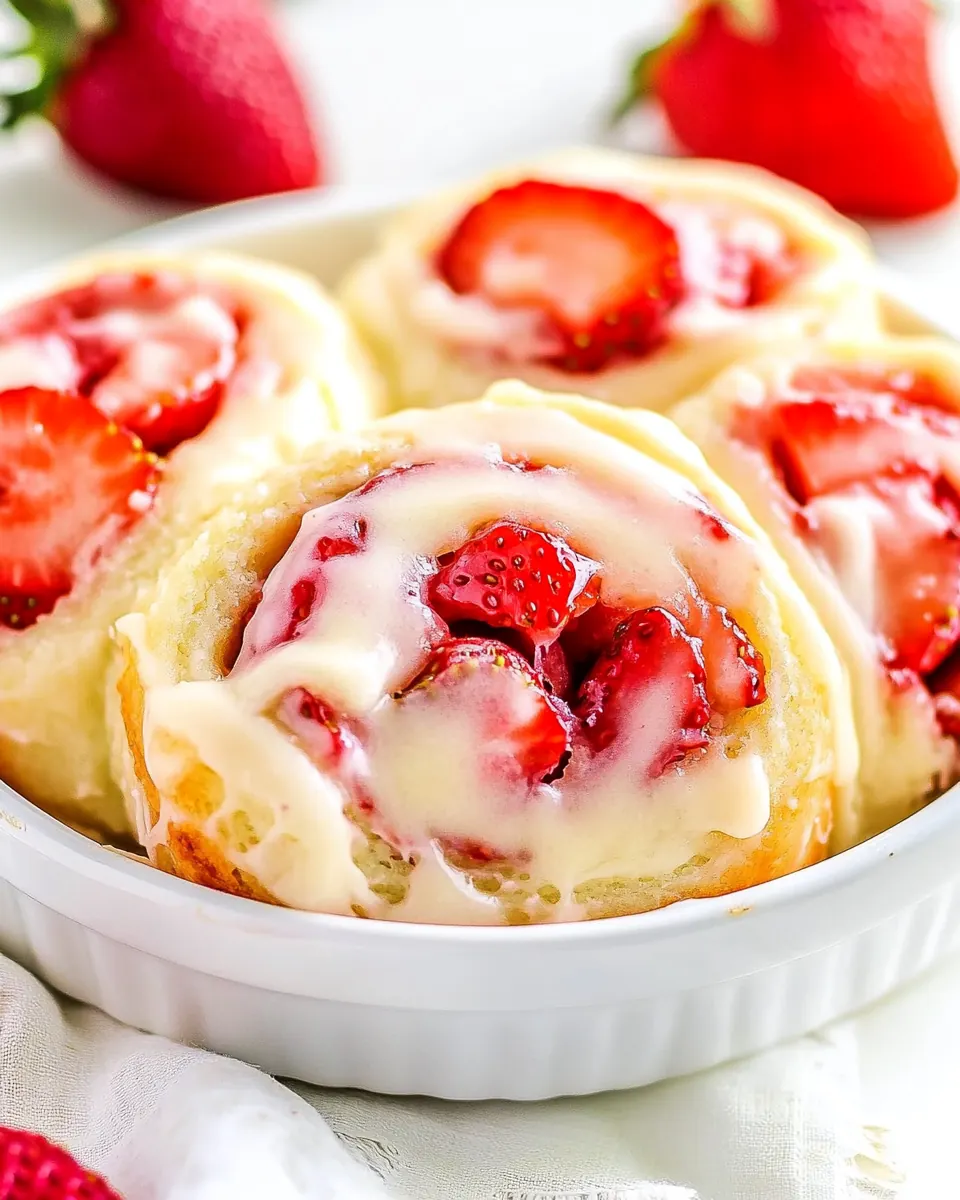
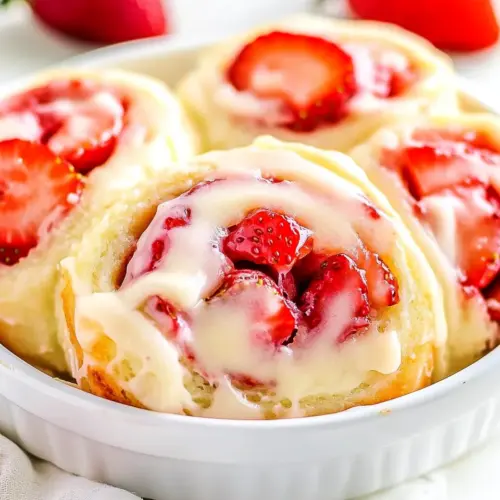
Strawberry Rolls with Cream Cheese Icing
Strawberry Rolls with Cream Cheese Icing are one of those comforting treats I reach for when I want something that tastes like spring and feels like a hug.
I first made these on a rainy Saturday when my kitchen smelled like warm dough and sweet fruit, and a neighbor knocked on the door because the aroma was impossible to ignore. I remember the sticky jam on my fingers and the soft give of the rolls when I pulled one apart, the steam carrying a gentle strawberry scent that made everyone pause. There is a simple joy in rolling the dough, spreading strawberry jam, and arranging fresh strawberries, knowing the final bite will be tender, slightly tangy, and richly comforting.
The moment I spooned the cream cheese icing over the warm rolls, the kitchen went very quiet. My brother who rarely compliments my baking tasted one and said it reminded him of bakery mornings, without the long line. That memory has kept this recipe on my regular rotation for brunches and weekend breakfasts. The combination of yeasted dough, vibrant strawberry jam, and silky cream cheese icing creates a balanced treat that is sweet without being cloying, and familiar yet special.
Recipe Snapshot
60 mins
30 mins
30 mins
Medium
250 kcal
American
Gluten-Free, Low FODMAP
Desserts
KitchenAid Artisan 5 Quart Stand Mixer, KitchenAid Hand Mixer, Classic Wooden Rolling Pin, 9-inch Pie Plate
What’s Great About This Strawberry Rolls with Cream Cheese Icing
Buttery, tender rolls that actually rise
I adore how the dough yields a soft, pillowy crumb. When you let it rise properly, the texture is light but substantial enough to hold the fruity filling. The use of warm milk and active dry yeast gives these rolls a bakery style lift, and I love that you can smell the yeasty sweetness as they proof.
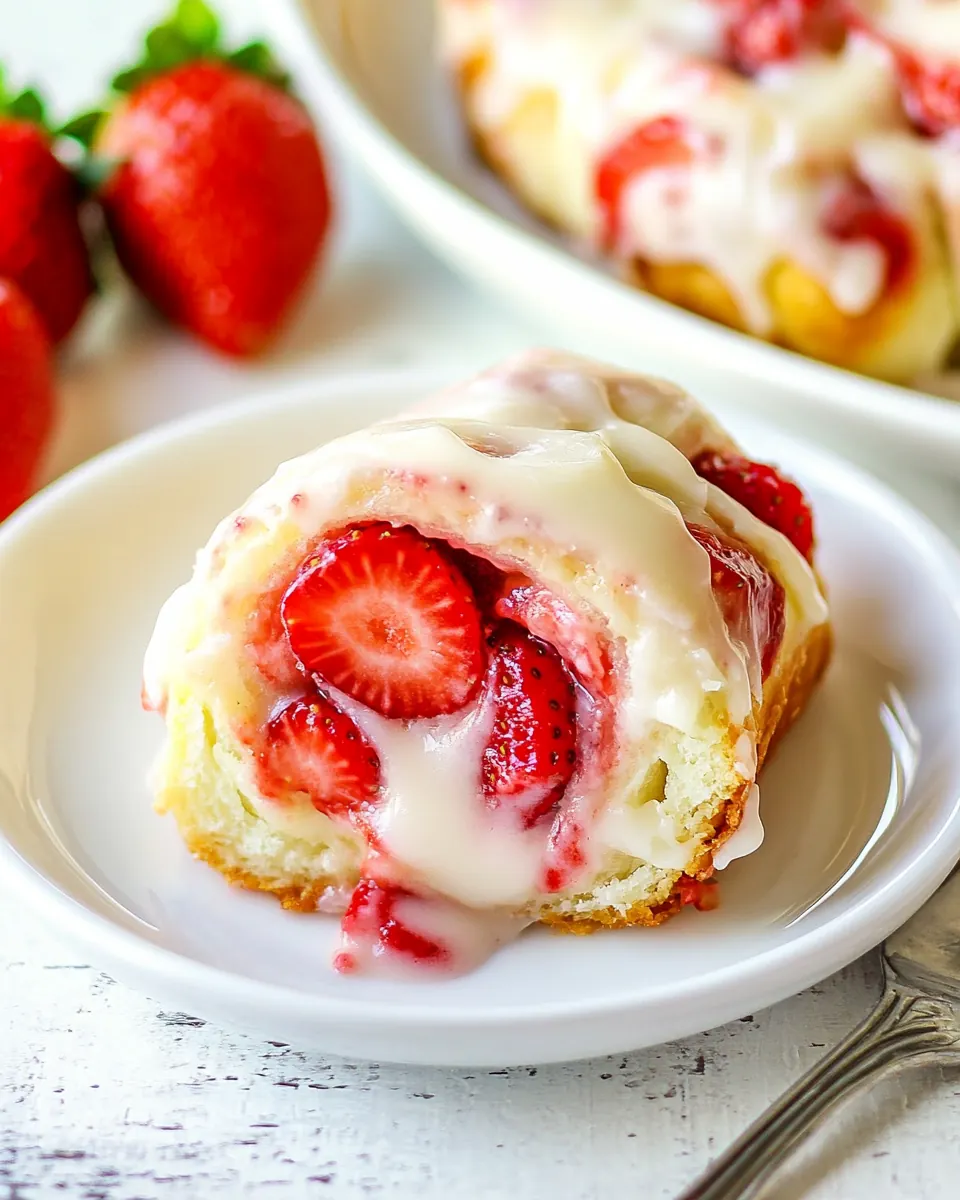
Fresh strawberry brightness
What elevates these from ordinary rolls is the fresh strawberries paired with strawberry jam. The jam gives a concentrated berry flavor and sticky gloss while the chopped berries add pops of freshness and gentle bursts of juiciness. I prefer this combo because it keeps the filling from becoming one note.
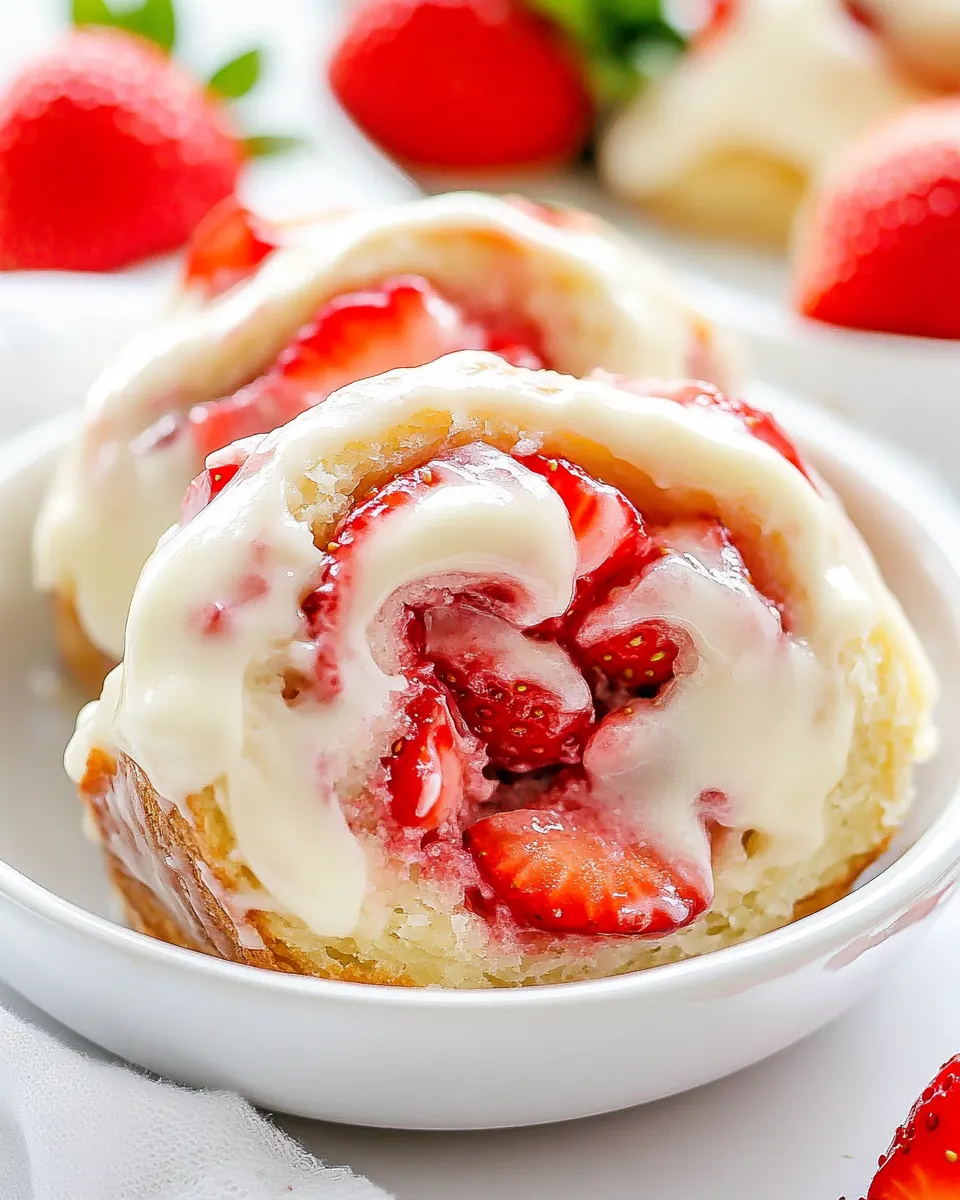
Creamy icing for balance
The cream cheese icing brings a cool, tangy contrast to the warm rolls. It melts slightly when drizzled over warm pastry, creating ribbons of sweet tang that cling to the layers. I find this balance keeps the rolls from tasting too sweet and adds a lush mouthfeel.
Flexible and forgiving technique
These rolls are forgiving for home bakers. The dough is straightforward, and a quick oven warm up acts as a proof box when your kitchen is cool. I love that you can make the dough at night, refrigerate the first rise, and finish in the morning. That flexibility makes them ideal for hosting or pacing your baking.
Perfect for many occasions
Whether for a spring brunch, a weekend treat, or a cozy coffee moment, these rolls feel celebratory but not fussy. I often bring them to potlucks because they travel well and look beautiful when glazed. That combination of approachability and impressive flavor is why I keep returning to this recipe.
Recipe Ingredients for Strawberry Rolls with Cream Cheese Icing
These ingredients are chosen to create harmony. The dough needs simple staples for structure and tenderness, while the jam and fresh strawberries bring bright flavor. The cream cheese icing ties everything together with a silky tang that cuts the sweetness. The butter and egg enrich the dough, producing a soft crumb that holds the filling without collapsing.
- 1/2 cup milk: Warm gently to lukewarm temperature and activate yeast; provides the liquid base for dough and helps dissolve sugar and yeast to create proper fermentation. Ensures a soft crumb and hydrating balance for the flour while aiding gluten formation. Monitor temperature to avoid killing yeast and to achieve a tender roll texture.
- 1 teaspoon active dry yeast: Dissolve into warmed milk to leaven the dough and create airy, soft rolls through fermentation. Contributes to rise and lightness by producing carbon dioxide that expands the dough during proofing. Measure accurately and proof in a warm draft-free spot for best results.
- 2 cups all-purpose flour: Combine with liquids and fats to form the structure and bulk of the dough; supplies gluten-forming proteins for chew and elasticity. Provides the primary dry component that balances hydration and binds other ingredients into a cohesive dough. Sift or whisk to remove lumps for even incorporation.
- 1/4 cups sugar: Add sweetness to feed the yeast slightly and flavor the dough while balancing tartness from strawberries and jam. Also contributes to browning during baking and tenderizes crumb by interfering with gluten bonds. Use measured amount to keep rolls mildly sweet without overpowering fillings.
- 1/4 teaspoons salt: Provide basic seasoning to enhance flavor and regulate yeast activity slightly by strengthening gluten network; even a small amount improves overall taste. Helps control fermentation rate and balances sweetness from sugar and jam. Distribute evenly in dry ingredients before mixing for uniformity.
- 1/4 cup unsalted butter (or margarine, softened to room temperature): Soften and incorporate into dough to enrich flavor, tenderize crumb, and add moisture and richness; acts as a fat that promotes flakiness and softness. Can be substituted with margarine as noted, but unsalted butter offers a cleaner dairy flavor. Ensure softened to room temperature for easier mixing and even distribution.
- 1 egg: Whisk into the dough to add richness, color, and act as a binder that improves dough elasticity and structure. Enhances flavor and contributes to a tender, slightly richer crumb in the rolls. Beat lightly before adding to ensure even incorporation.
- 3/4 cups strawberry jam: Spread as a sweet, fruity filling that brings strawberry flavor and moisture to the rolls; acts as the primary sweet filling component. Provides jammy texture and concentrated fruit sweetness that pairs with fresh strawberries. Warm slightly if too thick for easy spreading.
- 1 cups strawberries (fresh and chopped into small pieces): Fold into the filling for fresh fruit texture and bright strawberry flavor; contributes bursts of freshness and small pieces that complement the jam. Adds natural acidity and moisture, balancing sweetness and preventing the filling from becoming too homogenous. Chop uniformly to ensure even distribution inside each roll.
- 1/2 cup cream cheese (at room temperature): Soften to room temperature and beat into icing to create a tangy, creamy base that complements the sweet rolls. Balances confectioners' sugar and butter with slight acidity for a smooth, spreadable glaze. Ensure fully softened to avoid lumps and achieve silky consistency.
- 3 tablespoon butter (unsalted, softened): Cream together with cream cheese and powdered sugar to produce a smooth, rich component of the icing; adds buttery flavor and body. Helps create a spreadable texture that melts slightly over warm rolls and enhances richness. Use softened unsalted butter for controlled saltiness.
- 1 teaspoon vanilla extract: Add aromatic sweetness and depth to the icing while enhancing overall flavor profile; provides a warm, familiar note that complements strawberries and cream cheese. A small amount goes a long way in balancing sweetness and dairy flavors. Stir in gradually and taste to adjust intensity.
- 1 1/2 cups powdered sugar: Whisk into the cream cheese and butter until smooth to form a sweet, velvety icing that tops the rolls; provides structure and sweetness. Contributes to the glossy, thick finish and can be adjusted for consistency by adding small amounts at a time. Sift if lumpy and taste to ensure balanced sweetness.
Making Strawberry Rolls with Cream Cheese Icing
These instructions will walk you through the journey from a simple bowl of ingredients to warm, glazed rolls. Expect tactile moments like kneading, sensory cues like dough elasticity, and a satisfying golden bake. I’ll guide you through proofing tricks and how to know when the rolls are done without relying on exact timers alone.
- Warm up the milk in the microwave for 30 seconds. Add the yeast to it, stir and let sit for 5 minutes until yeast dissolves. You can also add about a teaspoon of sugar to it to help the yeast along.: You should feel a comforting warmth when you touch the container, not a burn, and the scent should be faintly creamy. This warmth helps the active dry yeast wake up and start producing bubbles, which gives the dough lift. A common error is overheating the milk , which kills the yeast, so always test it on your wrist, aiming for about the temperature of a warm bath. If you skip the check you risk a flat dough that will not rise well. If you see foaming within five minutes, that is a good sign the yeast is active.
- In the bowl of your stand mixer, combine the flour, sugar and salt together. To it, add the butter, egg and the yeast mixture. Using the dough hook attachment, knead the mixture for about 3 to 5 minutes. You're looking for the dough to become elastic and soft.: You will notice tiny bubbles forming and a slightly frothy surface, which smells gently yeasty and sweet. This proofing step confirms the yeast is alive and ready to leaven the dough. If there is no foam after the wait, that means poor yeast activity, so you should start over with fresh active dry yeast . Avoid stirring aggressively because that can cool the mixture and delay activation.
- Place the dough in a slightly oiled bowl, cover with plastic wrap and let it rise in a warm place until doubled in size. If your oven has the proof function use that and keep the dough inside the oven, otherwise turn the oven on to 350℉ for about 1 minute until it's warm inside, turn off the oven and place the bowl with the dough in the oven and close the door. This speeds up the process and in about 45 min your dough should have doubled in size.: The dry ingredients should be evenly mixed so the salt and sugar do not cluster. You will see the pale dust of flour transform when you add the wet elements, and a fragrant, slightly sweet smell will begin to develop as the butter and egg incorporate. Poorly mixed dry ingredients can create uneven texture, so take the extra minute to whisk them together first.
- Grease your baking dish, cast iron skillet, ceramic pie plate, glass dish… I’ve used them all and they all work beautifully.: At this point the dough will begin to come together, appearing shaggy before it smooths out. The butter should be softened so it folds into the flour without creating lumps. If the butter is too cold, you will have uneven pockets in the dough, and if it is melted, the dough may become too loose. Scrape the bowl as needed so everything blends evenly.
- Roll the dough into a rectangle that's about 18 inches x 12 inches. Spread the strawberry jam over the dough evenly. If you use too much jelly it will come out when you slice into rolls. Evenly arrange the strawberries over the jelly. Start rolling the dough, starting from the far side towards you. When you reach the end make sure to pinch the sides together.: You will hear a soft, rhythmic whirl and feel the dough transform from sticky to elastic and smooth. The sound is subtle, a low hum as the dough pulls away and wraps around the hook. This kneading develops gluten, giving a chewy, tender structure that traps the gas produced by the active dry yeast . Overkneading can make the dough tough, while underkneading yields a dense crumb, so watch for that elastic, slightly tacky texture as your cue.
- Gently cut the roll into 8 equal rolls. To make this easier cut the roll in half first, then each half in half and so on, until you have 8 rolls. I found it easier to cut the rolls using a sharp, serrated knife.: You will notice the dough growing, a visible expansion and soft springiness when gently pressed. The surface becomes smooth and taut, and the aroma turns pleasantly yeasty. If your kitchen is cool, use the oven proofing trick described to maintain consistent warmth. A common mistake is rushing this stage; underproofed dough will be dense, and overproofed dough can collapse, so aim for roughly double in volume for the right structure.
- Place the rolls into the prepared baking dish and cover with plastic wrap. Let the rolls rest and rise until doubled in size. You can use the oven trick again to speed up the process. Just make sure to turn off the oven, you only want it to warm for about a minute so that the rolls stay in a warm environment.: A lightly greased pan prevents sticking and encourages even browning along the bottom edges. You should be able to nudge a roll and see it slide slightly, indicating proper greasing. If you skip greasing, the rolls can stick and tear when plated, losing their neat spiral appearance. Choose a pan that fits the rolls comfortably without crowding them too tightly.
- In the meantime you can prepare the cream cheese icing. Place all the ingredients in the bowl of your mixer and mix until smooth. If you find the icing is too thick add 1 tablespoon of milk, keep adding milk until the desired consistency, but only add 1 tablespoon at a time because it thins out quickly. You shouldn't need more than 1 or 2 tablespoon of milk, I didn't use any at all. If the icing is too thin, add more powdered sugar and mix. Play with the ingredients, until you get your desired consistency. I like mine a bit thicker, but not too thick so that you can still drizzle over the rolls.: As you roll, the dough should feel smooth and pliable, the surface slightly tacky but not sticky. Rolling to this size creates thin, even layers that bake through without raw dough in the centers. If the dough resists, let it rest a few minutes to relax the gluten, otherwise it will shrink back and be difficult to shape. Evenness here prevents uneven baking and filling spillage.
- Once the rolls have doubled in size, bake at 350℉ for about 30 minutes or until nice and golden. Let the rolls cool a bit, for about 10 minutes then drizzle with the cream cheese icing and serve.: The jam should be glossy and spreadable, leaving a thin, even layer so the rolls hold shape and do not leak. If the jam is too thick, warm it briefly to make spreading easier; if it is too watery, blot excess moisture with a paper towel. Overfilling with jam is a frequent mistake that causes the rolls to ooze during baking and become soggy at the base.
- Evenly arrange the strawberries over the jelly: The chopped strawberries should be distributed so every bite has fruit. You should see little red flecks across the dough, and the mixture will glisten slightly. Larger chunks can rupture the dough when rolled, so keep pieces small to preserve structural integrity. Press lightly so they nestle into the jam without displacing it.
- Start rolling the dough, starting from the far side towards you: The roll should form smoothly, creating visible spiral layers. You will feel resistance as you go; a firm, even pressure produces a neat log. Pinch the seam to seal it, preventing the roll from unravelling during baking. A common error is rolling too tightly, which can compress the layers and prevent proper rising inside the swirls.
- When you reach the end make sure to pinch the sides together: Pinching the seam and ends helps keep the filling contained, and you should hear a faint tack as the dough seals. This step keeps the rolls tidy and prevents leaks while baking. If the seam opens, the rolls can spread and lose their spiral appearance, so ensure a secure seal without tearing the dough.
- Gently cut the roll into 8 equal rolls: Use the slicing sequence recommended to quarter then divide so each piece is uniform. A sharp, serrated knife or dental floss will give clean edges without squashing the roll. You should see the spiral cross section reveal pale dough and ribbons of jam. Slicing crookedly will create uneven sizes that bake at different rates, so aim for even pieces.
- To make this easier cut the roll in half first, then each half in half and so on, until you have 8 rolls: This method ensures consistent sizing and reduces handling that squashes the layers. Each cut should show defined spirals and tidy edges. If your knife drags, chill the roll briefly to firm the filling for cleaner cuts. Avoid sawing motions that can flatten the rolls; a steady press yields the best shape.
- I found it easier to cut the rolls using a sharp, serrated knife: A serrated blade slices without compressing the layers, and you will hear a quiet tearing sound as the teeth pass through jam and dough. Clean cuts keep the spiral intact so the rolls bake uniformly. A blunt knife will mash the roll and distort the shape, so sharpen or use floss instead.
- Place the rolls into the prepared baking dish and cover with plastic wrap: Arrange them snugly so sides touch slightly, which encourages them to bake tall and pull apart beautifully. Covering preserves moisture during the second rise and prevents a dry skin forming. If left uncovered, tops can dry and crack, which affects the final texture, so keep them covered until the second rise is complete.
- Let the rolls rest and rise until doubled in size: You will notice the rolls puffing and filling the pan, with seams smoothing under the plastic. This second rise softens the structure and ensures a tender crumb once baked. Common mistakes include rushing this step, which yields a dense interior, so be patient and check for visual doubling rather than relying strictly on the clock.
- You can use the oven trick again to speed up the process: A briefly warmed oven creates a cozy proofing environment. Turn the oven on briefly, then off, place the covered rolls inside, and close the door to trap gentle warmth. Ensure the oven is not hot as that can start baking prematurely. Too warm an environment can overproof and collapse the rolls, so aim only for a gentle, consistent warmth.
- In the meantime you can prepare the cream cheese icing: When you mix cream cheese , softened butter , vanilla extract , and powdered sugar , the texture becomes glossy and smooth, with a tangy sweet aroma. Start slowly to avoid a powdered sugar cloud, then increase speed until silky. If the icing seems too thick, add a little milk one tablespoon at a time; if too thin, add more powdered sugar . A common pitfall is adding liquid too quickly, which can make the icing runny in an instant.
- Place all the ingredients in the bowl of your mixer and mix until smooth: The sound here is a steady whirl as the mixer turns the components into a unified glaze, and the texture should be glossy and clingy. Taste and adjust for sweetness and tang, remembering warmth from the rolls will mellow the icing. If the mixture is lumpy, continue mixing at low speed rather than adding more liquid, which preserves consistency.
- If you find the icing is too thick add 1 tablespoon of milk, keep adding milk until the desired consistency: Make small adjustments and then pause to observe the change, because a single tablespoon can shift the icing from pipeable to pourable. You should be aiming for an icing that will drizzle but still hold a ribbon when poured. Avoid adding more liquid than needed, as over thinning cannot be easily reversed without more powdered sugar.
- You shouldn't need more than 1 or 2 tablespoon of milk, I didn't use any at all: Many times the softened cream cheese and butter alone produce the right texture, especially if your powdered sugar is finely sifted. If the weather is humid, you might need slightly more powdered sugar to maintain structure. Expect small tweaks rather than big changes here.
- If the icing is too thin, add more powdered sugar and mix: As you add more powdered sugar , the aroma will shift sweeter and the texture will firm up quickly. Sift the sugar if you want the silkiest finish and avoid graininess. Resist the urge to over sweeten; the rolls themselves are already bright with strawberry jam , so keep the icing balanced.
- Play with the ingredients, until you get your desired consistency: Taste and texture are the guiding lights here, so trust your palate and the feel of the glaze on a spoon. Small adjustments will tune the balance, and the finished drizzle should feel lush but not syrupy. If you overcorrect, you can always rebalance by adding tiny bits of powdered sugar or milk until it’s right.
- Once the rolls have doubled in size, bake at 350℉ for about 30 minutes or until nice and golden: As they bake you will notice a warm, sweet berry scent and the tops turning a rich golden color. The sound is subtle, an even hush from the oven as moisture escapes and the crust sets. Use visual cues more than time alone, because pan type and oven variance change bake times. Avoid opening the oven repeatedly, as that drops temperature and can alter the final rise and texture.
- Let the rolls cool a bit, for about 10 minutes then drizzle with the cream cheese icing and serve: In this resting window the steam redistributes and the interior firms slightly, making it easier to drizzle without all the icing melting away. The warm rolls will soften the glaze into shining ribbons that cling to the spirals. If you wait too long the icing will not melt into the pastry as beautifully, so I like to drizzle while they are still a touch warm for the best presentation.
Tips for Success
These tips come from repeated batches and small tweaks that saved me time and improved the texture. I share them so you can avoid the missteps I learned the hard way and get consistent results.
- Proof your yeast properly – Warm milk to about body temperature and wait for a foamy crown after adding active dry yeast. No foam usually means the yeast is inactive and will not leaven the dough, so start over rather than wasting other ingredients.
- Measure flour correctly – Spoon all-purpose flour into the cup and level it off to avoid dense dough. Too much flour makes the dough stiff and ruins the tender crumb you want for these rolls.
- Use softened butter – Unsalted butter should be soft but not melted so it blends evenly into the dough without creating oily pockets. If it’s too cold the dough will be lumpy, and if it’s too warm, the dough becomes slack.
- Keep strawberry pieces small – Chop the strawberries into small bits so they distribute evenly and do not cause the rolls to burst during baking. Big chunks can leak and make the bottom soggy.
- Serrated knife or dental floss for cutting – For the cleanest spirals, use unflavored dental floss or a sharp serrated knife to slice the log into even rolls without compressing the layers.
- Second rise matters – Allow the rolls to double during the second rise for a light, tender interior. Rushing this step leads to dense, underproofed rolls that do not achieve the desired lift.
- Adjust icing slowly – Add powdered sugar or milk a little at a time to reach a drizzleable consistency; small tweaks keep the glaze from becoming too sweet or too runny.
What to Serve Alongside Strawberry Rolls with Cream Cheese Icing
These rolls pair beautifully with bright, simple beverages and light accompaniments for a springtime spread. I like to serve them with coffee, tea, or a chilled fruit salad to complement the berry notes. They work for brunch, celebratory breakfasts, and casual gatherings where you want something pretty and fuss free.
- Serve with hot coffee or tea – A cup of coffee or a pot of tea balances the sweetness and provides a warm contrast to the cool cream cheese icing.
- Pair with a simple fruit salad – Fresh seasonal fruit echoes the strawberries in the rolls and adds a refreshing counterpoint to the rich dough and icing.
- Offer as a brunch centerpiece – Place the rolls on a platter for guests to pull apart, ideal for birthdays, weekend gatherings, or a spring brunch menu.
- Storage tips – Store leftover rolls in an airtight container at room temperature for a day or refrigerate for longer keeping. Rewarm gently in a low oven to revive freshness before serving.
- Make ahead options – You can prepare through the first rise and refrigerate overnight, then shape, proof, and bake the next morning for fresh rolls with minimal morning work.
- Seasonal occasions – These are lovely for spring events like baby showers, Mother’s Day brunches, or anytime you want a festive, fruit forward pastry.
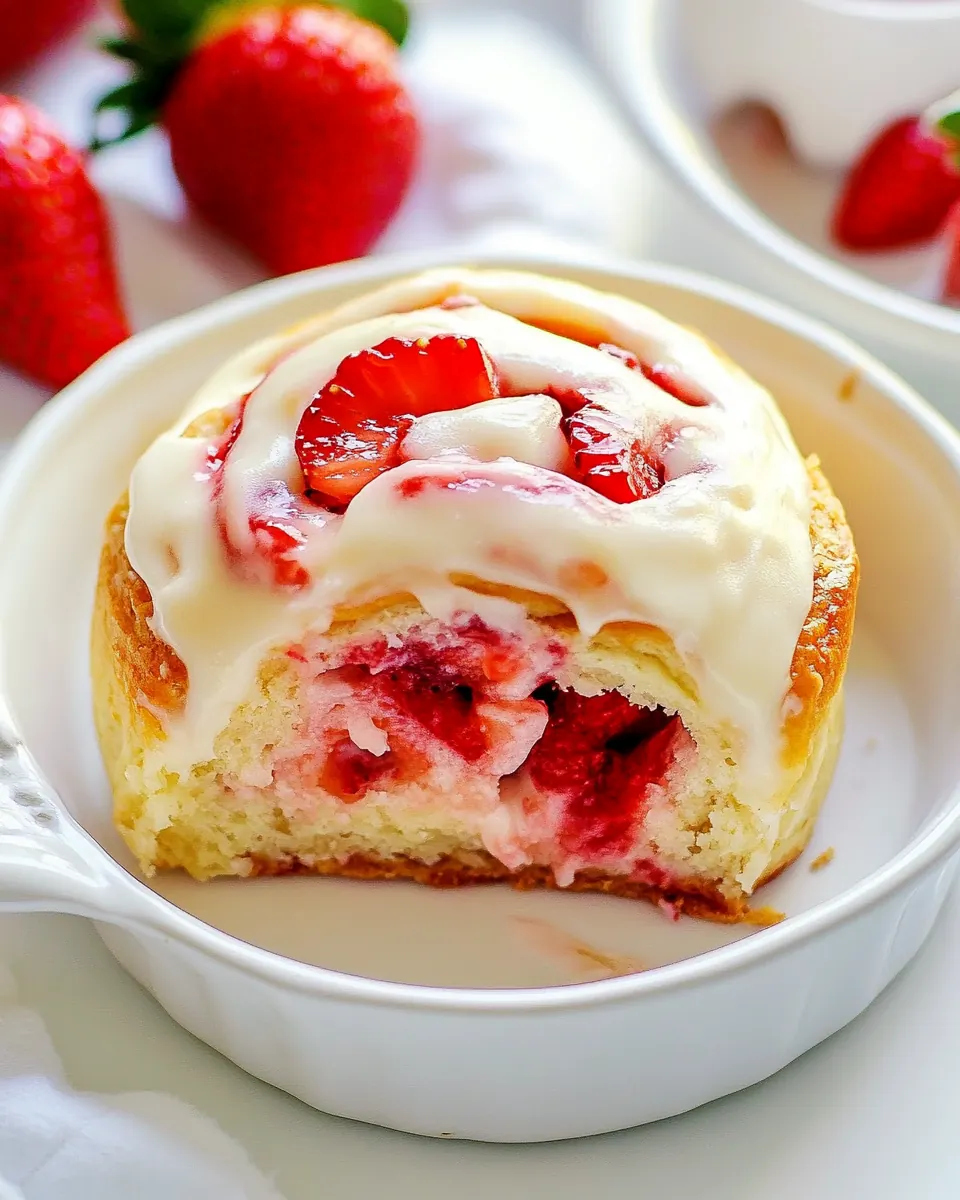
- Serving style – Drizzle the cream cheese icing while rolls are slightly warm for best presentation, letting it pool into the spirals for a bakery look.
FAQ
Conclusion
These Strawberry Rolls with Cream Cheese Icing combine tender, yeasted dough, vibrant strawberry filling, and a silky tangy glaze to create a memorable springtime pastry. The recipe stands out for its approachable technique, flexible proofing options, and the rewarding aroma that fills your kitchen as they bake. I hope you give these a try the next time you want a special breakfast or a sweet treat to share, because the results are reliably comforting and impressive without needing advanced baking skills. Enjoy the process and the warm, berry scented reward when you pull that first roll apart.
Strawberry Rolls with Cream Cheese Icing
Equipment
- KitchenAid Artisan 5 Quart Stand Mixer
- KitchenAid Hand Mixer
- Classic Wooden Rolling Pin
- 9-inch pie plate
Ingredients
- 1/2 cup milk Warm gently to lukewarm temperature and activate yeast; provides the liquid base for dough and helps dissolve sugar and yeast to create proper fermentation. Ensures a soft crumb and hydrating balance for the flour while aiding gluten formation. Monitor temperature to avoid killing yeast and to achieve a tender roll texture.
- 1 teaspoon active dry yeast Dissolve into warmed milk to leaven the dough and create airy, soft rolls through fermentation. Contributes to rise and lightness by producing carbon dioxide that expands the dough during proofing. Measure accurately and proof in a warm draft-free spot for best results.
- 2 cups all-purpose flour Combine with liquids and fats to form the structure and bulk of the dough; supplies gluten-forming proteins for chew and elasticity. Provides the primary dry component that balances hydration and binds other ingredients into a cohesive dough. Sift or whisk to remove lumps for even incorporation.
- 1/4 cups sugar Add sweetness to feed the yeast slightly and flavor the dough while balancing tartness from strawberries and jam. Also contributes to browning during baking and tenderizes crumb by interfering with gluten bonds. Use measured amount to keep rolls mildly sweet without overpowering fillings.
- 1/4 teaspoons salt Provide basic seasoning to enhance flavor and regulate yeast activity slightly by strengthening gluten network; even a small amount improves overall taste. Helps control fermentation rate and balances sweetness from sugar and jam. Distribute evenly in dry ingredients before mixing for uniformity.
- 1/4 cup unsalted butter (or margarine, softened to room temperature) Soften and incorporate into dough to enrich flavor, tenderize crumb, and add moisture and richness; acts as a fat that promotes flakiness and softness. Can be substituted with margarine as noted, but unsalted butter offers a cleaner dairy flavor. Ensure softened to room temperature for easier mixing and even distribution.
- 1 egg Whisk into the dough to add richness, color, and act as a binder that improves dough elasticity and structure. Enhances flavor and contributes to a tender, slightly richer crumb in the rolls. Beat lightly before adding to ensure even incorporation.
- 3/4 cups strawberry jam Spread as a sweet, fruity filling that brings strawberry flavor and moisture to the rolls; acts as the primary sweet filling component. Provides jammy texture and concentrated fruit sweetness that pairs with fresh strawberries. Warm slightly if too thick for easy spreading.
- 1 cups strawberries (fresh and chopped into small pieces) Fold into the filling for fresh fruit texture and bright strawberry flavor; contributes bursts of freshness and small pieces that complement the jam. Adds natural acidity and moisture, balancing sweetness and preventing the filling from becoming too homogenous. Chop uniformly to ensure even distribution inside each roll.
- 1/2 cup cream cheese (at room temperature) Soften to room temperature and beat into icing to create a tangy, creamy base that complements the sweet rolls. Balances confectioners' sugar and butter with slight acidity for a smooth, spreadable glaze. Ensure fully softened to avoid lumps and achieve silky consistency.
- 3 tablespoon butter (unsalted, softened) Cream together with cream cheese and powdered sugar to produce a smooth, rich component of the icing; adds buttery flavor and body. Helps create a spreadable texture that melts slightly over warm rolls and enhances richness. Use softened unsalted butter for controlled saltiness.
- 1 teaspoon vanilla extract Add aromatic sweetness and depth to the icing while enhancing overall flavor profile; provides a warm, familiar note that complements strawberries and cream cheese. A small amount goes a long way in balancing sweetness and dairy flavors. Stir in gradually and taste to adjust intensity.
- 1 1/2 cups powdered sugar Whisk into the cream cheese and butter until smooth to form a sweet, velvety icing that tops the rolls; provides structure and sweetness. Contributes to the glossy, thick finish and can be adjusted for consistency by adding small amounts at a time. Sift if lumpy and taste to ensure balanced sweetness.
Instructions
- Warm up the milk in the microwave for 30 seconds. Add the yeast to it, stir and let sit for 5 minutes until yeast dissolves. You can also add about a teaspoon of sugar to it to help the yeast along.: You should feel a comforting warmth when you touch the container, not a burn, and the scent should be faintly creamy. This warmth helps the active dry yeast wake up and start producing bubbles, which gives the dough lift. A common error is overheating the milk , which kills the yeast, so always test it on your wrist, aiming for about the temperature of a warm bath. If you skip the check you risk a flat dough that will not rise well. If you see foaming within five minutes, that is a good sign the yeast is active.
- In the bowl of your stand mixer, combine the flour, sugar and salt together. To it, add the butter, egg and the yeast mixture. Using the dough hook attachment, knead the mixture for about 3 to 5 minutes. You're looking for the dough to become elastic and soft.: You will notice tiny bubbles forming and a slightly frothy surface, which smells gently yeasty and sweet. This proofing step confirms the yeast is alive and ready to leaven the dough. If there is no foam after the wait, that means poor yeast activity, so you should start over with fresh active dry yeast . Avoid stirring aggressively because that can cool the mixture and delay activation.
- Place the dough in a slightly oiled bowl, cover with plastic wrap and let it rise in a warm place until doubled in size. If your oven has the proof function use that and keep the dough inside the oven, otherwise turn the oven on to 350℉ for about 1 minute until it's warm inside, turn off the oven and place the bowl with the dough in the oven and close the door. This speeds up the process and in about 45 min your dough should have doubled in size.: The dry ingredients should be evenly mixed so the salt and sugar do not cluster. You will see the pale dust of flour transform when you add the wet elements, and a fragrant, slightly sweet smell will begin to develop as the butter and egg incorporate. Poorly mixed dry ingredients can create uneven texture, so take the extra minute to whisk them together first.
- Grease your baking dish, cast iron skillet, ceramic pie plate, glass dish… I’ve used them all and they all work beautifully.: At this point the dough will begin to come together, appearing shaggy before it smooths out. The butter should be softened so it folds into the flour without creating lumps. If the butter is too cold, you will have uneven pockets in the dough, and if it is melted, the dough may become too loose. Scrape the bowl as needed so everything blends evenly.
- Roll the dough into a rectangle that's about 18 inches x 12 inches. Spread the strawberry jam over the dough evenly. If you use too much jelly it will come out when you slice into rolls. Evenly arrange the strawberries over the jelly. Start rolling the dough, starting from the far side towards you. When you reach the end make sure to pinch the sides together.: You will hear a soft, rhythmic whirl and feel the dough transform from sticky to elastic and smooth. The sound is subtle, a low hum as the dough pulls away and wraps around the hook. This kneading develops gluten, giving a chewy, tender structure that traps the gas produced by the active dry yeast . Overkneading can make the dough tough, while underkneading yields a dense crumb, so watch for that elastic, slightly tacky texture as your cue.
- Gently cut the roll into 8 equal rolls. To make this easier cut the roll in half first, then each half in half and so on, until you have 8 rolls. I found it easier to cut the rolls using a sharp, serrated knife.: You will notice the dough growing, a visible expansion and soft springiness when gently pressed. The surface becomes smooth and taut, and the aroma turns pleasantly yeasty. If your kitchen is cool, use the oven proofing trick described to maintain consistent warmth. A common mistake is rushing this stage; underproofed dough will be dense, and overproofed dough can collapse, so aim for roughly double in volume for the right structure.
- Place the rolls into the prepared baking dish and cover with plastic wrap. Let the rolls rest and rise until doubled in size. You can use the oven trick again to speed up the process. Just make sure to turn off the oven, you only want it to warm for about a minute so that the rolls stay in a warm environment.: A lightly greased pan prevents sticking and encourages even browning along the bottom edges. You should be able to nudge a roll and see it slide slightly, indicating proper greasing. If you skip greasing, the rolls can stick and tear when plated, losing their neat spiral appearance. Choose a pan that fits the rolls comfortably without crowding them too tightly.
- In the meantime you can prepare the cream cheese icing. Place all the ingredients in the bowl of your mixer and mix until smooth. If you find the icing is too thick add 1 tablespoon of milk, keep adding milk until the desired consistency, but only add 1 tablespoon at a time because it thins out quickly. You shouldn't need more than 1 or 2 tablespoon of milk, I didn't use any at all. If the icing is too thin, add more powdered sugar and mix. Play with the ingredients, until you get your desired consistency. I like mine a bit thicker, but not too thick so that you can still drizzle over the rolls.: As you roll, the dough should feel smooth and pliable, the surface slightly tacky but not sticky. Rolling to this size creates thin, even layers that bake through without raw dough in the centers. If the dough resists, let it rest a few minutes to relax the gluten, otherwise it will shrink back and be difficult to shape. Evenness here prevents uneven baking and filling spillage.
- Once the rolls have doubled in size, bake at 350℉ for about 30 minutes or until nice and golden. Let the rolls cool a bit, for about 10 minutes then drizzle with the cream cheese icing and serve.: The jam should be glossy and spreadable, leaving a thin, even layer so the rolls hold shape and do not leak. If the jam is too thick, warm it briefly to make spreading easier; if it is too watery, blot excess moisture with a paper towel. Overfilling with jam is a frequent mistake that causes the rolls to ooze during baking and become soggy at the base.
- Evenly arrange the strawberries over the jelly: The chopped strawberries should be distributed so every bite has fruit. You should see little red flecks across the dough, and the mixture will glisten slightly. Larger chunks can rupture the dough when rolled, so keep pieces small to preserve structural integrity. Press lightly so they nestle into the jam without displacing it.
- Start rolling the dough, starting from the far side towards you: The roll should form smoothly, creating visible spiral layers. You will feel resistance as you go; a firm, even pressure produces a neat log. Pinch the seam to seal it, preventing the roll from unravelling during baking. A common error is rolling too tightly, which can compress the layers and prevent proper rising inside the swirls.
- When you reach the end make sure to pinch the sides together: Pinching the seam and ends helps keep the filling contained, and you should hear a faint tack as the dough seals. This step keeps the rolls tidy and prevents leaks while baking. If the seam opens, the rolls can spread and lose their spiral appearance, so ensure a secure seal without tearing the dough.
- Gently cut the roll into 8 equal rolls: Use the slicing sequence recommended to quarter then divide so each piece is uniform. A sharp, serrated knife or dental floss will give clean edges without squashing the roll. You should see the spiral cross section reveal pale dough and ribbons of jam. Slicing crookedly will create uneven sizes that bake at different rates, so aim for even pieces.
- To make this easier cut the roll in half first, then each half in half and so on, until you have 8 rolls: This method ensures consistent sizing and reduces handling that squashes the layers. Each cut should show defined spirals and tidy edges. If your knife drags, chill the roll briefly to firm the filling for cleaner cuts. Avoid sawing motions that can flatten the rolls; a steady press yields the best shape.
- I found it easier to cut the rolls using a sharp, serrated knife: A serrated blade slices without compressing the layers, and you will hear a quiet tearing sound as the teeth pass through jam and dough. Clean cuts keep the spiral intact so the rolls bake uniformly. A blunt knife will mash the roll and distort the shape, so sharpen or use floss instead.
- Place the rolls into the prepared baking dish and cover with plastic wrap: Arrange them snugly so sides touch slightly, which encourages them to bake tall and pull apart beautifully. Covering preserves moisture during the second rise and prevents a dry skin forming. If left uncovered, tops can dry and crack, which affects the final texture, so keep them covered until the second rise is complete.
- Let the rolls rest and rise until doubled in size: You will notice the rolls puffing and filling the pan, with seams smoothing under the plastic. This second rise softens the structure and ensures a tender crumb once baked. Common mistakes include rushing this step, which yields a dense interior, so be patient and check for visual doubling rather than relying strictly on the clock.
- You can use the oven trick again to speed up the process: A briefly warmed oven creates a cozy proofing environment. Turn the oven on briefly, then off, place the covered rolls inside, and close the door to trap gentle warmth. Ensure the oven is not hot as that can start baking prematurely. Too warm an environment can overproof and collapse the rolls, so aim only for a gentle, consistent warmth.
- In the meantime you can prepare the cream cheese icing: When you mix cream cheese , softened butter , vanilla extract , and powdered sugar , the texture becomes glossy and smooth, with a tangy sweet aroma. Start slowly to avoid a powdered sugar cloud, then increase speed until silky. If the icing seems too thick, add a little milk one tablespoon at a time; if too thin, add more powdered sugar . A common pitfall is adding liquid too quickly, which can make the icing runny in an instant.
- Place all the ingredients in the bowl of your mixer and mix until smooth: The sound here is a steady whirl as the mixer turns the components into a unified glaze, and the texture should be glossy and clingy. Taste and adjust for sweetness and tang, remembering warmth from the rolls will mellow the icing. If the mixture is lumpy, continue mixing at low speed rather than adding more liquid, which preserves consistency.
- If you find the icing is too thick add 1 tablespoon of milk, keep adding milk until the desired consistency: Make small adjustments and then pause to observe the change, because a single tablespoon can shift the icing from pipeable to pourable. You should be aiming for an icing that will drizzle but still hold a ribbon when poured. Avoid adding more liquid than needed, as over thinning cannot be easily reversed without more powdered sugar.
- You shouldn't need more than 1 or 2 tablespoon of milk, I didn't use any at all: Many times the softened cream cheese and butter alone produce the right texture, especially if your powdered sugar is finely sifted. If the weather is humid, you might need slightly more powdered sugar to maintain structure. Expect small tweaks rather than big changes here.
- If the icing is too thin, add more powdered sugar and mix: As you add more powdered sugar , the aroma will shift sweeter and the texture will firm up quickly. Sift the sugar if you want the silkiest finish and avoid graininess. Resist the urge to over sweeten; the rolls themselves are already bright with strawberry jam , so keep the icing balanced.
- Play with the ingredients, until you get your desired consistency: Taste and texture are the guiding lights here, so trust your palate and the feel of the glaze on a spoon. Small adjustments will tune the balance, and the finished drizzle should feel lush but not syrupy. If you overcorrect, you can always rebalance by adding tiny bits of powdered sugar or milk until it’s right.
- Once the rolls have doubled in size, bake at 350℉ for about 30 minutes or until nice and golden: As they bake you will notice a warm, sweet berry scent and the tops turning a rich golden color. The sound is subtle, an even hush from the oven as moisture escapes and the crust sets. Use visual cues more than time alone, because pan type and oven variance change bake times. Avoid opening the oven repeatedly, as that drops temperature and can alter the final rise and texture.
- Let the rolls cool a bit, for about 10 minutes then drizzle with the cream cheese icing and serve: In this resting window the steam redistributes and the interior firms slightly, making it easier to drizzle without all the icing melting away. The warm rolls will soften the glaze into shining ribbons that cling to the spirals. If you wait too long the icing will not melt into the pastry as beautifully, so I like to drizzle while they are still a touch warm for the best presentation.
Notes
- Proof your yeast properly - Warm milk to about body temperature and wait for a foamy crown after adding active dry yeast. No foam usually means the yeast is inactive and will not leaven the dough, so start over rather than wasting other ingredients.
- Measure flour correctly - Spoon all-purpose flour into the cup and level it off to avoid dense dough. Too much flour makes the dough stiff and ruins the tender crumb you want for these rolls.
- Use softened butter - Unsalted butter should be soft but not melted so it blends evenly into the dough without creating oily pockets. If it’s too cold the dough will be lumpy, and if it’s too warm, the dough becomes slack.
- Keep strawberry pieces small - Chop the strawberries into small bits so they distribute evenly and do not cause the rolls to burst during baking. Big chunks can leak and make the bottom soggy.
- Serrated knife or dental floss for cutting - For the cleanest spirals, use unflavored dental floss or a sharp serrated knife to slice the log into even rolls without compressing the layers.
- Second rise matters - Allow the rolls to double during the second rise for a light, tender interior. Rushing this step leads to dense, underproofed rolls that do not achieve the desired lift.
- Adjust icing slowly - Add powdered sugar or milk a little at a time to reach a drizzleable consistency; small tweaks keep the glaze from becoming too sweet or too runny.