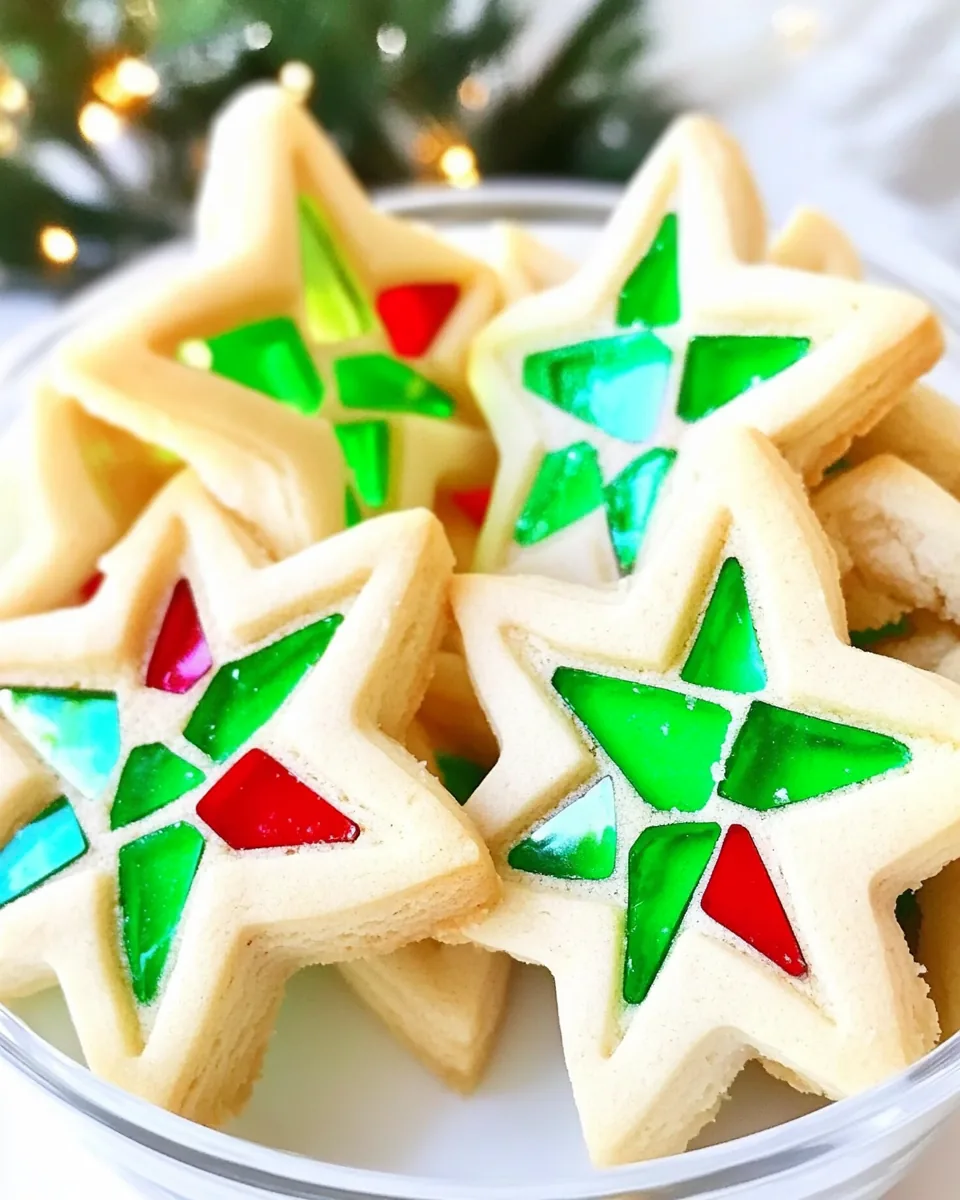
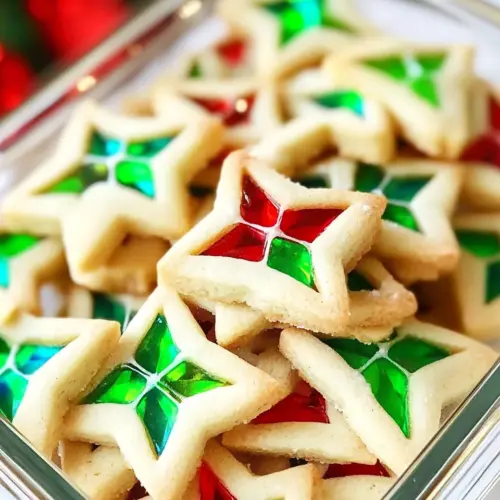
Stained Glass Cookies
Every time I think of the holidays, my mind drifts to those spectacular Stained Glass Cookies that light up the dessert table. The vibrant colors and unique designs always sparked my creativity, and there’s something so magical about seeing those colorful candies melt and transform into a beautiful centerpiece. I still remember the first time I made them with my family; it was an adventure filled with laughter, a bit of mess, and an explosion of sweetness. The kids loved choosing their favorite Jolly Rancher colors, and I cherished the moments we spent together in the kitchen, crafting these edible masterpieces. Every bite offered a delightful crunch followed by a chewy sweetness that brings back so many fond memories.
Recipe Snapshot
30 mins
15 mins
15 mins
Medium
120 kcal
1 g
Vegan, Gluten-Free, AIP
6 g
Baking Sheet, Oven, Mixing Bowl
What You’ll Enjoy About This Stained Glass Cookies
1. A Feast for the Eyes
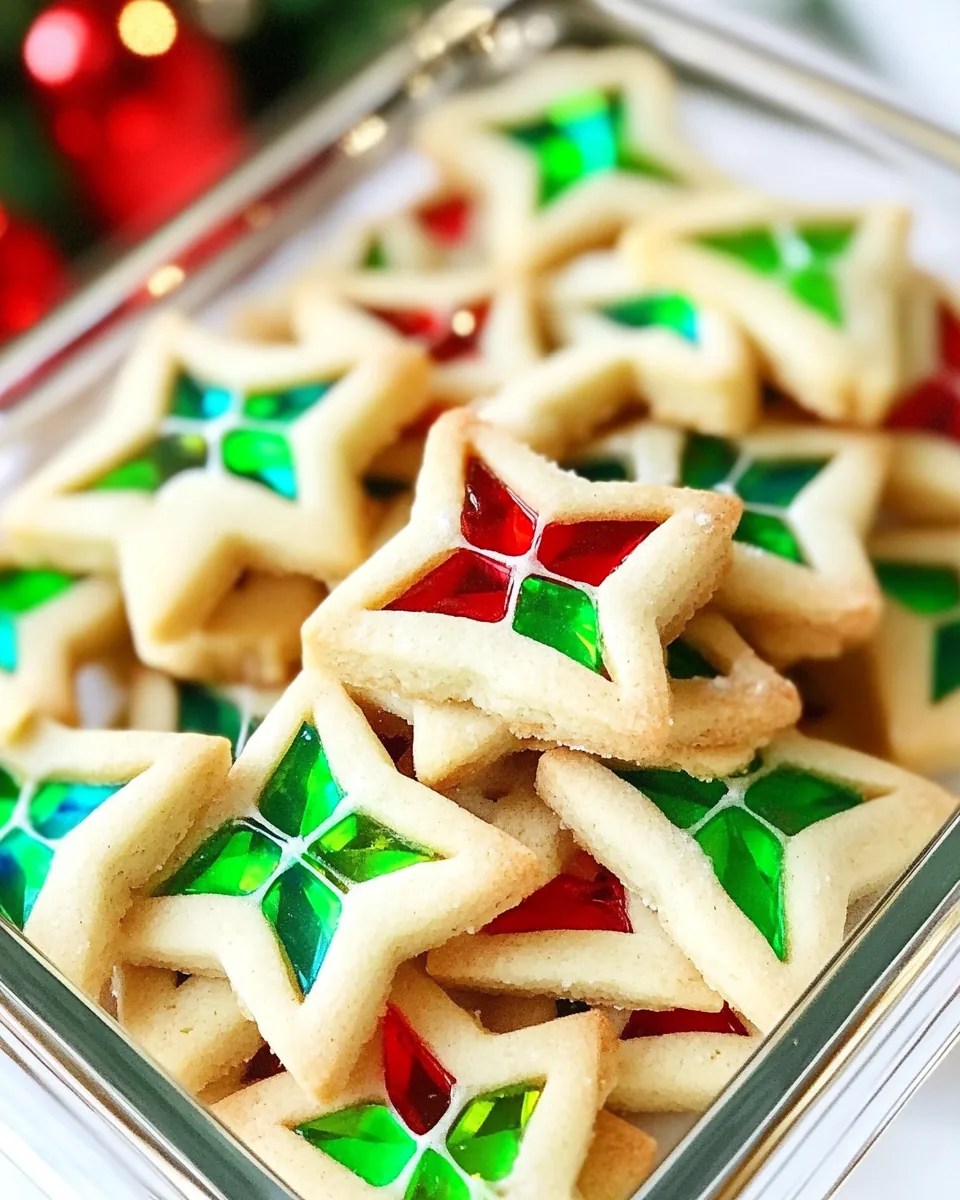
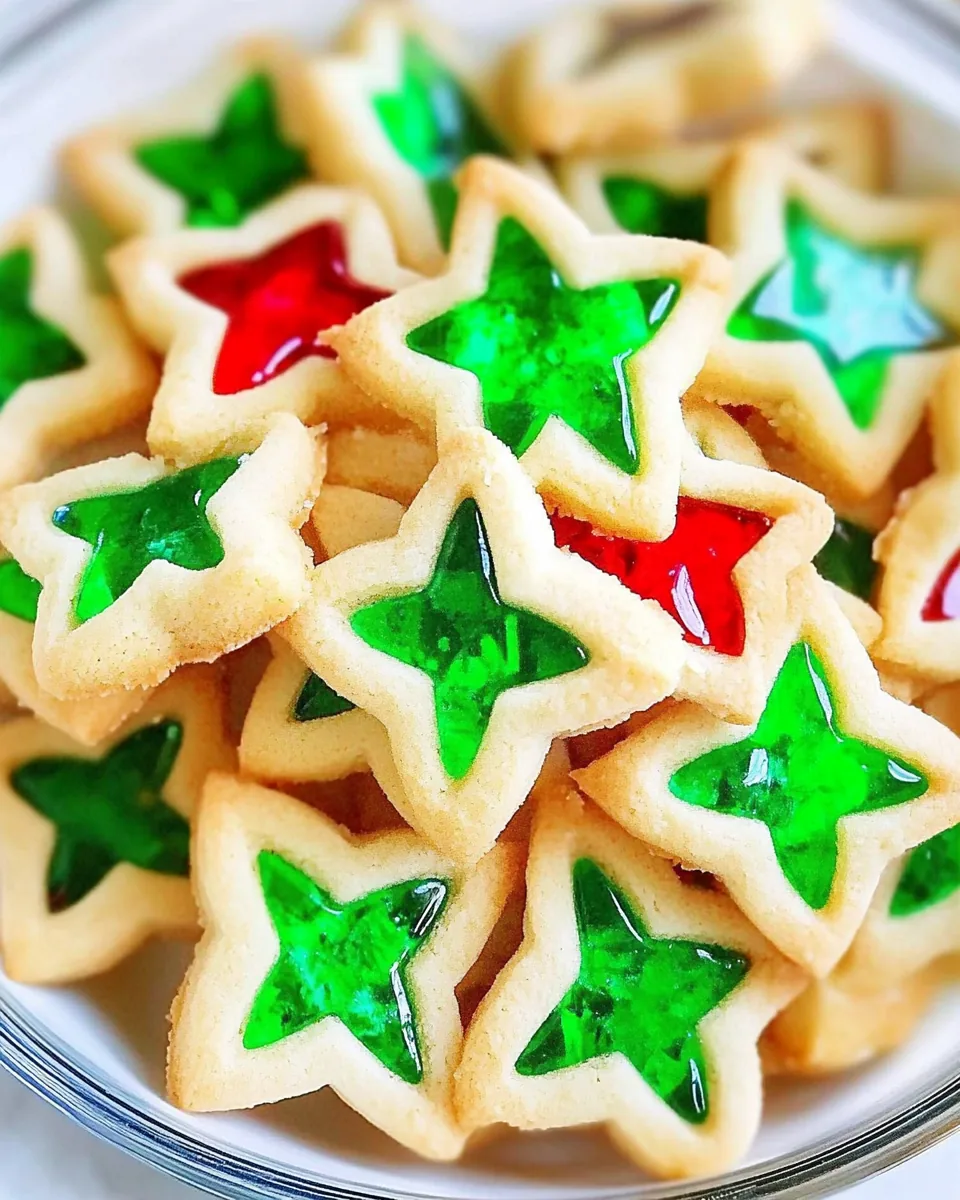
The vibrant colors of the Stained Glass Cookies truly make them a feast for the eyes. As the cookies bake, the Jolly Rancher pieces melt into a rainbow of hues, creating an enchanting stained glass effect that looks stunning on any dessert platter. They serve as not just a treat but a centerpiece for any festive gathering.
2. A Fun Project for All Ages
Making these cookies is not only about the end product; it’s about the journey. The process of rolling out the dough, cutting shapes, and filling them with crushed candies is a fantastic way to engage kids (and adults) in the kitchen. It’s an interactive project that brings everyone together, sparking creativity and teamwork.
3. Endless Customization
One of the most exciting aspects of Stained Glass Cookies is how customizable they are. You can experiment with different cookie shapes, colors, and even flavors! Whether you prefer classic round cookies or festive shapes like stars and hearts, the possibilities are endless. You can even switch up the flavor of the cookie dough to add a unique twist.
4. Perfect Gift or Treat
These cookies are an excellent gift option! Once cooled, they can be beautifully packaged in cellophane bags and tied with a ribbon. They make delightful gifts for neighbors, friends, or coworkers during the holiday season. Everyone loves a homemade treat, especially when it looks as beautiful as these.
5. A Sweet Tradition
Incorporating Stained Glass Cookies into your holiday traditions can create lasting memories. Whether it’s making them every Christmas or during special occasions, these cookies can become a staple in your baking repertoire, passed down through generations.
6. The Perfect Balance of Textures
Each bite offers a delightful contrast between the crisp cookie base and the chewy, melted candy center. This balance is what makes Stained Glass Cookies an irresistible treat that pleases both kids and adults alike.
What You’ll Need for Stained Glass Cookies
Creating Stained Glass Cookies requires a delightful selection of ingredients that complement each other beautifully. The main players include unsalted butter, which gives the cookies their rich flavor and tender texture, and granulated sugar for sweetness. The Jolly Rancher candies are the stars of the show, providing that stunning stained glass effect and adding a burst of fruity flavor. Together, these ingredients come together to create a truly memorable treat.
- 16 tablespoons unsalted butter (room temperature) – The base of the cookie, providing richness and flavor.
- ¾ cup granulated sugar – Sweetens the dough and helps create that delightful texture.
- 1 teaspoon vanilla extract – Adds a warm, aromatic flavor to the cookie.
- 1 teaspoon almond extract – Enhances the flavor profile with a hint of nuttiness.
- ¼ teaspoon kosher salt – Balances the sweetness and enhances overall flavor.
- 1 large egg (room temperature) – Binds the ingredients together and adds moisture.
- 2 ¼ cups all-purpose flour – The main structure of the cookie, giving it body and texture.
- ½ teaspoon baking powder – Helps the cookies rise slightly for a lighter texture.
- 20 Jolly Rancher hard candies (separated by color) – The highlight of the cookie, melting into a colorful center.
- sanding sugar – Adds a sparkling finish to the cookies before baking.
How to Assemble Stained Glass Cookies
Assembling Stained Glass Cookies is a fun and straightforward process that anyone can master. Follow these steps closely for stunning results. Each step allows you to build the flavors and textures that make these cookies so special. Let’s dive in!
- In a large mixing bowl, combine unsalted butter and granulated sugar. Using an electric hand mixer or stand mixer fitted with a paddle attachment, beat the mixture until it becomes light and fluffy, taking about three minutes. You should see a pale yellow color and a fluffy texture.
- Add vanilla extract, almond extract, and kosher salt to the butter-sugar mixture. Beat until well combined. The aroma of the extracts will fill your kitchen, creating a lovely base for your cookies.
- Crack the large egg into the bowl and mix until fully incorporated. The mixture should look smooth and creamy, indicating that all ingredients are well combined.
- Gradually add the all-purpose flour in about half a cup at a time, mixing slowly to avoid any mess. Once all the flour is mixed in, the dough will begin to come together. Make sure not to overmix; you want a soft and manageable dough.
- Form the dough into a ball and divide it into two halves. This makes it easier to roll out later on.
- Prepare your work surface by laying down a sheet of parchment paper. Place one half of the dough on the parchment and roll it out to about ¼ inch thick. Try to maintain an even thickness for uniform baking.
- Repeat the rolling process with the remaining half of the dough. Place both rolled-out doughs onto large baking sheets and cover them with plastic wrap. Refrigerate for at least two hours or, for best results, overnight. This chilling step helps firm up the dough.
- Preheat your oven to 350°F. Line two large baking sheets with parchment paper or a silicone baking mat for easy cleanup.
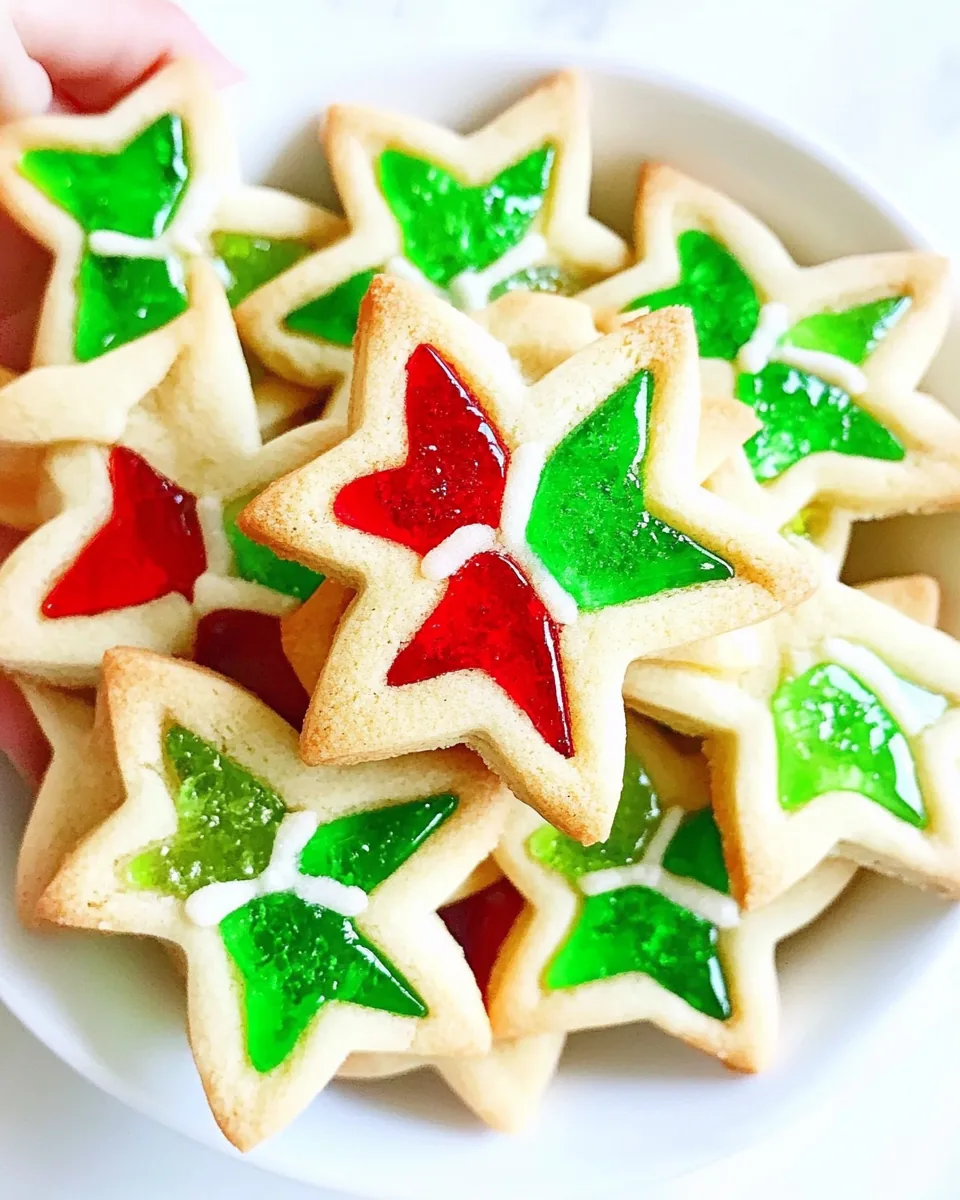
- Select two cookie cutters of the same shape, ensuring that one is slightly smaller than the other, measuring about 2 to 3 inches in size. Use the larger cutter to cut out cookies from the dough. Next, use the smaller cutter to remove the center of each cookie, creating a window for the candy filling.
- Place the cut-out cookies on the prepared baking sheet, leaving about an inch or two between each cookie. Repeat the process until you run out of dough, rolling and re-rolling as necessary. If the dough softens, gather it back into a ball and roll it out again. To make handling easier, consider covering the dough and placing it in the freezer for 5 to 10 minutes until firm.
- Sort the Jolly Rancher candies by color. Unwrap each candy and place them in separate Ziploc bags. Using a rolling pin, gently crush the candies until they are finely crushed. This will create the stained glass effect.
- Spoon a small amount of crushed candies into the center of each cookie cut-out. Be careful not to overfill, as the melted candy will spread slightly while baking. Use about a teaspoon for each cookie, adjusting based on size.
- Place the baking sheets in the preheated oven and bake for 12 to 15 minutes, or until the Jolly Rancher candies have completely melted and the edges of the cookies have a light golden color.
- Once baked, remove the cookies from the oven and allow them to cool on the baking sheet for about 10 minutes. Then gently transfer them to a wire rack to cool completely before serving.
Things Worth Knowing
- Chilling the Dough: It’s essential to chill the dough to prevent the cookies from spreading too much during baking. The colder the dough, the better the shape will hold.
- Color Variations: Feel free to experiment with different colors of Jolly Ranchers to create unique designs for each batch of cookies. You can even mix colors for a fun rainbow effect.
- Cookie Thickness: Ensure that your cookies are of even thickness for uniform baking. Thicker cookies may require a longer baking time.
- Handling the Dough: If the dough becomes too warm and sticky while working, consider placing it back in the refrigerator for a few minutes until it firms up again.
Expert Tips about Stained Glass Cookies
To make the most out of your Stained Glass Cookies, here are some expert tips that I’ve gathered over the years. These can help elevate your cookie making experience and ensure success every time.
- Storage: Store any leftover Stained Glass Cookies in an airtight container at room temperature for 3 to 5 days. This helps maintain their freshness and crispness.
- Freezing: You can freeze these cookies as well. Store cooled cookies in a freezer-safe container for up to a month. Thaw them at room temperature before enjoying.
- Cookie Dough in Advance: If you’re short on time, prepare the dough in advance, wrap it tightly in plastic wrap, and store it in the freezer for up to 1 month. Thaw overnight in the refrigerator before rolling out.
- Cutting Tips: When cutting out the cookies, use a sharp cookie cutter for clean edges. If the dough sticks, lightly dust it with flour.
- Variations: Consider adding different extracts or spices, like cinnamon or lemon zest, to the dough for a twist on flavor.
- Watch the Baking Time: Keep an eye on the cookies towards the end of the baking time. The Jolly Rancher candies should be completely melted but not burnt.
What Goes Well With This Stained Glass Cookies
Serving Stained Glass Cookies is a delightful experience, as they can elevate any occasion. Here are some ideas on how to pair these cookies:
- Tea Time: Enjoy these cookies with a warm cup of tea for a delightful afternoon snack. The sweetness of the cookies pairs perfectly with the comforting flavors of your favorite brew.
- Holiday Gatherings: They make a stunning addition to any holiday dessert table, alongside traditional pies and cakes. Their unique look can become a conversation starter.
- Baking Parties: Host a baking party and involve friends or family in the decorating process. Each person can create their version of Stained Glass Cookies.
- Gift Giving: Package these cookies beautifully in cellophane bags and gift them to friends, neighbors, or colleagues during the holiday season. They are sure to be a hit!
- Seasonal Celebrations: Perfect for celebrations like Christmas, birthdays, or other special occasions, Stained Glass Cookies will add a touch of sweetness and color to the festivities.
FAQ
Conclusion
The vibrant, eye-catching Stained Glass Cookies not only satisfy your sweet tooth but also bring a splash of color and creativity to any celebration. These cookies are perfect for sharing with friends and family during the holiday season or any festive occasion. I encourage you to try making these cookies; they are sure to become a cherished tradition in your home!
Stained Glass Cookies
Equipment
- Baking Sheet
- Oven
- Mixing Bowl
Ingredients
- 16 tablespoons Unsalted Butter Room temperature
- ¾ cup Granulated Sugar 150 grams
- 1 teaspoon Vanilla Extract
- 1 teaspoon Almond Extract or more vanilla extract
- ¼ teaspoon Kosher Salt
- 1 large Egg Room temperature
- 2 ¼ cups All-Purpose Flour 300 grams
- ½ teaspoon Baking Powder
- 20 Jolly Rancher Hard Candies Separated by color
- Sanding Sugar
Instructions
- In a large mixing bowl, combine unsalted butter and granulated sugar. Using an electric hand mixer or stand mixer fitted with a paddle attachment, beat the mixture until it becomes light and fluffy, taking about three minutes. You should see a pale yellow color and a fluffy texture.
- Add vanilla extract, almond extract, and kosher salt to the butter-sugar mixture. Beat until well combined. The aroma of the extracts will fill your kitchen, creating a lovely base for your cookies.
- Crack the large egg into the bowl and mix until fully incorporated. The mixture should look smooth and creamy, indicating that all ingredients are well combined.
- Gradually add the all-purpose flour in about half a cup at a time, mixing slowly to avoid any mess. Once all the flour is mixed in, the dough will begin to come together. Make sure not to overmix; you want a soft and manageable dough.
- Form the dough into a ball and divide it into two halves. This makes it easier to roll out later on.
- Prepare your work surface by laying down a sheet of parchment paper. Place one half of the dough on the parchment and roll it out to about ¼ inch thick. Try to maintain an even thickness for uniform baking.
- Repeat the rolling process with the remaining half of the dough. Place both rolled-out doughs onto large baking sheets and cover them with plastic wrap. Refrigerate for at least two hours or, for best results, overnight. This chilling step helps firm up the dough.
- Preheat your oven to 350°F. Line two large baking sheets with parchment paper or a silicone baking mat for easy cleanup.
- Select two cookie cutters of the same shape, ensuring that one is slightly smaller than the other, measuring about 2 to 3 inches in size. Use the larger cutter to cut out cookies from the dough. Next, use the smaller cutter to remove the center of each cookie, creating a window for the candy filling.
- Place the cut-out cookies on the prepared baking sheet, leaving about an inch or two between each cookie. Repeat the process until you run out of dough, rolling and re-rolling as necessary. If the dough softens, gather it back into a ball and roll it out again. To make handling easier, consider covering the dough and placing it in the freezer for 5 to 10 minutes until firm.
- Sort the Jolly Rancher candies by color. Unwrap each candy and place them in separate Ziploc bags. Using a rolling pin, gently crush the candies until they are finely crushed. This will create the stained glass effect.
- Spoon a small amount of crushed candies into the center of each cookie cut-out. Be careful not to overfill, as the melted candy will spread slightly while baking. Use about a teaspoon for each cookie, adjusting based on size.
- Place the baking sheets in the preheated oven and bake for 12 to 15 minutes, or until the Jolly Rancher candies have completely melted and the edges of the cookies have a light golden color.
- Once baked, remove the cookies from the oven and allow them to cool on the baking sheet for about 10 minutes. Then gently transfer them to a wire rack to cool completely before serving.
Notes
- Storage: Store any leftover Stained Glass Cookies in an airtight container at room temperature for 3 to 5 days.
- Freezing: Store cooled cookies in a freezer-safe container for up to a month. Thaw at room temperature before enjoying.
- Cookie Dough in Advance: Prepare the dough in advance and freeze it for up to 1 month. Thaw overnight in the refrigerator before rolling out.
- Cutting Tips: Use a sharp cookie cutter for clean edges. If the dough sticks, dust it lightly with flour.
- Variations: Add different extracts or spices for a unique flavor twist.
- Watch the Baking Time: Keep an eye on the cookies to ensure the melted candies do not burn.