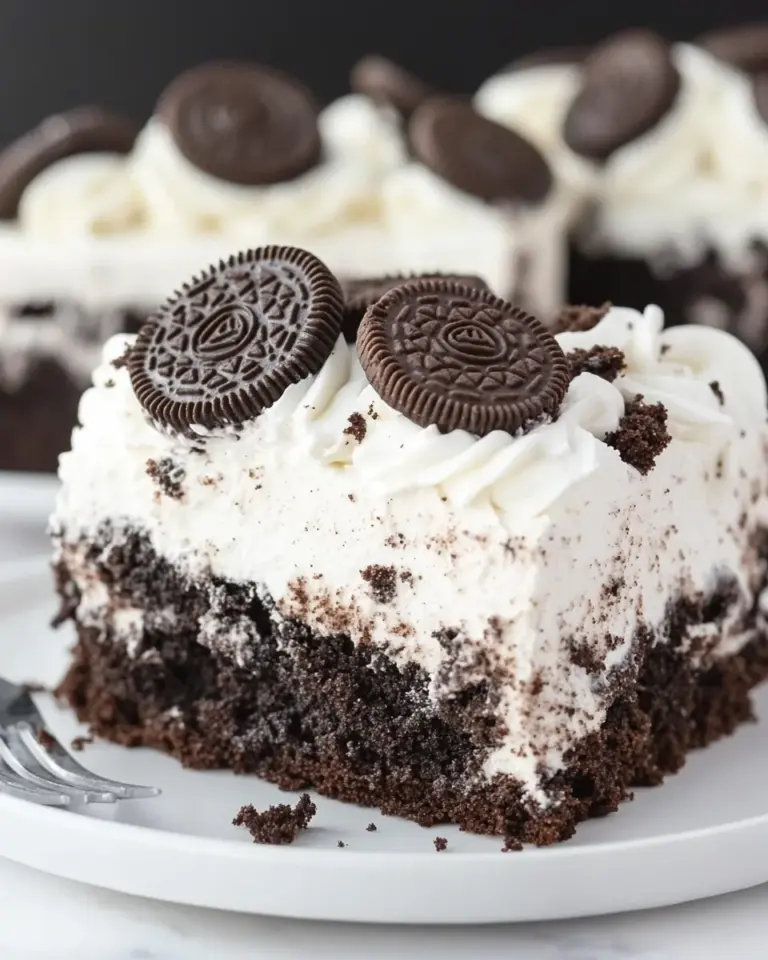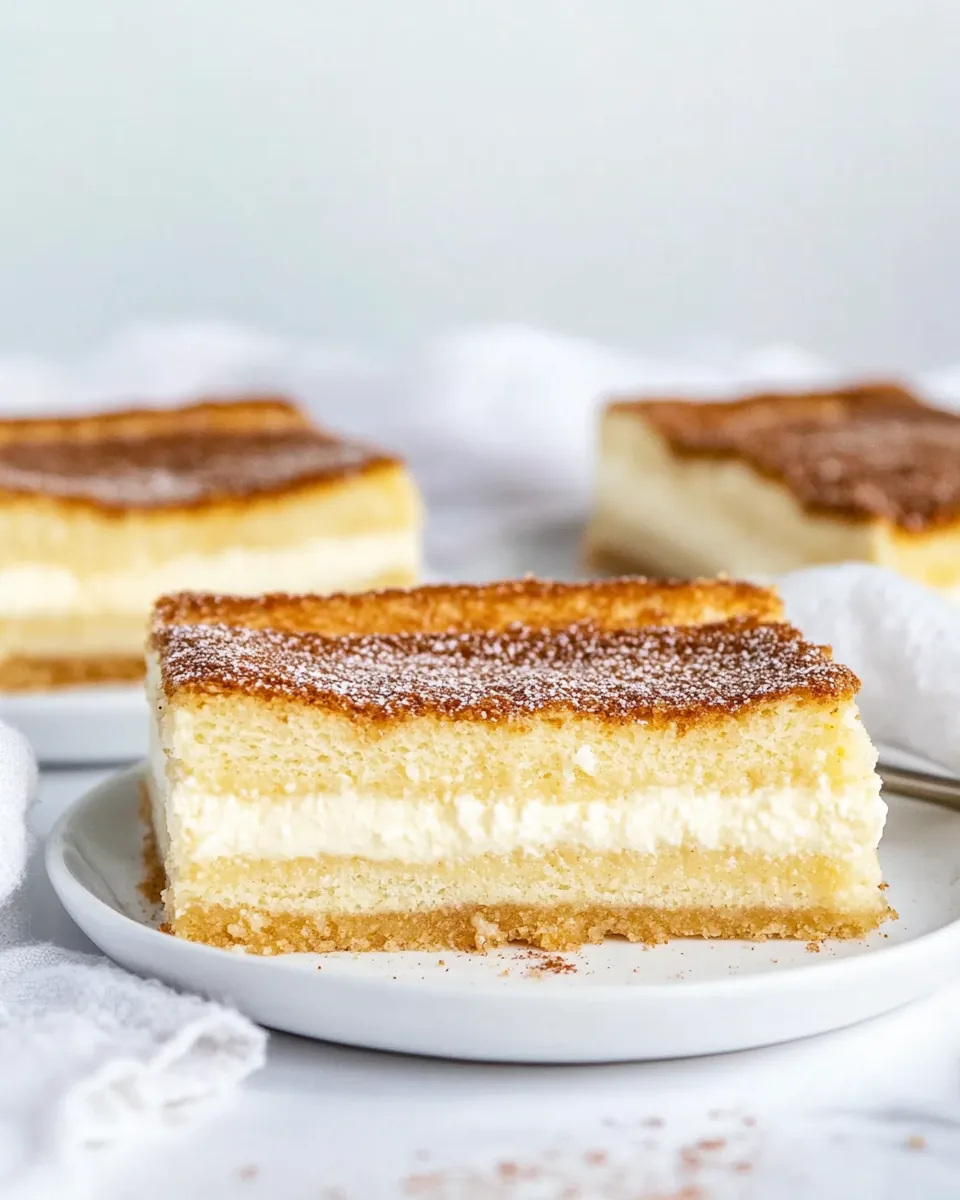
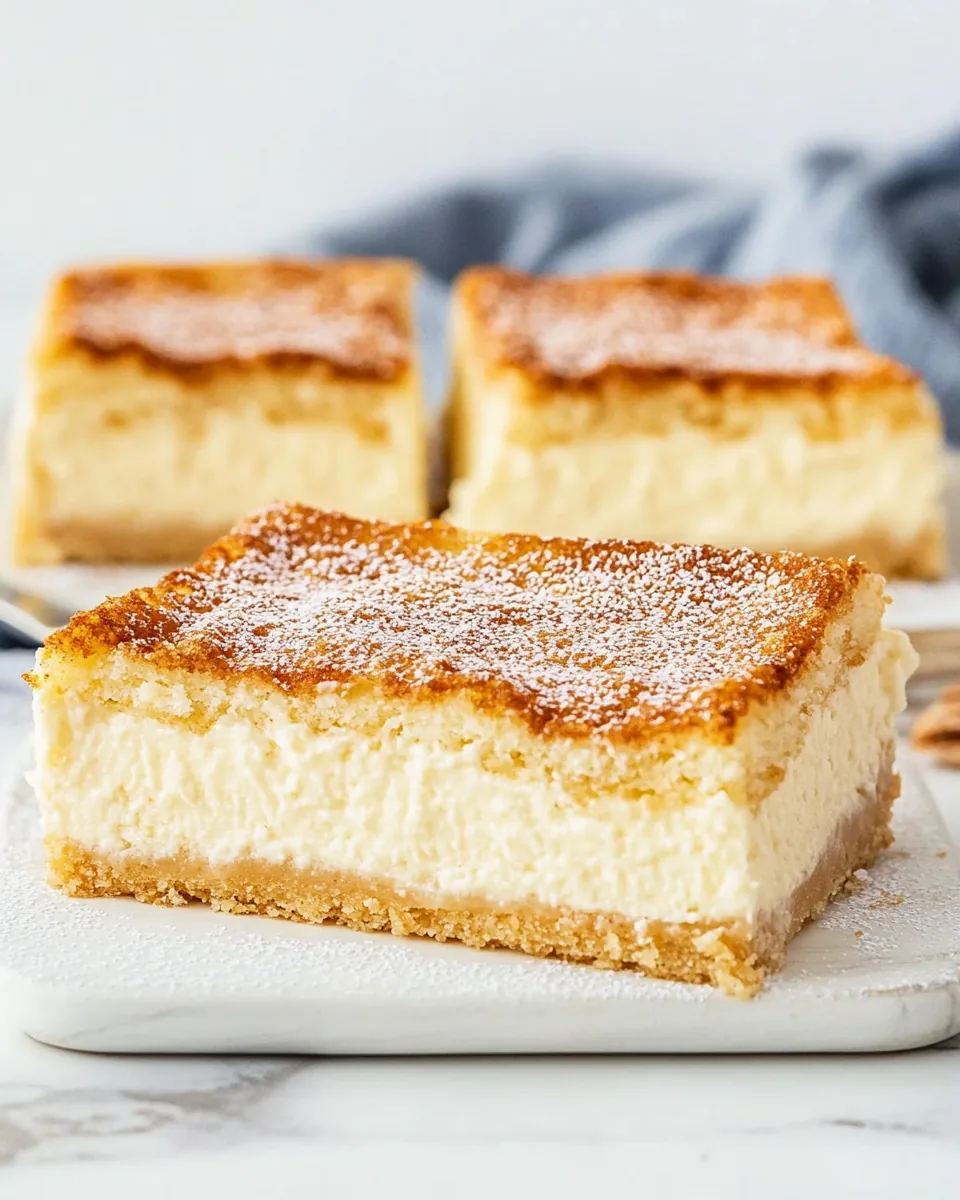
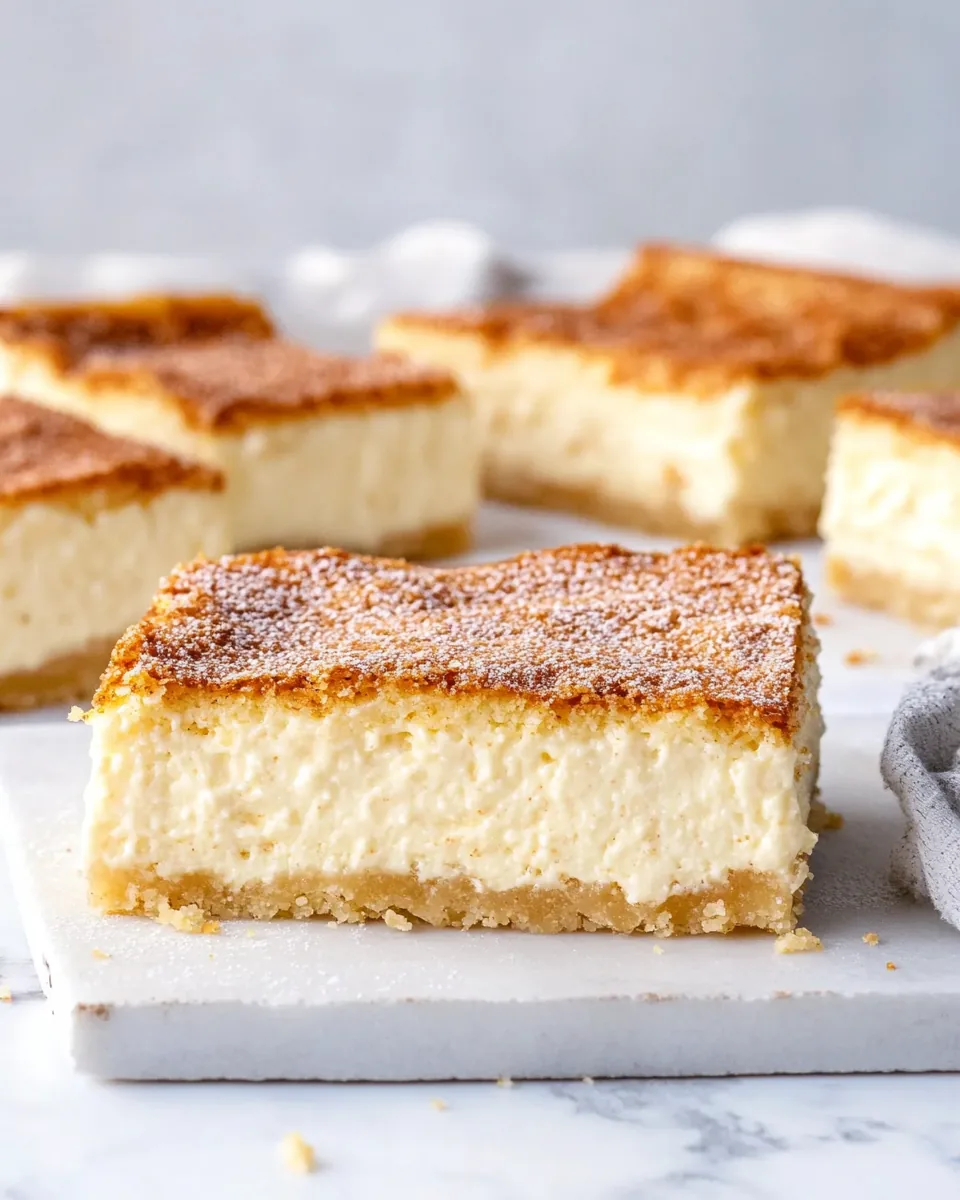
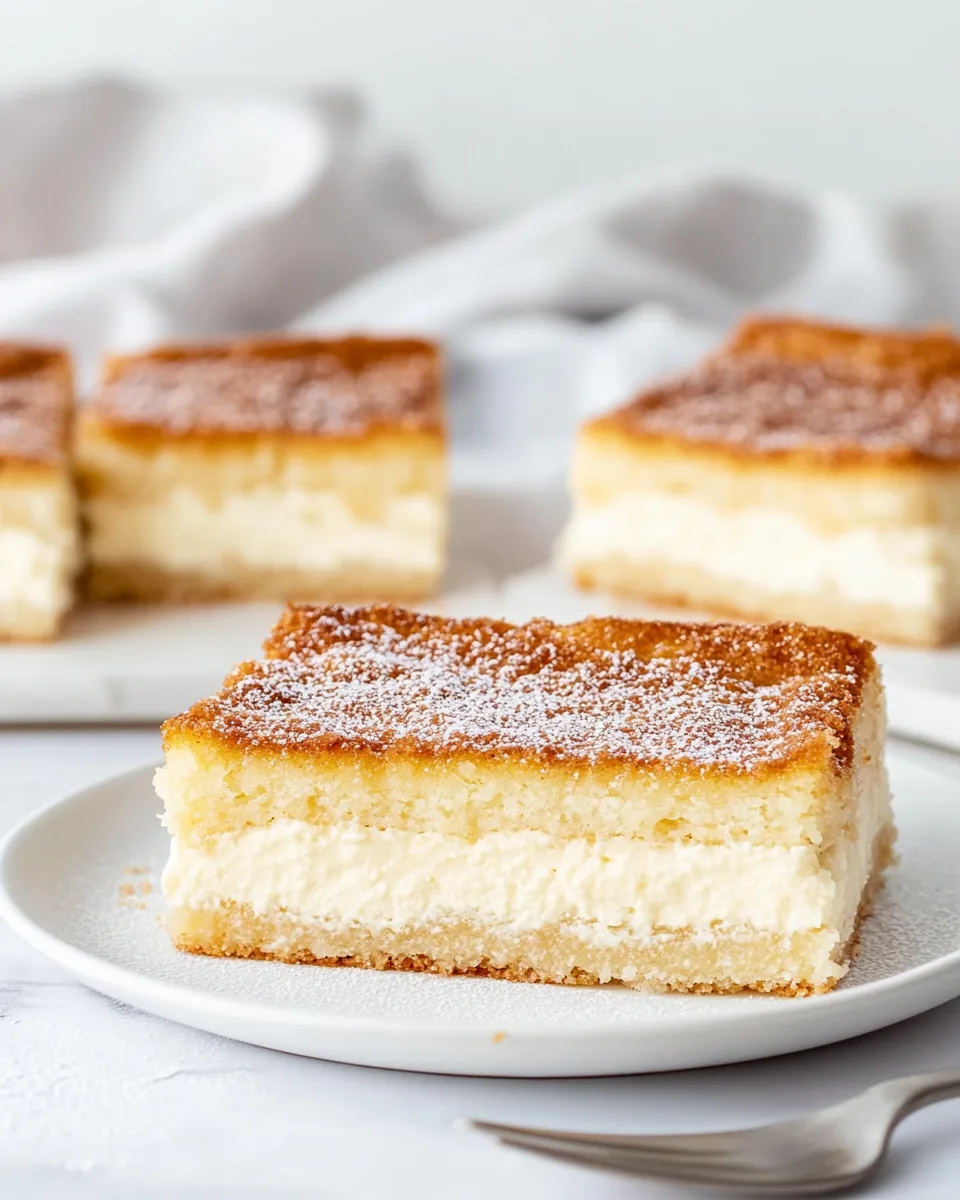
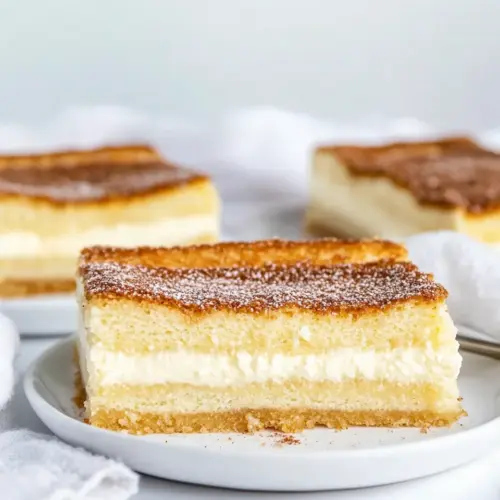
Sopapilla Cheesecake
I’ve always been captivated by the rich flavors and comforting textures of desserts that remind me of home. The Sopapilla Cheesecake is one of those treasures that takes me back to family gatherings, where everyone gathered around the table, laughter mingling with the sweet aroma of baked treats. This heavenly cheesecake is a combination of creamy, rich filling encased in flaky layers, topped off with a sprinkle of cinnamon sugar that just beckons to be devoured. It’s an irresistible way to indulge in a dessert that holds memories and flavors all at once.
Recipe Snapshot
55 mins
15 mins
40 mins
Medium
360 kcal
5 g
Keto, Gluten-Free, Low FODMAP
24 g
9 x 13 inch baking pan, Hand mixer, Mixing Bowl
Why This Sopapilla Cheesecake Stands Out
Easy to Make
One of the reasons I adore the Sopapilla Cheesecake is how simple it is to prepare. Even if you’re a novice in the kitchen, this recipe requires minimal effort and delivers maximum flavor. The ingredients come together in a way that feels effortless, making it perfect for those last-minute gatherings or cozy family nights.
Comforting Flavors
This dessert embodies the essence of comfort food. With the combination of cream cheese and granulated sugar, every bite melts in your mouth, creating a delightful experience. No one can resist that creamy filling with a hint of sweetness, topped with a crunchy, buttery crust.
Perfect for Any Occasion
Whether it’s a holiday gathering, a birthday celebration, or just a casual get-together with friends, the Sopapilla Cheesecake fits right in. It’s versatile enough to be served at any time of the year, making it a go-to recipe for all occasions. You can even dress it up with fresh fruits or drizzles of honey for an extra touch.
Family Favorite
This recipe has become a staple in my home, and I love sharing it with friends and family. The delight on their faces when they take that first bite is priceless. Knowing that I’ve created something memorable for them makes cooking even more rewarding.
Endless Variations
One of the best parts of the Sopapilla Cheesecake is its adaptability. You can easily tweak it to suit your tastes or try different toppings. Feeling adventurous? Top it with chocolate syrup or even a dollop of whipped cream. The possibilities are endless!
Quick and Satisfying
In our fast-paced lives, finding recipes that are both quick and satisfying can be a challenge. The Sopapilla Cheesecake allows you to whip up a delicious dessert without spending hours in the kitchen. It’s the perfect solution for satisfying those sweet cravings without the fuss.
Ingredients You’ll Need for Sopapilla Cheesecake
The beauty of the Sopapilla Cheesecake lies in its simple yet effective ingredients. They blend harmoniously, creating a dessert that’s not only delicious but also surprisingly easy to make. Each component plays a vital role, ensuring you achieve that perfect balance of flavors.
- 28-ounce cans refrigerated crescent roll sheets: These flaky layers form the base and top of the cheesecake, providing a delightful crunch and a buttery flavor that pairs perfectly with the creamy filling.
- 1 ½ teaspoons ground cinnamon: A warm spice that adds depth and a cozy aroma to the dessert, making it feel even more inviting.
- 1 ¼ cups granulated sugar: Sweetness is essential in this recipe, enhancing the flavors and balancing the creaminess of the cheese.
- 24 ounces cream cheese: The star of the show, providing richness and a smooth texture that makes every bite heavenly.
- 2 teaspoons pure vanilla extract: This adds a subtle sweetness and aromatic quality, elevating the overall flavor profile.
- ¼ cup salted butter: Melted and drizzled on top, it creates a golden crust that’s simply irresistible.
Cooking Instructions for Sopapilla Cheesecake
Cooking the Sopapilla Cheesecake is a delightful experience, filled with enticing aromas and satisfying steps. Follow along as I guide you through the process, ensuring that your cheesecake comes out perfectly every time.
- First, adjust the oven rack to the lower-middle position and preheat your oven to 350°F (180°C) or 160°C for a fan oven. This temperature is crucial for achieving that perfect bake.
- Next, lightly spray a 9×13 inch baking pan with cooking spray. Unroll one of the tubes of crescent roll sheets and press it into the bottom of the pan, making sure to seal any seams. This forms the foundation of your cheesecake.
- In a small bowl, combine ¼ cup of granulated sugar with the ground cinnamon and set aside. This mixture will add a sweet, spicy sprinkle on top later.
- In a mixing bowl, using a hand mixer, beat the cream cheese with the remaining vanilla extract and 1 cup of granulated sugar until well combined. You want it to be smooth and creamy, with no lumps.
- Transfer this luscious mixture and spread it evenly over the layer of crescent rolls in the pan. Use a spatula to smooth it out, ensuring every corner is filled.
- Now, unroll the second can of crescent rolls and press the seams together. Layer it over the cream cheese mixture, creating a top layer.
- Drizzle the top with the melted butter, making sure to cover it well. Then, sprinkle the cinnamon-sugar mixture generously over the top.
- Bake uncovered for 30 to 40 minutes until it’s slightly golden brown. The layers will bubble and rise beautifully during baking.
- Once baked, remove it from the oven and let it cool for at least 30 minutes before slicing. This cooling time allows the cheesecake to set properly and makes it easier to cut.
Things Worth Knowing
- Using Room Temperature Ingredients: Ensure all dairy ingredients, especially cream cheese, are at room temperature for a smooth mixture that blends easily.
- Don’t Rush the Cooling Process: Allowing the cheesecake to cool properly ensures it sets well and is easier to slice, which is essential for presentation.
- Experiment with Toppings: Feel free to top your Sopapilla Cheesecake with fresh berries, whipped cream, or a drizzle of honey for an extra layer of flavor.
- Check for Doneness: The cheesecake should be golden brown on top and slightly firm in the center when done. If it jiggles too much, it may need more baking time.
Recipe Variations about Sopapilla Cheesecake
If you’re looking to mix things up with your Sopapilla Cheesecake, there are plenty of variations to explore. Here are some fun tips to enhance your experience:
- Storage: Keep your leftover cheesecake bars in an airtight container in the fridge for up to 3 days to maintain freshness.
- Freezing: You can freeze the Sopapilla Cheesecake for up to 3 months. Just make sure to wrap it tightly to prevent freezer burn.
- Pairing: Serve it with a scoop of vanilla ice cream or fresh whipped cream for an indulgent dessert experience.
- Flavor Enhancements: Consider adding a splash of almond extract to the cream cheese mixture for a unique twist.
- Fruit Additions: Layer fresh berries or sliced bananas on top for added flavor and freshness.
- Nutty Crunch: Add chopped nuts to the cinnamon-sugar topping for an extra crunch and delicious flavor contrast.
What to Pair With Sopapilla Cheesecake
When it comes to serving the Sopapilla Cheesecake, the options are endless! Here are some fantastic pairings that will elevate your dessert experience:
- Fresh Fruits: Pairing your cheesecake with sliced strawberries, blueberries, or raspberries can add a refreshing touch.
- Whipped Cream: A dollop of whipped cream on the side adds a light and airy contrast to the richness of the cheesecake.
- Coffee or Tea: Enjoying a slice with a hot cup of coffee or herbal tea creates a delightful balance of flavors.
- Holiday Gatherings: This cheesecake is perfect for celebrations like Thanksgiving or Christmas, bringing a special touch to any festive table.
- Picnics: Slice it up and take it to your next picnic for a sweet treat that everyone will love.
- Casual Gatherings: It’s a great dessert to share with friends during casual get-togethers or potlucks.
FAQ
Conclusion
The Sopapilla Cheesecake is a true delight, bringing together the rich, creamy texture of cheesecake with the flaky goodness of sopapillas. It’s a versatile dessert that can be enjoyed for any occasion, whether it’s a family dinner or a festive gathering. I encourage you to try making this recipe; it’s sure to impress your friends and family with its delightful flavors. Don’t wait too long—this delicious treat deserves a spot on your table tonight!
Sopapilla Cheesecake
Equipment
- 9 x 13-inch baking pan
- Hand Mixer
- Mixing Bowl
Ingredients
- 2 cans refrigerated crescent roll sheets divided – if you can find seamless dough sheets that's ideal but crescent rolls can be used too.
- 1.5 teaspoons ground cinnamon
- 1.25 cups granulated sugar divided
- 24 ounces cream cheese at room temperature
- 2 teaspoons pure vanilla extract (10ml)
- 0.25 cup salted butter melted
Instructions
- Adjust the oven rack to the lower-middle position. Preheat the oven to 350°F (180°C), or 160°C for a fan oven.
- Lightly spray a 9×13 inch baking pan, then unroll one of the crescent roll sheets and press it in the bottom of the pan, pressing the seams together.
- In a small bowl, combine ¼ cup of granulated sugar with the ground cinnamon and set aside.
- In a mixing bowl using a hand mixer, beat the cream cheese with vanilla extract, and 1 cup of granulated sugar until well combined.
- Transfer the mixture and spread it over the crescent rolls.
- Unroll the remaining can of crescent rolls, press the seams together and layer it over the cream cheese layer.
- Drizzle the top with melted butter then sprinkle with the cinnamon sugar.
- Bake uncovered for 30-40 minutes until it’s slightly golden brown. Cool for at least 30 minutes before slicing.
Notes
- For extra sweetness: drizzle the bars with honey after they’ve cooled.
- Some similar recipes: call for an egg to be mixed into the cream cheese. I don’t find it necessary, but you can add it if you prefer your filling to be richer.
- To Store: Keep these cheesecake bars in an airtight container in the fridge for up to 3 days, or freeze for up to 3 months.