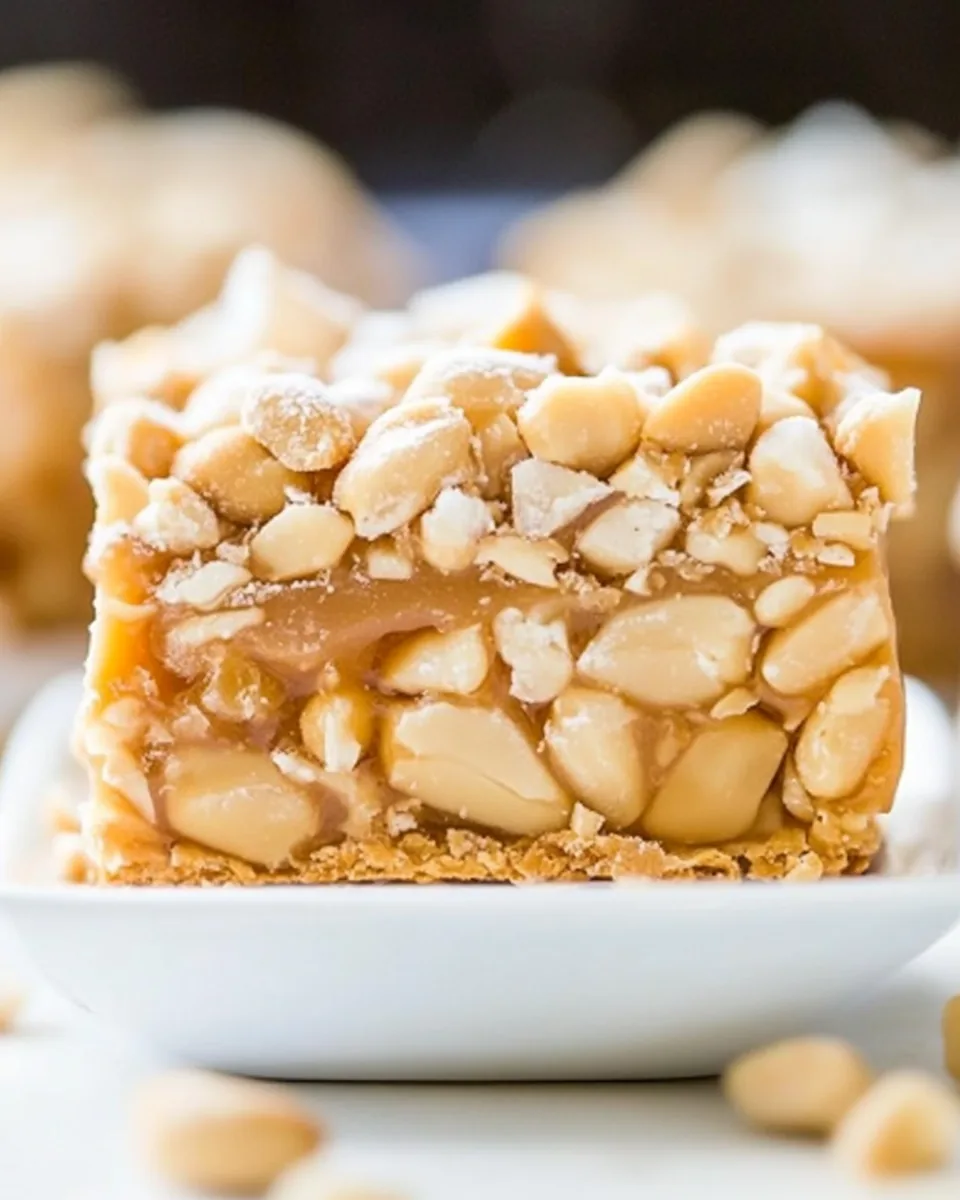
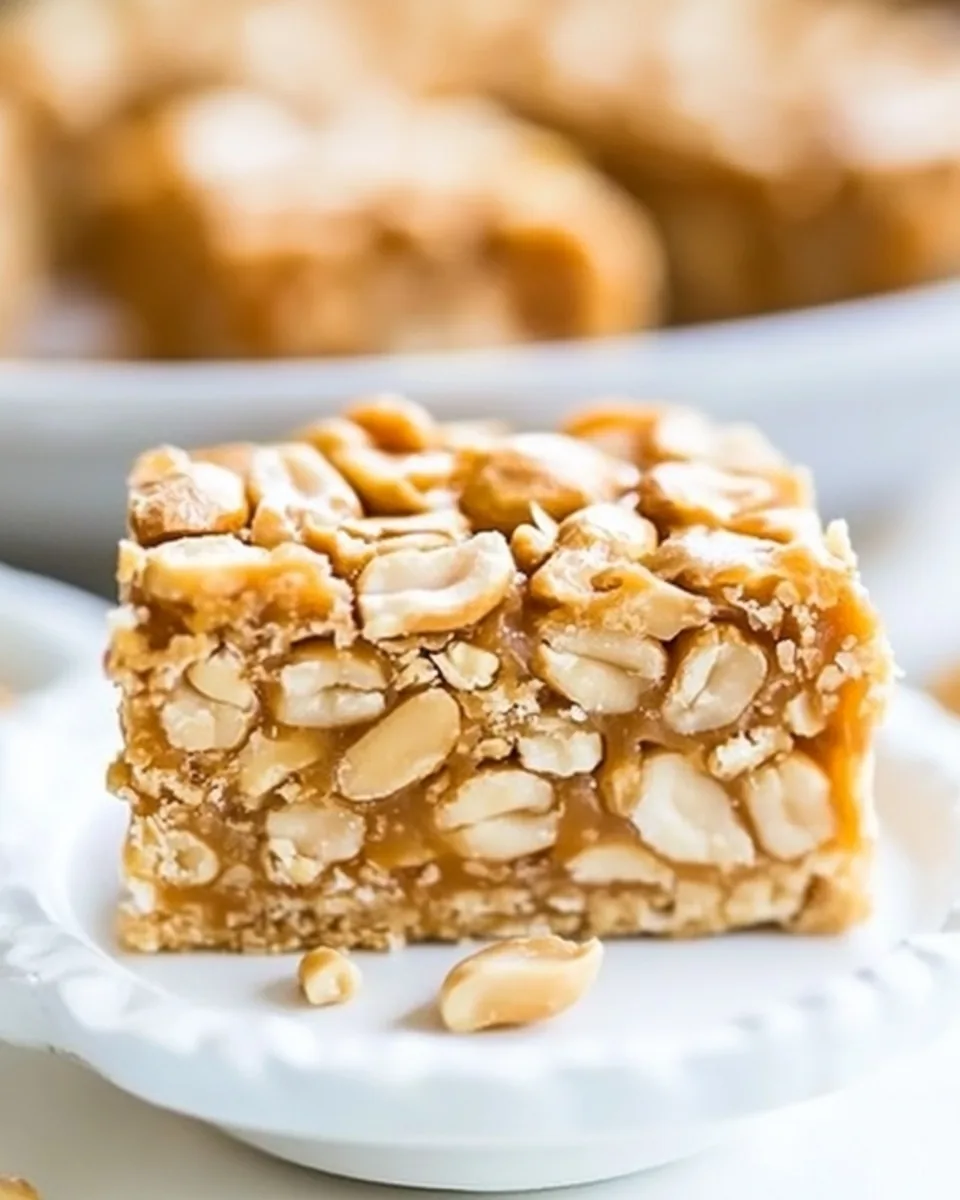
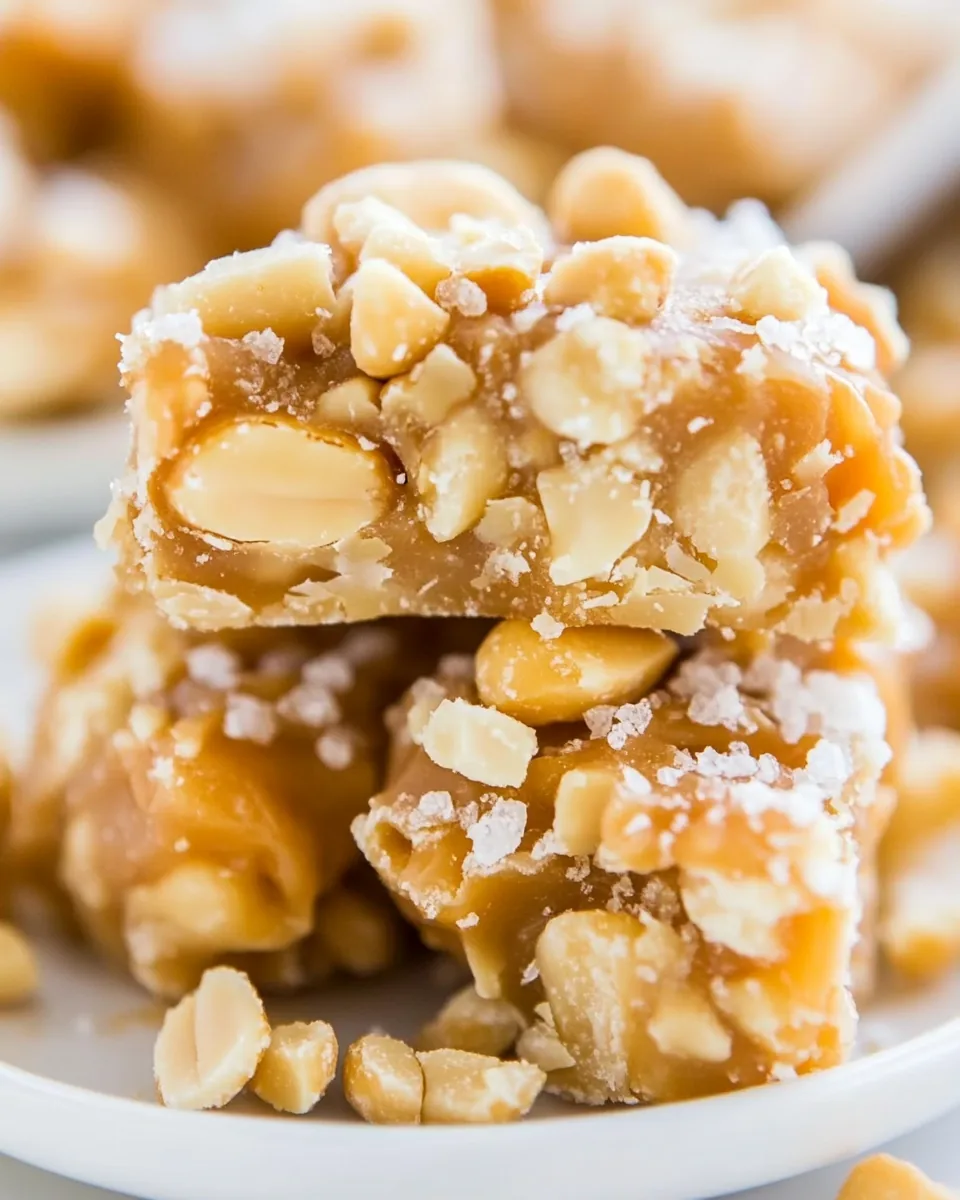
Salted Peanut Chews
There’s something incredibly nostalgic about my favorite sweet treats, and Salted Peanut Chews holds a special place in my heart. I still remember the first time I tasted these bars at a family gathering. My aunt had baked a batch, and as soon as I took a bite, I was hooked. The combination of chewy marshmallows, creamy peanut butter, and salty peanuts created a flavor explosion that was irresistible. Every holiday season, I look forward to recreating this delicious dessert in my own kitchen, sharing it with friends and family, and watching their faces light up with joy.
Making Salted Peanut Chews is not just about following a recipe; it’s about the love and happiness you create in the process. The aroma of melting marshmallows and warm peanut butter fills the air, inviting everyone to gather around. Whether it’s a cozy night in or a festive celebration, these bars always bring smiles and delightful memories. Trust me, once you try making these, they might just become a staple in your kitchen, too!
Recipe Snapshot
25 mins
10 mins
15 mins
Medium
220 kcal
4 g
Gluten-Free
10 g
Wooden Spoon, Mixing Bowl, Frying Pan, Baking Sheet, Oven
Why You’ll Love This Salted Peanut Chews
1. Sweet and Salty Harmony
The balance of flavors in Salted Peanut Chews is absolutely delightful. You get the sweetness from the marshmallows and the confectioners’ sugar, perfectly countered by the savory crunch of salted peanuts. This combination makes every bite exciting and satisfying.
2. Nostalgic Comfort Food
For many of us, these bars are a trip down memory lane. They remind us of family gatherings and joyful celebrations. Baking Salted Peanut Chews not only indulges our sweet tooth but also brings back cherished memories.
3. Versatile Treat
These bars are perfect for any occasion. Whether it’s a birthday party, a picnic, or just a sweet snack at home, Salted Peanut Chews fit right in. They can easily be packed for lunch or served at gatherings, making them a versatile choice.
4. Simple Ingredients
The ingredients are straightforward and easy to find. You likely have many of them in your pantry already! This simplicity makes it easy to whip up a batch on a whim when a craving strikes.
5. Quick and Easy to Make
Despite how delicious they are, Salted Peanut Chews are surprisingly simple to prepare. With just a few steps, you can have a pan of these delightful bars ready, making them great for both novice and experienced bakers.
6. Customizable
You can easily tweak the recipe based on your preferences. Want to add chocolate chips or use different nuts? Go for it! This flexibility allows you to make the recipe your own.
Everything You Need for Salted Peanut Chews
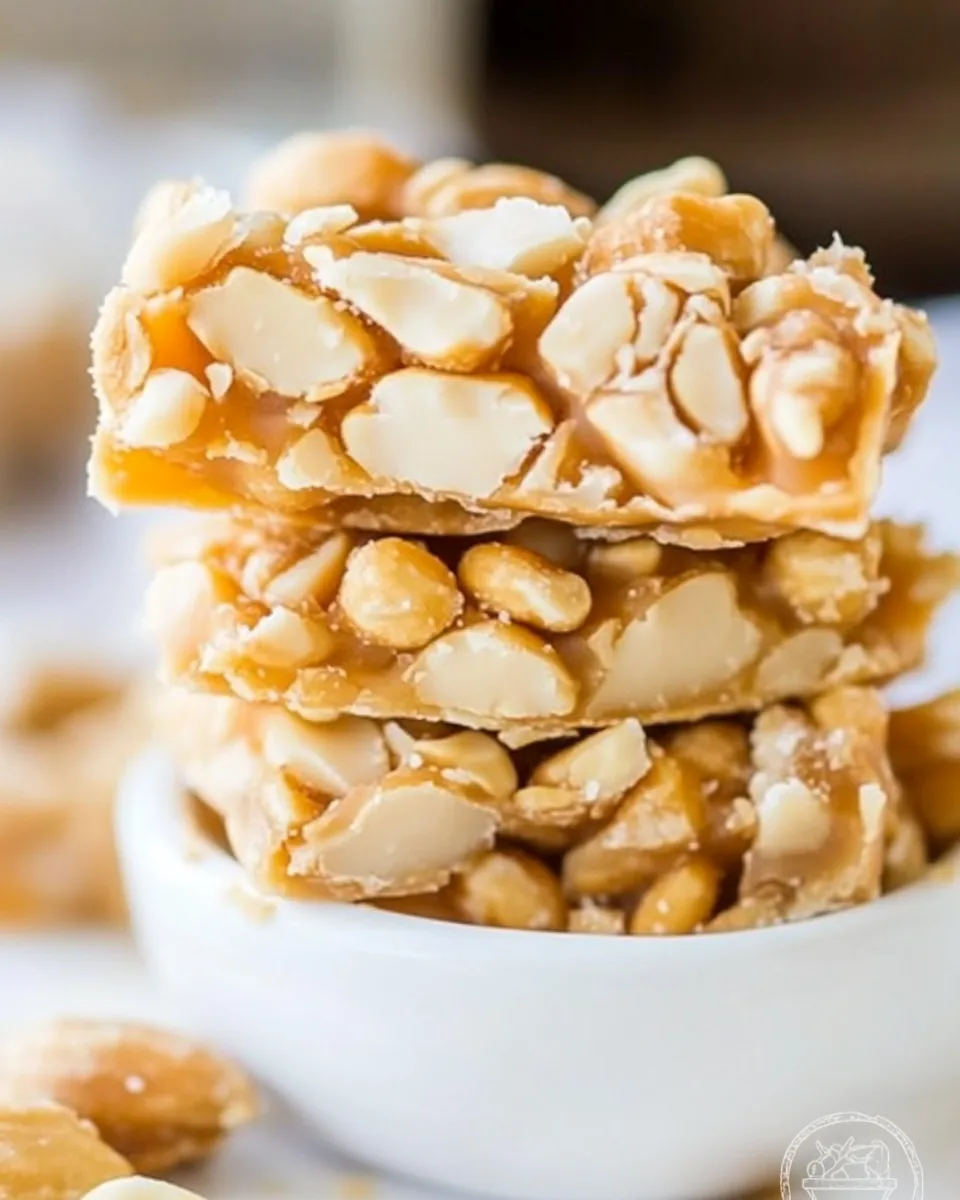
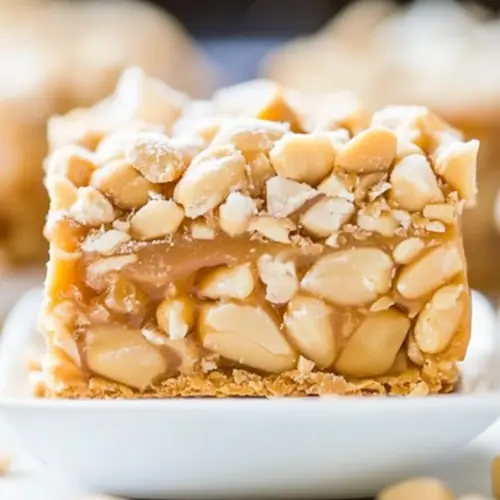
The ingredients for Salted Peanut Chews come together to create a delicious balance of flavors and textures. The key players are the creamy peanut butter and marshmallows, which provide that delightful chewiness and richness. Combined with salted peanuts for a perfect crunch, these ingredients create a treat that’s hard to resist.
- 1 cup all-purpose flour: This serves as the base of the crust, giving it structure.
- ¼ cup confectioners sugar: Adds sweetness and helps to create a tender crust.
- ¼ cup creamy peanut butter: Provides that rich peanut flavor that everyone loves.
- ½ cup unsalted butter, softened: Essential for a rich, buttery crust.
- About 2 heaping cups marshmallows: These create a gooey, chewy layer that ties the bars together.
- One 10-ounce bag peanut butter chips: Enhances the peanut flavor and adds creaminess.
- ⅓ cup light-colored corn syrup: Helps to bind the ingredients and adds sweetness.
- 2 tablespoons unsalted butter: Used in the topping for richness.
- 2 teaspoons vanilla extract: Adds a warm, sweet flavor.
- 1 ½ cups Rice Krispies or similar crispy rice cereal: Adds texture and crunch.
- 1 ½ cups salted peanuts or salted honey roasted peanuts: Provides that beautiful salty crunch.
Cooking Instructions for Salted Peanut Chews
Making Salted Peanut Chews is a fun and rewarding experience. Follow these steps, and you’ll create a delicious treat that everyone will love. Don’t forget to enjoy the process and taste along the way!
Start by preheating your oven to 350°F. This step is crucial for ensuring that your bars bake evenly. While the oven heats, line an 8-by-8-inch baking pan with aluminum foil and spray it with cooking spray to prevent sticking.
Next, grab a large bowl and combine flour, confectioners’ sugar, and creamy peanut butter. Cut in the unsalted butter using two forks. You’ll want to keep mixing until the mixture looks like crumbly bits, about the size of peas. Make sure to incorporate everything well for a uniform crust.
-
Once your mixture is ready, turn it out into the prepared baking pan. Using your fingertips, hard-pack the mixture into an even, smooth, flat layer. This crust will be a little sticky, so take your time to ensure it’s well-formed. Bake in the preheated oven for about 15 to 17 minutes, or just until it’s set but not overbaked, as it will go back in the oven later.
After the crust is set, remove the pan from the oven and evenly sprinkle the marshmallows over the top. Return the pan to the oven for about 3 to 4 minutes. Keep a close eye on them; you want them puffy but not browned. If you’re using mini marshmallows, they may puff up faster, so start checking after 2 minutes.
While the marshmallows are puffing, take a large microwave-safe bowl and add the peanut butter chips, corn syrup, and unsalted butter. Heat on high power for about 2 minutes, stopping every 30 seconds to stir. You’ll want the mixture to melt completely and become smooth.
-
Once melted, stir in the vanilla extract until well combined. Then, add the Rice Krispies and salted peanuts, mixing until everything is evenly coated.
Now, turn this mixture out on top of the puffy marshmallows. Use a spatula to smooth the top and lightly press down so the layers meld together nicely.
Cover the pan with a sheet of foil and place it in the fridge for at least 2 hours to allow everything to set up. This chilling time is essential for cutting the bars cleanly.
-
Once set, remove from the fridge and slice into bars. These Salted Peanut Chews can be stored in an airtight container at room temperature for up to 5 days or frozen for up to 6 months.
Things Worth Knowing
- Be patient with the crust: It’s sticky, so take your time when pressing it into the pan. A well-formed crust will give you the best results.
- Watch your marshmallows: Keep an eye on them while they bake, as they can quickly go from perfectly puffy to overcooked.
- Chill before cutting: Letting the bars set in the fridge makes it much easier to cut them into neat squares.
- Experiment with flavors: Feel free to add chocolate chips or swap out the nuts based on what you have available.
How to Switch It Up
If you’re looking for ways to customize your Salted Peanut Chews, you’re in luck! Here are some fun ideas to switch things up and make this recipe your own.
- Add chocolate: Mix in some chocolate chips or drizzle melted chocolate on top for an extra treat.
- Use different nuts: Feel free to change the salted peanuts for walnuts or almonds to give a different texture and flavor.
- Flavor variations: Experiment with different nut butters like almond or cashew butter for a unique twist.
- Make it gluten-free: Substitute all-purpose flour with a gluten-free blend for those with dietary restrictions.
- Storage: Store leftover bars in an airtight container to keep them fresh and chewy.
- Freezing: You can freeze these bars for future enjoyment. Just make sure to wrap them well!
- Pairing: Serve your Salted Peanut Chews with a glass of milk or hot chocolate for a nostalgic treat.
What to Pair With Salted Peanut Chews
When it comes to serving your Salted Peanut Chews, there are plenty of delicious options to consider. Here are some great pairings:
- Milk: A classic choice, pairing these bars with a glass of cold milk enhances their flavor and texture.
- Ice cream: Serve alongside a scoop of vanilla or chocolate ice cream for a truly indulgent dessert.
- Fruit: Fresh fruit, like strawberries or bananas, can provide a refreshing contrast to the rich flavors of the bars.
- Coffee: A warm cup of coffee complements the sweetness perfectly, making it a great choice for an afternoon treat.
- Picnics: They make an excellent addition to any picnic or outdoor gathering, providing a sweet and satisfying snack.
- Seasonal gatherings: Perfect for holiday parties or family gatherings, these bars are sure to be a hit!
FAQ
Conclusion
Salted Peanut Chews are a delightful combination of sweet and salty, chewy and crunchy. They are not just a treat but a nostalgic dessert that brings joy to any gathering. I encourage you to try making them and share them with loved ones; the smiles will make it all worthwhile!
Salted Peanut Chews
Equipment
- Wooden Spoon
- Mixing Bowl
- Frying Pan
- Baking Sheet
- Oven
Ingredients
- 1 cup all-purpose flour
- ¼ cup confectioners sugar
- ¼ cup creamy peanut butter
- ½ cup unsalted butter
- 2 cups marshmallows Use mini for thinner bars.
- 1 bag peanut butter chips
- ⅓ cup light-colored corn syrup
- 2 tablespoons unsalted butter
- 2 teaspoons vanilla extract
- 1 ½ cups Rice Krispies
- 1 ½ cups salted peanuts
Instructions
- Preheat oven to 350°F. Line an 8-by-8-inch baking pan with aluminum foil, spray with cooking spray; set aside.
- In a large bowl, add the flour, confectioners’ sugar, peanut butter, and cut in the butter using two forks until mixture resembles pea-sized crumbly bits.
- Turn mixture out into prepared pan, hard-packing it with your fingertips in an even, smooth, flat layer to form a crust. Bake for 15 to 17 minutes, or just until set.
- Remove pan from oven and sprinkle with marshmallows. Return to oven for 3 to 4 minutes or until puffed. Don’t brown.
- In a microwave-safe bowl, combine peanut butter chips, corn syrup, butter, and heat on high power to melt, about 2 minutes total.
- Add the vanilla, then stir in the Rice Krispies and salted peanuts until well combined.
- Turn mixture out on top of the marshmallows, smoothing the top with a spatula.
- Cover with foil and refrigerate for at least 2 hours, then slice and serve.
Notes
- Storage: Store leftovers in an airtight container at room temperature for up to 5 days.
- Freezing: These bars can be frozen for up to 6 months; wrap them well!
- Pairing: Enjoy with a cold glass of milk or hot chocolate.
- Customizable: Feel free to add chocolate chips or swap nuts.
- Easy to make: Perfect for novice bakers!