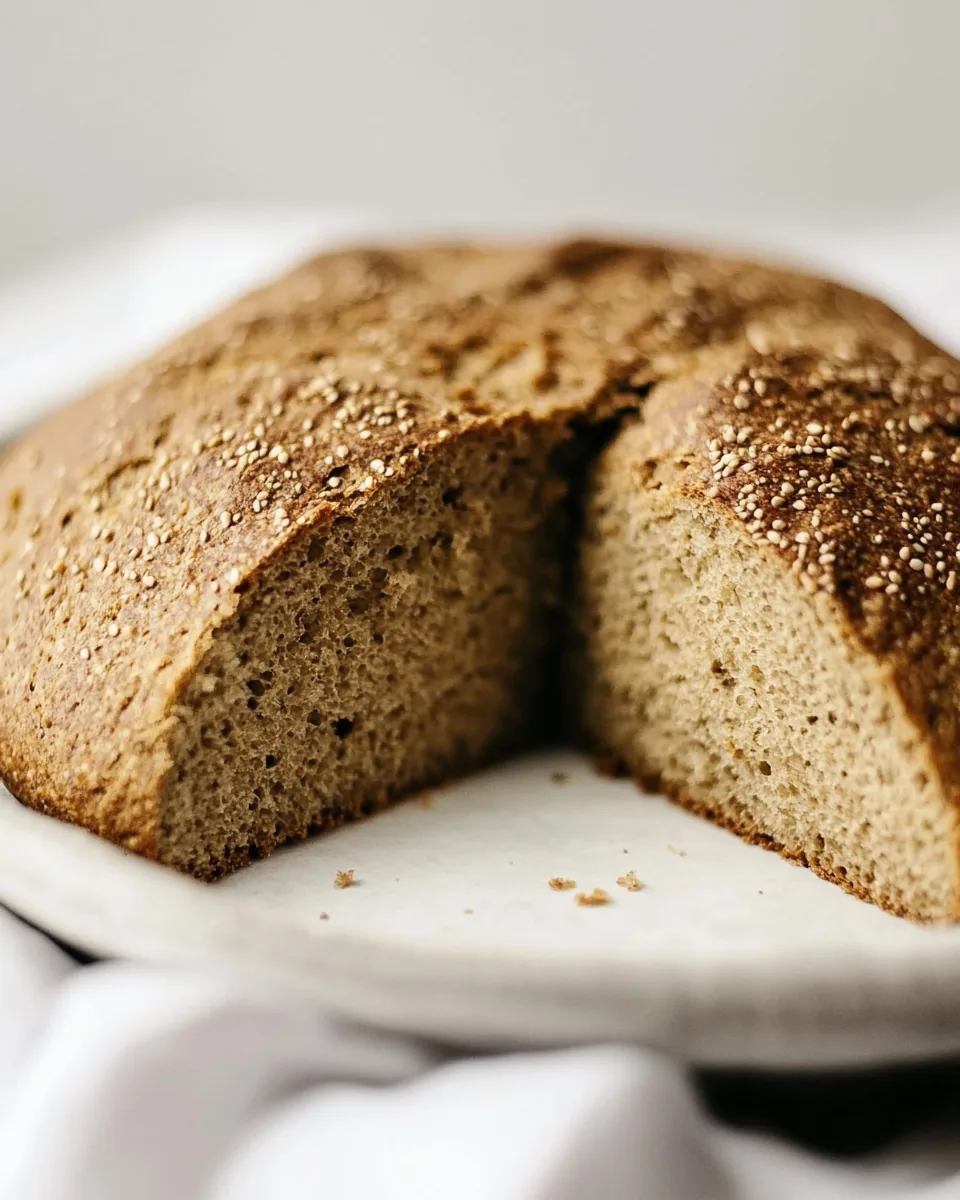
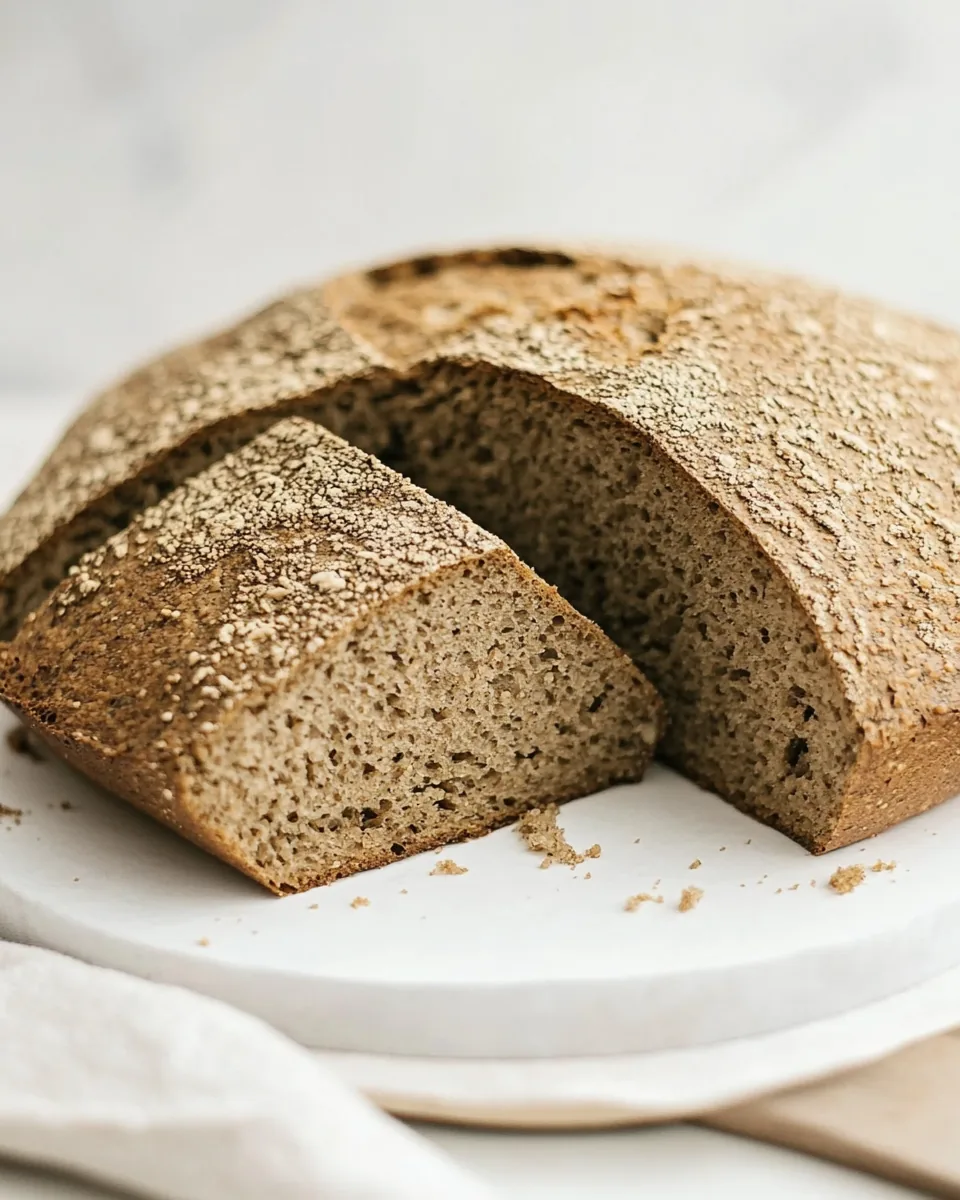
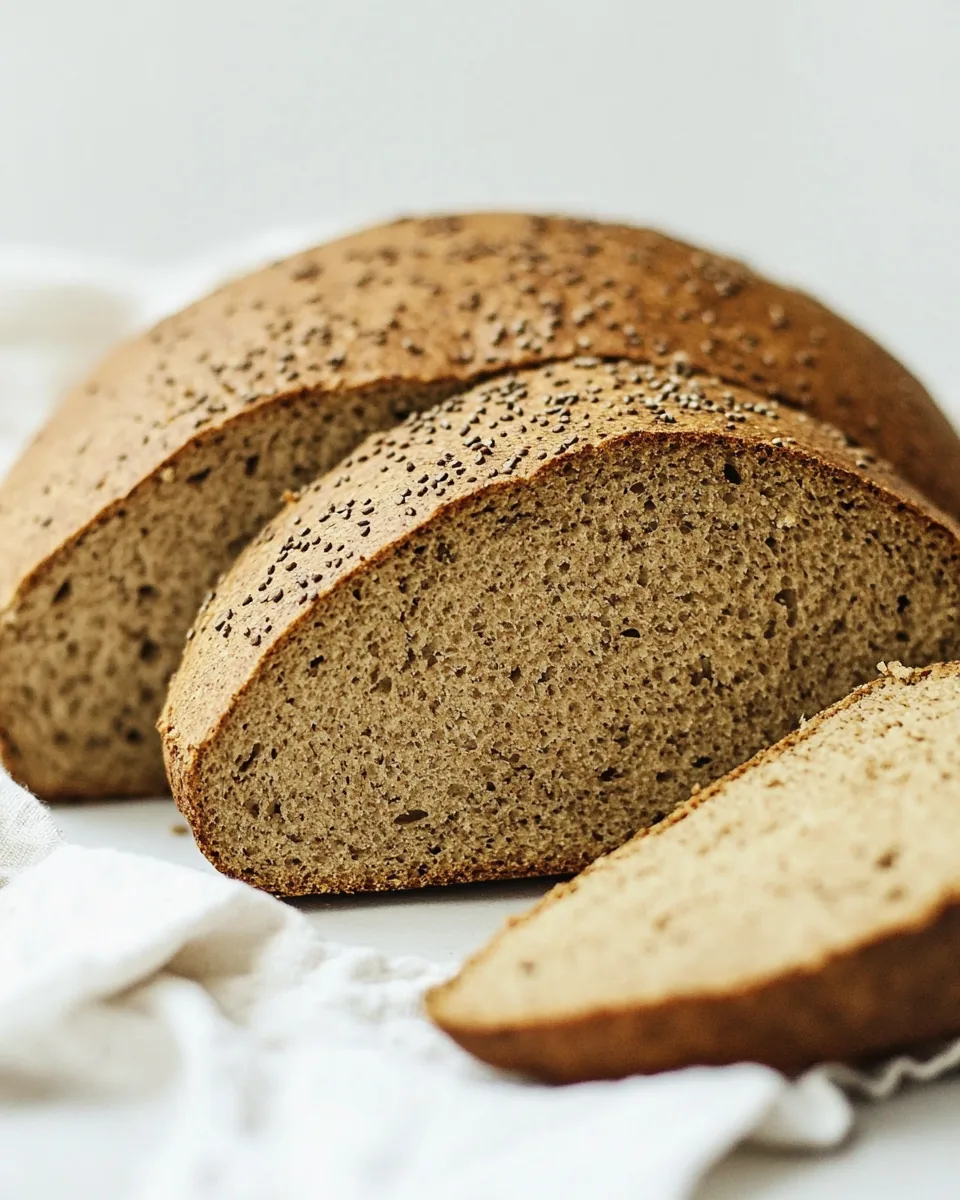
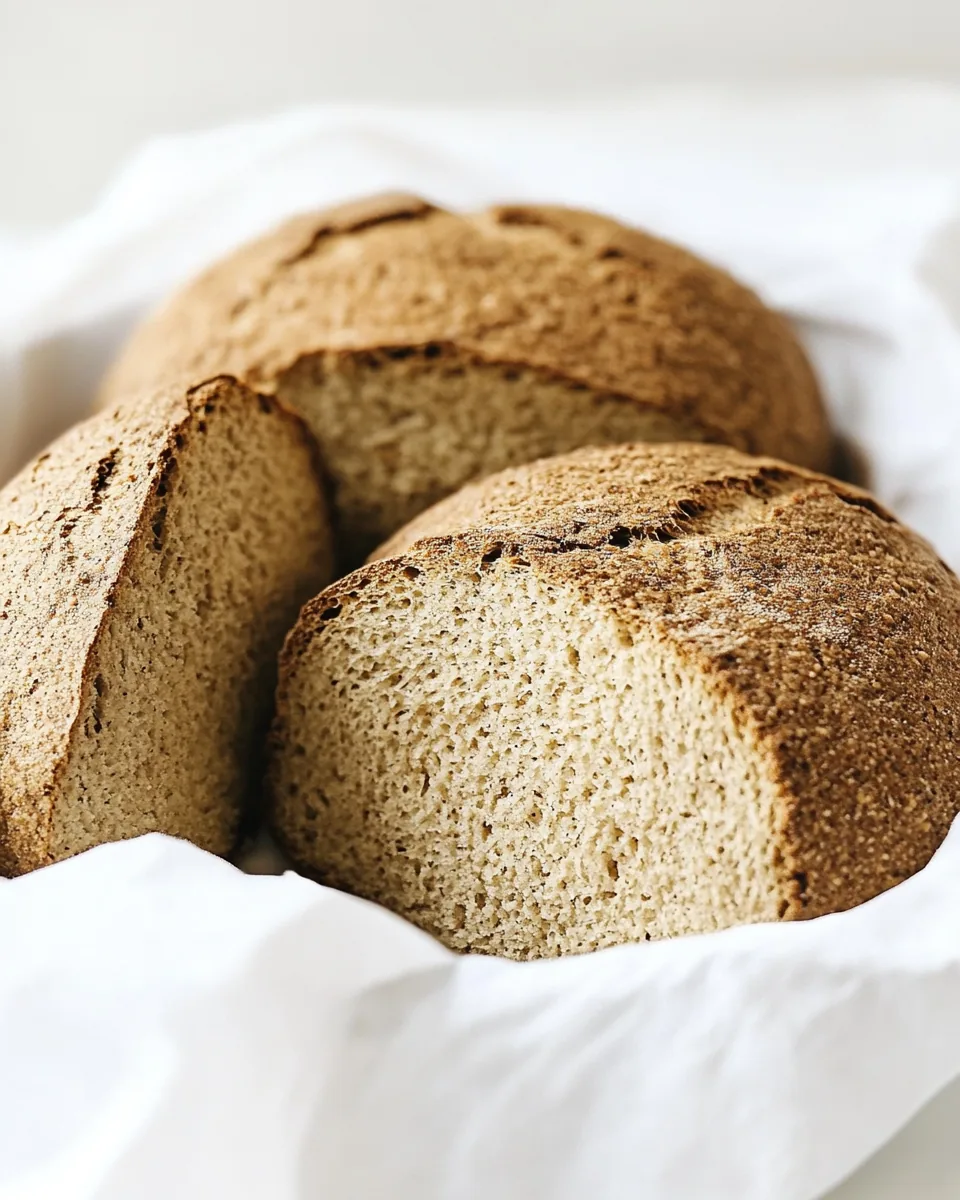
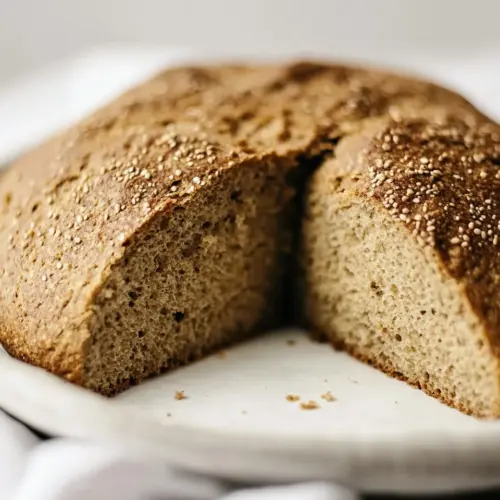
Rye Bread
There’s something magical about the aroma of freshly baked bread wafting through the house. The first time I made Rye Bread, it was a chilly Sunday afternoon, and I had a craving for something hearty with a touch of warmth. I remember gathering the ingredients, feeling the gritty texture of the rye flour as I poured it into the mixing bowl. The excitement was palpable; I couldn’t wait to slice into that golden-brown crust and enjoy it with a spread of butter. Baking bread isn’t just a process; it’s an experience, a way to connect with the simple joys of life.
Recipe Snapshot
50 mins
20 mins
30 mins
Medium
150 kcal
4 g
Vegan
2 g
Baking Sheet, Oven, Mixing Bowl
The Magic of This Rye Bread
Rich Flavor Profile
The complexity of Rye Bread comes from its unique flavor profile, thanks to the combination of rye flour and caraway seeds. This duo creates a depth of taste that simply can’t be replicated with regular bread. I love how every bite is packed with flavor, making it an excellent choice for sandwiches or served warm with soup.
Nutritional Benefits
Rye Bread is a nutritional powerhouse. It’s rich in fiber, which helps with digestion and keeps you feeling full longer. The inclusion of whole grains also provides essential nutrients like magnesium and iron. I often find myself reaching for this bread over others, knowing it’s a healthier option for my family.
A Versatile Ingredient
What I adore about Rye Bread is its versatility. It pairs wonderfully with both savory and sweet toppings. From classic butter and jam to a hearty smoked salmon sandwich, the possibilities are endless. I’ve even enjoyed it toasted with a sprinkle of garlic powder and olive oil as a unique twist on croutons for salads.
Perfect for Any Occasion
Whether it’s a cozy family dinner or a festive gathering, Rye Bread always shines as a delightful addition. Its rustic charm makes it a fantastic option for any table setting. I love serving it warm, adding a touch of elegance to simple meals.
Great for Meal Prep
Making Rye Bread at home not only fills your kitchen with irresistible aromas but also makes for excellent meal prep. You can slice and freeze leftovers for quick sandwiches throughout the week. I often bake a couple of loaves at once—it’s rewarding to know I have homemade bread on hand when the craving strikes!
Rye Bread Shopping List
When it comes to baking Rye Bread, the ingredients are simple yet effective. Each component plays an essential role in creating the perfect loaf. Let’s dive into the key players that make this bread a standout.
- Warm Water: Acts as the base for activating the yeast. The right temperature is crucial for a good rise.
- Active Dry Yeast: This is what makes the bread rise, creating that airy texture we love.
- Molasses: Adds a hint of sweetness and enhances the color of the crust.
- Whole Milk: Contributes to the richness and moisture of the bread.
- Salt: Essential for flavor and controlling yeast activity.
- Vegetable Oil: Keeps the bread soft and fresh.
- Bread Flour: Provides gluten structure for a chewy texture.
- Whole Wheat Flour: Adds nuttiness and extra fiber.
- Rye Flour: The star ingredient that gives the bread its name and flavor.
- Caraway Seeds: Optional but highly recommended for that classic rye taste.
Making This Rye Bread
There’s nothing quite like the satisfaction of making Rye Bread from scratch! Follow along as I take you through each step, ensuring you get a beautiful loaf every time.
- Start by gathering all your ingredients: warm water, active dry yeast, molasses, whole milk, salt, vegetable oil, bread flour, whole wheat flour, rye flour, and caraway seeds. In the bowl of a mixer, combine ½ cup warm water (about 105 degrees Fahrenheit), 2 tablespoons molasses, and 1 packet active dry yeast. Let this sit for about 5 minutes until it’s nice and frothy.
- Once the yeast is activated, add in 1 cup whole milk, 1 ½ teaspoons salt, 2 tablespoons vegetable oil, 1 ¼ cup bread flour, ½ cup whole wheat flour, 1 ½ cup rye flour, and 2 tablespoons caraway seeds. Using the hook attachment, mix on low until combined. Gradually increase the speed to medium and knead for about 8 to 10 minutes until the dough is smooth and elastic.
- Oil a large bowl and transfer the dough into it. Make sure to cover it with a kitchen towel, placing it aside in a warm spot for about 1 ½ to 2 hours, or until the dough doubles in size.
- Once the dough has risen, punch it down gently and turn it out onto a clean counter. Allow it to rest for about 5 minutes. This resting period relaxes the gluten, making it easier to shape.
- Using your hands, shape the dough into a round loaf. Carefully place it on a parchment-lined baking sheet. Cover it again and let it rise for another hour.
- Preheat your oven to 425 degrees Fahrenheit about 40 minutes into the second rise. This ensures that your oven is at the perfect temperature when the bread is ready to bake.
- Before placing the loaf in the oven, slash the top with a sharp knife or a bread lame. This allows steam to escape and helps create a beautiful crust.
- Bake the bread for 30 to 35 minutes, or until it turns golden brown and the crust is firm. The aroma will fill your kitchen!
- Once baked, remove the loaf from the oven and allow it to cool for at least 20 minutes before slicing. This step is crucial; it allows the bread to finish cooking inside and firm up.
Things Worth Knowing
- Water Temperature is Key: Ensure your warm water is between 100 to 110 degrees Fahrenheit for optimal yeast activation.
- Let it Rise: Be patient! Allow the dough to rise fully for the best texture.
- Don’t Skip the Resting: The resting period after shaping helps develop the loaf’s structure.
- Watch for Color: Your bread should be a deep golden brown when done, indicating a crispy crust.
Helpful Notes about Rye Bread
Everyone loves a good tip! Here are some insights I’ve gathered through my adventures in baking Rye Bread.
- Storage: Keep leftovers in an airtight container at room temperature for up to three days. If you want to keep it longer, slice and freeze the bread.
- Freezing: You can freeze slices of Rye Bread for quick breakfasts or sandwiches later. Just wrap them tightly in plastic wrap.
- Pairing: This bread goes beautifully with soups or stews. Consider serving it with a hearty vegetable soup or a creamy spread.
- Variations: Feel free to experiment with adding seeds or nuts for added texture.
- Crust Preference: If you prefer a softer crust, cover the loaf with a kitchen towel right after baking.
Perfect Matches for Rye Bread
When it comes to serving Rye Bread, there are endless possibilities. Here are some of my favorites:
- Classic Sandwich: Use Rye Bread for a pastrami sandwich with mustard—a true deli classic!
- Soup Companion: Enjoy your bread alongside a rich tomato or clam chowder for a comforting meal.
- Brunch Delight: Top slices with avocado and a sprinkle of salt for a trendy brunch option.
- Snack Time: Serve with cheese and charcuterie for an elegant appetizer or snack.
- Special Occasions: Perfect for holiday gatherings, Rye Bread can be the star of your charcuterie board!
FAQ
Conclusion
Making Rye Bread is not just about creating a delicious loaf; it’s about embracing the art of baking and enjoying the process. There’s a unique satisfaction in crafting your own bread, and the result is always worth it. I encourage you to try making this bread at home—experience the joy of baking and share it with your loved ones!
Rye Bread
Equipment
- Baking Sheet
- Oven
- Mixing Bowl
Ingredients
- ½ cup Warm Water
- 1 packet Active Dry Yeast
- 2 tablespoons Molasses
- 1 cup Whole Milk room temperature
- 1 ½ teaspoons Salt
- 2 tablespoons Vegetable Oil
- 1 ¼ cup Bread Flour
- ½ cup Whole Wheat Flour
- 1 ½ cup Rye Flour
- 2 tablespoons Caraway Seeds
Instructions
- In the bowl of a mixer, combine ½ cup warm water (about 105 degrees Fahrenheit), 2 tablespoons molasses, and 1 packet active dry yeast. Let sit for about 5 minutes until the yeast is nice and frothy.
- Add in 1 cup whole milk, 1 ½ teaspoons salt, 2 tablespoons vegetable oil, 1 ¼ cup bread flour, ½ cup whole wheat flour, 1 ½ cup rye flour, and 2 tablespoons caraway seeds. Use the hook attachment to mix on low until combined, and then bring the speed up to medium and knead for about 8-10 minutes until the dough is smooth.
- Oil a large bowl and transfer the dough into it. Cover it with a kitchen towel and set the bowl aside in a warm place for about 1 ½-2 hours, or until the dough has doubled in size.
- When the dough has doubled, punch it down and turn it out onto a clean counter. Allow it to rest for about 5 minutes before using your hands to gently pull the dough on the counter to shape it into a round loaf. Place the loaf carefully on a parchment-lined baking sheet. Cover and allow to rise for another hour.
- About 40 minutes into the second rise, preheat the oven to 425 degrees Fahrenheit. Slash the bread with a sharp knife or a bread lame. Place in the oven and bake for 30-35 minutes, until golden brown.
- Allow the loaf to cool for at least 20 minutes before slicing.
Notes
- Storage: Keep leftovers in an airtight container at room temperature for up to three days. If you want to keep it longer, slice and freeze the bread.
- Freezing: You can freeze slices of Rye Bread for quick breakfasts or sandwiches later. Just wrap them tightly in plastic wrap.
- Pairing: This bread goes beautifully with soups or stews. Consider serving it with a hearty vegetable soup or a creamy spread.
- Variations: Feel free to experiment with adding seeds or nuts for added texture.
- Crust Preference: If you prefer a softer crust, cover the loaf with a kitchen towel right after baking.