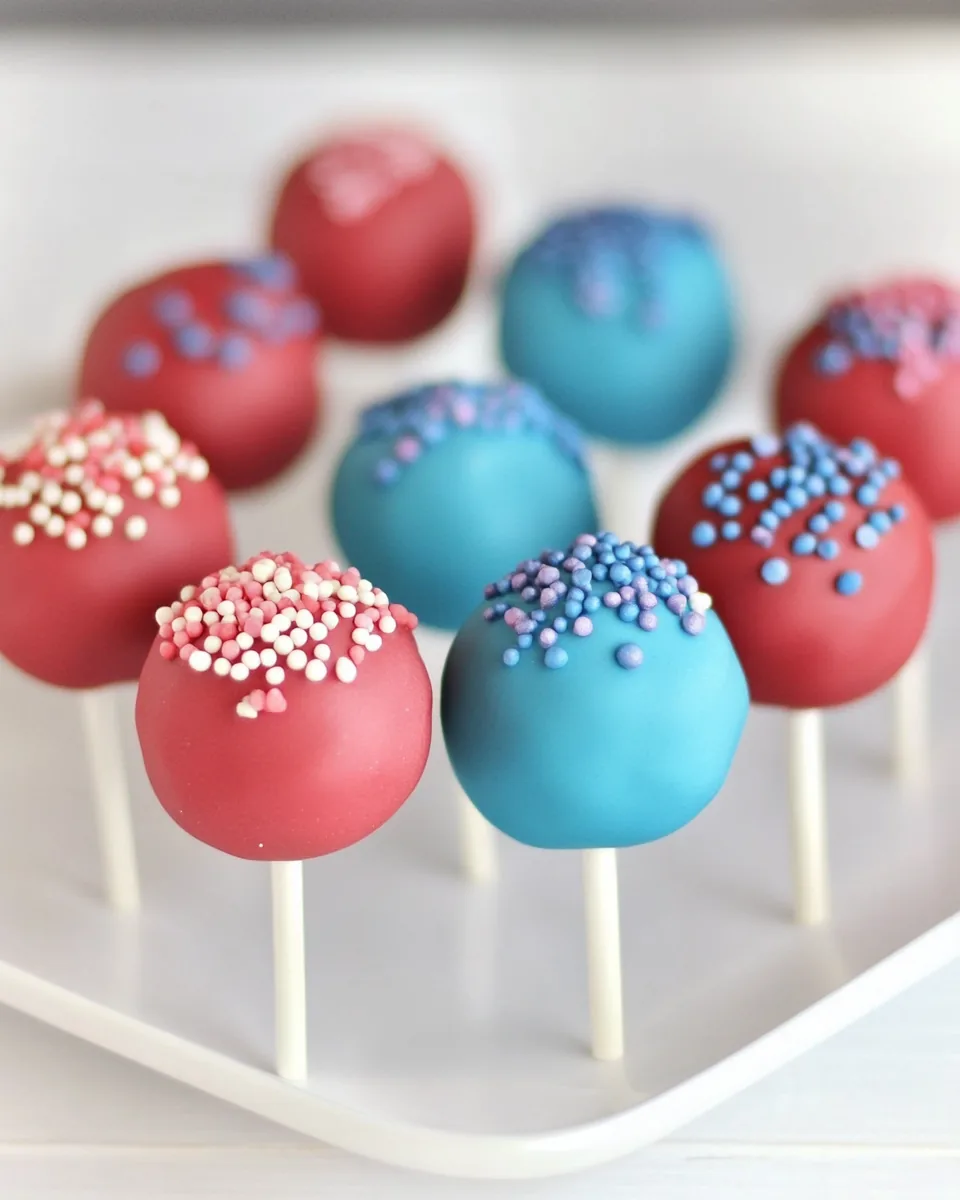
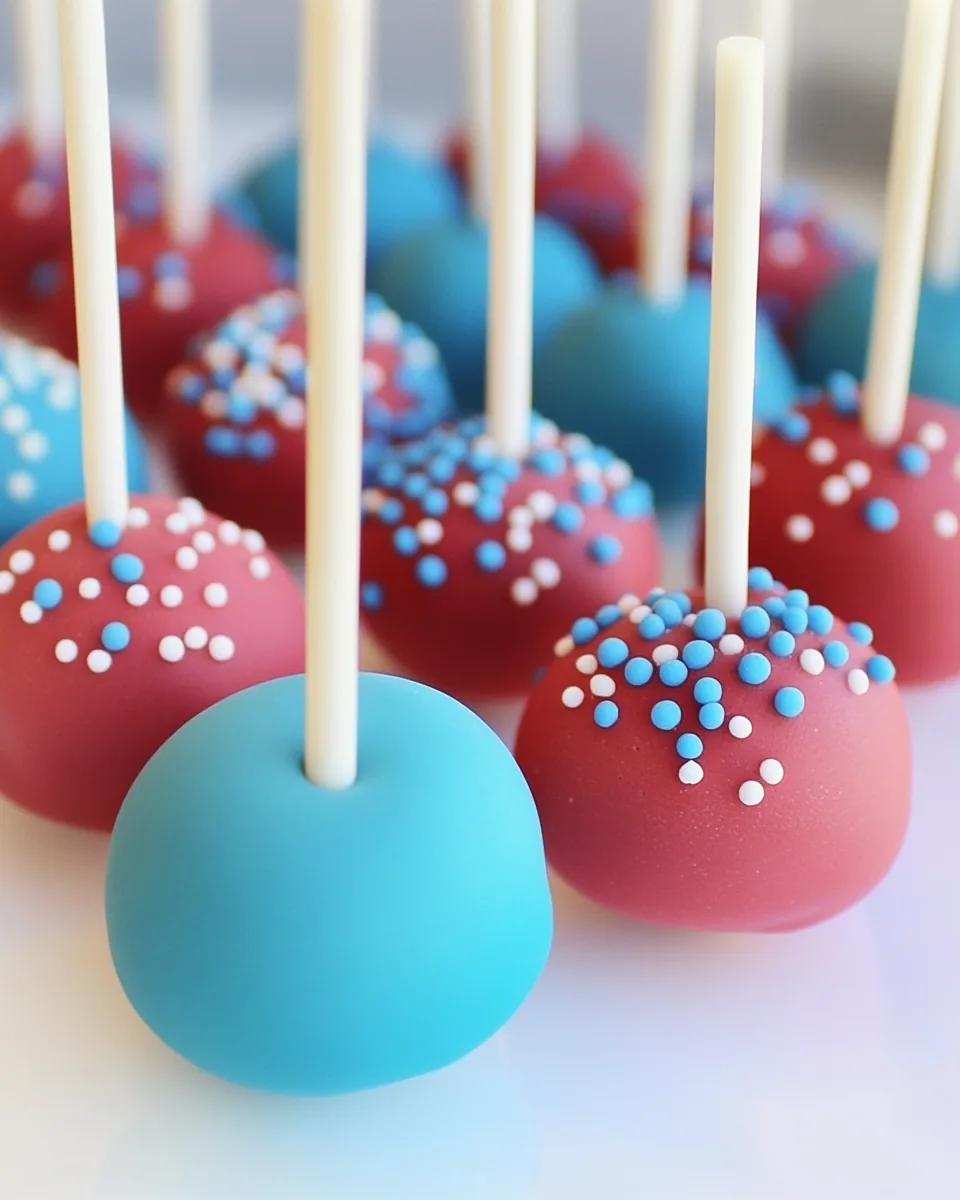
Red White and Blue Cake Pops
There’s something incredibly festive about Red White and Blue Cake Pops. I remember the first time I made them for a Fourth of July barbecue; it was a spontaneous decision that turned into a wonderful experience! As the vibrant colors of the cake pops gleamed against the summer sun, everyone gathered around, intrigued and excited to try these playful treats. The delighted smiles on my friends’ faces as they took their first bites were priceless. Each bite was a celebration of flavors, reminding us of warm summer days filled with laughter and joy. Whether it’s a holiday gathering or a simple family evening, these cake pops always bring a sense of fun and festivity to the table.
Recipe Snapshot
1 hr 35 mins
60 mins
35 mins
Medium
160 kcal
1 g
Keto, Paleo, Whole30
7 g
Lollipop sticks
Why This Red White and Blue Cake Pops Is So Good
1. A Fun and Interactive Treat
One of the best things about making Red White and Blue Cake Pops is that they are incredibly interactive! Kids and adults alike love getting involved in the decorating process. You can set up a mini decorating station, complete with different toppings, and let everyone customize their pops. This not only makes for a fun activity but also leaves each guest with a unique treat to enjoy.
2. Perfect for Any Occasion
These cake pops are perfect for a multitude of occasions. Whether you’re celebrating Independence Day, Memorial Day, or just a summer weekend, their festive colors make them a hit! They are also ideal for birthdays, baby showers, or any celebration where you want to impress your guests with a visually stunning dessert that tastes delicious.
3. Easy to Make
Don’t worry if you’re not a baking pro; making Red White and Blue Cake Pops is surprisingly easy! With just a boxed cake mix and some frosting, you can whip these up in no time. The melting and dipping process can be done by anyone, and you’ll be amazed at how beautiful they turn out!
4. Versatile Flavor Combinations
With cake mix and frosting being the base, the flavor combinations are endless. You can easily customize your cake pops with different flavors of cake and frosting to suit your taste. Want a chocolate twist? Go for chocolate cake with vanilla frosting! The possibilities are only limited by your creativity.
5. Great for Leftovers
If you’re like me, you often have leftover cake from parties or gatherings. Turning that leftover cake into Red White and Blue Cake Pops is a fantastic way to minimize waste. You can gather up any excess cake, mix it with frosting, and create delightful pops that will be devoured in no time.
6. Eye-Catching Decoration
Let’s not forget about how beautiful these treats are! The vibrant red, white, and blue colors not only taste amazing but also make for a visually stunning display. They are sure to be the centerpiece of any dessert table, drawing everyone’s attention and sparking conversations.
Red White and Blue Cake Pops Shopping List
Gathering the right ingredients is key to making the perfect Red White and Blue Cake Pops. The combination of flavors and colors not only makes these treats irresistible but also highlights the joy of festive baking. Here’s what you’ll need:
- 1 (13.25 ounce) box cake mix – Choose any flavor that you love; it serves as the foundation for the pops.
- 1 (16 ounce) can cake frosting – This will help bind the cake and add richness.
- 1 (12 ounce) bag red candy melts – The vibrant color is essential for that festive look.
- 1 (12 ounce) bag blue candy melts – Adds another layer of color and taste.
- 1 (12 ounce) bag white candy melts – Perfect for those who want a classic finish.
How to Cook Red White and Blue Cake Pops
Making Red White and Blue Cake Pops is a delightful experience that brings out your inner baker! The steps are quite straightforward, making it perfect for both novice and experienced bakers alike. Let’s dive into the fun!
- Start by baking your favorite cake mix in a 9×13 inch pan according to the package directions. Once baked, let it completely cool to room temperature.
- Once cool, crumble the cake into a large bowl. You want it to be in fine crumbs, so take your time with this step.
- Add in the cake frosting and mix it thoroughly using your hands or a spatula. It’s going to be messy, but trust me, it’ll be worth it!
- Once the mixture is well combined, use either your hands or a cookie scoop to form the mixture into balls. Aim for about 1 inch in diameter for each ball.
- Place the formed balls onto a cookie sheet lined with parchment paper. Then, insert a lollipop stick into the top of each ball.
- Now, it’s time to freeze! Pop the cookie sheet into the freezer and let the cake pops chill for at least one hour. This will help them hold their shape when you dip them in chocolate.
- While the cake pops are freezing, melt your red, blue, and white candy melts separately in the microwave, stirring every 30 seconds until smooth.
- Once the cake pops are firm, dip each one into the melted candy melts. Make sure to coat them thoroughly and gently tap off any excess.
- Place the dipped cake pops back onto the lined cookie sheet. You can get creative here by adding sprinkles or other decorations while the chocolate is still wet.
- Finally, let the chocolate harden completely at room temperature. This usually takes about 30 to 60 minutes.
Things Worth Knowing
- Chilling is Key: Ensure your cake pops are well-chilled before dipping them in chocolate. This prevents them from falling apart during the process.
- Work Quickly: Once dipped, the chocolate can harden fast. Decorate immediately after dipping!
- Use Quality Candy Melts: The quality of your candy melts can greatly affect the taste and finish. Choose high-quality melts for the best results.
- Storage Tips: Keep any uneaten cake pops in an airtight container in the refrigerator to maintain freshness.
Tips and Variations

To make your baking experience even more enjoyable, here are some tips and variations for your Red White and Blue Cake Pops:
- Storage: Keep your cake pops in an airtight container at room temperature for up to three days. For longer storage, refrigerate them for up to a week.
- Freezing: Yes, you can freeze cake pops! Just place them in an airtight container and freeze for up to a month. When ready to eat, let them thaw in the fridge.
- Flavor Variations: Try different flavored cake mixes and frostings to create your unique cake pops! Chocolate cake with vanilla frosting is a classic.
- Decorations: Get creative with your toppings! Consider using crushed nuts, edible glitter, or themed sprinkles to match your occasion.
- Serving Options: These cake pops can be served on a stick or placed in a decorative treat box. They make excellent party favors!
- Color Coordination: Choose your candy melts based on your event colors. Whether it’s red, white, and blue for a holiday or other colors for a birthday, it’s all about personalizing!
What to Serve With Red White and Blue Cake Pops
When it comes to serving your beautifully crafted Red White and Blue Cake Pops, think about the occasion and the guests. Here are some fun serving ideas:
- Picnic Treats: These cake pops are perfect for picnics. Pair them with fresh fruit like strawberries and blueberries for a colorful dessert spread.
- Barbecue Desserts: Serve them alongside classic barbecue dishes like burgers and hot dogs. They make a fun and sweet ending to a savory meal.
- Summer Parties: If you’re hosting a summer bash, these pops can be a beautiful centerpiece on your dessert table. They fit right into any festive atmosphere.
- Birthday Parties: For kids’ birthday parties, consider setting up a cake pop decorating station where kids can decorate their cake pops before eating them!
- Holiday Gatherings: These pops are a great addition to any holiday dessert table, especially during the Fourth of July or Labor Day celebrations.
- Family Nights: Enjoy them as dessert during family movie nights. They are easy to eat and bring fun to your casual evenings.
FAQ
Conclusion
The beauty of Red White and Blue Cake Pops lies in their festive appearance and delicious flavors that can bring joy to any gathering. They are not just treats; they are a way to celebrate togetherness and fun in the kitchen. I encourage you to try making these delightful cake pops for your next celebration. You’ll love how simple and enjoyable they are to craft, and your family and friends will surely appreciate the sweet gesture!

Red White and Blue Cake Pops
Equipment
- Lollipop sticks
Ingredients
- 1 box cake mix Choose any flavor you love!
- 1 can cake frosting This adds richness and binds the cake.
- 1 bag red candy melts Vibrant color for decoration.
- 1 bag blue candy melts Essential for the festive look.
- 1 bag white candy melts Perfect for a classic finish.
Instructions
- 1. Start by baking your favorite cake mix in a 9×13 inch pan according to the package directions. Once baked, let it completely cool to room temperature.
- 2. Once cool, crumble the cake into a large bowl. You want it to be in fine crumbs, so take your time with this step.
- 3. Add in the cake frosting and mix it thoroughly using your hands or a spatula. It’s going to be messy, but trust me, it’ll be worth it!
- 4. Once the mixture is well combined, use either your hands or a cookie scoop to form the mixture into balls. Aim for about 1 inch in diameter for each ball.
- 5. Place the formed balls onto a cookie sheet lined with parchment paper. Then, insert a lollipop stick into the top of each ball.
- 6. Now, it’s time to freeze! Pop the cookie sheet into the freezer and let the cake pops chill for at least one hour. This will help them hold their shape when you dip them in chocolate.
- 7. While the cake pops are freezing, melt your red, blue, and white candy melts separately in the microwave, stirring every 30 seconds until smooth.
- 8. Once the cake pops are firm, dip each one into the melted candy melts. Make sure to coat them thoroughly and gently tap off any excess.
- 9. Place the dipped cake pops back onto the lined cookie sheet. You can get creative here by adding sprinkles or other decorations while the chocolate is still wet.
- 10. Finally, let the chocolate harden completely at room temperature. This usually takes about 30 to 60 minutes.
Notes
- Tip 1: Keep your cake pops in an airtight container at room temperature for up to three days.
- Tip 2: Yes, you can freeze cake pops! Just place them in an airtight container and freeze for up to a month.
- Tip 3: Try different flavored cake mixes and frostings to create your unique cake pops!
- Tip 4: Get creative with your toppings! Consider using crushed nuts or themed sprinkles.
- Tip 5: These cake pops can be served on a stick or placed in a decorative treat box.