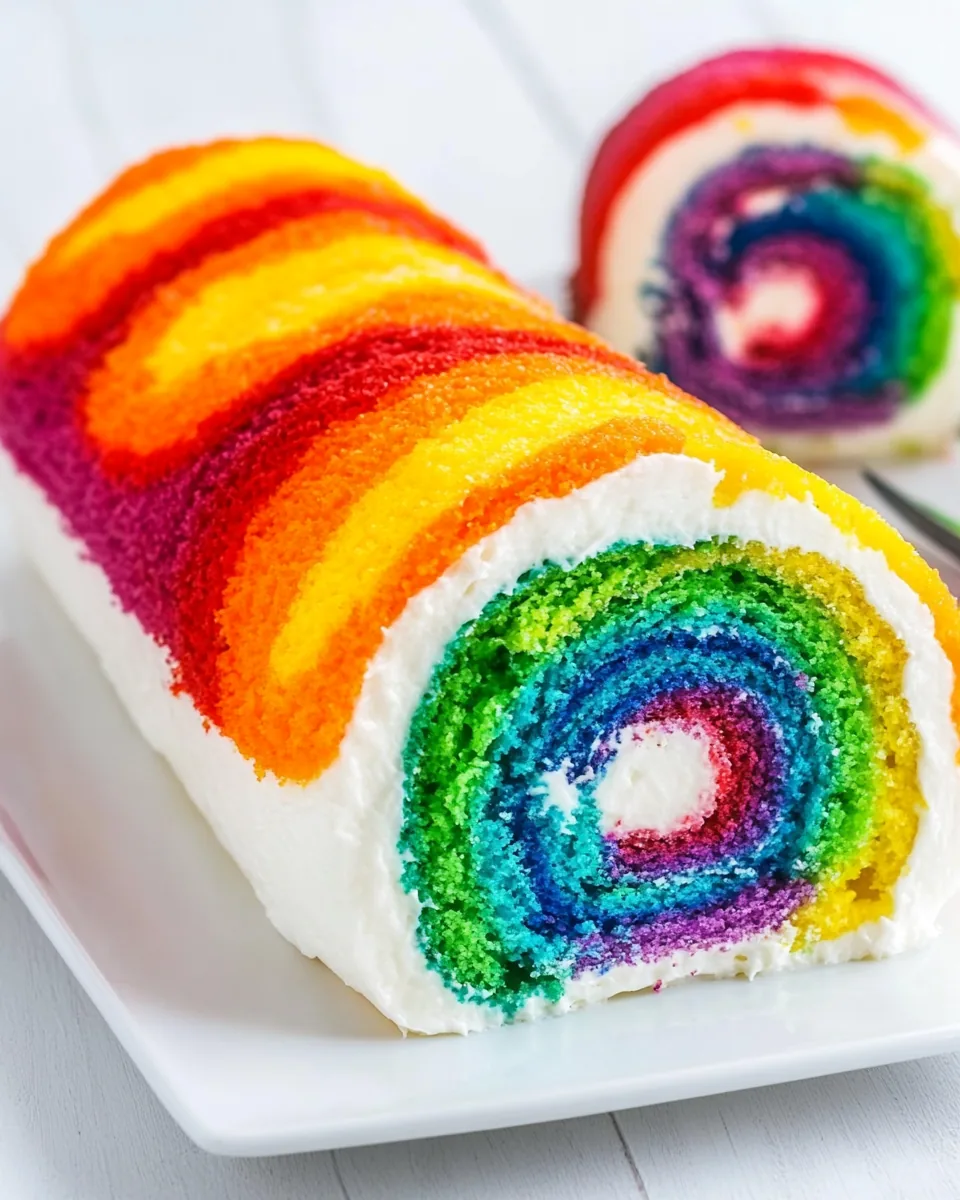
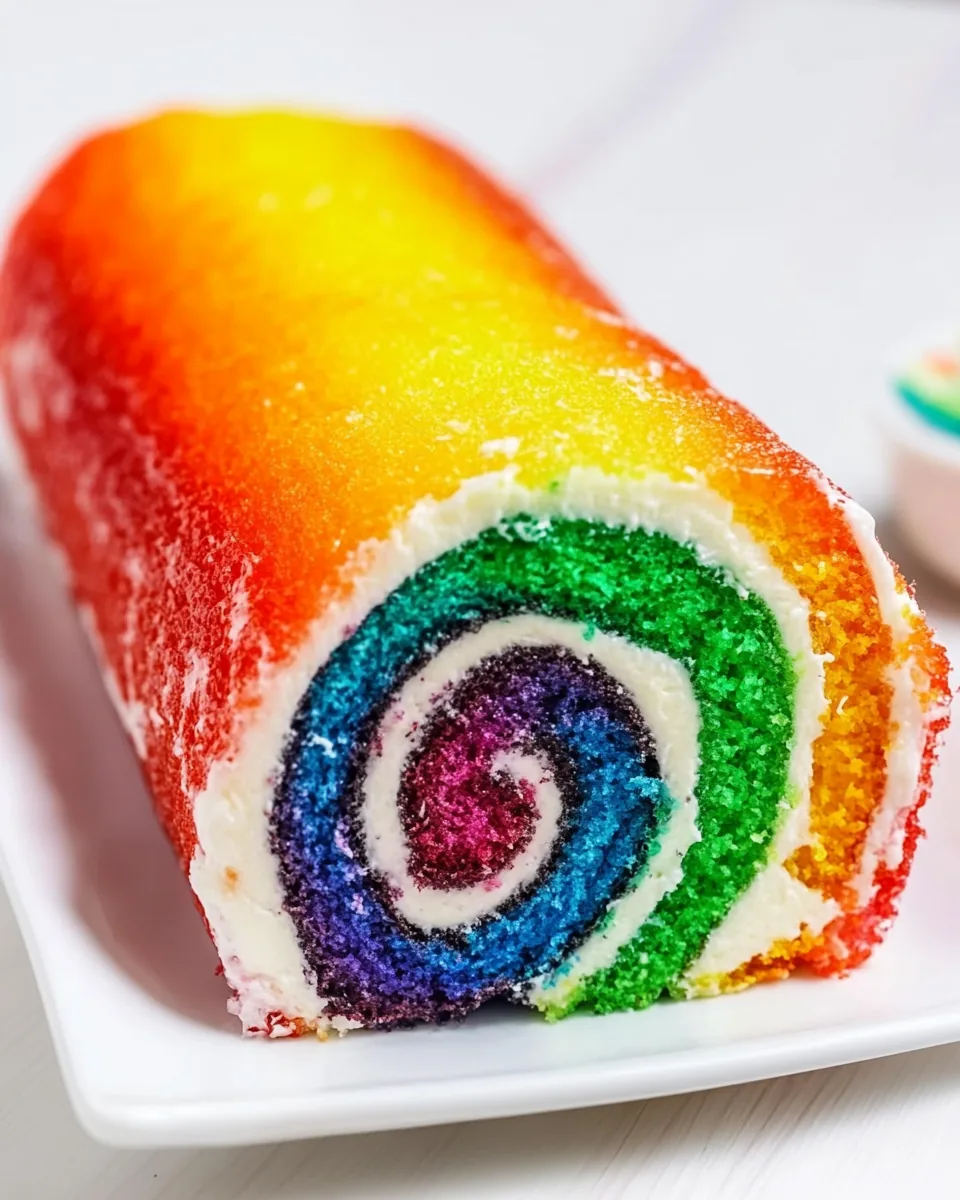
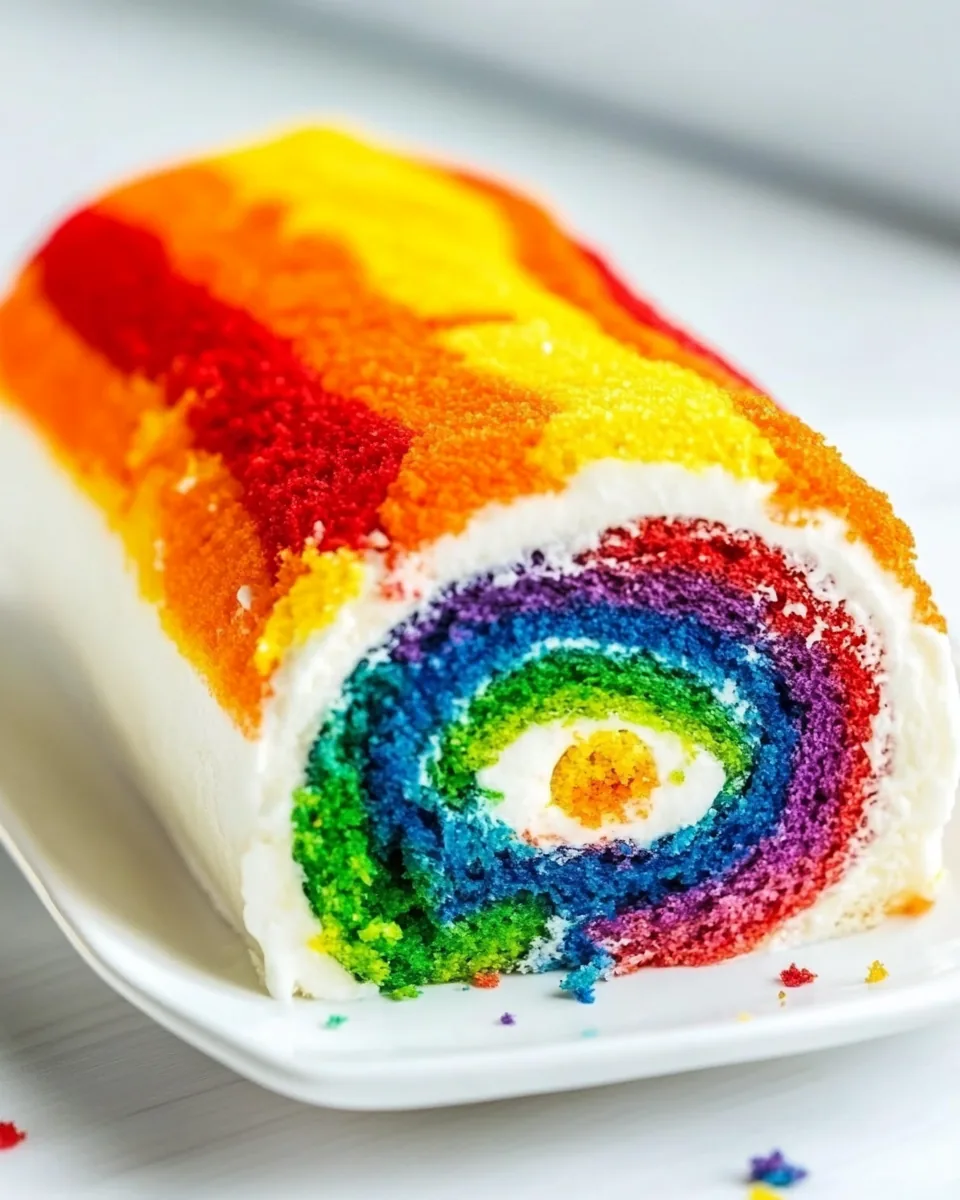
Rainbow Roll Cake
When it comes to desserts that bring a smile, the Rainbow Roll Cake is a vibrant delight that never fails to impress. I remember the first time I laid eyes on one at a friend’s birthday party. The colorful swirls made it look like a work of art, and I couldn’t help but feel excited about trying a slice. To my surprise, it was not only beautiful but also delicious, with fluffy layers and a creamy filling that danced on my taste buds. Ever since that day, I’ve been on a mission to recreate this masterpiece in my own kitchen, and it has become a staple at any gathering. Whether it’s a birthday, holiday, or just a sunny afternoon, bringing out a Rainbow Roll Cake instantly brightens the mood. It’s a slice of happiness that everyone loves, and I’m thrilled to share how you can make this show-stopping cake.
Recipe Snapshot
35 mins
25 mins
10 mins
Hard
250 kcal
2 g
Gluten-Free, Low FODMAP
11 g
Peeler, Mixing Bowl, Frying Pan, Chef’s Knife, Whisk, Baking Sheet, Oven
Why This Rainbow Roll Cake Shines
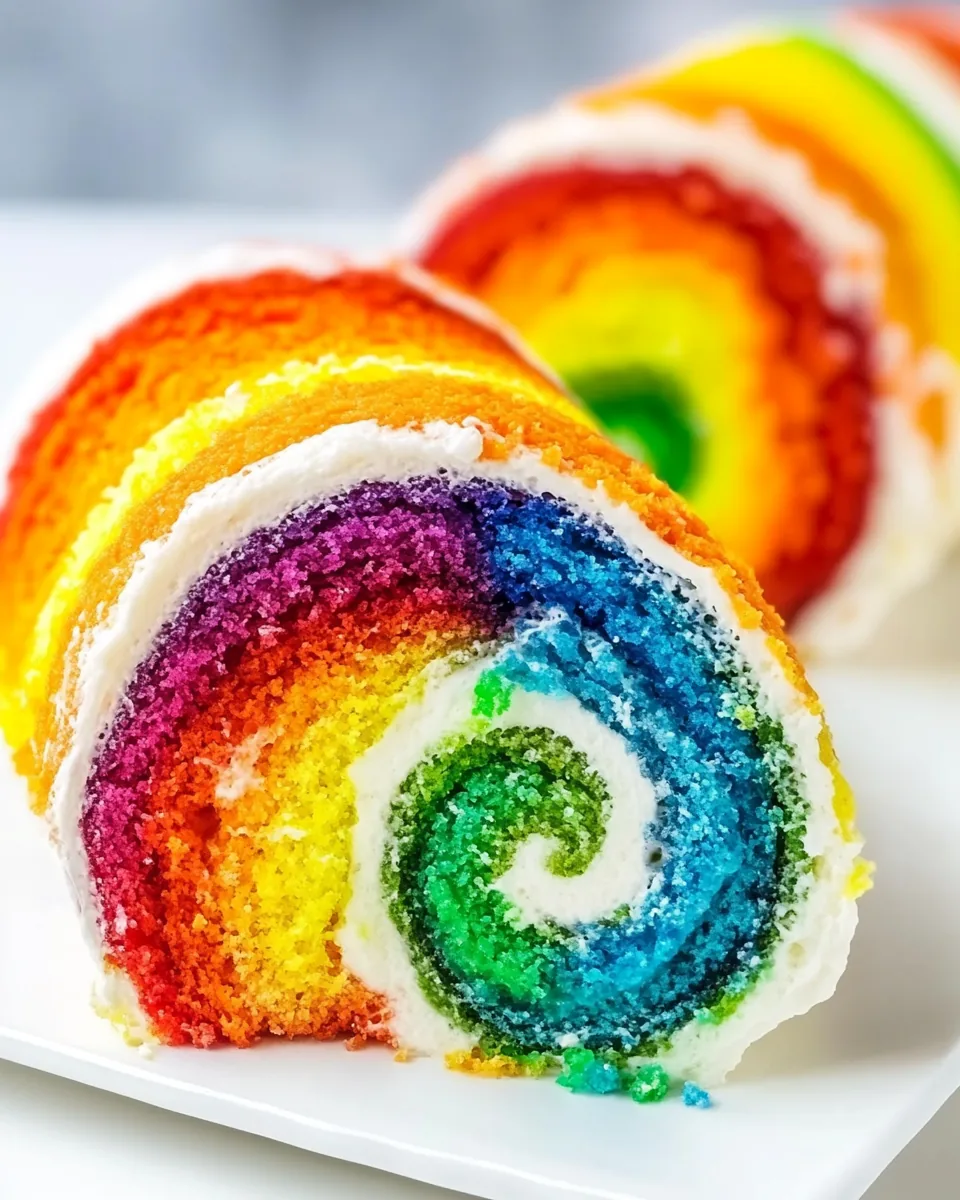
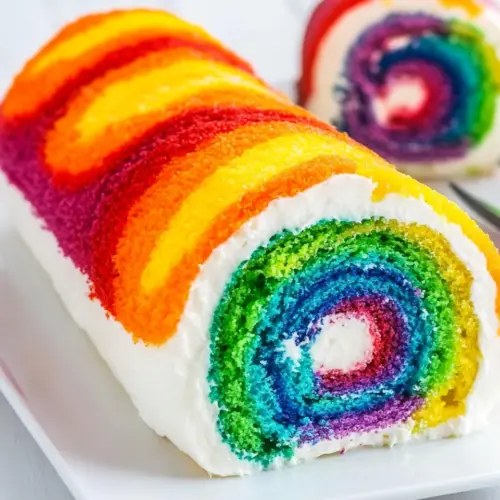
Vibrant Colors
The Rainbow Roll Cake stands out for its eye-catching colors. Each slice reveals a stunning spectrum that is as cheerful as it is delicious. The bright hues not only invite you to take a bite but also make it perfect for celebrations.
Versatile Flavor
This cake is not just about looks; it offers a delightful blend of flavors thanks to its buttery cake and creamy filling. The combination of vanilla and almond extracts adds a subtle richness, while the colorful gel food coloring makes each bite a fun surprise.
Fun to Make
Making a Rainbow Roll Cake is a fantastic way to get creative in the kitchen. Kids love helping out with this recipe. They can choose their favorite colors and watch how the batter transforms into a rainbow.
Perfect for Sharing
This cake is a crowd-pleaser. Whether you’re hosting a party or just want to impress friends and family, the Rainbow Roll Cake is sure to be a hit. It’s easy to slice into portions, making it perfect for sharing.
Appealing Texture
The texture is another reason to love this cake. The sponge is light and fluffy, while the filling is creamy and smooth, creating a wonderful contrast that makes each bite satisfying.
Impressive Presentation
The rolled design of the Rainbow Roll Cake makes it look elegant and professional. It’s a dessert that looks like it belongs in a bakery, but you can make it right at home!
What’s In This Rainbow Roll Cake
Choosing the right ingredients is essential for the success of your Rainbow Roll Cake. Each one plays a crucial role in creating the delicious flavors and vibrant colors that make this dessert so special. The combination of basic pantry staples with a few key players results in a cake that is both fun and flavorful.
- ¾ cup all-purpose flour: The base of the cake, providing structure and lightness.
- 1 teaspoon baking powder: Helps the cake rise and become fluffy.
- ½ teaspoon salt: Enhances the sweetness and balances flavors.
- 4 large eggs: Adds richness and moisture to the batter.
- ½ cup granulated sugar: Sweetens the cake and helps achieve a tender texture.
- 3 tablespoons vegetable oil: Keeps the cake moist and adds richness.
- 1½ teaspoons pure vanilla extract: Infuses a warm, sweet flavor into the cake.
- ½ teaspoon pure almond extract: Adds a lovely nutty note to the flavor profile.
- Gel food coloring: Used to create the vibrant rainbow colors.
- Powdered sugar: For dusting and adding sweetness to the finished cake.
- ¾ cup salted sweet cream butter: The base for the filling, providing creaminess and flavor.
- 1 teaspoon clear vanilla flavoring: Enhances the overall flavor of the filling.
- ½ teaspoon almond extract: Complementing the filling with a delightful nuttiness.
- 2 cups powdered sugar: Sweetens the filling, making it rich and creamy.
- 2 tablespoons heavy cream: Adds smoothness and richness to the filling.
Recipe Steps for Rainbow Roll Cake
Making a Rainbow Roll Cake is a delightful process that comes together in a series of simple steps. As you prepare, you’ll be captivated by the colors and aromas that fill your kitchen. Let’s dive into the steps that will guide you toward creating this stunning dessert.
Preheat your oven to 350°F. Grab a 10x15x1-inch baking sheet, also known as a jelly roll pan, and line it with parchment paper. This will help the cake come out easily later.
In a small mixing bowl, combine ¾ cup all-purpose flour, 1 teaspoon baking powder, and ½ teaspoon salt. Whisk them together to ensure even distribution of the leavening agent.
-
In a separate large mixing bowl, use a stand mixer or a handheld mixer to beat together 4 large eggs, ½ cup granulated sugar, 3 tablespoons vegetable oil, 1½ teaspoons pure vanilla extract, and ½ teaspoon pure almond extract. Beat this mixture on high speed for about 5 to 6 minutes until it becomes thick and light yellow in color.
Gently fold the flour mixture into the wet ingredients until just combined. Be careful not to overmix, as you want to retain the air bubbles that were created.
Divide the batter evenly among six bowls, aiming for about ⅔ cup in each. Use the gel food coloring to tint each bowl a different color; start with red, then orange, yellow, green, blue, and purple. The amount of coloring depends on how vibrant you want the shades to be.
-
Transfer each color into six disposable piping bags or quart-size ziplock bags and secure the tops. This will make it easy to pipe the colors onto your baking sheet.
Lightly spray the prepared baking sheet with nonstick spray. Snip a small corner off each piping bag, and begin piping the batter onto the sheet. Start with the red batter and make a straight line, followed by orange, yellow, green, blue, and purple. Continue until the pan is filled with colorful lines.
After piping, gently tap the pan on the counter to release any trapped air bubbles. Bake the cake in the preheated oven for about 8 minutes or until the edges start to slightly pull away from the sides.
-
Once baked, remove the pan from the oven. Dust the baked cake with powdered sugar, which will prevent it from sticking when you roll it.
Prepare a large cutting board or cooling rack. While the cake is still warm, place a clean piece of parchment paper over the top and flip it onto the board or rack. Remove the original parchment paper gently.
Fold the overhanging parchment paper up over the cake and start rolling it from one short side to the other, keeping the parchment inside the roll. This helps maintain its shape. Set the rolled cake aside on a cooling rack.
-
In a mixing bowl, beat ¾ cup salted sweet cream butter for about 1 to 1½ minutes until it’s smooth. Add 1 teaspoon clear vanilla flavoring and ½ teaspoon almond extract, mixing for another 30 seconds.
Gradually add 2 cups powdered sugar, alternating with 2 tablespoons heavy cream, beating until smooth. This creamy filling will complement the cake perfectly.
Once the cake has completely cooled, gently unroll it. Spread the filling over the surface, avoiding the edges. Be generous but careful.
-
Prepare two sheets of plastic wrap, overlapping them slightly and spraying with nonstick spray. Carefully roll the cake back up, wrapping it tightly in the plastic once rolled. Chill in the refrigerator for about 6 hours to set.
When you’re ready to serve, carefully unwrap the cake and slice it into ten ½-inch pieces.
Things Worth Knowing
- Use a jelly roll pan: This specific pan is designed for making roll cakes, allowing for even baking.
- Gentle mixing: When folding in the flour, be gentle to retain the air bubbles, ensuring a fluffy cake.
- Coloring method: Using gel food coloring yields vibrant results. Liquid colorings can affect the batter’s consistency.
- Cooling properly: Allow the cake to cool completely before unrolling; this prevents cracks.
- Serve chilled: A chilled cake roll is refreshing and the flavors meld beautifully after sitting in the fridge.
Helpful Notes about Rainbow Roll Cake
Creating the perfect Rainbow Roll Cake comes with its set of considerations. Here are some helpful notes to keep in mind:
- Storage: Store leftovers in an airtight container in the refrigerator to maintain freshness.
- Freezing: You can freeze the rolled cake before filling it. Just wrap it tightly in plastic wrap for up to a month.
- Pairing: Serve with fresh fruit or whipped cream for an extra touch of sweetness.
- Color tips: Experiment with different colors to make the cake uniquely yours.
- Serving suggestions: This cake is perfect for birthdays, holidays, or any celebration!
Serving Suggestions
When it comes to serving a Rainbow Roll Cake, there are countless delightful ways to enjoy this treat. Here are some suggestions:
- Birthday Celebrations: A Rainbow Roll Cake is a fantastic centerpiece for a birthday party, sure to wow both kids and adults alike.
- Tea Time: Serve slices during afternoon tea with a side of fresh fruits, enhancing both the presentation and flavor.
- Picnics: Pack slices in a picnic basket for a colorful addition, bringing cheer to any outdoor gathering.
- Holidays: The vibrant colors make it an excellent choice for holiday desserts, especially for festive occasions.
- Casual Gatherings: Perfect for any casual get-together with friends, it’s a conversation starter and a delicious treat.
- Storage: Leftovers can be wrapped and stored in the fridge, but they won’t last long because this cake is too tempting!
FAQ
Conclusion
The Rainbow Roll Cake is not just a dessert; it’s a celebration of color and flavor, making it a favorite for any occasion. With its stunning appearance and delicious taste, I encourage you to try making it at home. You’ll be amazed at how easy it is to create this beautiful cake that brings joy to the table. So roll up your sleeves and get ready for some colorful fun in the kitchen!
Rainbow Roll Cake
Equipment
- Peeler
- Mixing Bowl
- Frying Pan
- Chef's Knife
- Whisk
- Baking Sheet
- Oven
Ingredients
- ¾ cup All-purpose flour
- 1 teaspoon Baking powder
- ½ teaspoon Salt
- 4 large Eggs (room temperature)
- ½ cup Granulated sugar
- 3 tablespoons Vegetable oil
- 1½ teaspoons Pure vanilla extract
- ½ teaspoon Pure almond extract
- gel food coloring (red, orange, yellow, green, blue, and purple)
- Powdered sugar (for dusting)
- ¾ cup Salted sweet cream butter (softened)
- 1 teaspoon Clear vanilla flavoring
- ½ teaspoon Almond extract
- 2 cups Powdered sugar
- 2 tablespoons Heavy cream
Instructions
- Preheat your oven to 350°F. Grab a 10x15x1-inch baking sheet, also known as a jelly roll pan, and line it with parchment paper. This will help the cake come out easily later.
- In a small mixing bowl, combine ¾ cup all-purpose flour, 1 teaspoon baking powder, and ½ teaspoon salt. Whisk them together to ensure even distribution of the leavening agent.
- In a separate large mixing bowl, use a stand mixer or a handheld mixer to beat together 4 large eggs, ½ cup granulated sugar, 3 tablespoons vegetable oil, 1½ teaspoons pure vanilla extract, and ½ teaspoon pure almond extract. Beat this mixture on high speed for about 5 to 6 minutes until it becomes thick and light yellow in color.
- Gently fold the flour mixture into the wet ingredients until just combined. Be careful not to overmix, as you want to retain the air bubbles that were created.
- Divide the batter evenly among six bowls, aiming for about ⅔ cup in each. Use the gel food coloring to tint each bowl a different color; start with red, then orange, yellow, green, blue, and purple. The amount of coloring depends on how vibrant you want the shades to be.
- Transfer each color into six disposable piping bags or quart-size ziplock bags and secure the tops. This will make it easy to pipe the colors onto your baking sheet.
- Lightly spray the prepared baking sheet with nonstick spray. Snip a small corner off each piping bag, and begin piping the batter onto the sheet. Start with the red batter and make a straight line, followed by orange, yellow, green, blue, and purple. Continue until the pan is filled with colorful lines.
- After piping, gently tap the pan on the counter to release any trapped air bubbles. Bake the cake in the preheated oven for about 8 minutes or until the edges start to slightly pull away from the sides.
- Once baked, remove the pan from the oven. Dust the baked cake with powdered sugar, which will prevent it from sticking when you roll it.
- Prepare a large cutting board or cooling rack. While the cake is still warm, place a clean piece of parchment paper over the top and flip it onto the board or rack. Remove the original parchment paper gently.
- Fold the overhanging parchment paper up over the cake and start rolling it from one short side to the other, keeping the parchment inside the roll. This helps maintain its shape. Set the rolled cake aside on a cooling rack.
- In a mixing bowl, beat ¾ cup salted sweet cream butter for about 1 to 1½ minutes until it’s smooth. Add 1 teaspoon clear vanilla flavoring and ½ teaspoon almond extract, mixing for another 30 seconds.
- Gradually add 2 cups powdered sugar, alternating with 2 tablespoons heavy cream, beating until smooth. This creamy filling will complement the cake perfectly.
- Once the cake has completely cooled, gently unroll it. Spread the filling over the surface, avoiding the edges. Be generous but careful.
- Prepare two sheets of plastic wrap, overlapping them slightly and spraying with nonstick spray. Carefully roll the cake back up, wrapping it tightly in the plastic once rolled. Chill in the refrigerator for about 6 hours to set.
- When you’re ready to serve, carefully unwrap the cake and slice it into ten ½-inch pieces.
Notes
- Tip 1: Make sure you are using an actual jelly roll pan; a cookie sheet won’t suffice.
- Tip 2: Be gentle when folding in the flour and color to keep the batter fluffy.
- Tip 3: Place each piping bag in a cup with the cut end up to prevent spills.
- Tip 4: Keep an eye on your cake as oven temperatures can vary.
- Tip 5: Use parchment paper instead of a tea towel as the colors will stain fabric.
- Tip 6: Be patient when rolling; rushing can lead to cracks.