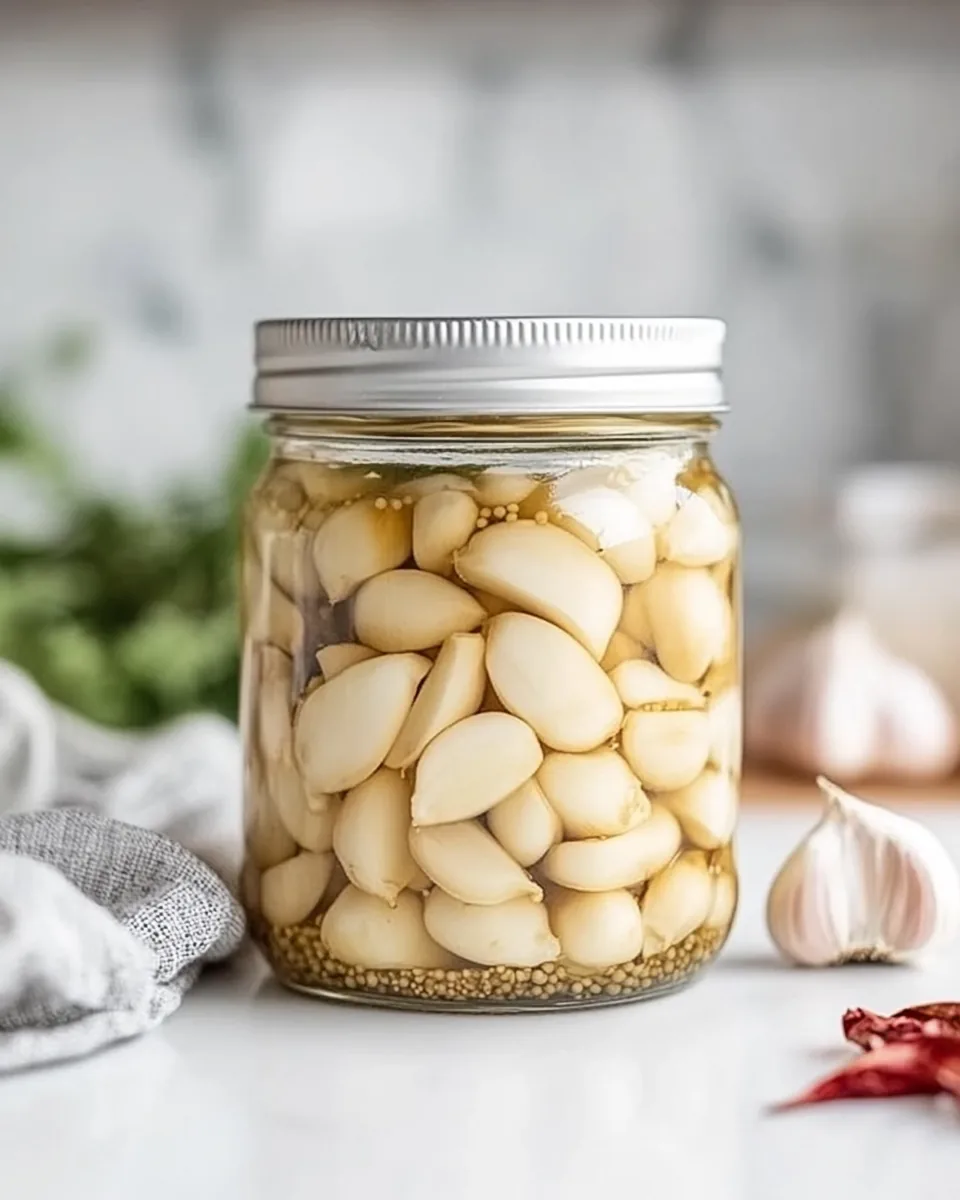
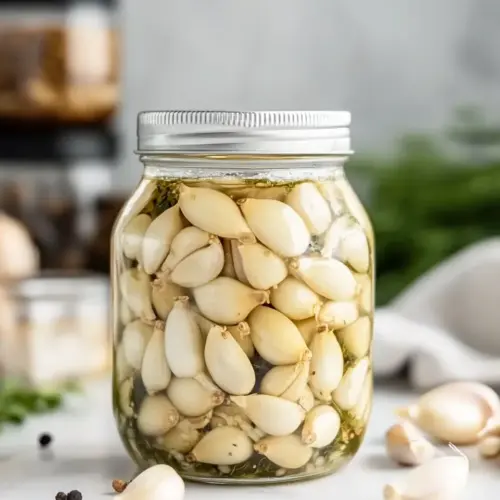
Pickled Garlic
There’s something truly magical about the simplicity of Pickled Garlic. Growing up, my grandmother had a way of preserving the flavors of summer in jars, and this recipe for pickled garlic is one of her finest creations. I remember the first time I tried it, the tangy crunch of the garlic paired with the fragrant dill took me by surprise. It was a revelation! Since then, I’ve made it my mission to perfect this recipe, and it’s become a staple in my kitchen. Whether I’m adding a spoonful to a salad or just snacking on a clove straight from the jar, I can’t get enough of that bold, zesty flavor.
Recipe Snapshot
20 mins
15 mins
5 mins
Easy
40 kcal
0 g
Keto, Paleo, Whole30
0 g
Large Pot, Peeler, Frying Pan
What We Adore About This Pickled Garlic
Bold Flavor
The first reason to love Pickled Garlic is its incredible flavor. The tartness of the vinegar enhances the natural sweetness of the garlic, creating a perfect balance. Each clove bursts with flavor, making it a wonderful addition to salads, sandwiches, and even charcuterie boards.
Health Benefits
Garlic is known for its numerous health benefits, including antimicrobial properties and heart health support. By pickling garlic, you not only preserve it but also amplify its health benefits, making it a delicious and nutritious addition to your meals.
Versatile Ingredient
Another reason I adore Pickled Garlic is its versatility. You can use it in a variety of cuisines. Whether you’re whipping up a Mediterranean dish or a spicy Asian stir-fry, the pickled garlic adds that extra punch that elevates your dish to new heights.
Easy to Make
You don’t need to be a culinary expert to whip up this recipe. It’s straightforward, requiring just a handful of ingredients and minimal prep time. I love that I can make a batch and have it ready to enjoy in just a few days.
Great Gift
Pickled Garlic makes a fantastic homemade gift. Who wouldn’t appreciate a jar of these flavorful goodies? Friends and family will love the unique taste and will be impressed by your culinary skills.
Long Shelf Life
Once pickled, the garlic can last for up to three months in your refrigerator. This means you can make a big batch and enjoy it over time without worrying about spoilage, making it a smart choice for anyone who loves to cook.
Ingredients to Make Pickled Garlic
The ingredients for Pickled Garlic are all about bringing out the best in each other. The tangy white distilled vinegar, the briny salt, and the fragrant dill all harmonize beautifully with the robust flavor of the garlic. Together, they create a magical pickling solution that transforms raw garlic into a delicious, tangy treat.
- 1 cup white distilled vinegar: The acidic base that helps in preserving and flavoring.
- ½ cup water: Balances the vinegar, making it less intense.
- 1 tablespoon kosher salt: Enhances flavor and helps with preservation.
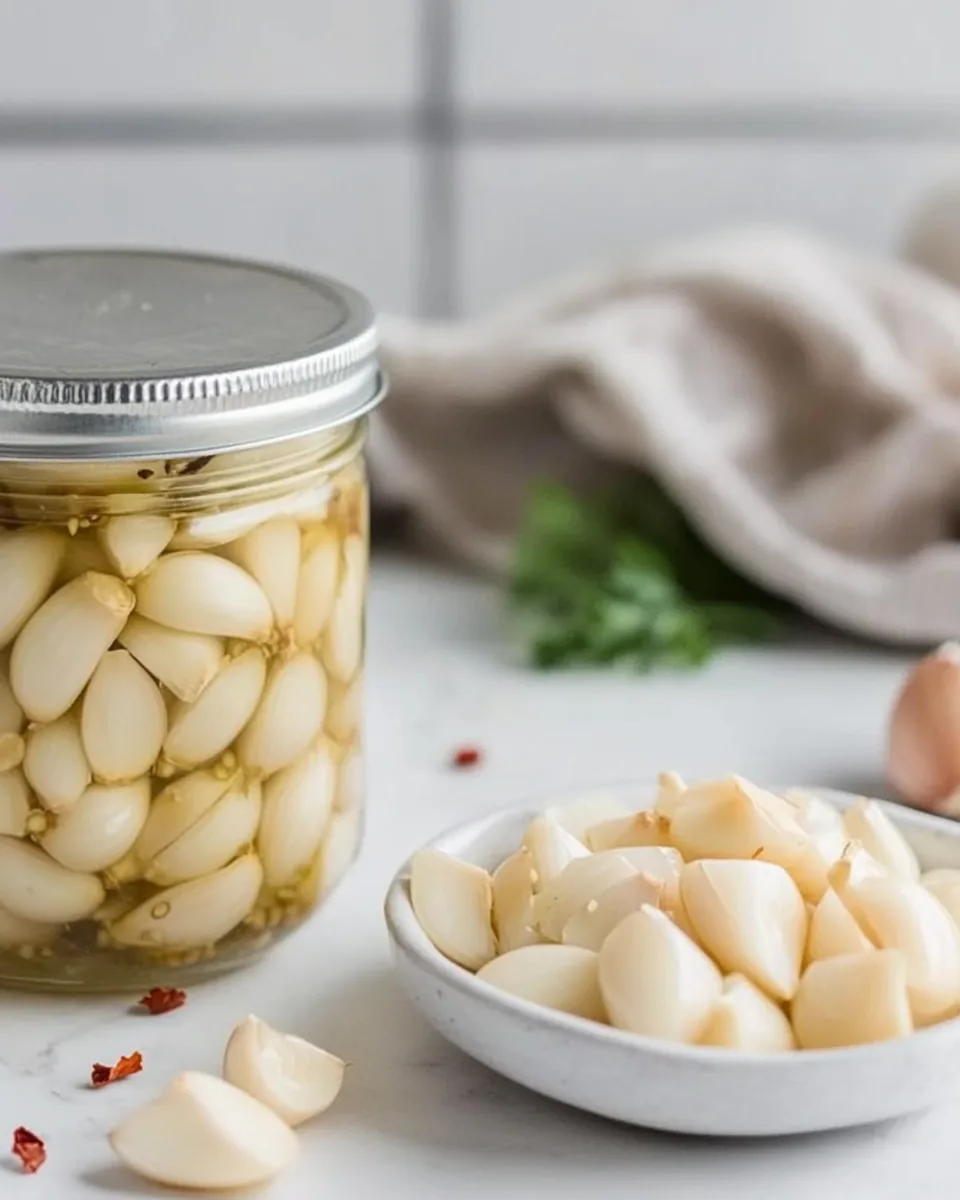
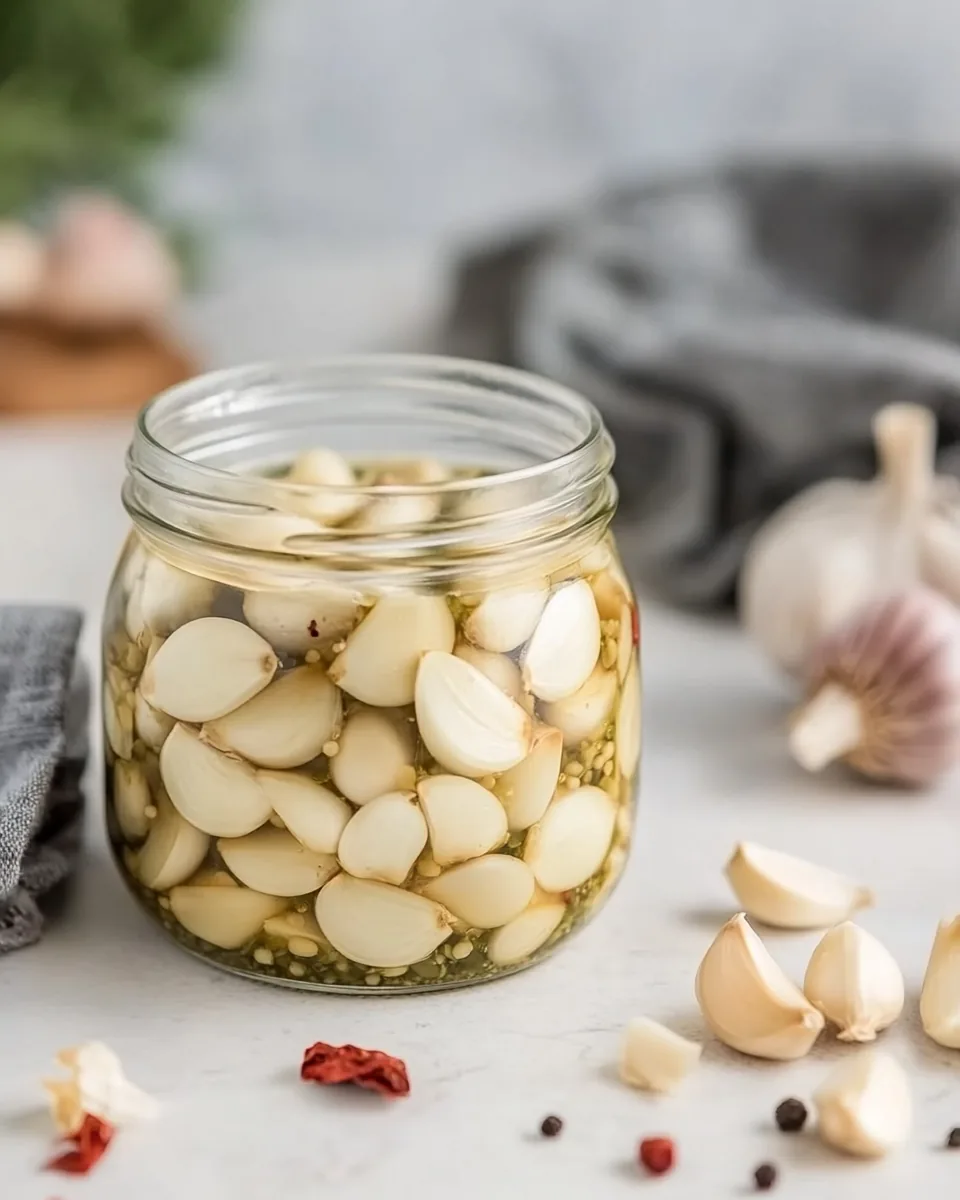
- 2 cups whole peeled garlic cloves: The star of the show, these cloves become beautifully tangy.
- ¼ cup fresh dill: Adds a wonderful herbaceous flavor to the pickling brine.
- 1 teaspoon red pepper flakes: For a hint of heat, adjust to your taste.
Making This Pickled Garlic
Making Pickled Garlic is a delightful process that anyone can enjoy. It involves a few simple steps, and before you know it, you’ll have a jar of deliciousness ready to enhance your meals. Let’s dive into the instructions!
-
Start by combining the white distilled vinegar, water, and kosher salt in a medium saucepan. Set the heat to medium-high and allow the mixture to come to a gentle boil. This step is crucial as it dissolves the salt and melds the flavors together.
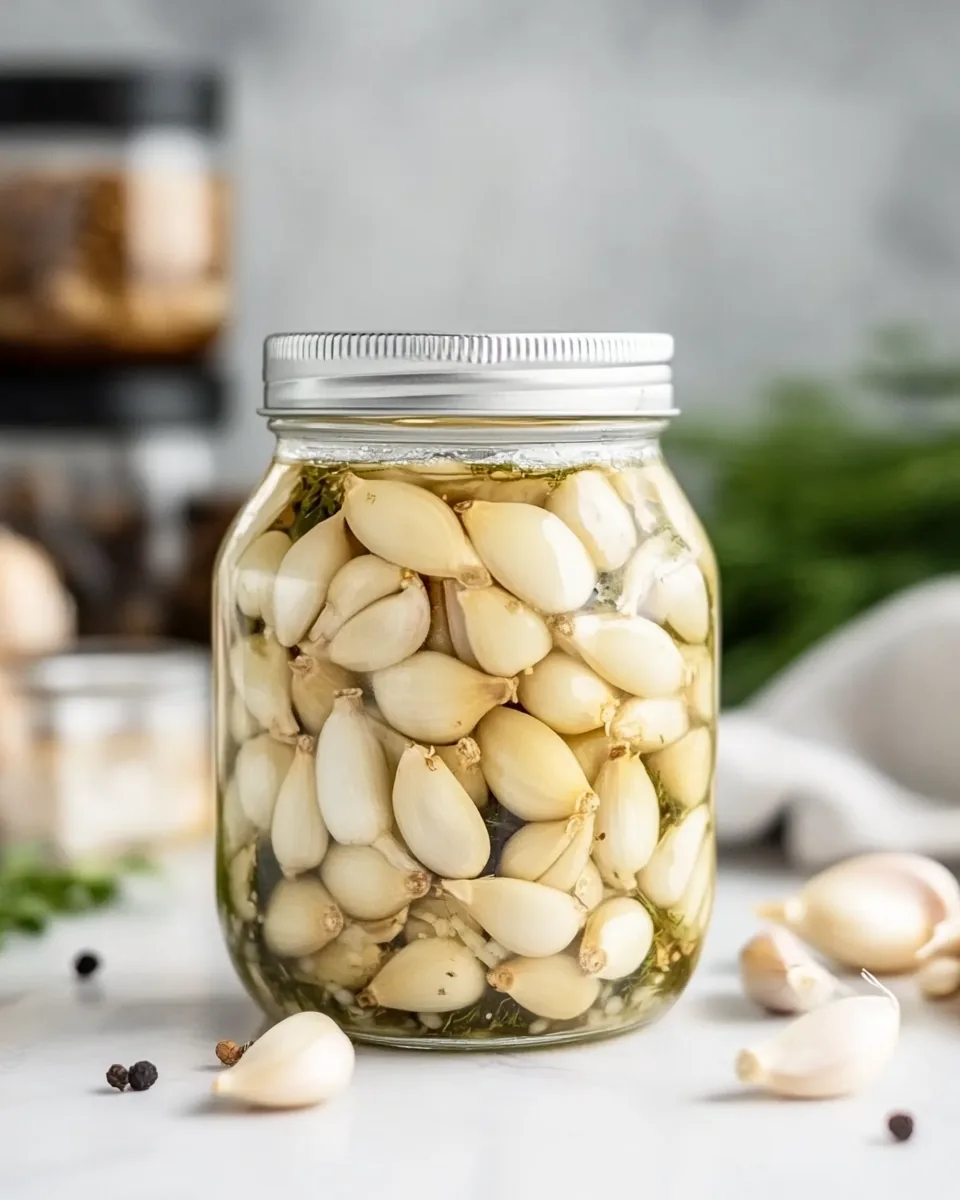
Once the salt is fully dissolved, carefully layer the whole peeled garlic cloves, fresh dill, and red pepper flakes into a wide-mouth pint-sized jar. This layering helps distribute the flavors evenly throughout the jar.
After layering, slowly and carefully pour the hot pickling liquid over the garlic, ensuring you leave about half an inch of space at the top of the jar. This space is important for the garlic to expand as it absorbs the brine.
-
Now, allow the jar to cool to room temperature. It’s tempting to rush this step, but letting it cool ensures that the flavors meld beautifully and that the garlic doesn’t cook further from the heat.
Once cooled, seal the jar tightly and place it in the refrigerator. The pickled garlic will be ready to enjoy after just 24 hours, but I recommend waiting one to two weeks for the best flavor.
Things Worth Knowing
- Quality of ingredients: Always use fresh, high-quality garlic for the best flavor. Old garlic can taste bitter and affect the overall taste of your pickles.
- Cooling time: Allowing the pickling liquid to cool completely before sealing the jar is essential. This prevents cooking the garlic further.
- Storage: Ensure your jar is airtight and store it in the fridge to maintain freshness and flavor.
- Flavor development: The longer you let the garlic sit in the brine, the more intense the flavor will become. Don’t rush the process!
Recipe Notes about Pickled Garlic
Here are some helpful tips to ensure your Pickled Garlic turns out perfectly every time.
- Storage: Keep your pickled garlic in the refrigerator. It is not suitable for pantry storage.
- Freezing: While pickled garlic can be enjoyed fresh, freezing is not recommended as it alters the texture.
- Long shelf life: This recipe will keep well for up to three months in a sealed jar in the fridge.
- Smell check: If the garlic develops an unpleasant smell or shows signs of mold, discard it immediately.
- Variations: Experiment by adding other spices or herbs to the brine like mustard seeds or thyme for a different flavor profile.
Accompaniments for Pickled Garlic
When it comes to serving Pickled Garlic, the possibilities are endless! Here are some great ideas:
- Charcuterie boards: Add pickled garlic to your cheese and meat platters for a burst of flavor.
- Salads: Dice and mix into salads for an extra crunch and tang.
- Sandwiches: Use as a topping on sandwiches, burgers, or wraps for a unique twist.
- Grilled meats: Serve alongside grilled dishes to enhance flavor.
- Gifts: Package in a decorative jar for a homemade gift that’s sure to impress.
- Cooking: Incorporate into stir-fries and pasta dishes for a flavor boost.
FAQ
Conclusion
Pickled Garlic is not just a condiment; it’s a flavor enhancer that can change the way you enjoy your meals. The tangy and savory notes it adds are simply irresistible. I wholeheartedly encourage you to try making this recipe, as it’s a straightforward and rewarding kitchen project. You’ll be amazed at how much a simple jar of pickled garlic can elevate your dishes!
Pickled Garlic
Equipment
- Large Pot
- Peeler
- Frying Pan
Ingredients
- 1 cup White distilled vinegar
- ½ cup Water
- 1 tablespoon Kosher salt
- 2 cups Whole peeled garlic cloves
- ¼ cup Fresh dill
- 1 teaspoon Red pepper flakes or to taste
Instructions
- Combine the white distilled vinegar, water, and kosher salt in a medium saucepan set over medium-high heat. Bring to a boil and cook until the salt has dissolved, about 5 minutes.
- Layer the whole peeled garlic cloves, fresh dill, and red pepper flakes into a wide-mouth pint size jar.
- Carefully pour the pickling liquid over the garlic, leaving ½” of room at the top of the can.
- Allow to cool to room temperature, cover tightly, and then store in the fridge.
- The garlic will be quick pickled after 24 hours in the fridge, however I think it has the best flavor after 1-2 weeks.
Notes
- Storage: Keep your pickled garlic in the refrigerator. It is not suitable for pantry storage.
- Freezing: While pickled garlic can be enjoyed fresh, freezing is not recommended as it alters the texture.
- Long shelf life: This recipe will keep well for up to three months in a sealed jar in the fridge.
- Smell check: If the garlic develops an unpleasant smell or shows signs of mold, discard it immediately.
- Variations: Experiment by adding other spices or herbs to the brine like mustard seeds or thyme for a different flavor profile.