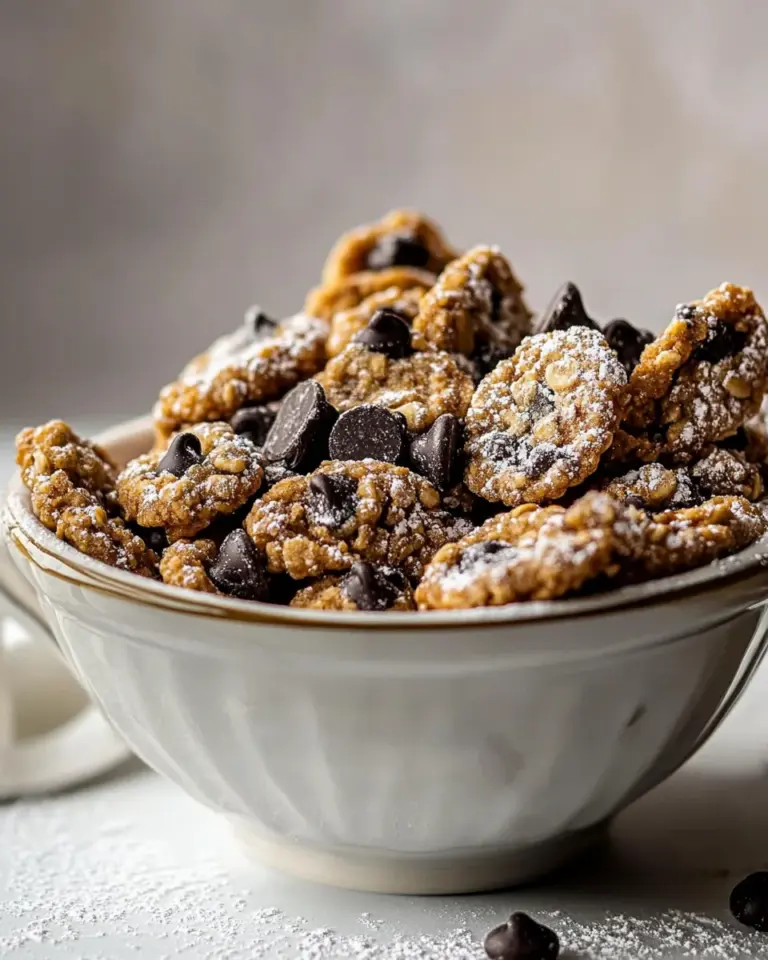
Oreo Truffles
When I think about indulgence, the first thing that comes to my mind is Oreo Truffles. There’s something about the combination of rich, creamy filling and the beloved crunch of Oreos that takes me back to my childhood. I remember making these delightful treats with friends, laughing in the kitchen as we mixed and rolled the dough. They’re not just a treat; they’re a memory, a moment of shared joy. Every bite of these Oreo Truffles brings back that sweet nostalgia, and the best part? They’re incredibly simple to make! Whether it’s a special occasion or just a craving for something sweet, these truffles never disappoint. The way the chocolate melts in your mouth complements the cookie crumbles perfectly, making it impossible to stop at just one. You can customize them, drizzle different chocolates, or sprinkle them with your favorite toppings. Each variation is a new adventure, sparking creativity and excitement. So let’s dive into this delicious journey and whip up some Oreo Truffles that will impress friends and family alike.
Recipe Snapshot
1 hr 30 mins
90 mins
0 mins
Hard
120 kcal
1 g
Keto, Gluten-Free, Low FODMAP
7 g
Baking Sheet, Food Processor, Mixing Bowl, Whisk
What’s Great About This Oreo Truffles
Why These Truffles Are Special
There’s a reason why Oreo Truffles are a beloved treat! Here are just a few reasons why they stand out:
1. Simple Ingredients
One of the things I love most about these truffles is how few ingredients are needed. With just Oreos, cream cheese, and almond bark, you can whip up something absolutely delicious without a long shopping list. This simplicity means that you can enjoy making them without any stress, which is perfect for those busy days.
2. No Baking Required
Who doesn’t love a no-bake dessert? Oreo Truffles are perfect for those hot summer days when you don’t want to turn on the oven. Just mix, roll, and chill. It’s that easy! This makes them not only a quick treat but also a fantastic option for last-minute dessert ideas.
3. Customizable
If you’re someone who loves to experiment, these truffles are an excellent canvas. You can change the chocolate coating, add peppermint extract for a festive twist, or roll them in different toppings. This versatility means you can make them for any occasion, and they will always feel fresh and exciting!
4. Perfect for Gifting
When it comes to gifting, Oreo Truffles are a hit! You can package them beautifully in a box tied with a ribbon, making them an adorable and heartfelt gift. Friends and family will appreciate the effort you put into making something so delicious and unique, and they’ll be asking for more.
5. Crowd-Pleaser
No matter where you take them, these truffles are sure to be a crowd-pleaser. Whether you’re at a birthday party, potluck, or family gathering, they tend to disappear fast. Everyone loves that satisfying crunch followed by creamy sweetness!
6. Easy Clean-Up
After enjoying your time making these truffles, the clean-up is a breeze! Since they don’t require any complicated equipment or messy processes, you’ll find that you can spend more time enjoying your creations rather than dreading the clean-up.
Ingredients to Make Oreo Truffles
To craft the perfect Oreo Truffles, the ingredients play a critical role in achieving that unique texture and flavor. The combination of Oreos and cream cheese creates a rich, creamy filling that pairs wonderfully with the chocolate coating. Here’s what you’ll need to bring these delicious truffles to life:
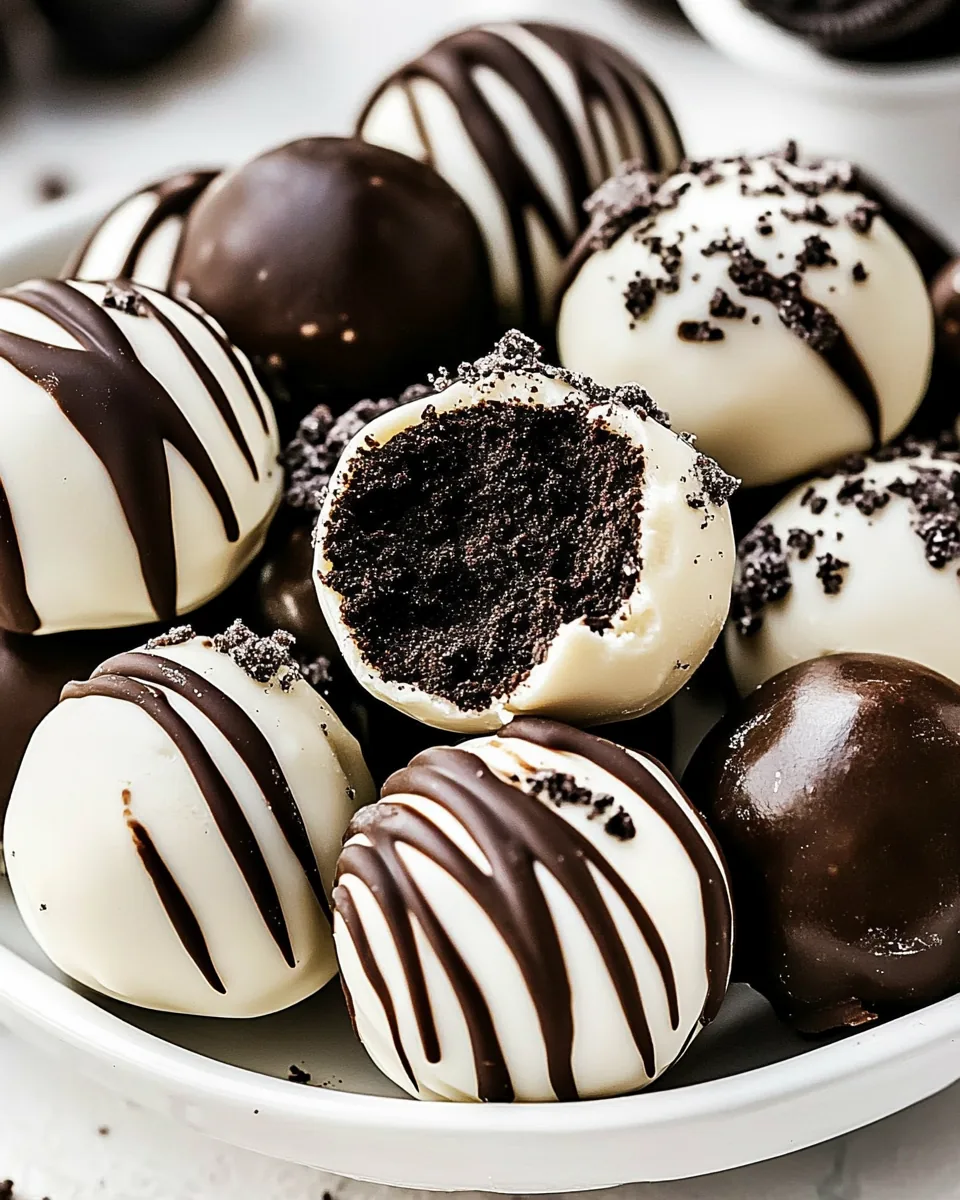
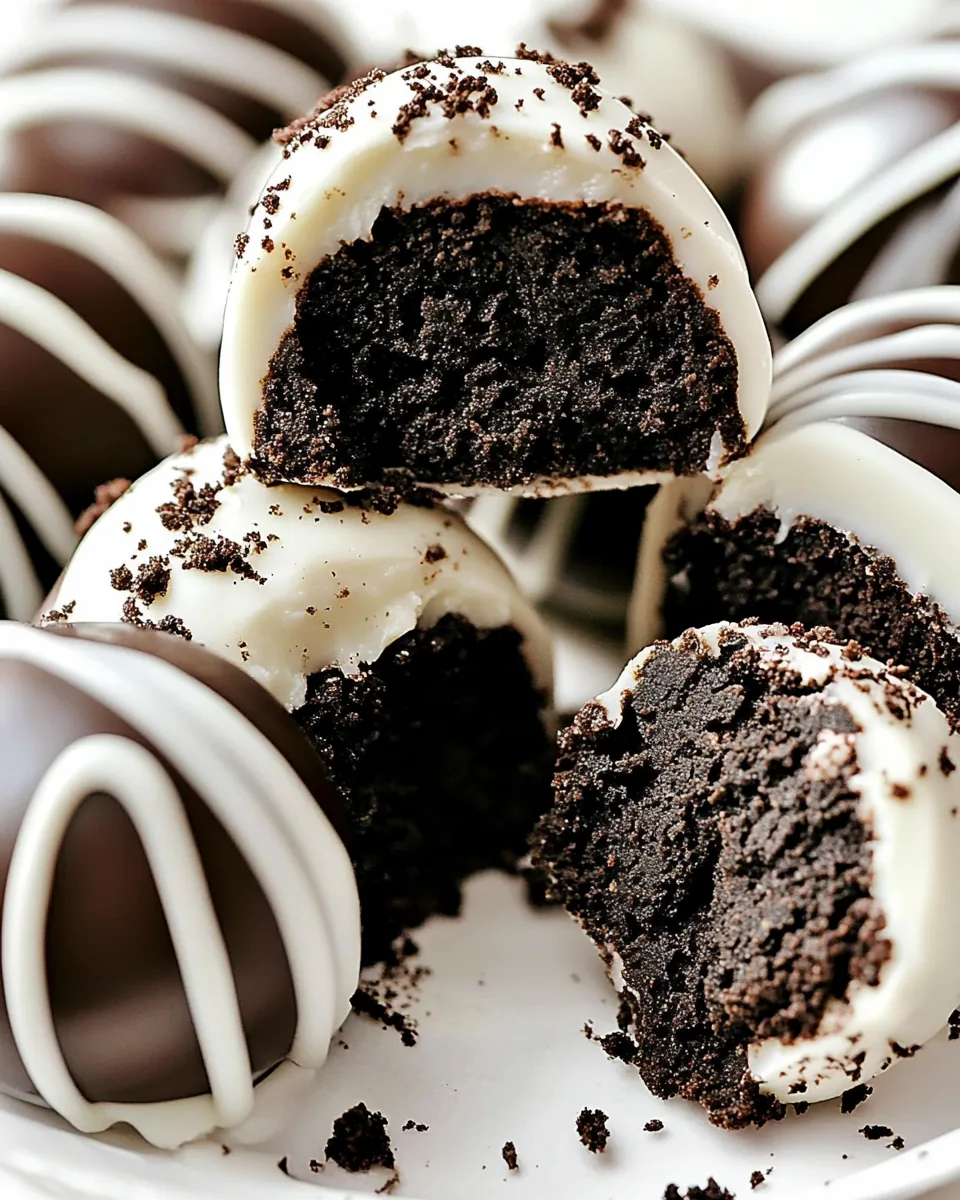
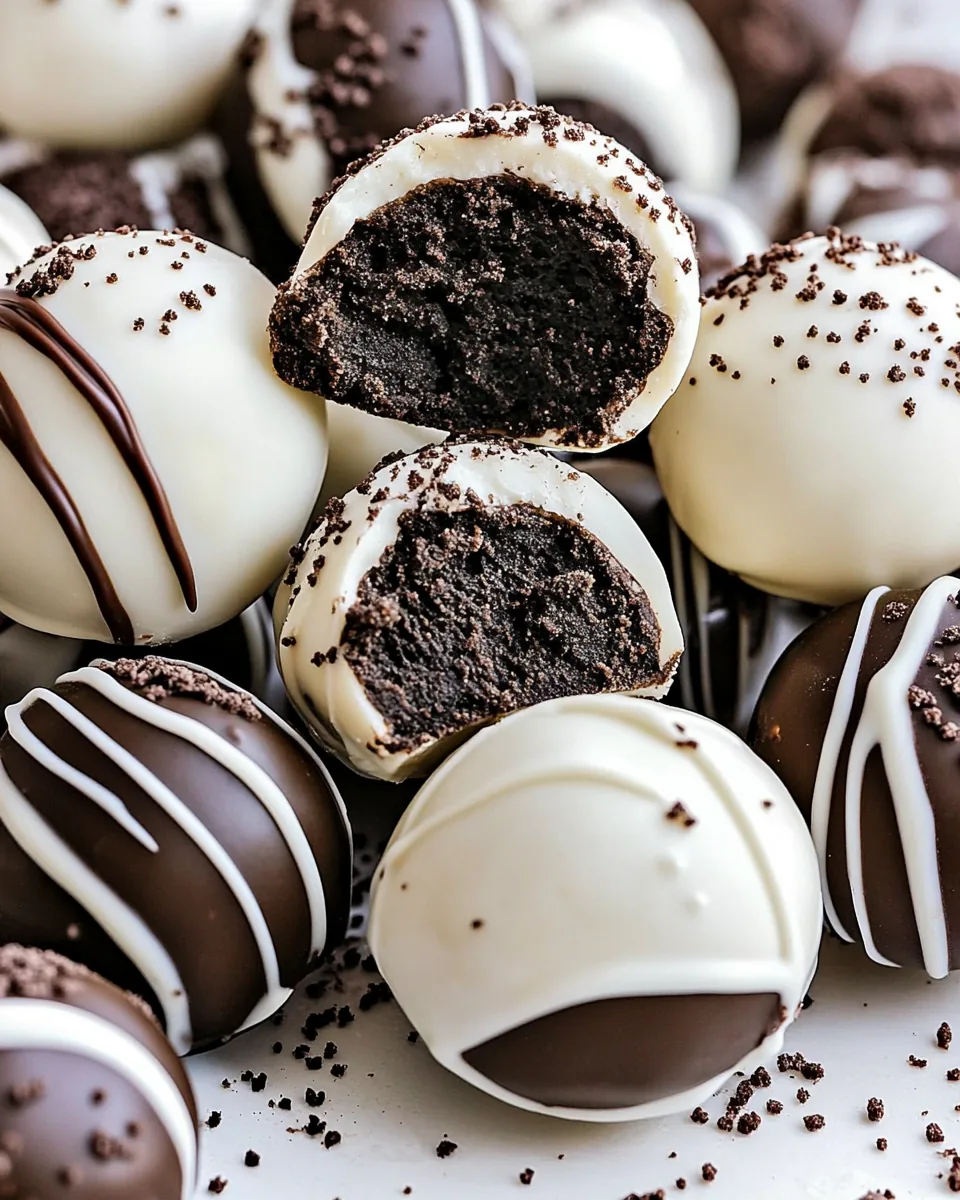
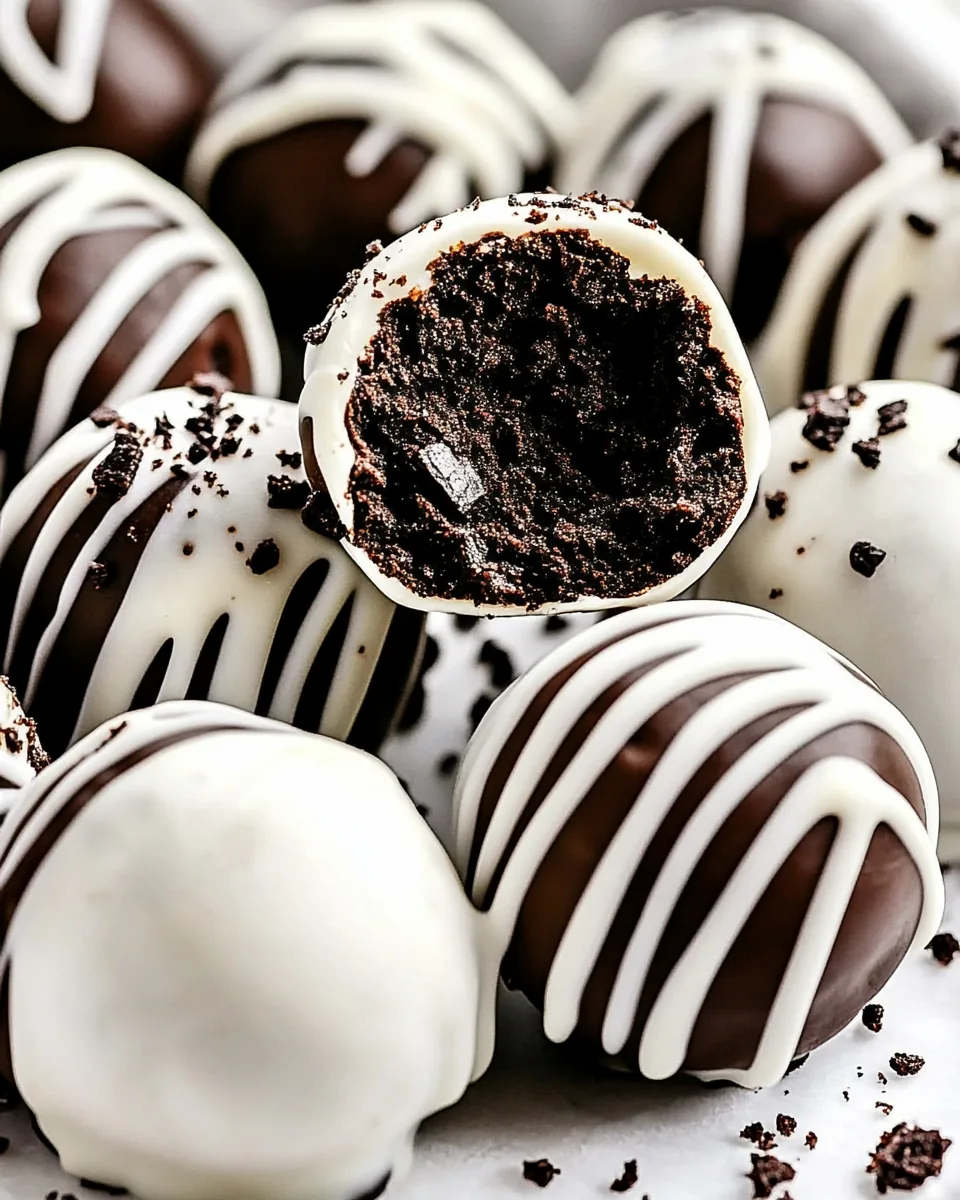
- 39 Oreos plus filling (one 14.3 oz pkg.) – The star of the show! These classic cookies provide a delightful crunch and a sweet flavor that forms the base of your truffles.
- 18 oz. cream cheese, very soft – This is what gives your truffles that creamy consistency, making them melt in your mouth.
- 16 oz. white almond bark or chocolate almond bark – This will be used for coating and adds a sweet, chocolatey exterior to your truffles.
- 2 tablespoons vegetable shortening – This helps to smooth out the chocolate and gives a nice sheen to the coating.
- 6 ounces almond bark, candy melts, or baker’s chocolate for drizzling (optional) – If you want to take your truffles to the next level, this is perfect for drizzling on top.
The Method for Oreo Truffles
Making Oreo Truffles is a fun and straightforward process. You’ll find it’s more of a creative adventure than a culinary challenge! Here’s how to bring these treats to life:
- Start by lining a baking sheet with parchment paper or a nonstick silicone mat. This will prevent the truffles from sticking once they’re set. It’s a little step that makes a big difference in the end!
- Next, take your Oreos and place them in a food processor. Pulse until they are fine crumbs. You can reserve 2 tablespoons of the crumbs for later use as a topping, which adds an extra layer of flavor and texture.
- Now, add the softened cream cheese into the food processor with the crushed Oreos. Pulse until everything is well combined and looks like a sticky dough. You’ll know it’s ready when you can easily form it into a ball.
- Using a tablespoon or a cookie scoop, portion out the mixture and roll it into balls. Space them out on your prepared baking sheet to avoid them sticking to each other.
- Once your truffles are rolled, place the baking sheet in the freezer for at least 30 minutes or until they are firm. This chilling step is crucial as it helps them keep their shape when you dip them in chocolate.
- While the truffles are chilling, prepare your second baking sheet lined with parchment paper or a nonstick mat for the dipped truffles. This will be where your finished truffles will go to set.
- Now it’s time to melt your almond bark or the candy melts according to the package directions. Stir in the vegetable shortening for a smooth chocolate consistency. If you find your chocolate starting to thicken, don’t worry! You can reheat it gently.
- Remove a few truffles from the freezer at a time, keeping the rest firm. Dip the bottom of each truffle in the melted chocolate, then balance it on the end of a butter knife or fork. Use a spoon to pour melted chocolate over the top until it’s fully covered. Allow any excess chocolate to drip off.
- Carefully slide the truffle onto your prepared baking sheet using a toothpick. If you’re not drizzling, immediately sprinkle the top with crushed Oreos or other toppings before the chocolate sets.
- If you’re looking to drizzle, allow the chocolate to set for about 10 minutes first. Then melt additional chocolate and use a fork or a plastic bag with a snipped corner to drizzle over the truffles.
- Finally, refrigerate the truffles for at least 30 minutes before serving. If you’re not serving them right away, cover them once set or store in a tightly sealed container with parchment paper in between any rows for up to 2 weeks.
Things Worth Knowing
- Chilling is Key: Make sure to chill the truffles thoroughly; this helps maintain their shape during coating.
- Quality Matters: Use high-quality chocolate for coating to enhance the flavor of the truffles.
- Experiment with Flavors: Feel free to add different flavor extracts, such as peppermint or orange, for a unique twist.
- Rolling Technique: Wet your hands slightly when rolling the truffles to prevent the mixture from sticking to your hands.
Making Adjustments
If you’re looking to personalize your Oreo Truffles, here are some tips to consider:
- Storage: Keep the truffles in the refrigerator in a single layer covered tightly with plastic wrap or stack them in an airtight container with parchment paper between each row. They’ll stay fresh for up to 2 weeks.
- Freezing: Want to make these ahead of time? You can freeze the truffles! Line them on a baking sheet so they aren’t touching and flash freeze for 30 minutes. Then, transfer them to a resealable bag or freezer-safe container. They’ll last up to 2 months.
- Serving Options: These truffles are best served chilled. If you’re transporting them, I suggest freezing them first and then letting them thaw on the way.
- Candy Cane Variation: For a festive touch, add crushed candy canes on top of your chocolate coating for a holiday twist!
- Different Oreos: Mix it up by using different flavors of Oreos, such as peanut butter or birthday cake, to create unique variations.
- Chocolate Pairing: You can use a mixture of white and dark chocolate for dipping to create a striking contrast and different flavor profiles.
- Sprinkle Variety: Top the truffles with colorful sprinkles or chopped nuts for a fun presentation!
How to Serve Oreo Truffles
When it comes to serving your Oreo Truffles, there are countless delightful ways to do so. Here are some ideas:
- Chilled Treats: Serve them straight from the fridge for a refreshing dessert that’s sure to please.
- Party Platter: Place them on a decorative platter for parties or gatherings; they make a stunning centerpiece.
- Gift Giving: Package them in small boxes or tins to create thoughtful gifts for friends and family.
- With Coffee: Pair them with a hot cup of coffee or hot chocolate for a cozy afternoon treat.
- Seasonal Themes: Decorate them with seasonal sprinkles for holidays, like red and green for Christmas or pastel colors for Easter.
- Snack Time: They also make for a perfect snack for movie nights or game days; everyone will love indulging in these sweet bites!
- Transporting: If you’re taking them on the go, freeze them first to maintain their shape during transport.
FAQ
Conclusion
In conclusion, Oreo Truffles are not just a dessert; they are an experience filled with nostalgia, creativity, and joy. The combination of creamy filling and chocolate coating creates a treat that is hard to resist. I encourage you to gather your ingredients and give this recipe a try—you won’t be disappointed! Whether for a gathering or just a sweet indulgence, these truffles are sure to become a favorite in your home.

Oreo Truffles
Equipment
- Baking Sheet
- Food Processor
- Mixing Bowl
- Whisk
Ingredients
- 39 pieces Oreos plus filling (one 14.3 oz pkg.)
- 18 oz Cream Cheese very soft
- 16 oz White Almond Bark or chocolate almond bark
- 2 tablespoons Vegetable Shortening
- 6 oz Almond Bark optional for drizzling
Instructions
- Line a baking sheet with parchment paper or a nonstick silicone mat; set aside.
- Pulse Oreos in a food processor into fine crumbs. Reserve 2 tablespoons crumbs for topping.
- Add softened cream cheese and pulse until well combined into a sticky dough.
- Use a 1 tablespoon cookie scoop or tablespoon to scoop mixture and roll into balls. Place balls on prepared baking sheet so they aren’t touching.
- Freeze Oreo balls for at least 30 minutes or until ready to dip.
- Meanwhile, line a second baking sheet with parchment paper or a nonstick mat.
- Melt almond bark or candy melts according to package directions until smooth. Whisk in the shortening until smooth.
- Remove only a few truffles from the freezer at a time so they stay firm; otherwise, they will soften and melt in the chocolate.
- Dip the bottom of one ball in the chocolate then balance it on the end of a butter knife or fork and use a spoon to pour some chocolate over the top until fully covered.
- Let the excess chocolate run off then use a toothpick to gently slide the truffle onto the parchment paper.
- If not drizzling with chocolate: immediately sprinkle the top with crushed Oreos, crushed candy canes, etc. because the chocolate sets very quickly.
- If you want to drizzle the tops with contrasting chocolate, then let the chocolate set first, then drizzle, then add the Oreos.
- To drizzle: once the truffles are set (about 10 minutes), melt the chocolate in a small microwave-safe bowl or melt according to package directions.
- You can either dip a fork into the melted chocolate and drizzle it over the Oreo balls or let the chocolate cool slightly, then transfer it to a plastic bag, snip the corner, and drizzle over the truffles.
- Place the truffles in the refrigerator for at least 30 minutes before serving.
- If not serving immediately, cover the truffles once set or store in a tightly sealed container with parchment paper in between any rows for up to 2 weeks.
Notes
- Peppermint Oreo Truffles: Pulse Oreos into fine crumbs then add the softened cream cheese and ¾ teaspoon peppermint extract; pulse until smooth. Dip in white chocolate and/or chocolate and top with about 3 crushed candy canes.
- Mix up the chocolate: Use all chocolate, all white chocolate or half and half. You can also use other candy melt flavors such as birthday cake, salted caramel, and pumpkin spice.
- Color the chocolate: Transform the white melted chocolate into any color with just a few drops of oil-based food coloring.
- Use different types of Oreos: Any Oreo will work as long as it is not thin or double stuffed. Choose from Peanut Butter, Golden, Birthday Cake, etc.
- Different chocolate drizzles: Mix up the flavor profile by using a combination of chocolate and white chocolate.
- More topping ideas: Top the Oreo Truffles with shredded coconut, chopped nuts, or colorful sprinkles.
- To serve: They’re best served chilled straight from the refrigerator.
- To freeze: Line the Oreo Balls on a baking sheet and flash freeze for 30 minutes.