Orange Bars
I’ve always had a special place in my heart for Orange Bars. They remind me of sunny afternoons spent with family, laughter echoing through the kitchen as we baked together. The aroma of fresh oranges filling the air instantly transports me back to those cherished moments. It’s incredible how a simple dessert can evoke such warm memories. Imagine slicing into a perfectly baked bar, the zesty filling bursting with flavor, and the buttery crust crumbling just right. Each bite of these Orange Bars is like a little slice of happiness that brings a smile to everyone’s face.
Recipe Snapshot
1 hr 40 mins
40 mins
60 mins
Medium
220 kcal
3 g
Gluten-Free, Low FODMAP
10 g
Mixing Bowl, Frying Pan, Whisk, Blender, Baking Sheet, Oven
The Beauty of This Orange Bars
A Zesty Refreshment
What truly sets Orange Bars apart is the refreshing burst of citrus flavor. The combination of fresh orange juice and zest creates a vibrant filling that dances on your taste buds. It’s a delightful experience that can brighten up any day.
Perfectly Balanced Sweetness
These bars strike an ideal balance between sweet and tangy. The layers of sweet sugar and tart citrus harmonize beautifully, making them a treat you’ll crave again and again. It’s a dessert that satisfies without being overly indulgent.
Versatile for Any Occasion
Whether it’s a casual family gathering, a picnic in the park, or even a festive celebration, Orange Bars fit the bill. They are easy to transport and serve, making them a fantastic choice for any event.
A Simple Yet Impressive Dessert
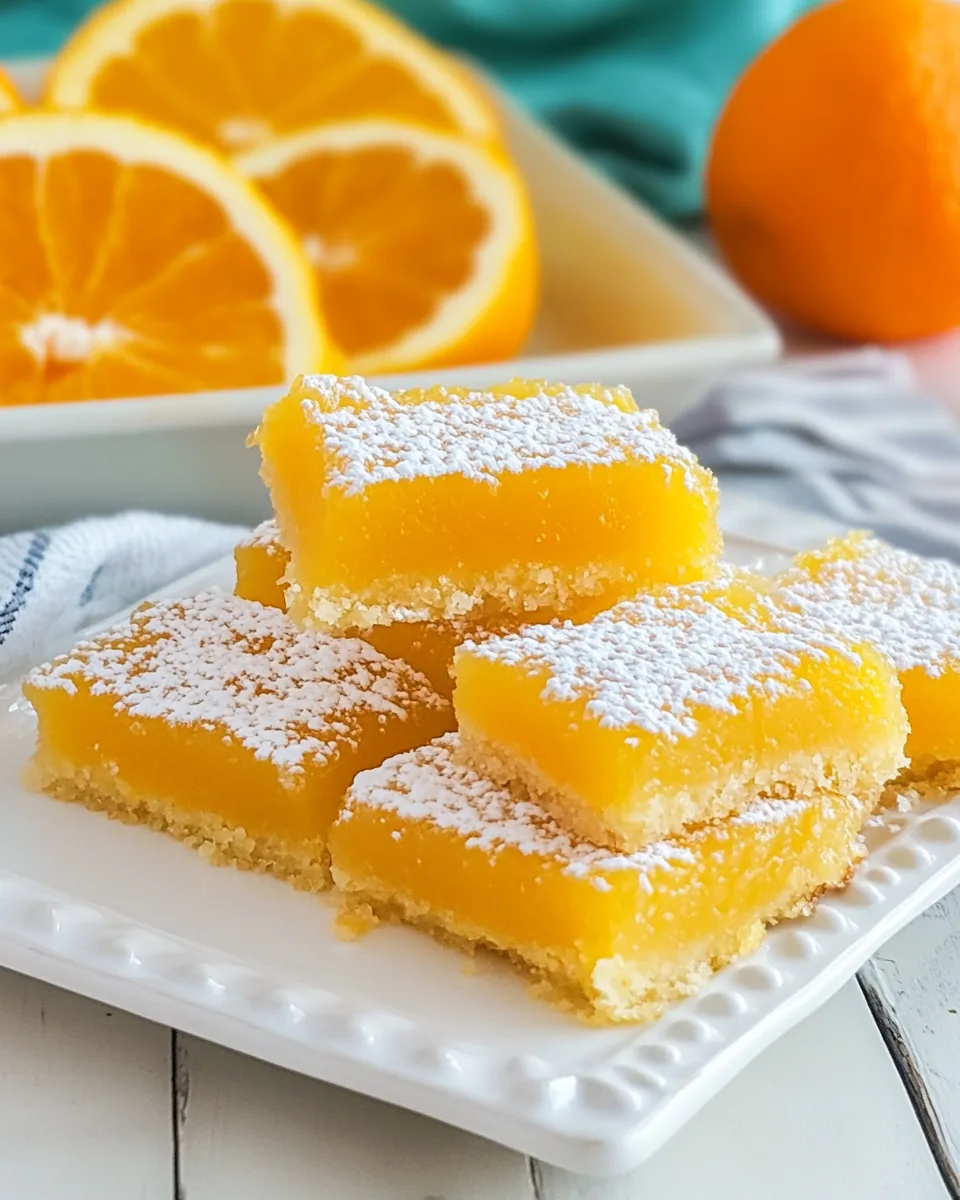
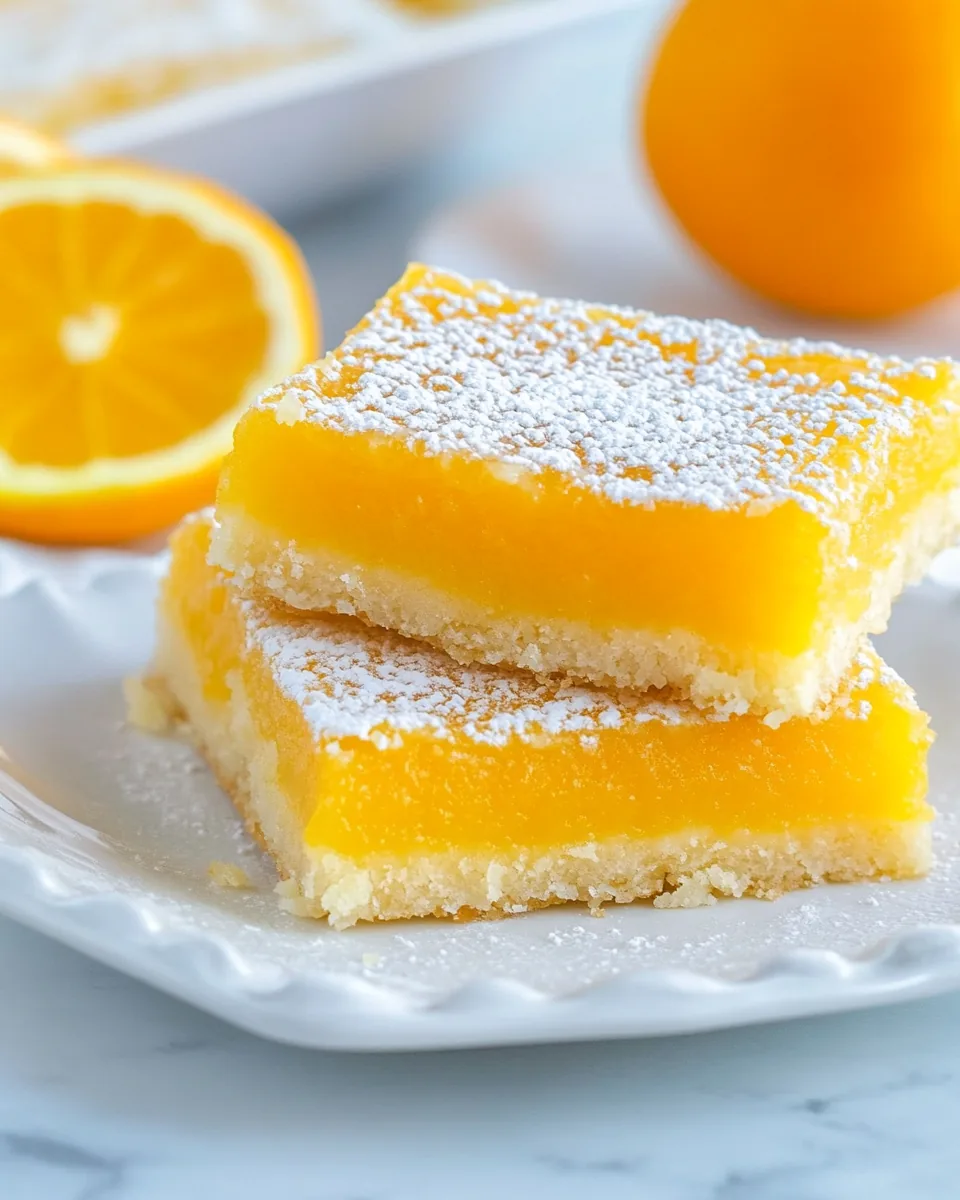
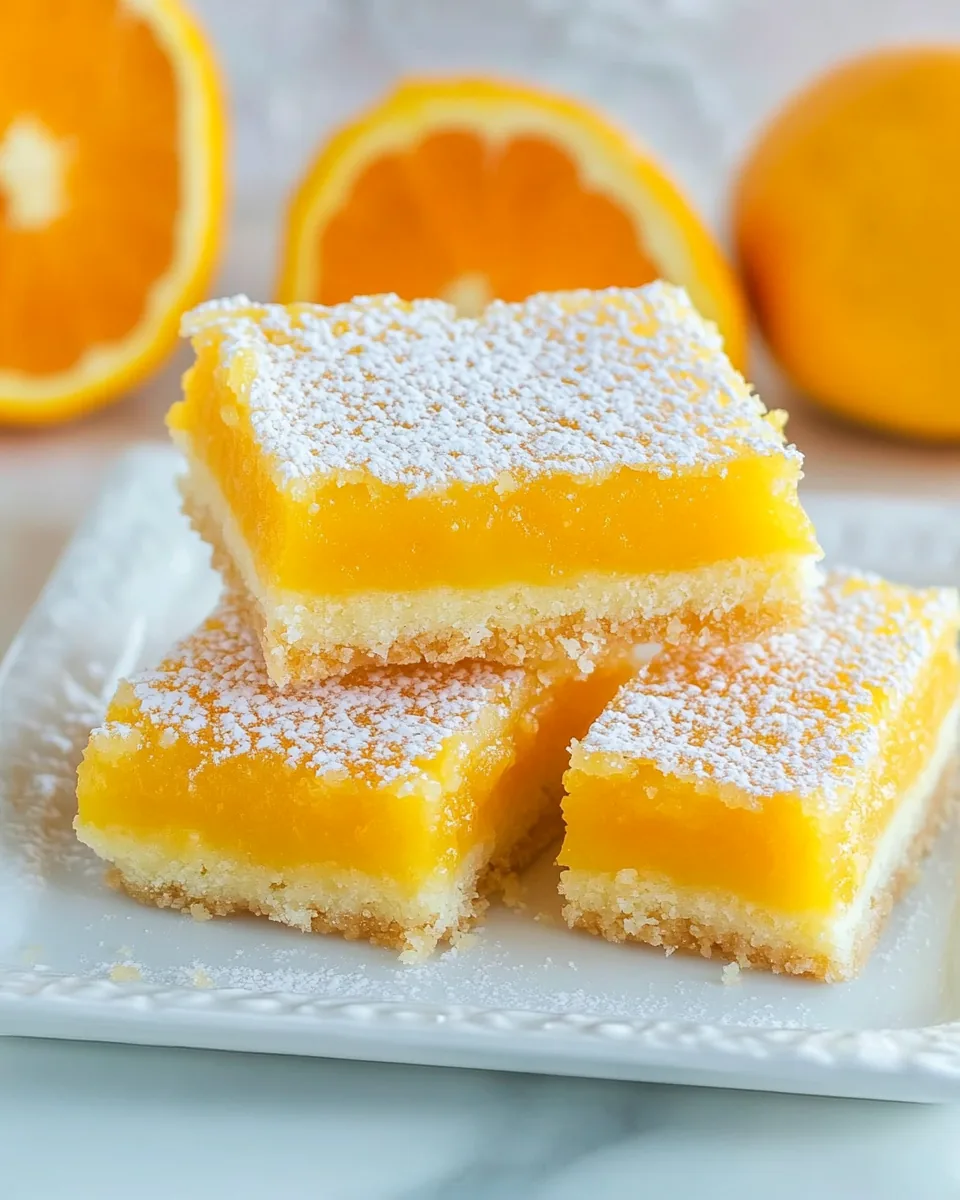
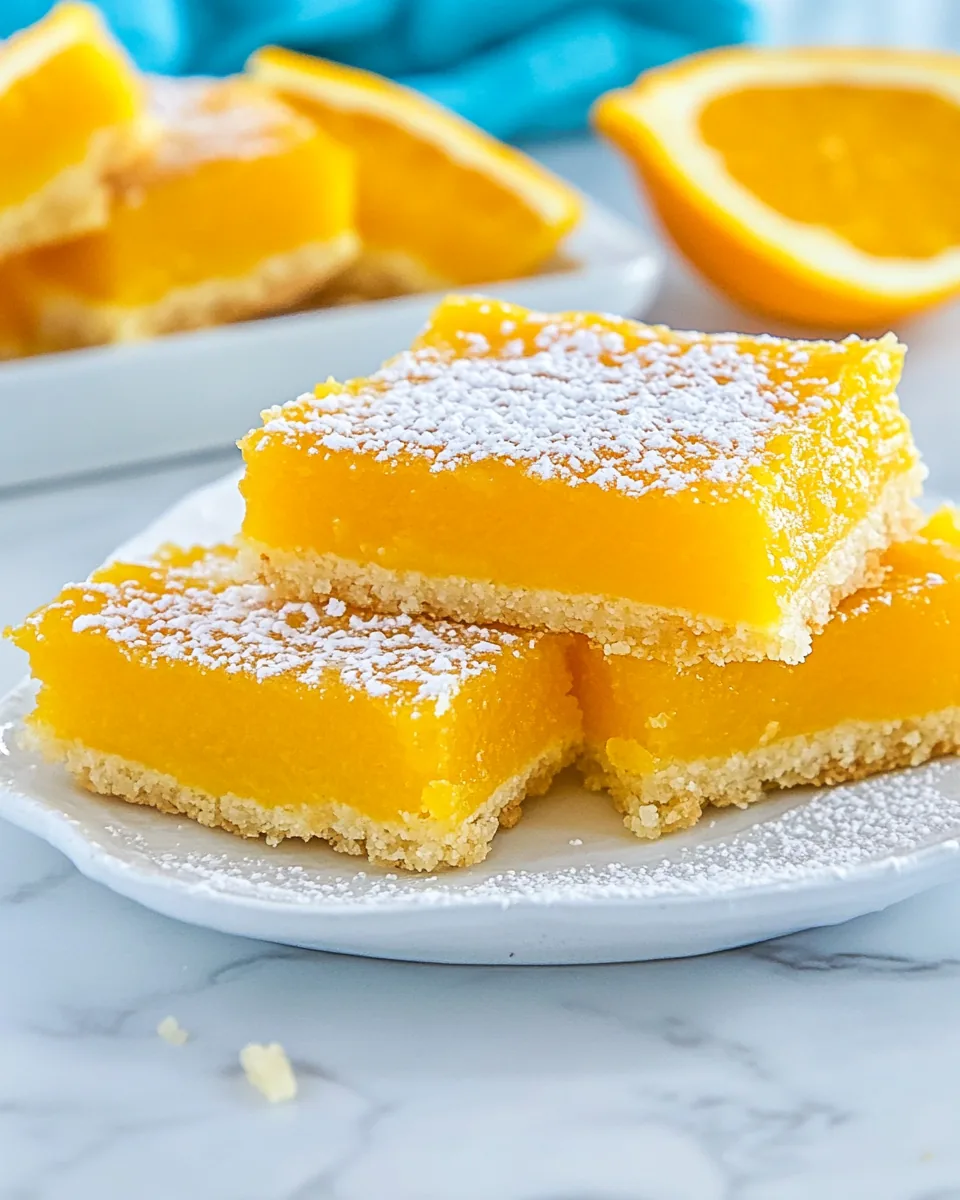
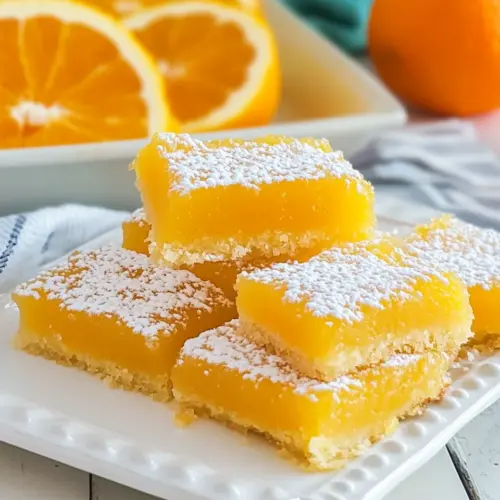
Don’t be fooled by their simplicity; these bars look stunning on a dessert table. A dusting of powdered sugar adds a touch of elegance, and the vibrant orange color makes them visually appealing. Your guests will be impressed!
Family-Friendly Fun
Baking can be a fun family activity, and Orange Bars are the perfect recipe to involve everyone. Children love squeezing the oranges and mixing the ingredients. It’s a great way to create lasting memories together.
Everything You Need for Orange Bars
To create the perfect Orange Bars, you’ll need a selection of straightforward but essential ingredients. Each plays a vital role in crafting that signature flavor and texture. The vibrant orange juice and zest deliver the zesty kick, while the buttery crust provides a delicious base that holds everything together.
- Unsalted Butter (1 cup): This luxury ingredient adds richness and flavor, ensuring a tender and crumbly crust.
- All-Purpose Flour (2 cups): The backbone of the crust, it gives structure and balance to the bars.
- Granulated Sugar (½ cup): Sweetens the crust and helps create a golden texture when baked.
- Salt (¼ teaspoon): A pinch enhances the flavors, balancing the sweetness perfectly.
- Fresh Squeezed Orange Juice (½ cup): Fresh juice infuses the bars with vibrant citrus flavor, making them refreshing.
- Zest of 1 Orange: Adds an extra layer of orange intensity that brightens the filling.
- Orange Extract (1 teaspoon): A little goes a long way in amplifying the orange flavor.
- Granulated Sugar (1 ½ cups): This is for the filling, ensuring it’s sweet and delightful.
- All-Purpose Flour (¼ cup): A small amount stabilizes the filling.
- Baking Powder (½ teaspoon): Helps the filling rise slightly, creating a lovely texture.
- Large Eggs (4): They bind the filling and add richness.
- Powdered Sugar: For topping, it adds a sweet finish, making the bars visually appealing.
Orange Bars Instructions
Making Orange Bars is a delightful process that allows you to engage with each step. Follow along as I guide you through the simple yet satisfying journey of baking these bars.
- Preheat your oven to 350F (175C) to ensure it’s hot and ready for the crust. While it’s heating, line a 9×13” baking pan with foil or parchment paper and spray it lightly with nonstick cooking spray to prevent sticking.
- In a large mixing bowl, beat together unsalted butter until creamy. Use a hand or stand mixer for this; if you’re using a hand mixer, be prepared for a bit of a workout. The butter should be light and fluffy before you proceed.
- Add the all-purpose flour, granulated sugar, and salt to the butter. Continue beating until a soft dough forms. You want everything well combined, so take your time here.
- Once the dough is ready, press it firmly into the bottom of your prepared pan to create an even crust. It should cover the entire base without any gaps. Bake this crust for 18 minutes until it’s golden and set.
- While the crust is baking, it’s time to prepare the filling. In a blender, combine the fresh squeezed orange juice, zest of 1 orange, orange extract, granulated sugar, all-purpose flour, baking powder, and large eggs.
- Blend the filling ingredients until smooth. Depending on your blender, this may take only a few seconds up to a minute. Ensure there are no lumps, as a silky texture is what we’re after.
- When the crust is done, carefully pour the filling over it, spreading it evenly. Return the pan to the oven and bake for an additional 20 to 23 minutes. You’ll know it’s done when the top is no longer jiggly.
- Once baked, remove from the oven and let the bars cool completely in the pan on a wire rack. This cooling step is crucial for the bars to set properly.
- After they have cooled, dust the top generously with powdered sugar. Then, slice them into bars. The presentation will impress everyone!
Things Worth Knowing
- Important Baking Tip: Make sure your crust is compacted firmly. Any holes can lead to leakage during baking, which might ruin the bars.
- Fresh Juice is Key: Don’t strain the fresh squeezed juice; the pulp adds flavor and texture to the filling.
- Using Zest: For the zest, aim for at least 1 tablespoon. The more zest you use, the more vibrant the flavor.
- Check for Doneness: When baking, the top should not jiggle. Keep an eye on the color; it should be a light golden.
Customization Ideas
These Orange Bars are not only delicious but also versatile! Here are some ways to customize your dessert.
- Storage: Store leftover bars in an airtight container at room temperature for up to three days. If you want to keep them longer, refrigerate them, where they should last for about a week.
- Freezing: You can freeze them, too! Wrap them tightly in plastic wrap, then foil, and store in the freezer for up to three months.
- Variations: Consider adding a layer of cream cheese frosting on top for a richer flavor. This can elevate the dessert and make it even more decadent.
- Fruit Additions: If you’re a fan of berries, try adding blueberries or raspberries to the filling for a fruity twist!
- Serving Style: For a fun twist, serve them with a scoop of vanilla ice cream or a dollop of whipped cream to complement the citrus.
What to Serve Alongside Orange Bars
When it comes to serving Orange Bars, the options are endless. Here are some delightful pairings to consider:
- Light Breakfast: Start your day with a bar alongside your morning coffee or tea. The citrus flavor is refreshing and pairs beautifully with a warm beverage.
- Perfect for Picnics: These bars travel well, making them an ideal choice for picnics or potlucks. Just cut them into squares and pack them up!
- After Dinner Treat: Serve them as a light dessert after dinner. The zesty flavor is a perfect finale to a hearty meal.
- Celebration Dessert: They’re fantastic for birthday parties or gatherings! Just make sure to have plenty on hand since they’ll go fast!
- Seasonal Appeal: Perfect for summer gatherings, their bright flavors fit right in with warm weather festivities.
FAQ
Conclusion
These Orange Bars are a delightful blend of sweetness and citrus that captures the essence of sunshine in every bite. They’re not just a dessert but a way to create fond memories with loved ones. I encourage you to try making these bars yourself; you’ll find that they’re not only simple to prepare but utterly enjoyable. Get ready to impress your family and friends with this refreshing treat!
Orange Bars
Equipment
- Mixing Bowl
- Frying Pan
- Whisk
- Blender
- Baking Sheet
- Oven
Ingredients
- 1 cup Unsalted Butter
- 2 cups All-Purpose Flour
- ½ cup Granulated Sugar
- ¼ teaspoon Salt
- ½ cup Fresh Squeezed Orange Juice
- Zest of 1 Orange
- 1 teaspoon Orange Extract
- 1½ cups Granulated Sugar
- ¼ cup All-Purpose Flour
- ½ teaspoon Baking Powder
- 4 large Eggs
- Powdered Sugar for topping
Instructions
- Preheat your oven to 350F (175C) to ensure it’s hot and ready for the crust. While it’s heating, line a 9×13” baking pan with foil or parchment paper and spray it lightly with nonstick cooking spray to prevent sticking.
- In a large mixing bowl, beat together unsalted butter until creamy. Use a hand or stand mixer for this; if you’re using a hand mixer, be prepared for a bit of a workout. The butter should be light and fluffy before you proceed.
- Add the all-purpose flour, granulated sugar, and salt to the butter. Continue beating until a soft dough forms. You want everything well combined, so take your time here.
- Once the dough is ready, press it firmly into the bottom of your prepared pan to create an even crust. It should cover the entire base without any gaps. Bake this crust for 18 minutes until it’s golden and set.
- While the crust is baking, it’s time to prepare the filling. In a blender, combine the fresh squeezed orange juice, zest of 1 orange, orange extract, granulated sugar, all-purpose flour, baking powder, and large eggs.
- Blend the filling ingredients until smooth. Depending on your blender, this may take only a few seconds up to a minute. Ensure there are no lumps, as a silky texture is what we’re after.
- When the crust is done, carefully pour the filling over it, spreading it evenly. Return the pan to the oven and bake for an additional 20 to 23 minutes. You’ll know it’s done when the top is no longer jiggly.
- Once baked, remove from the oven and let the bars cool completely in the pan on a wire rack. This cooling step is crucial for the bars to set properly.
- After they have cooled, dust the top generously with powdered sugar. Then, slice them into bars. The presentation will impress everyone!