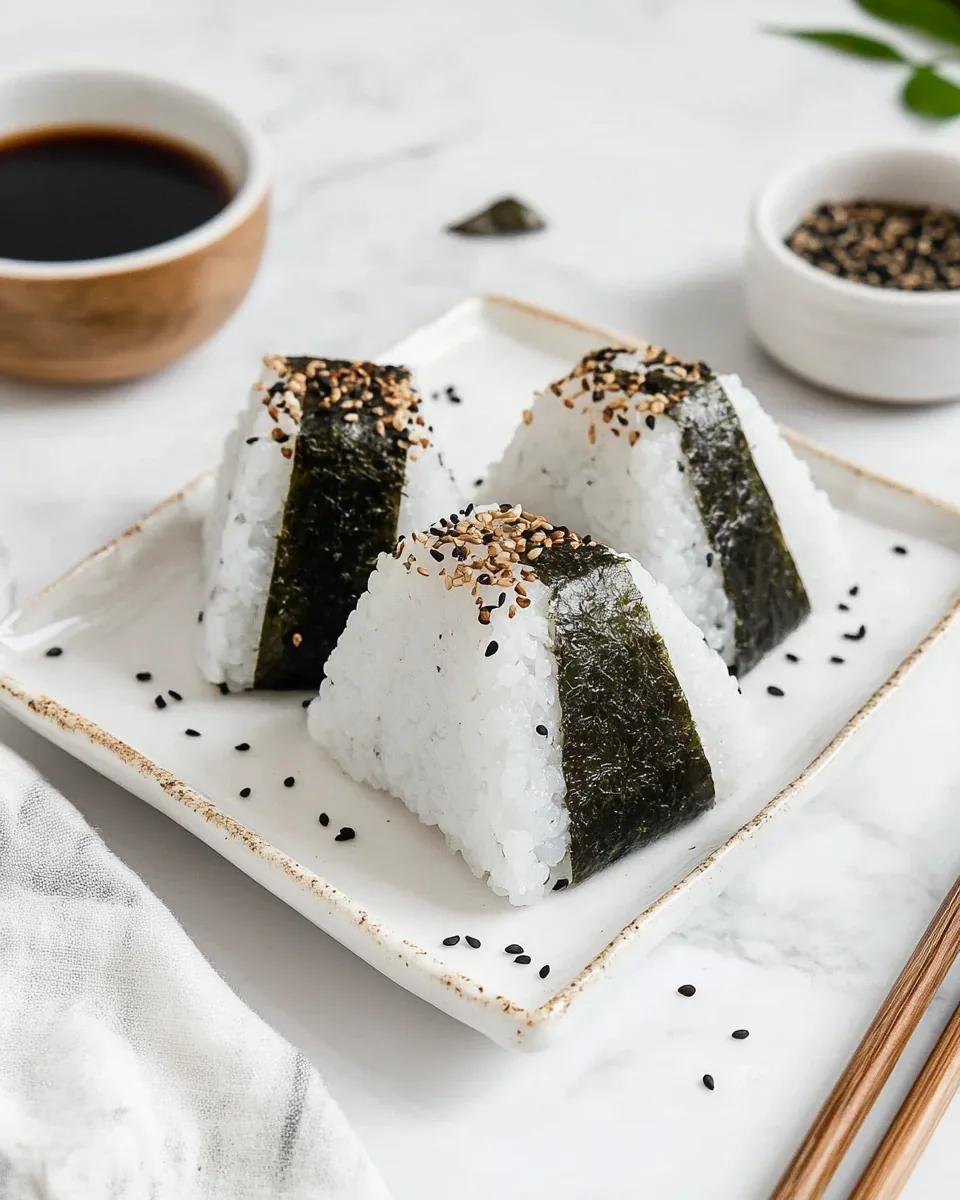
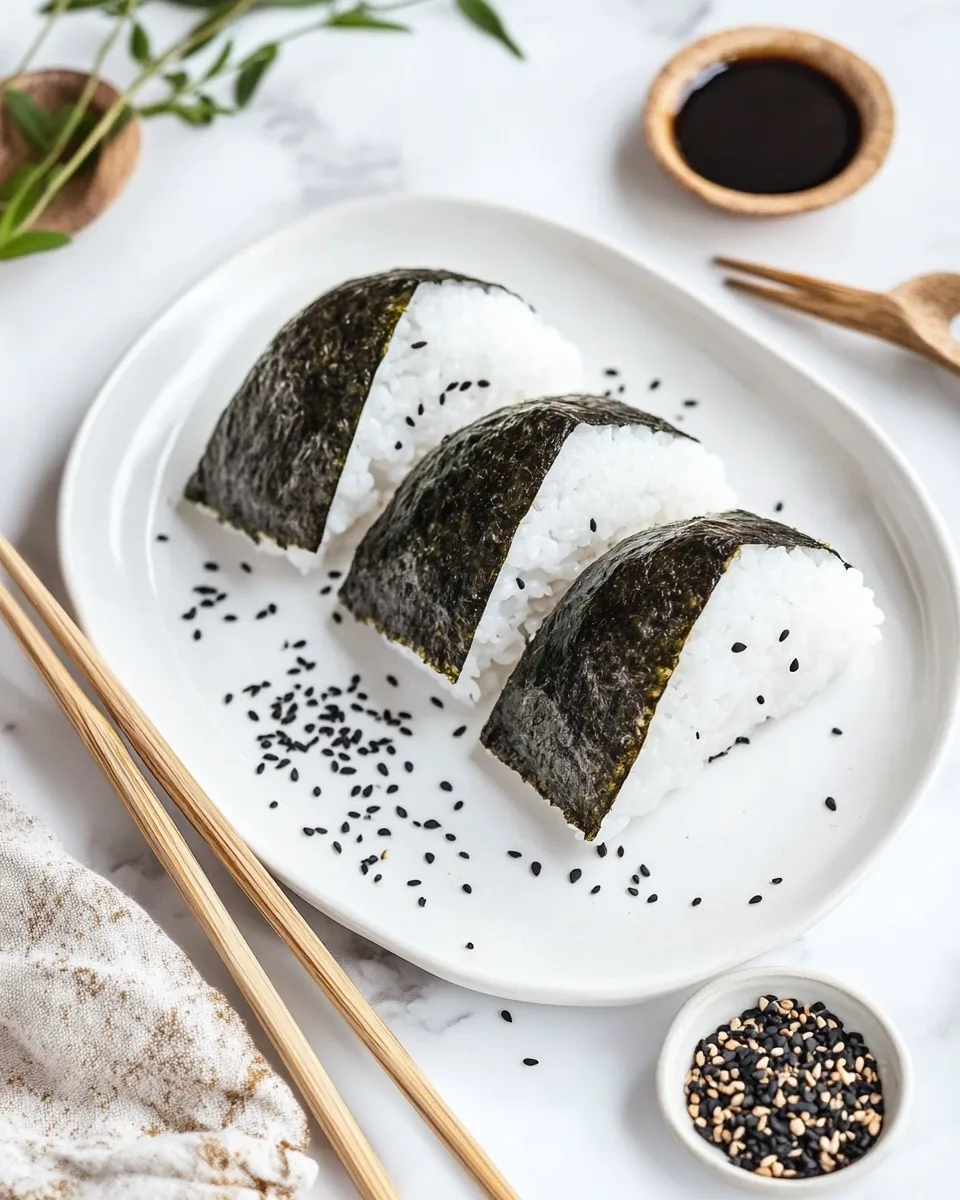
Onigiri Recipe
Whenever I think of comfort food, I can’t help but reminisce about the times I enjoyed making Onigiri Recipe in my kitchen. This delightful Japanese rice ball has always held a special place in my heart, not just because of its delicious taste but also due to the memories tied to it. I remember sitting around the table with family, each of us crafting our own unique rice ball, filling it with our favorite ingredients and wrapping it with nori. The excitement in the air was palpable as we shared tips on how to shape the perfect triangle and which fillings to choose. Onigiri Recipe isn’t just food; it represents love, creativity, and a bit of culinary magic.
As I got older, I began to appreciate the balance of flavors and textures in Onigiri Recipe. Each bite is a harmonious blend of seasoned rice, savory fillings, and the delicate crunch of nori. It’s versatile too, allowing for endless combinations of fillings, from savory tuna to spicy vegetables. What’s more, it’s a dish that can be enjoyed warm or cold, making it perfect for lunch boxes or picnics. I also love how easy it is to prepare. With just a few ingredients and some love, you can create a satisfying meal that feels both special and comforting.
Whether you’re hosting a gathering, preparing a simple dinner, or just craving a comforting snack, Onigiri Recipe is sure to impress. So, roll up your sleeves and get ready to dive into this beautiful and delicious world of rice balls!
Recipe Snapshot
20 mins
20 mins
0 mins
Medium
250 kcal
10 g
Vegan, Gluten-Free, Low FODMAP
8 g
Mixing Bowl
What Makes This Onigiri Recipe Special
It’s a Labor of Love
There’s something incredibly fulfilling about making Onigiri Recipe. The simple act of shaping the rice balls by hand connects you with the food in a way that not many recipes do. Each rice ball becomes a unique creation, reflecting your personal touch.
Versatility in Every Bite
One of the best parts about Onigiri Recipe is its versatility. You can fill them with a variety of ingredients, from savory to sweet, ensuring there’s something for everyone. Whether you prefer classic tuna or want to explore other fillings, the possibilities are endless!
A Perfect Grab-and-Go Meal
With our busy lifestyles, having a portable meal option is a blessing. Onigiri Recipe is perfect for picnics, school lunches, or a quick snack at work. It’s easy to wrap and take on the go, making it an ideal food for any occasion.
Cultural Connection
Preparing Onigiri Recipe allows you to connect with Japanese culture. This traditional dish has been enjoyed for centuries and serves as comfort food for many. By making it at home, you are not just cooking; you’re embracing a rich culinary history.
Health Benefits
Rice is a staple in many diets, and when paired with healthy fillings like vegetables and fish, Onigiri Recipe can be a nutritious meal. It’s a great source of carbohydrates, protein, and essential vitamins.
Fun for Everyone
Making Onigiri Recipe is a fun activity for families. Kids love getting involved in the kitchen, and shaping rice balls is a great way to teach them about cooking and healthy eating. It becomes a bonding experience filled with laughter and creativity.
Ingredient List for Onigiri Recipe
When it comes to making Onigiri Recipe, the ingredients play a vital role in crafting the perfect rice ball. The combination of textures and flavors creates a satisfying bite that is simply irresistible. The key players here are the rice, which serves as the foundation, and the various fillings that add personality to each ball. Let’s explore the essential ingredients that come together to make this delightful dish.
- Tuna: 1 can (5 ounces), drained – A classic filling that’s packed with flavor and protein, making it a popular choice for Onigiri Recipe.
- Mayonnaise: 2 tablespoons – Adds creaminess to the tuna filling, enhancing its taste and texture.
- Soy Sauce: 3/4 teaspoon – A touch of umami that elevates the flavor profile of the filling.
- Kosher Salt: for seasoning your hands – This is used to help shape the rice and enhance its flavor.
- Short-Grain Sushi Rice: 3 cups, cooked – The star of the dish, this rice is sticky and perfect for forming into shapes.
- Furikake: for sprinkling (optional) – A Japanese seasoning that adds a burst of flavor, making the rice even more delicious.
- Nori Sheets: 3, cut into strips (optional) – The perfect wrap for your Onigiri Recipe, adding flavor and a crunchy texture.
Cooking Instructions for Onigiri Recipe
Making Onigiri Recipe is a straightforward yet rewarding process. You’ll be surprised at how easy it is to create this delicious dish in your own kitchen. Let’s get started with these simple steps that will guide you through the process.
- In a small bowl, mix the drained tuna with mayonnaise and soy sauce until well combined. The mixture should be creamy and evenly blended, with all ingredients nicely incorporated.
- Wet your hands with water to prevent the rice from sticking. Sprinkle a pinch of Kosher salt on your hands. This step is crucial to ensure that the rice balls hold together well and have a bit of seasoning.
- Scoop about 1/2 cup of cooked short-grain sushi rice and gently form a small well in its center. The rice should be warm but manageable. Press it down slightly for stability.
- Place 1 to 2 teaspoons of the tuna mayo filling into the well you created. Be careful not to overfill; you want to ensure the rice can properly encase the filling.
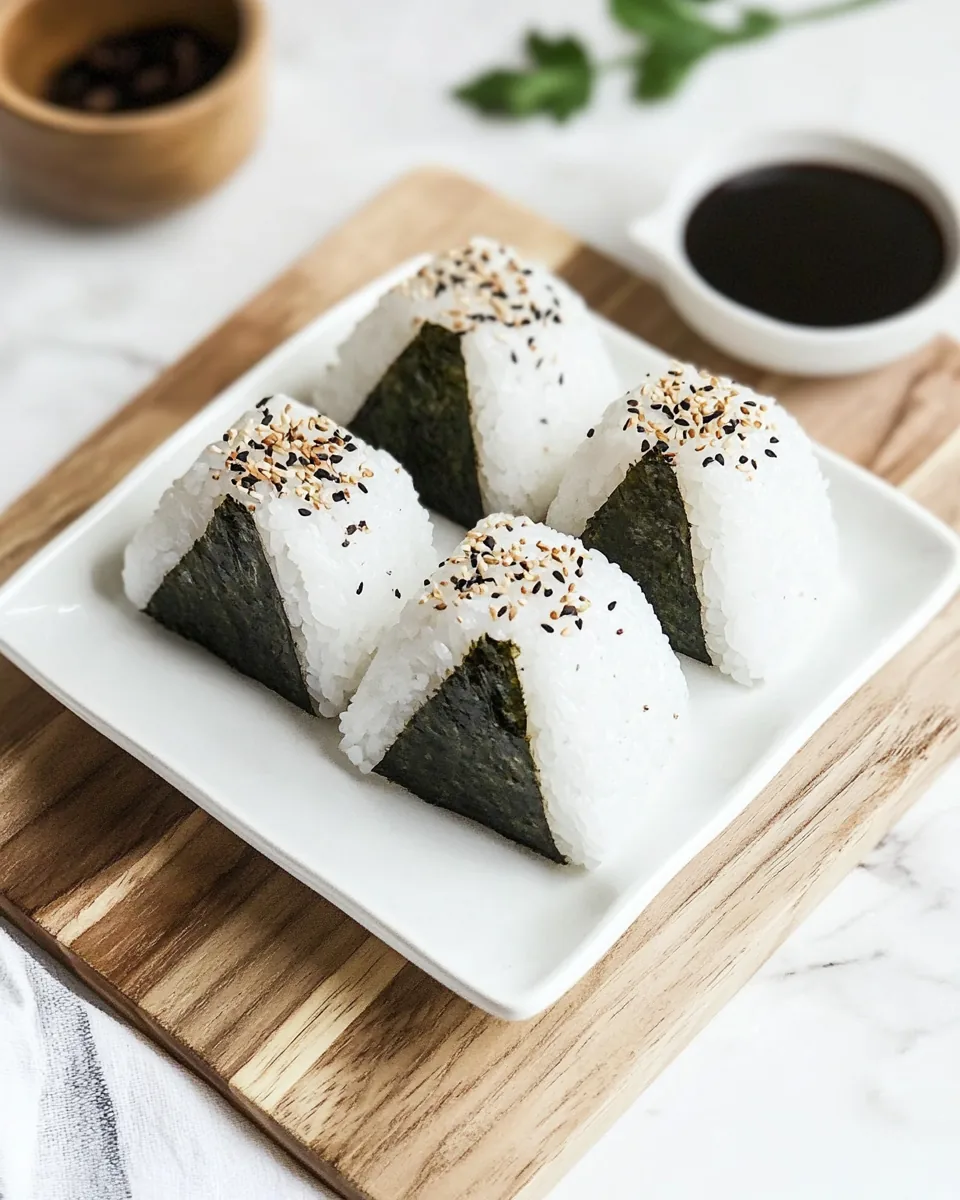
- Cover the filling with a bit more rice and gently press to form a triangular shape. You can use your fingers to mold the rice into a triangle, ensuring it holds its shape.
- Repeat the steps above until all the rice is used. You can make as many or as few Onigiri as you want, depending on your appetite!
- For an extra touch, sprinkle some furikake on top of your rice balls if you like. This will add a delightful crunch and flavor.
- Wrap a strip of nori seaweed around part of the Onigiri, or serve the nori on the side. This enhances the flavor and provides a nice texture contrast.
- Enjoy your Onigiri Recipe warm or at room temperature. They make a great snack or meal option, whether you’re at home or on the go!
Things Worth Knowing
- Rinse the Rice: Always rinse your sushi rice thoroughly before cooking. This removes excess starch, making it less sticky and more manageable.
- Use Warm Rice: It’s best to shape the Onigiri while the rice is still warm. This helps it mold better and stick together.
- Experiment with Fillings: Feel free to get creative with your fillings! Try using avocado, pickled vegetables, or even grilled seafood.
- Store Properly: If you’re not eating them right away, wrap your Onigiri in plastic wrap to keep them fresh and maintain their shape.
Helpful Notes about Onigiri Recipe
Making Onigiri Recipe is fun, and having some notes on hand can enhance your experience. Here are some valuable tips to ensure your rice balls turn out perfect every time.
- Storage: To store leftovers, wrap them tightly in plastic wrap and keep them in the refrigerator. They are best eaten within two days.
- Freezing: You can freeze Onigiri for later eating. Just wrap them individually in plastic wrap and place them in a freezer-safe bag. Thaw them overnight in the fridge before eating.
- Pairing: Onigiri Recipe pairs beautifully with miso soup or a fresh salad for a complete meal.
- Customizing: Don’t hesitate to customize your Onigiri with different sauces or toppings, like sesame seeds or spicy mayo.
- Serving Temperature: Onigiri can be enjoyed warm or at room temperature, making them versatile for any occasion.
What Goes Well With This Onigiri Recipe
When it comes to serving Onigiri Recipe, the options are plentiful! Here are some wonderful pairings and serving ideas that will elevate your meal:
- Miso Soup: A warm bowl of miso soup complements the flavors of Onigiri perfectly. The soup’s umami flavor balances the rice balls beautifully.
- Pickled Vegetables: Serve alongside pickled vegetables for a burst of acidity that cuts through the richness of the filling.
- Salad: A fresh green salad adds a crunchy texture and vibrant colors to your plate, making it a delightful meal.
- Tea: Pair your Onigiri with a refreshing cup of green tea to cleanse the palate and enhance the experience.
- Lunch Boxes: Onigiri is perfect for lunch boxes! They hold well and can be enjoyed as a fun, hand-held meal during school or work.
- Seasonal Fruits: Including seasonal fruit as a side adds sweetness and balance, making it a well-rounded meal.
FAQ
Conclusion
Onigiri Recipe is not just a meal; it’s an experience filled with creativity and comfort. The combination of flavors and textures makes it a dish that anyone can love, while the fun of making it adds to its charm. I encourage you to try your hand at making these delightful rice balls. You’ll not only enjoy a delicious snack but also create wonderful memories in your kitchen!
Onigiri Recipe
Equipment
- Mixing Bowl
Ingredients
- 1 can (5 ounces) Tuna drained
- 2 tablespoons Mayonnaise
- 3/4 teaspoon Soy Sauce
- pinch Kosher Salt for seasoning your hands
- 3 cups Short-Grain Sushi Rice cooked
- to taste Furikake for sprinkling (optional)
- 3 sheets Nori cut into strips (optional)
Instructions
- In a small bowl, mix the drained tuna with mayonnaise and soy sauce until well combined. The mixture should be creamy and evenly blended, with all ingredients nicely incorporated.
- Wet your hands with water to prevent the rice from sticking. Sprinkle a pinch of Kosher salt on your hands. This step is crucial to ensure that the rice balls hold together well and have a bit of seasoning.
- Scoop about 1/2 cup of cooked short-grain sushi rice and gently form a small well in its center. The rice should be warm but manageable. Press it down slightly for stability.
- Place 1 to 2 teaspoons of the tuna mayo filling into the well you created. Be careful not to overfill; you want to ensure the rice can properly encase the filling.
- Cover the filling with a bit more rice and gently press to form a triangular shape. You can use your fingers to mold the rice into a triangle, ensuring it holds its shape.
- Repeat the steps above until all the rice is used. You can make as many or as few Onigiri as you want, depending on your appetite!
- For an extra touch, sprinkle some furikake on top of your rice balls if you like. This will add a delightful crunch and flavor.
- Wrap a strip of nori seaweed around part of the Onigiri, or serve the nori on the side. This enhances the flavor and provides a nice texture contrast.
- Enjoy your Onigiri Recipe warm or at room temperature. They make a great snack or meal option, whether you're at home or on the go!