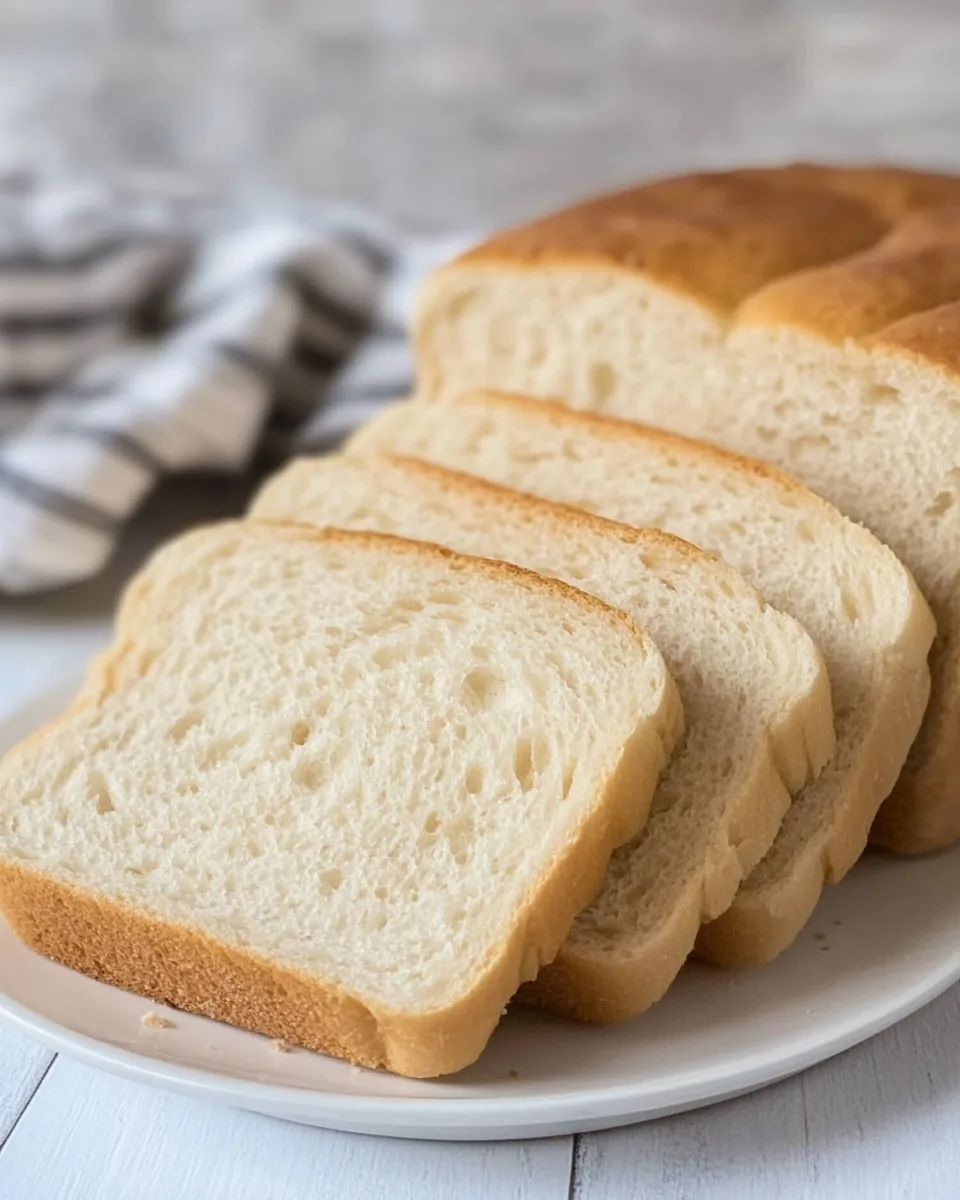
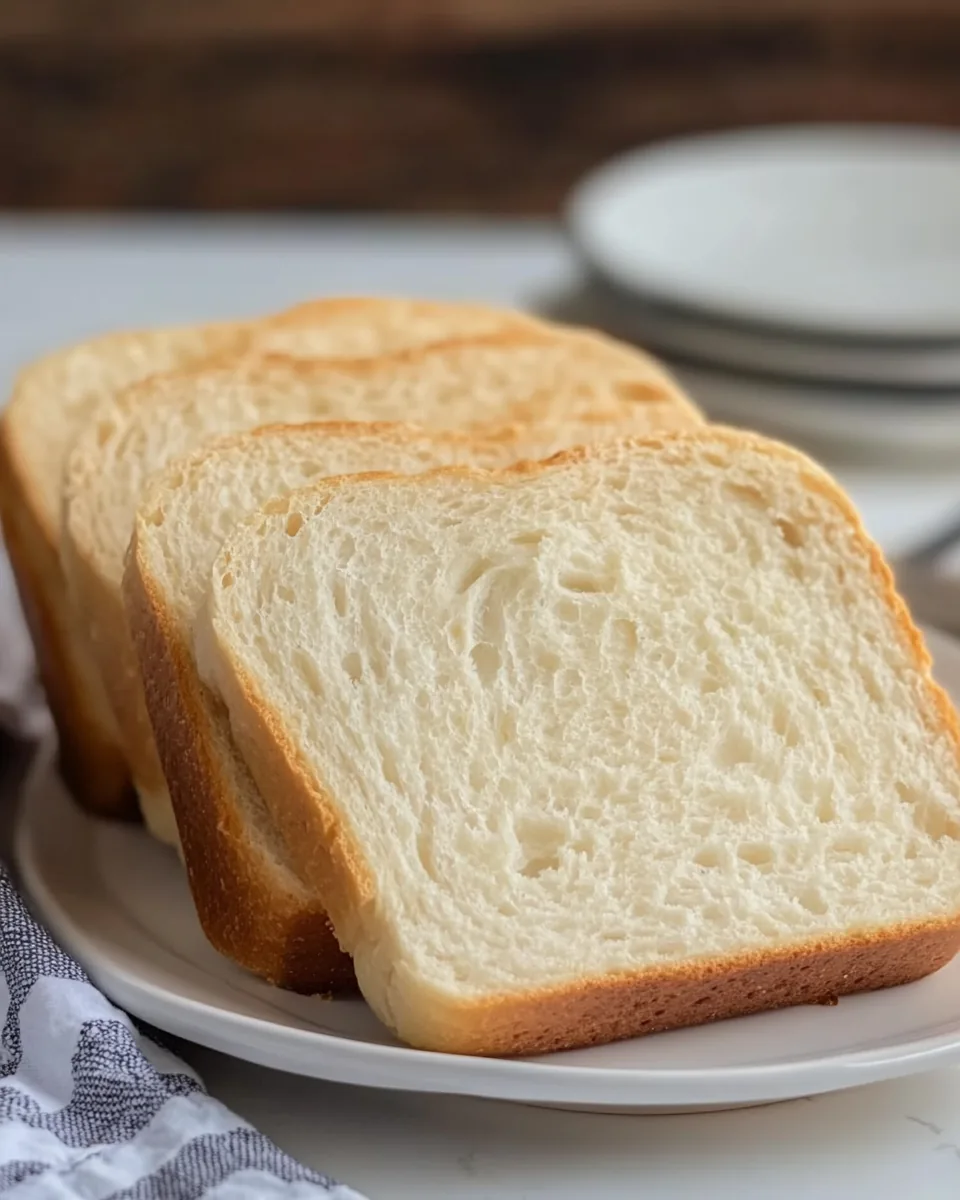
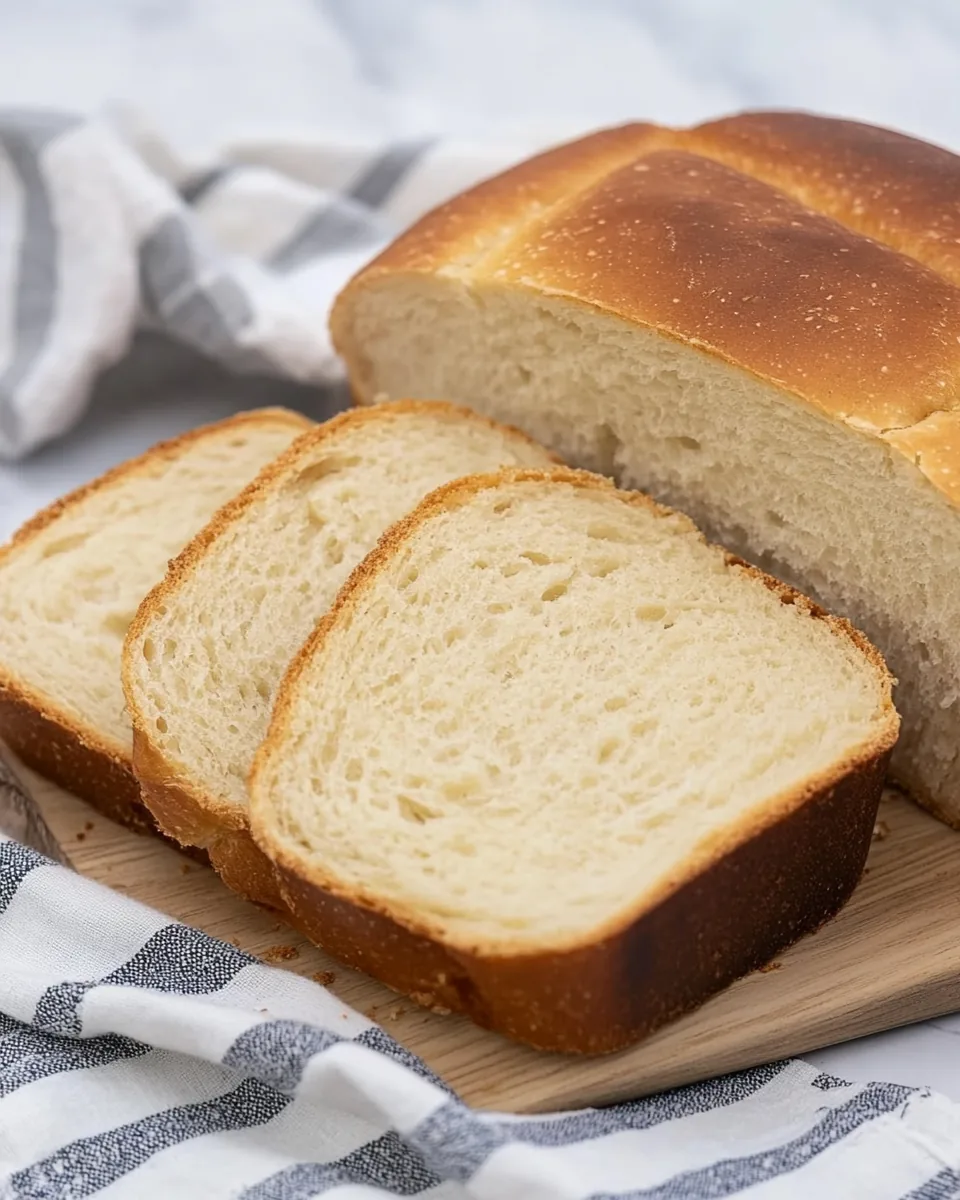
Homemade White Bread
There’s just something incredibly comforting about a loaf of freshly baked bread, especially when it’s Homemade White Bread. As a child, I remember the aroma wafting through the house as my mother baked our weekly bread. It was a ritual, a warm hug that greeted us at the door after school. The anticipation of slicing into that golden crust, revealing the soft, fluffy interior was always a highlight of my day. Nothing beats the satisfaction of creating something so simple yet so profoundly fulfilling. As I grew older, I realized that baking bread is not just about the end product; it’s about the journey of mixing, kneading, and patiently waiting for the dough to rise. This Homemade White Bread recipe is not just a way to fill your stomach—it’s a delicious experience that brings people together. Whether you’re enjoying it toasted for breakfast or as a sandwich for lunch, each slice holds a little piece of love and care. So, roll up your sleeves, let’s dive into this delightful baking adventure together!
Recipe Snapshot
1 hr 15 mins
40 mins
35 mins
Medium
120 kcal
3 g
Gluten-Free, Low FODMAP
2 g
Wooden Spoon, Mixing Bowl, Frying Pan, Chef’s Knife, Whisk, Baking Sheet, Oven
Why I Love This Recipe
Why You Need This Homemade White Bread
1. It’s Therapeutic
Baking bread is a beautiful activity that not only nourishes your body but also your soul. The act of kneading dough can be incredibly therapeutic. It allows you to release stress, and as you knead, you can feel the dough transform under your hands. It’s a quiet moment where you can reflect and focus on the simple pleasure of creating something from scratch.
2. Freshness You Can’t Beat
Nothing compares to the taste of bread fresh out of the oven. When you make Homemade White Bread, you have complete control over the ingredients, ensuring that everything is fresh and wholesome. The crust, warm and golden; the inside, soft and pillowy—it’s a taste experience you can’t get from store-bought alternatives.
3. Customizable to Your Liking
This recipe serves as a fantastic base. You can easily customize it by adding herbs, seeds, or even cheese, depending on your preference. Want a hint of garlic flavor? Toss in some roasted garlic. Craving something a bit sweeter? Add a dash of cinnamon or some dried fruits. Your imagination is the only limit!
4. Perfect for Any Occasion
Whether you’re hosting a dinner party or just want something comforting to enjoy at home, this Homemade White Bread fits the bill. It’s versatile enough to serve alongside soups, stews, or salads, or simply enjoy with some butter or jam. It can elevate any meal.
5. A Great Skill to Learn
Making bread is a fundamental cooking skill that can be incredibly rewarding. Mastering the art of bread baking opens up a whole new world of culinary possibilities. Once you get the hang of it, you’ll find yourself eager to experiment with different types of flour, shapes, and flavors!
Ingredients for Homemade White Bread
The ingredients for Homemade White Bread are simple, yet they work harmoniously together to create that comforting loaf we all love. Each component has its role, contributing to the flavor and texture of the bread. Let’s explore our key players:
- Bread Flour: This flour is specifically designed for bread making, providing the necessary gluten structure for a great rise.
- Active Dry Yeast: The magic behind the rise, yeast ferments the sugars in the dough, creating bubbles that make the bread light and airy.
- Honey: A touch of sweetness, honey also feeds the yeast, helping it to grow and adding a hint of flavor.
- Warm Water: Essential for activating the yeast, the right temperature (not too hot, not too cold) is key for a successful rise.
- Unsalted Butter: Adds richness and flavor to the dough, making the bread tender and soft.
- Salt: Enhances the flavor and controls the yeast growth, making it crucial for a balanced loaf.
- Dry Milk Powder: Helps to create a softer crumb and adds a bit of nutrition.
Putting Together Homemade White Bread
Now that we have our ingredients ready, it’s time to start the process of making this delightful Homemade White Bread. Each step is crucial, so let’s take it slow and enjoy the journey of baking together!
-
Start by proofing the yeast. In a small bowl, combine 1/2 cup of the warm water with a teaspoon of honey (or sugar) and the active dry yeast. Stir gently and let it sit for about 5 to 10 minutes. The mixture should become foamy and bubbly, indicating that the yeast is alive and kicking. This step is essential, as it confirms that your yeast is active and ready to help rise the dough.
While the yeast is proofing, in the bowl of a stand mixer, whisk together 2-1/2 cups of bread flour, 1-1/2 teaspoons of salt, and 3 tablespoons of dry milk powder. This blend of dry ingredients ensures that our loaf will have the right structure and flavor.
Next, soften 2 tablespoons of unsalted butter. You can do this by leaving it at room temperature for a while or microwaving it for just a few seconds. Cut the softened butter into small pieces and add it to the mixing bowl with the dry ingredients along with the remaining honey.
-
Once the yeast is bubbly, stir in the remaining 1/2 cup of warm water. Then pour this liquid mixture into the bowl with the dry ingredients. Attach the dough hook to your mixer and mix on low speed for about 3 to 5 minutes. You want to ensure that all the flour is incorporated and that the mixture forms a rough dough.
Check the consistency of your dough. It should feel slightly tacky to the touch but not overly sticky. If it sticks heavily to the bowl’s sides, you can add a little more flour, one tablespoon at a time, until it reaches the right consistency.
Now it’s time to knead! Increase the mixer speed by one notch and let it knead for about 7 to 10 minutes. You’re aiming for a soft ball of dough that has a smooth and elastic texture. If you’ve never kneaded bread before, you can also do this by hand on a floured surface, which can be quite rewarding.
-
Once kneaded, lightly oil the bottom and sides of a large bowl. Place the dough ball inside and roll it around so it gets coated with oil on all sides. Cover the bowl with a damp towel or plastic wrap and let it rise in a warm, draft-free place for about 1 to 2 hours, or until it has doubled in size. This is the magic moment where the yeast does its work!
Prepare your loaf pan by buttering it well. I like to use an 8-1/2 x 4-1/2 or 9 x 5-inch pan. Set it aside while your dough rises.
Once the dough has risen, punch it down gently to deflate it. Place it on a floured board and roll it out into an oblong shape, about 1/4 inch thick. If you see any large air bubbles, make sure to press them out gently.
-
Starting from one of the short ends, tightly roll up the dough into a log shape. Pinch the seams closed to seal them well. Place the dough, seam side down, into the prepared loaf pan.
Now, loosely cover the pan with a piece of plastic wrap that’s been sprayed with cooking spray. Let the dough rise again for about 1 to 2 hours, until it’s risen just above the top of the pan.
As the dough is nearing the end of its second rise, preheat your oven to 350 degrees F, positioning the rack in the lower third of the oven.
-
Once it’s ready, uncover the pan and bake the bread for about 35 to 45 minutes. You’ll know it’s done when the top is golden brown, the center reads between 190 to 200 degrees F on an instant-read thermometer, and it sounds hollow when tapped on the bottom.
When it’s finished baking, melt the remaining 1 tablespoon of butter and brush it over the top of the loaf for a nice sheen. Allow the bread to cool in the pan for about 5 minutes, then carefully use a knife to loosen the edges and turn the loaf out onto a wire rack.
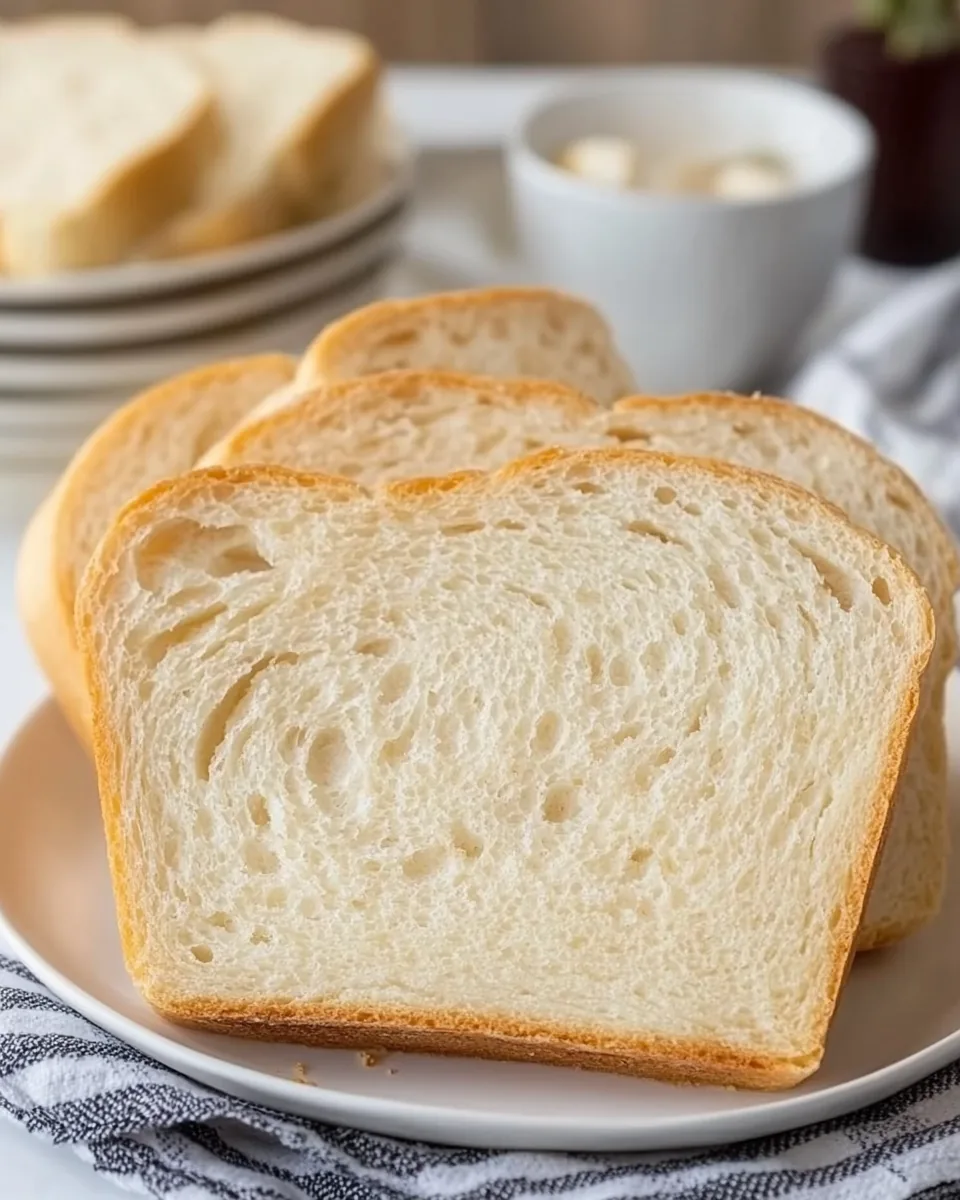
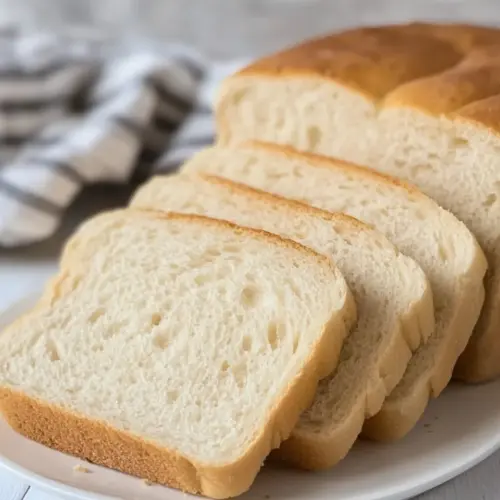
Let the loaf cool completely before slicing it. It’s best enjoyed slightly warm or at room temperature. You’ve just created your very own Homemade White Bread!
Things Worth Knowing
- Proofing the Yeast: Ensure your yeast is fresh and active. If it doesn’t foam during proofing, it may be dead, and you should start over.
- Kneading Technique: If kneading by hand, use the palms of your hands to push the dough away, then fold it back over. Repeat for 7 to 10 minutes.
- Rising Environment: A warm, draft-free area is ideal for rising. You can create a warm environment by placing the covered bowl in a slightly warmed oven.
- Storage: Your bread can be stored at room temperature for a few days. Just make sure to keep it wrapped to maintain freshness.
- Testing Bread Doneness: Don’t rely solely on time; use a thermometer to check the internal temperature for perfect results.
Tips for Success
To ensure you create the best Homemade White Bread, here are some helpful tips:
- Storage: Keep your homemade bread wrapped in plastic wrap or in a bread box at room temperature. For longer storage, consider slicing it and freezing individual pieces.
- Freezing: You can freeze the loaf for up to three months. Slice it beforehand, so you can grab a piece whenever you crave fresh bread!
- Pairing: This bread pairs wonderfully with soups, salads, or as the base for sandwiches. It’s incredibly versatile!
- Variations: Experiment with different flours—like whole wheat or rye—for unique flavors. You can also add seeds or herbs to the dough.
- Checking for Doneness: Tap the bottom of the loaf; it should sound hollow when fully baked. This is a classic check for bread!
Serving Suggestions
When it comes to serving your Homemade White Bread, the options are endless. Here are some delicious ideas:
- Toast: Serve slices toasted with butter or your favorite jam for a delightful breakfast treat.
- Sandwiches: Use this bread for classic sandwiches, from turkey to veggie, making lunch enjoyable and hearty.
- Soup Side: Pair your freshly baked bread with hearty soups or stews. The bread is perfect for sopping up all that delicious broth!
- Bruschetta: Top slices with tomatoes, basil, and olive oil for a simple yet tasty appetizer.
- French Toast: Make French toast for a special weekend breakfast. The fluffy texture holds up beautifully!
- Grilled Cheese: Create a delicious grilled cheese sandwich with your favorite cheese for a comforting meal.
FAQ
Conclusion
Baking Homemade White Bread is a rewarding experience that fills your home with warmth and delicious aromas. Each slice is a testament to the love and care you put into making it. I encourage you to try this recipe and enjoy the satisfaction that comes from creating something so special. Your taste buds will thank you, and your friends and family will appreciate the effort. So, roll up your sleeves and start baking—there’s nothing quite like homemade bread!
Homemade White Bread
Equipment
- Wooden Spoon
- Mixing Bowl
- Frying Pan
- Chef's Knife
- Whisk
- Baking Sheet
- Oven
Ingredients
- 2-1/2 to 3 cups bread flour (measured with a spoon-and-level method)
- 2-1/4 teaspoons active dry yeast (1 packet)
- 2 tablespoons honey (or granulated sugar, divided)
- 1 cup warm water (105 to 110 degrees F, divided)
- 3 tablespoons unsalted butter (divided plus additional for pan)
- 1-1/2 teaspoons table salt
- 3 tablespoons dry milk powder
Instructions
- In a small bowl, stir together 1/2 cup of the warm water, a teaspoonful of the honey or sugar, and the yeast. Let stand for 5 to 10 minutes until the mixture is foamy and small bubbles rise to the surface.
- While the yeast is proofing, whisk 2-1/2 cups flour, the salt, and the milk powder in the bowl of a stand mixer. Soften 2 tablespoons of butter, cut it into a few pieces, and add it to the mixer bowl with the rest of the honey (no need to stir).
- When the yeast is proofed, stir in the remaining 1/2 cup of water, and add the entire liquid mixture to the dry ingredients in the stand mixer.
- Fit the mixer with the dough hook and mix on low speed for 3-5 minutes, until all of the flour is incorporated. Check the dough consistency. It should be slightly tacky to the touch, but not sticking heavily to the sides of the bowl. It's ok if it gently sticks in a small circle to the center of the bottom. If needed, add some of the remaining 1/2 cup of flour a tablespoon at a time, mixing to incorporate after each addition, until the described consistency is reached.
- Increase the mixer speed by one notch and let the dough knead for 7-10 minutes, until a soft ball forms that has an elastic texture.
- Lightly oil the bottom and sides of a large bowl. Add the dough ball to the bowl and gently roll it around so it has a light coating of oil on all sides. Cover the bowl with a towel or plastic wrap and let it rise at room temperature, in a bread proofer, or in a warm (not hot) spot in your kitchen, for 1-2 hours, until doubled in size.
- Butter an 8-1/2 x 4/-1/2 or 9×5-inch loaf pan. Set aside.
- Punch the risen dough down to deflate it. Place the dough on a floured board and roll it out to an 8-inch wide oblong shape, about 1/4 inch thick. If you see any large air bubbles in the dough, press them out.
- Starting at the short end, tightly roll up the dough to a log. Pinch the bottom and side seams to seal. Place the dough, bottom seam side down, in the prepared pan.
- Loosely cover the pan with a piece of plastic wrap sprayed with cooking spray and let the dough rise for another 1-2 hours, until it is 1 to 1-1/4 inches higher than the top of the loaf pan.
- When the dough is almost finished with its second rise, preheat the oven to 350 degrees F, with the rack in the lower third of the oven.
- Uncover the pan and bake the bread for 35-45 minutes. The bread is ready when the top is golden, the center reads 190-200 degrees F on an instant read thermometer, and the loaf sounds hollow when tapped.
- Melt the remaining 1 tablespoon of butter and brush it over the top of the loaf when you take it out of the oven. Let the bread cool in the loaf pan for 5 minutes. Use a thin knife to loosen the sides from the pan and turn the bread out onto a wire rack to cool.
- Slice the bread when just slightly warm or room temperature and serve.
Notes
- Tip 1: The article above this recipe card contains additional information and tips for success. We highly encourage you to give it a read!