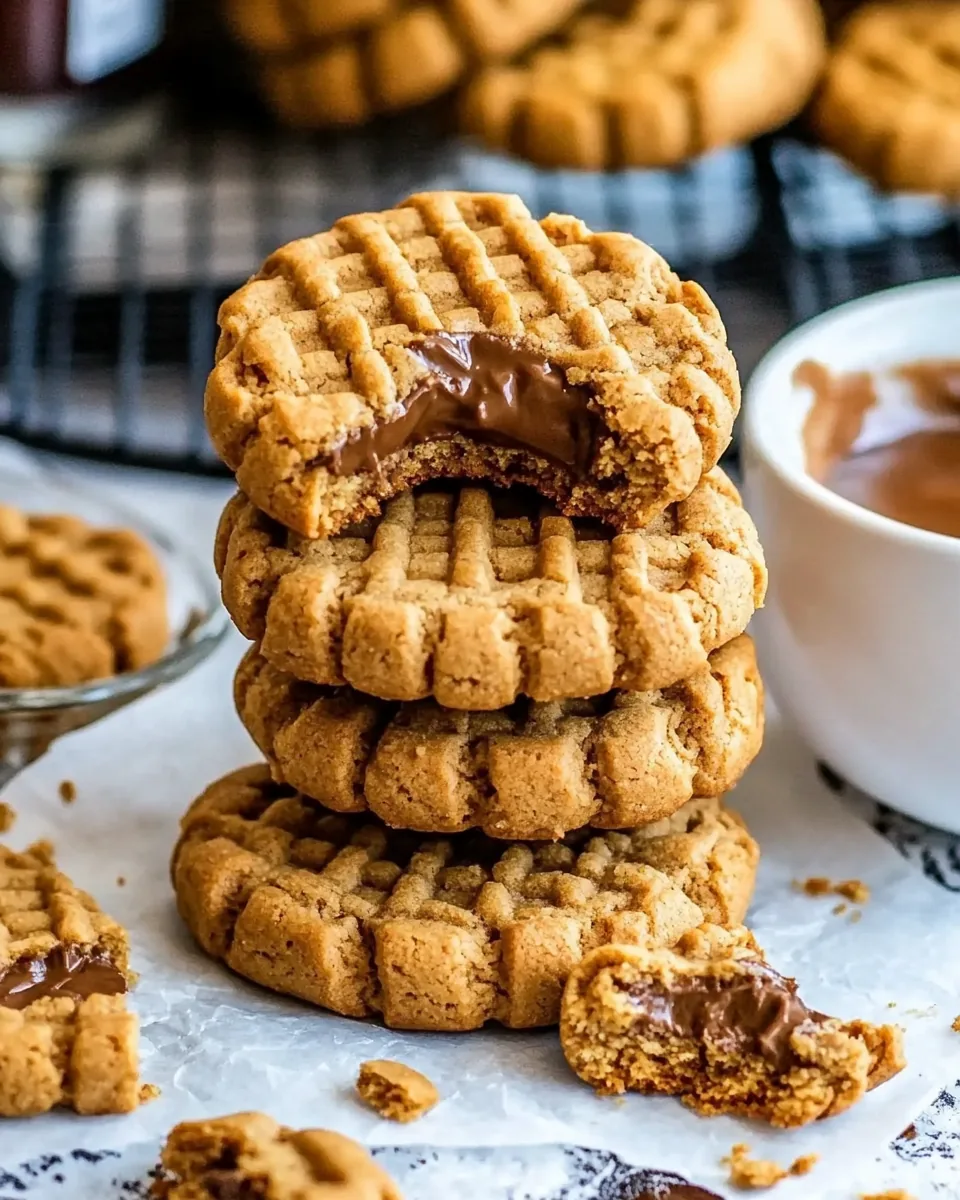
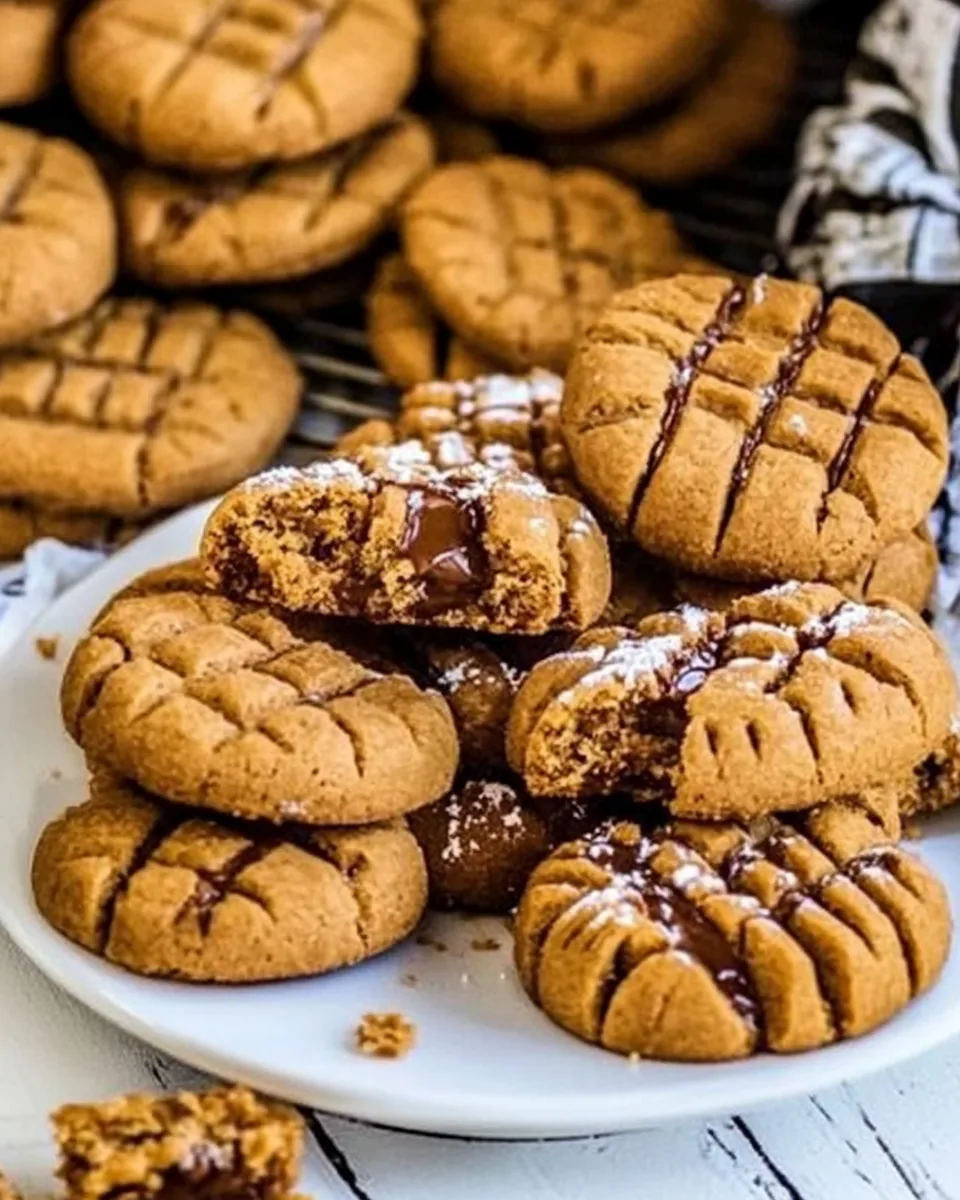
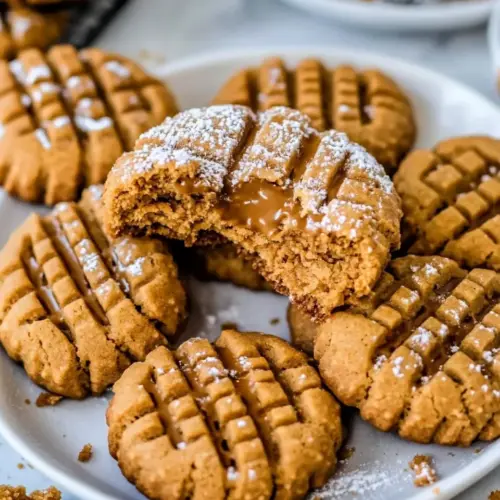
Homemade Nutter Butter Cookies
There’s something incredibly nostalgic about Homemade Nutter Butter Cookies. I remember the first time I tasted these delightful treats at my friend’s birthday party. Their unique shape and rich peanut butter flavor left a lasting impression on me. Since then, I’ve made it my mission to create the perfect recipe that captures that childhood joy. These cookies are not just a snack, but a comforting reminder of carefree days spent with friends and family. Whether you enjoy them with a glass of milk or as an after-dinner treat, they bring a special warmth to any occasion.
Recipe Snapshot
35 mins
20 mins
15 mins
Hard
150 kcal
3 g
Gluten-Free, Low FODMAP
7 g
Baking Sheet, Food Processor, Oven, Mixing Bowl
Why This Homemade Nutter Butter Cookies Shines
They’re Irresistibly Delicious
Imagine biting into a cookie that combines the creamy flavor of peanut butter with a hint of sweetness. The crunch of the cookie paired with the smooth filling makes every bite feel like a little piece of heaven. Once you start, it’s hard to stop!
Perfect for Any Occasion
Homemade Nutter Butter Cookies are incredibly versatile. Whether it’s a holiday gathering, a casual get-together, or simply a snack for yourself, these cookies fit right in. They’re a hit at potlucks and a great way to impress your friends.
Fun to Make with Kids
One of my favorite things about this recipe is how much fun it is to make with children. Rolling the dough into balls and pressing them flat can be a delightful experience for kids. Plus, who can resist dipping cookies in chocolate?
Customize to Your Heart’s Content
This recipe is also a great base for experimentation. Want to add a sprinkle of flaky sea salt? Go for it! Thinking about trying different types of chocolate? The options are limitless!
Lasting Memories
Each batch of Homemade Nutter Butter Cookies not only brings flavor but also creates memories. Baking is a wonderful way to bond with loved ones, sharing laughter and stories as you create these tasty treats together.
They’re Always a Crowd-Pleaser
I’ve never met anyone who doesn’t love these cookies. They’re perfect for sharing, whether you’re bringing them to a gathering or just surprising someone special. Each bite is a reminder of why we gather around tables filled with treats.
Homemade Nutter Butter Cookies Ingredients
Before diving into the preparation of Homemade Nutter Butter Cookies, let’s talk about the ingredients. Each one plays a vital role in creating that signature flavor and texture. The combination of rich peanut butter, sweet granulated sugar, and creamy butter makes the cookies come alive, while the chocolate and sea salt finish them perfectly.
- 1 cup peanut butter (creamy) – This is the star ingredient that gives the cookies their rich flavor and soft texture.
- 1 cup granulated sugar – Adds sweetness and helps create that delightful cookie crunch.
- 1 egg (room temperature) – Binds all ingredients together and helps the cookies rise.
- ½ teaspoon vanilla extract – Enhances the overall flavor with a touch of warmth.
- 1 tablespoon all purpose flour – Just a small amount helps to stabilize the cookies and prevent them from spreading too much.
- ¾ cup peanut butter (creamy) – Used again in the filling for a delightful sandwich effect.
- ⅓ cup powdered sugar – Gives the filling a sweet and smooth consistency.
- 2 tablespoons maple syrup – Adds a natural sweetness and moisture to the filling.
- ½ teaspoon vanilla extract – Just like in the cookie dough, this adds depth to the filling.
- 3 ounces Ghirardelli chocolate melting wafers (dark or milk chocolate) – For dipping, it creates a delicious chocolate coating.
- flaky sea salt (optional) – A sprinkle of this on top enhances the sweetness and adds a touch of sophistication.
Cooking Instructions for Homemade Nutter Butter Cookies
Making Homemade Nutter Butter Cookies is a straightforward process that fills your kitchen with warmth and delicious aromas. Follow these steps to create your cookie masterpiece. Enjoy the delight of each stage as your kitchen transforms into a baking haven!
- Preheat your oven to 350°F. Line a large baking sheet with a silicone baking mat or parchment paper. This step ensures that your cookies won’t stick, making cleanup a breeze.
- In a large mixing bowl, combine 1 cup of creamy peanut butter with 1 cup of granulated sugar. Using a hand mixer or a whisk, beat these together until the mixture is creamy and smooth.
- Add in 1 egg and ½ teaspoon of vanilla extract. Beat again until everything is well combined, and you have a consistent mixture.
- Gradually mix in 1 tablespoon of all-purpose flour. This will slightly thicken the dough, making it easier to handle.
- Using your hands, roll the dough into small balls, about ½ teaspoon to 1 teaspoon of dough per ball. This is where the fun begins!
- Place two balls side by side on the prepared baking sheet. Then, using the bottom of a cup or measuring cup, flatten the cookies to about ⅛ to ¼ inch thickness.
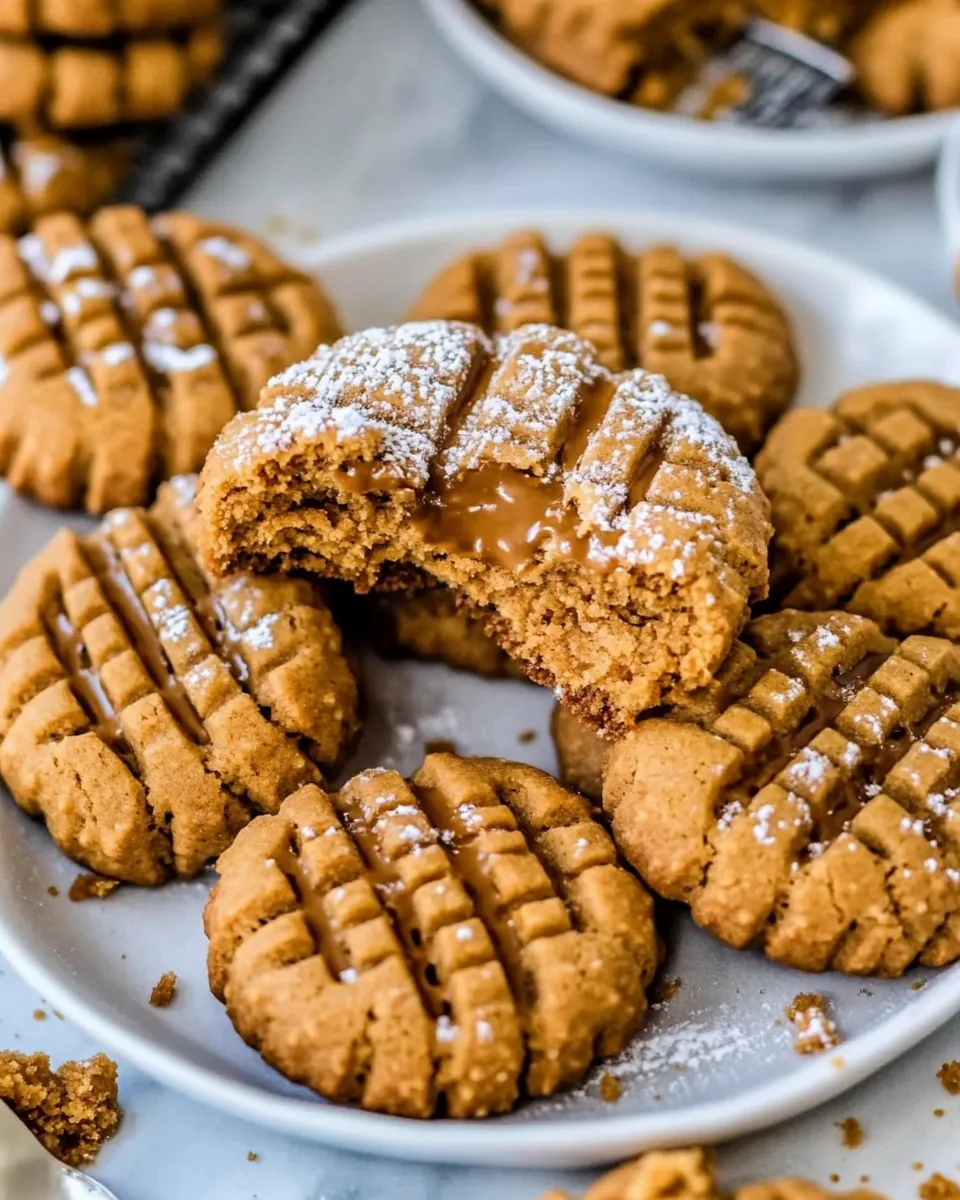
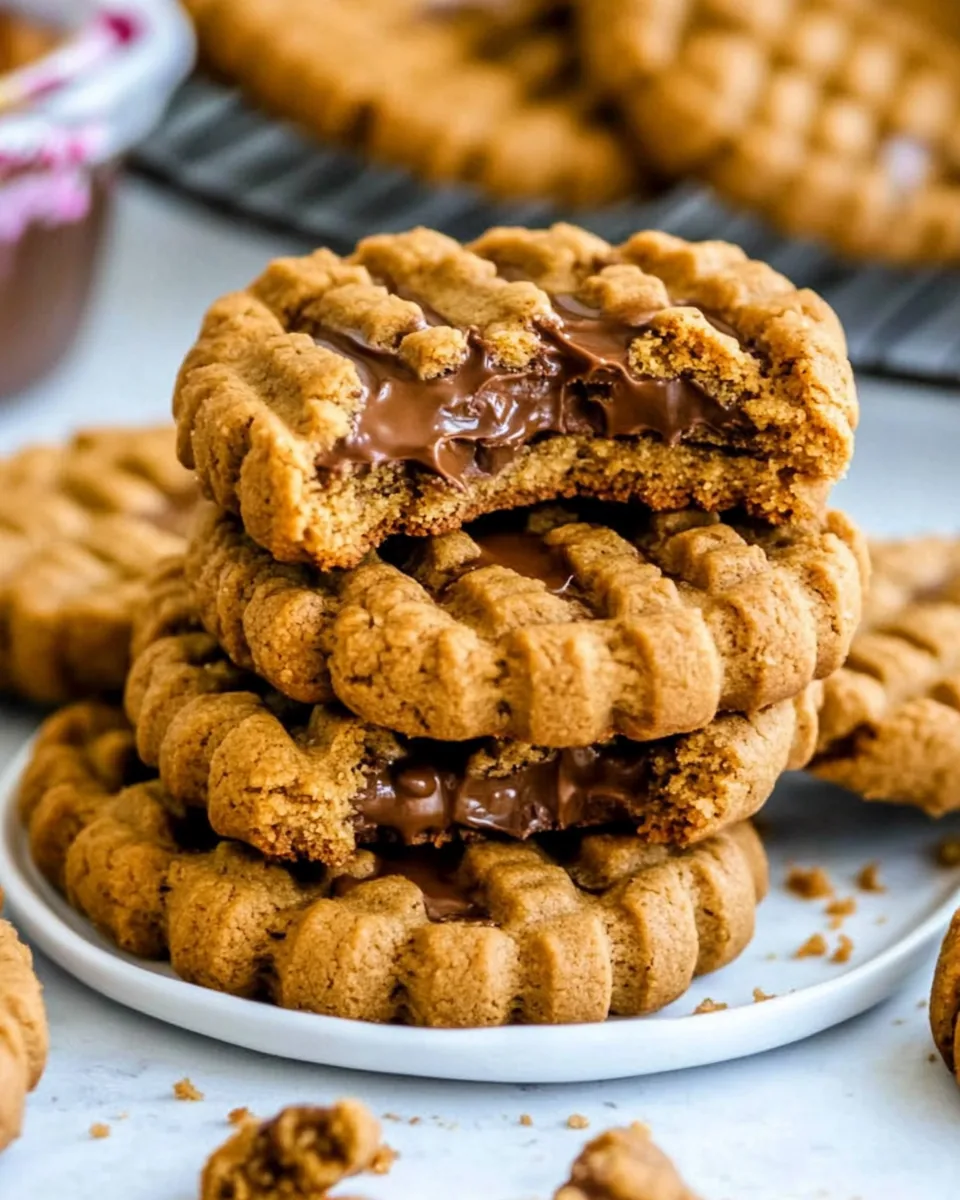
- To create the signature criss-cross markings, dip the tines of a fork into the flour and press down gently on each cookie.
- Bake the cookies in the preheated oven for 9 to 11 minutes or until they look golden brown. Remove them from the oven and let them rest on the baking sheet for about 5 minutes.
- After resting, carefully transfer the cookies to a cooling rack to cool completely. If you’re in a hurry, pop them in the freezer for about 10 minutes to speed up the cooling process.
- While the cookies cool, prepare the filling by mixing ¾ cup of creamy peanut butter, ⅓ cup of powdered sugar, 2 tablespoons of maple syrup, and ½ teaspoon of vanilla extract in a bowl. Adjust the consistency with maple syrup or powdered sugar as needed.
- Spread about a teaspoon of filling onto the bottom of one cookie and sandwich it with another cookie. Repeat until all cookies are filled and paired.
- Transfer the sandwich cookies to a parchment-lined baking sheet and freeze them for 10 minutes.
- Melt the 3 ounces of chocolate wafers according to the package directions until smooth.
- Dip each sandwich cookie into the melted chocolate, allowing excess to drip off, then place them back on the parchment-lined baking sheet.
- If you wish, sprinkle flaky sea salt on top of the cookies before the chocolate sets.
- Allow the chocolate to set completely before serving. Enjoy your Homemade Nutter Butter Cookies!
Things Worth Knowing
- Don’t skip the cooling time: It’s essential for achieving the right texture. If you fill them too early, the cookies might crumble.
- Experiment with fillings: Try different flavors to create a unique twist on the classic recipe. You can use chocolate ganache or even flavored creams.
- Watch the baking time: Each oven is different, so keep an eye on your cookies to prevent overbaking.
- Use quality ingredients: The flavor of your cookies largely depends on the quality of your peanut butter and chocolate. Choose brands you love.
Variations to Try
If you’re looking to mix things up, there are countless ways to enjoy Homemade Nutter Butter Cookies. Here are some variations to consider:
- Chocolate Dipped: Instead of just melting chocolate for dipping, add sprinkles or crushed nuts to the melted chocolate for added texture.
- Nutty Addition: Incorporate chopped nuts into the cookie dough for an added crunch.
- Flavor Infusion: Add a dash of cinnamon or even a hint of espresso powder to the dough for a unique flavor twist.
- Alternative Sweeteners: Experiment with honey or agave syrup as a substitute for maple syrup in the filling.
- Cookie Sandwiches: Instead of filling with peanut butter, try using whipped cream or flavored frosting for a different treat.
- Stuffed Cookies: Create a surprise in the center of your cookie by adding a chocolate or caramel piece before baking.
- Vegan Version: Substitute the egg with a flaxseed meal and use a plant-based butter to create a vegan-friendly cookie.
Serving This Homemade Nutter Butter Cookies
When it comes to serving Homemade Nutter Butter Cookies, the possibilities are endless. Here’s how to present these delectable treats:
- Coffee Pairing: Serve your cookies alongside a hot cup of coffee for a delightful afternoon pick-me-up.
- Family Gatherings: These cookies are perfect for family get-togethers or potlucks; set them out on a festive platter for all to enjoy.
- Seasonal Treats: Decorate with seasonal sprinkles or edible glitter for festive occasions.
- Picnic Delight: Pack them for a picnic; they’re sturdy enough to hold up in your basket and are sure to please everyone.
- Storage Tips: Keep any leftovers in an airtight container at room temperature for up to 4 days. If you want to keep them longer, they can be frozen for up to 3 months.
- Special Occasions: Make these cookies for birthdays or holidays; they’re sure to impress.
- Children’s Parties: Kids love these cookies, making them an ideal treat for birthday parties or school events.
FAQ
Conclusion
In conclusion, Homemade Nutter Butter Cookies are more than just a treat; they’re a journey back to fond memories and shared moments. The combination of rich, creamy peanut butter and smooth chocolate is hard to resist. I encourage you to gather your ingredients and give this recipe a try. You won’t just be making cookies; you’ll be crafting memories that will last a lifetime.
Homemade Nutter Butter Cookies
Equipment
- Baking Sheet
- Food Processor
- Oven
- Mixing Bowl
Ingredients
- 1 cup Peanut Butter (creamy)
- 1 cup Granulated Sugar
- 1 each Egg (room temperature)
- ½ teaspoon Vanilla Extract
- 1 tablespoon All Purpose Flour
- ¾ cup Peanut Butter (creamy)
- ⅓ cup Powdered Sugar
- 2 tablespoons Maple Syrup
- ½ teaspoon Vanilla Extract
- 3 ounces Ghirardelli Chocolate Melting Wafers (dark or milk chocolate)
- Flaky Sea Salt (optional)
Instructions
- Preheat your oven to 350°F. Line a large baking sheet with a silicone baking mat or parchment paper. This step ensures that your cookies won’t stick, making cleanup a breeze.
- In a large mixing bowl, combine 1 cup of creamy peanut butter with 1 cup of granulated sugar. Using a hand mixer or a whisk, beat these together until the mixture is creamy and smooth.
- Add in 1 egg and ½ teaspoon of vanilla extract. Beat again until everything is well combined, and you have a consistent mixture.
- Gradually mix in 1 tablespoon of all-purpose flour. This will slightly thicken the dough, making it easier to handle.
- Using your hands, roll the dough into small balls, about ½ teaspoon to 1 teaspoon of dough per ball. This is where the fun begins!
- Place two balls side by side on the prepared baking sheet. Then, using the bottom of a cup or measuring cup, flatten the cookies to about ⅛ to ¼ inch thickness.
- To create the signature criss-cross markings, dip the tines of a fork into the flour and press down gently on each cookie.
- Bake the cookies in the preheated oven for 9 to 11 minutes or until they look golden brown. Remove them from the oven and let them rest on the baking sheet for about 5 minutes.
- After resting, carefully transfer the cookies to a cooling rack to cool completely. If you're in a hurry, pop them in the freezer for about 10 minutes to speed up the cooling process.
- While the cookies cool, prepare the filling by mixing ¾ cup of creamy peanut butter, ⅓ cup of powdered sugar, 2 tablespoons of maple syrup, and ½ teaspoon of vanilla extract in a bowl. Adjust the consistency with maple syrup or powdered sugar as needed.
- Spread about a teaspoon of filling onto the bottom of one cookie and sandwich it with another cookie. Repeat until all cookies are filled and paired.
- Transfer the sandwich cookies to a parchment-lined baking sheet and freeze them for 10 minutes.
- Melt the 3 ounces of chocolate wafers according to the package directions until smooth.
- Dip each sandwich cookie into the melted chocolate, allowing excess to drip off, then place them back on the parchment-lined baking sheet.
- If you wish, sprinkle flaky sea salt on top of the cookies before the chocolate sets.
- Allow the chocolate to set completely before serving. Enjoy your Homemade Nutter Butter Cookies!
Notes
- Storage Information: Cookies can be stored at room temperature in an airtight container for up to 4 days.
- Freezing: Lay the cookies out in a single layer on a parchment lined baking sheet and flash freeze for about 30 minutes. Once they’re frozen, place them in an airtight, freezer-safe ziplock bag and keep them in the freezer for up to 3 months. To thaw, let defrost at room temperature for 3 to 4 hours before serving.