Homemade Jello 1 2 3 Recipe
Whenever I think of childhood desserts, the memories of my mom whipping up a colorful batch of Homemade Jello 1 2 3 Recipe flood my mind. This layered treat was not just a dessert; it was an experience that brought us together around the table, giggling and waiting impatiently as it set in the fridge. Each vibrant layer was like a treasure waiting to be uncovered on our plates, bringing smiles to our faces. I remember sneaking spoonfuls right out of the bowl, mesmerized by how such simple ingredients could create something so beautiful and delicious. This dessert has a nostalgic charm that makes it perfect for any occasion, whether it’s a birthday party, a family gathering, or just a cozy night at home.
Recipe Snapshot
30 mins
10 mins
20 mins
Medium
120 kcal
1 g
Keto, Paleo, Whole30
0 g
Large Pot, Mixing Bowl, Blender
The Charm of This Homemade Jello 1 2 3 Recipe
It’s Nostalgic and Fun
This Homemade Jello 1 2 3 Recipe isn’t just food; it’s a walk down memory lane. Each layer represents a moment of joy from my childhood, making it particularly special. I love reminiscing about the times spent in the kitchen with family and friends, laughing and creating together.
Perfect for All Ages
No matter the age, everyone loves the wobbly, colorful layers of this dessert. Kids are fascinated by the vibrant colors and textures, while adults appreciate the lightness and nostalgia, making it a perfect family-friendly treat.
Customizable Flavor
This recipe is versatile. You can play with flavors and colors based on what you like or what you have on hand. From tropical fruits to berry blends, the possibilities are endless, and that’s part of what makes it exciting!
Easy to Make
With just a few ingredients and simple steps, this recipe is incredibly easy to whip up. You don’t need to be a seasoned baker to impress your guests or family. The straightforward blending of layers means you can get creative without the pressure.
Great for Events
If you’re hosting a gathering, you can prepare this dessert ahead of time. It looks stunning on any dessert table and is always a hit at parties, bringing a touch of color and whimsy.
Healthy Twist
When made with natural fruit juices, this dessert can be a lighter alternative to other sweets. It’s refreshing and naturally sweet, making it a guilt-free indulgence.
Everything You Need for Homemade Jello 1 2 3 Recipe
The magic of this dessert lies in its simplicity. Each ingredient plays a role in creating a delightful layered experience, making it a fun project for the whole family to enjoy. The key players include gelatin mix for structure, boiling water to activate it, cold water to cool the mixture, and whipped topping to add creaminess. Together, they create a beautifully textured and visually appealing dessert that’s bound to impress.
- 4 ounces any flavor gelatin mix: This is the star of the show! Choose your favorite flavor to give your dessert an exciting base.
- 3/4 cup boiling water: This is essential for dissolving the gelatin mix, ensuring a smooth consistency.
- ice cubes: You’ll need these to cool the water quickly, helping your layers set faster.
- 1/2 cup cold water: This balances the temperature and helps reach the right volume for the gelatin.
- 1/2 cup thawed whipped topping: Adding this makes the dessert wonderfully creamy and adds a delightful texture contrast to the gelatin layers.
Step by Step Instructions for Homemade Jello 1 2 3 Recipe
Making this delightful dessert is easier than you might think. I love how quickly you can prepare it, allowing for a little patience while it sets. Here’s how you can recreate this nostalgic treat yourself.
- Start by dissolving the gelatin mix in the boiling water. Take a large bowl, pour in the water, and gradually add the gelatin mix, stirring continuously. You’ll notice the vibrant color of the mix changing as it dissolves. This should only take a couple of minutes.
- Next, prepare your cooling mixture. In a separate measuring cup, combine enough ice cubes with cold water to make a total of 1 and 1/4 cups. This step is crucial as it will help cool the gelatin mixture down quickly.
- Once the gelatin is fully dissolved, pour the cold water and ice mixture into the bowl with the gelatin. Stir gently to combine everything. You’ll feel the temperature drop as the ice melts, making it easier to work with.
- Now it’s time for blending! Transfer the gelatin mixture to a blender, covering it tightly. Blend for about 30 seconds until it’s frothy and well combined. Watch as the mixture transforms into a light concoction.
- Add the whipped topping to the blender. Cover it again and blend until it’s smooth and creamy. This will give the dessert its unique texture, making each bite delightful.
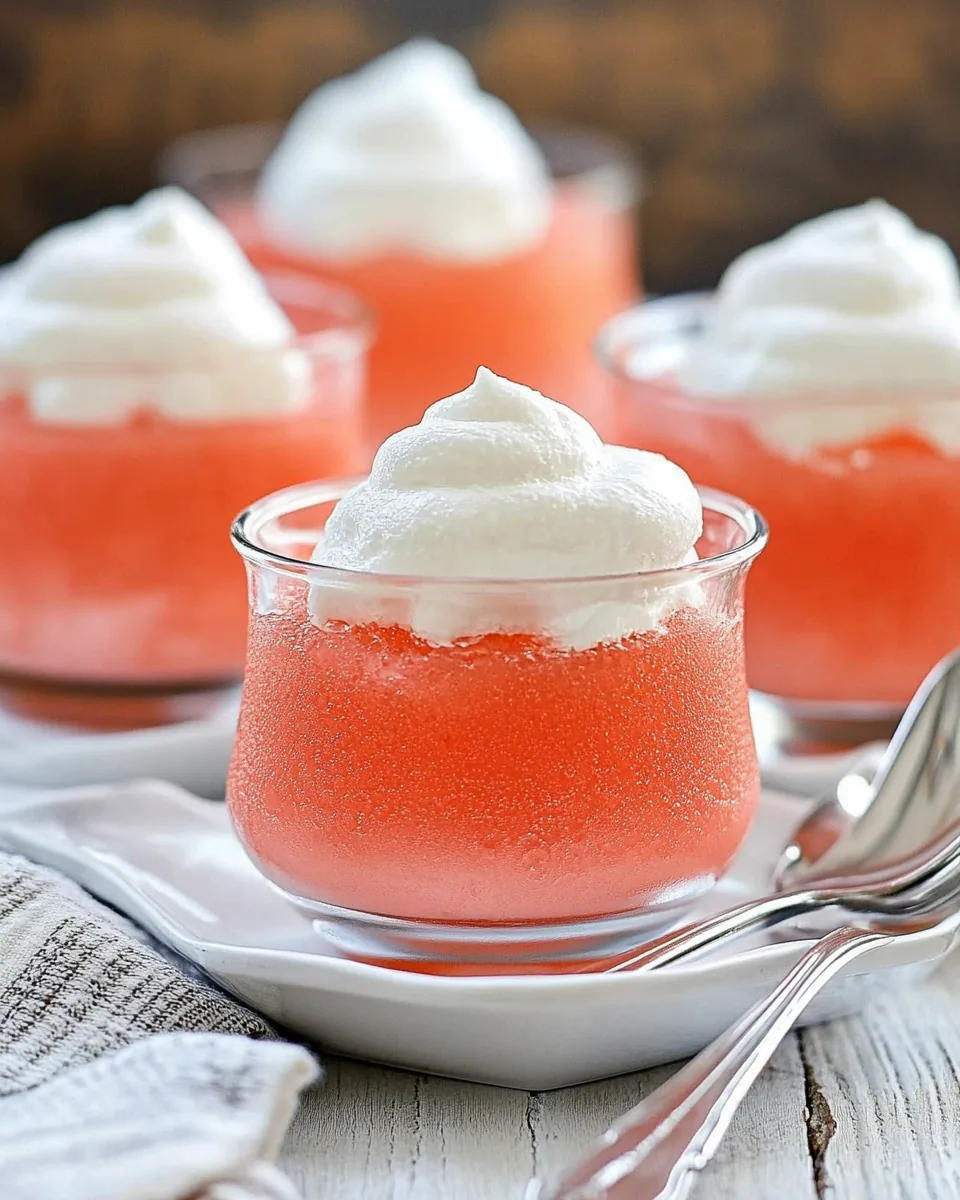
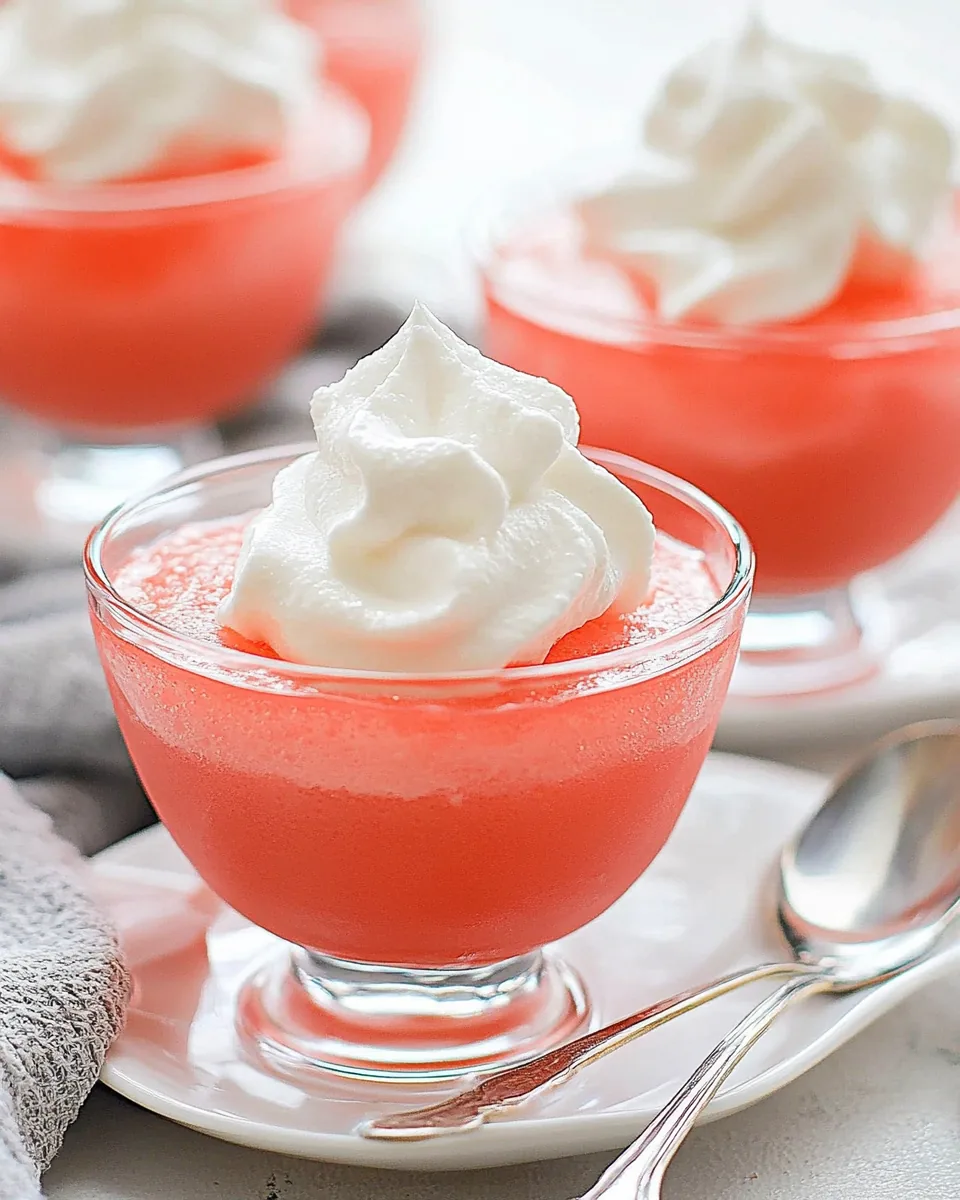
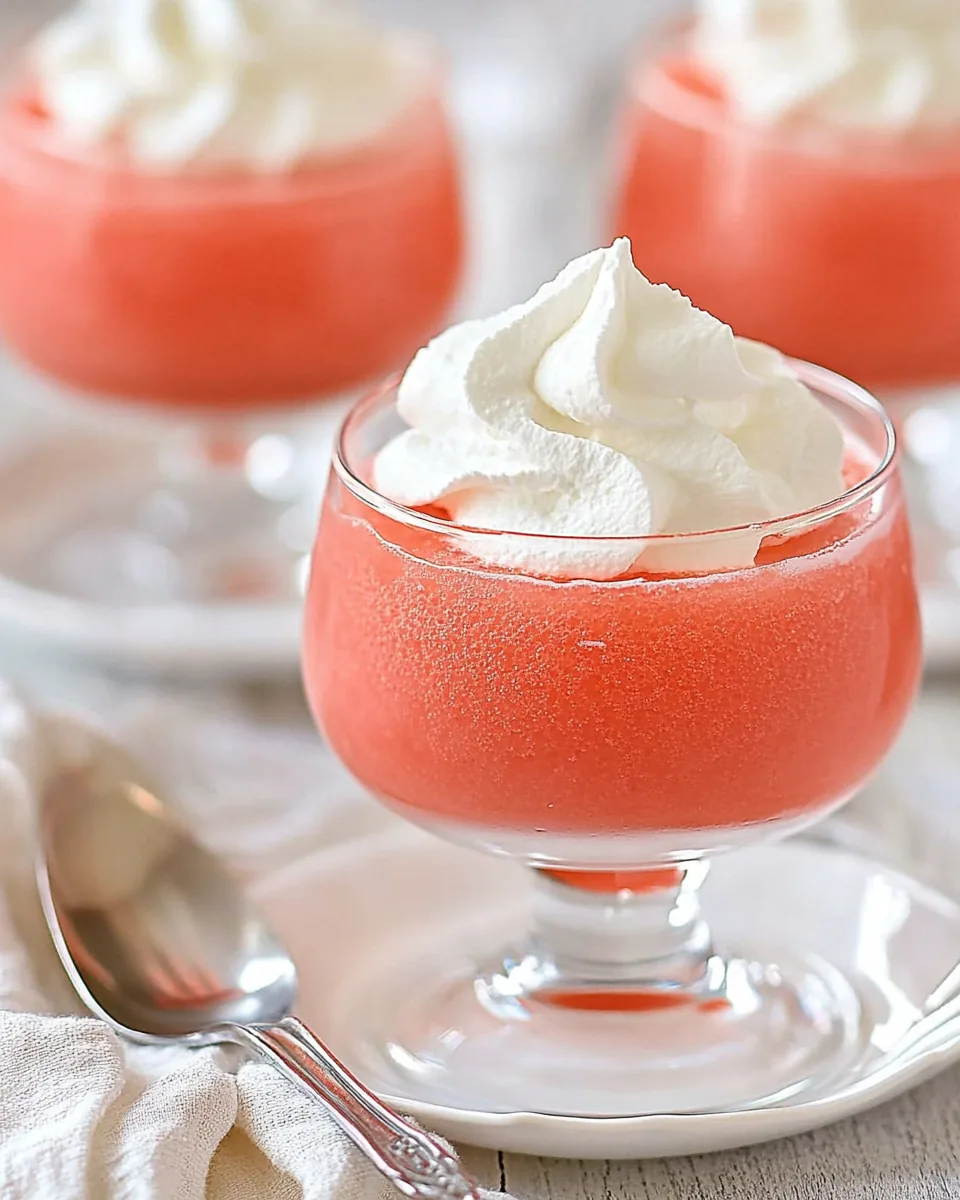
- Prepare your dessert dishes. I recommend using clear cups or small bowls to showcase the layers. Pour the mixture evenly into the dishes, filling them about 2/3 full. This allows room for additional layers if you decide to get creative.
- Finally, cover the dishes with plastic wrap and place them in the refrigerator. Let them set for at least 20 minutes, or until they’re firm. I like to check the consistency after 15 minutes—if they’re not quite ready, it’s okay to let them chill a bit longer.
Things Worth Knowing
- Layering Tips: Make sure each layer is completely set before adding the next one if you want distinct layers.
- Chilling Time: The 20 minutes is a minimum; feel free to chill longer for an even firmer set.
- Gelatin Alternatives: While this recipe traditionally uses gelatin, you can explore plant-based alternatives if desired, but the texture may vary.
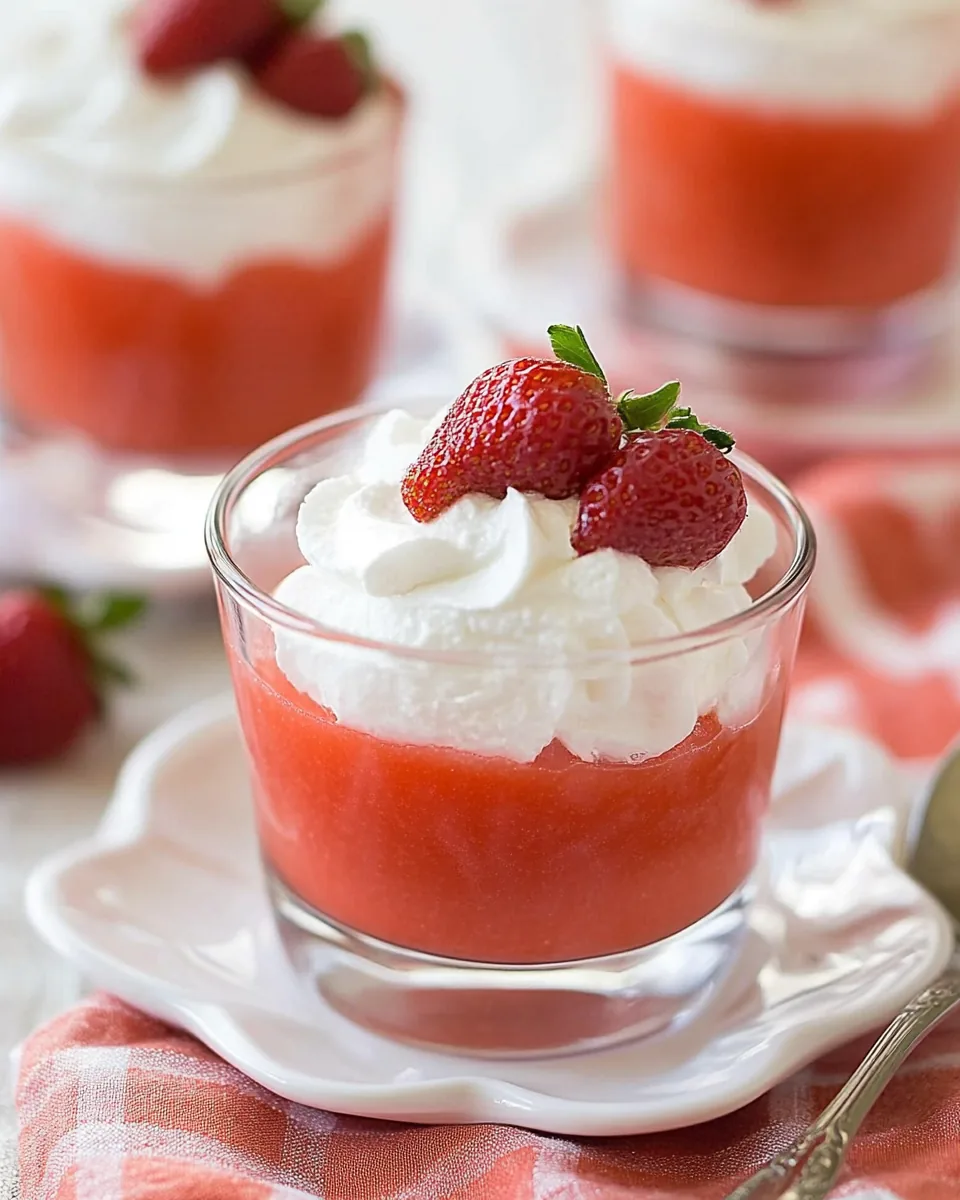
- Serving Suggestions: Try garnishing with fresh fruits or a drizzle of honey for an extra touch of elegance.
How to Switch It Up
This dessert is incredibly versatile, making it easy to switch up flavors and styles. Here are some ideas to consider for your next batch!
- Storage: Store leftovers in an airtight container in the refrigerator for up to three days. The dessert stays fresh and delicious!
- Freezing: While it’s best enjoyed fresh, you can freeze the dessert for up to a month. Just make sure to thaw it in the fridge overnight before serving.
- Pairing: This dessert pairs well with a dollop of fresh cream or a sprinkle of fruit. Consider serving it alongside a light salad for a refreshing meal.
- Flavor Combinations: Don’t hesitate to mix flavors! Combine different fruit juices or use a flavored gelatin mix for unique layers.
- Color Themes: Choose colors based on the season or occasion, like pastel colors for spring or bright colors for summer parties!
What Goes Well With This Homemade Jello 1 2 3 Recipe
- Light Salads: Pair this dessert with a crisp garden salad to balance the sweetness.
- Birthday Parties: It’s a hit among kids and adults, making it perfect for birthdays.
- Summer Picnics: The refreshing nature of this dessert makes it ideal for outdoor gatherings.
- Family Gatherings: Serve as a fun dessert option that everyone can enjoy, evoking nostalgia.
- Holiday Celebrations: Customize the colors to fit your holiday theme for a creative touch!
FAQ
Conclusion
The Homemade Jello 1 2 3 Recipe is a delightful way to revisit cherished memories while enjoying a sweet treat. Its layers of vibrant colors and flavors bring joy to any occasion. I hope you’ll try this recipe and share it with your loved ones. It’s perfect for gatherings or simply to enjoy at home, reminding us of the simple pleasures in life.

Homemade Jello 1 2 3 Recipe
Equipment
- Large Pot
- Mixing Bowl
- Blender
Ingredients
- 4 ounces gelatin mix
- 3/4 cup boiling water
- 1/2 cup cold water
- ice cubes ice cubes
- 1/2 cup thawed whipped topping
Instructions
- Start by dissolving the gelatin mix in the boiling water. Take a large bowl, pour in the water, and gradually add the gelatin mix, stirring continuously. You’ll notice the vibrant color of the mix changing as it dissolves. This should only take a couple of minutes.
- Next, prepare your cooling mixture. In a separate measuring cup, combine enough ice cubes with cold water to make a total of 1 and 1/4 cups. This step is crucial as it will help cool the gelatin mixture down quickly.
- Once the gelatin is fully dissolved, pour the cold water and ice mixture into the bowl with the gelatin. Stir gently to combine everything. You’ll feel the temperature drop as the ice melts, making it easier to work with.
- Now it's time for blending! Transfer the gelatin mixture to a blender, covering it tightly. Blend for about 30 seconds until it’s frothy and well combined. Watch as the mixture transforms into a light concoction.
- Add the whipped topping to the blender. Cover it again and blend until it’s smooth and creamy. This will give the dessert its unique texture, making each bite delightful.
- Prepare your dessert dishes. I recommend using clear cups or small bowls to showcase the layers. Pour the mixture evenly into the dishes, filling them about 2/3 full. This allows room for additional layers if you decide to get creative.
- Finally, cover the dishes with plastic wrap and place them in the refrigerator. Let them set for at least 20 minutes, or until they’re firm. I like to check the consistency after 15 minutes—if they’re not quite ready, it’s okay to let them chill a bit longer.
Notes
- Storage: Store leftovers in an airtight container in the refrigerator for up to three days. The dessert stays fresh and delicious!
- Freezing: While it's best enjoyed fresh, you can freeze the dessert for up to a month. Just make sure to thaw it in the fridge overnight before serving.
- Pairing: This dessert pairs well with a dollop of fresh cream or a sprinkle of fruit. Consider serving it alongside a light salad for a refreshing meal.
- Flavor Combinations: Don’t hesitate to mix flavors! Combine different fruit juices or use a flavored gelatin mix for unique layers.
- Color Themes: Choose colors based on the season or occasion, like pastel colors for spring or bright colors for summer parties!