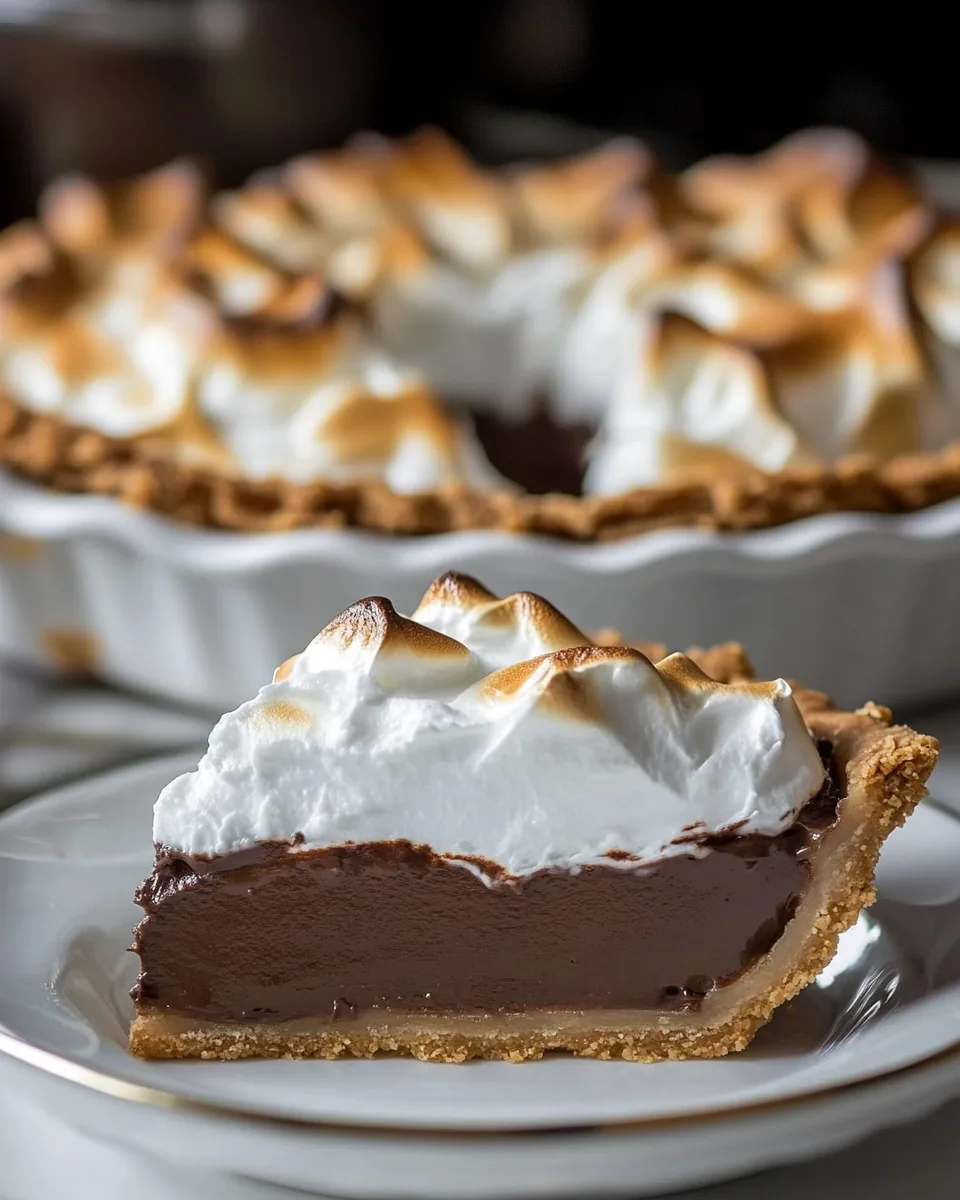
Homemade Chocolate Meringue Pie
When I think of comfort desserts, nothing quite compares to a Homemade Chocolate Meringue Pie. Growing up, this pie was a staple at family gatherings, evoking warm memories of laughter, joy, and of course, the heavenly aroma of chocolate filling wafting through the kitchen. I distinctly remember the excitement of helping my grandmother prepare this decadent dessert, watching her whip the egg whites into fluffy peaks that would later crown the silky chocolate filling. It was a magical process that transformed simple ingredients into something truly special. The first time I tasted a slice was pure bliss—the rich, velvety chocolate contrasted perfectly with the light, airy meringue. Even now, I find myself revisiting those cherished moments each time I make this pie, and I can’t wait to share it with you!
Recipe Snapshot
1 hr 15 mins
15 mins
60 mins
Hard
400 kcal
6 g
Keto, Gluten-Free, Low FODMAP
18 g
9-inch pie dish, Pie weights, dried beans, or rice, Hand mixer or stand mixer
Why Try This Homemade Chocolate Meringue Pie
A Timeless Classic
The Homemade Chocolate Meringue Pie has stood the test of time. It’s a dessert that has graced tables for generations, beloved for its perfect balance of flavors and textures. The rich chocolate filling, made from simple ingredients, is deeply satisfying without being overly heavy. This pie is not just dessert; it’s a celebration of family traditions and warm memories.
Perfect for Any Occasion
This pie is incredibly versatile. Whether it’s a festive dinner, a summer picnic, or just a cozy night in, the Homemade Chocolate Meringue Pie fits right in. It’s a crowd-pleaser that never fails to impress and can elevate any occasion into something memorable. I’ve brought this pie to potlucks, and it’s always the first to disappear!
Visual Appeal
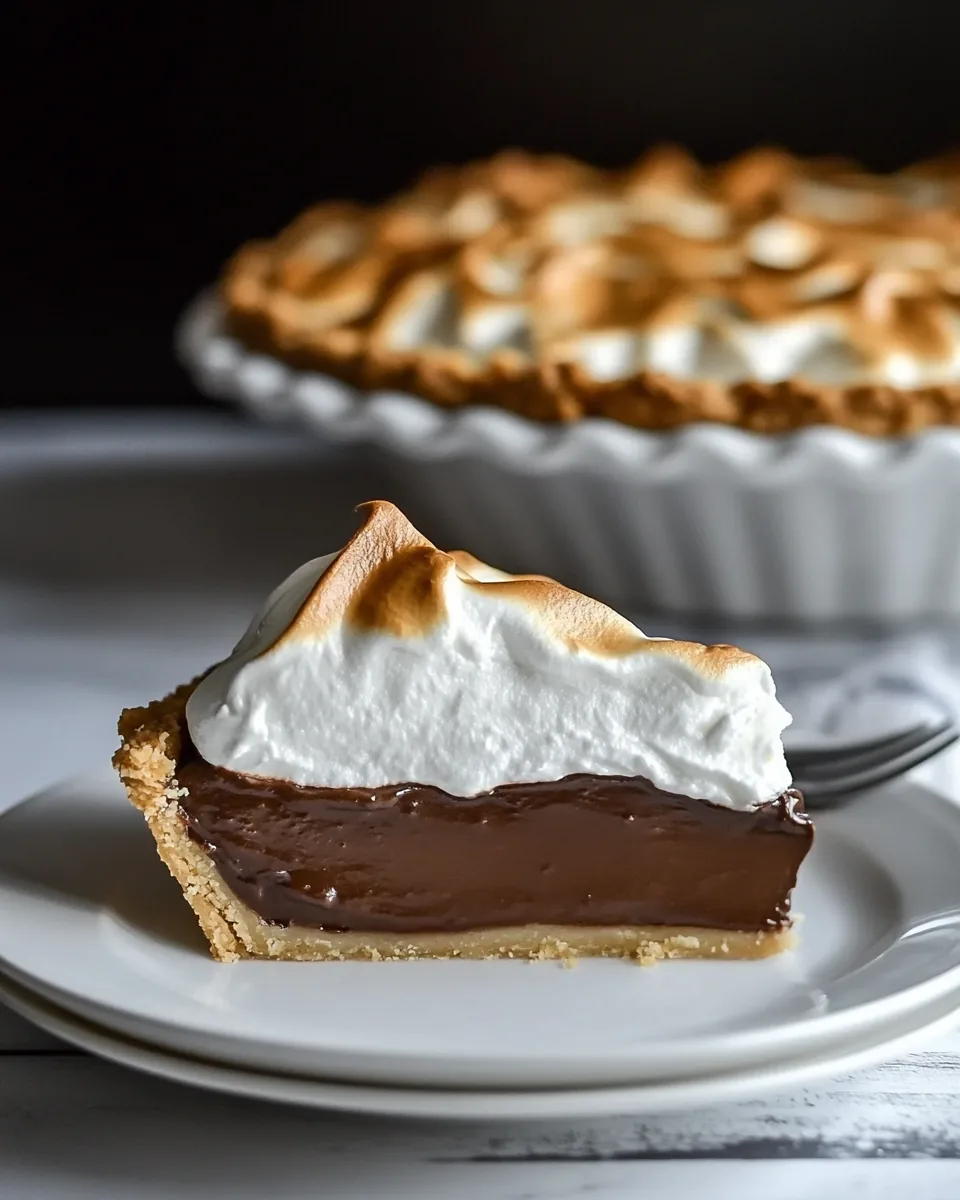
The visual impact of a perfectly made Homemade Chocolate Meringue Pie is undeniable. The glossy chocolate filling peeking through the fluffy meringue creates a stunning dessert that looks as good as it tastes. It’s a showstopper that invites everyone to indulge. When I set this pie on the table, I can see the anticipation on everyone’s faces, waiting for that first slice.
Easy to Make, Hard to Resist
Many may shy away from meringue, thinking it’s too difficult to master, but I assure you, it’s more about technique than complexity. The satisfaction of creating that billowy topping is unmatched. Plus, knowing it’s made from scratch adds a layer of pride. I’ve broken it down into simple steps that are easy to follow, even for beginners.
A Flavor Symphony
The combination of flavors in the Homemade Chocolate Meringue Pie is what truly makes it special. Each bite features the deep, rich chocolate harmonizing beautifully with the sweet, airy meringue. This dessert is not just about sweetness; it’s about balance, with the chocolate providing a comforting depth that complements the lightness of the meringue.
Customizable Delight
This recipe is incredibly adaptable. You can easily tweak the chocolate level to suit your taste or even experiment with different toppings and flavors. While I adore the classic version, I’ve tried adding a touch of espresso for an extra kick or using dark chocolate for those who relish a more intense flavor.
Shopping List for Homemade Chocolate Meringue Pie
The ingredients in this Homemade Chocolate Meringue Pie work in harmony to create a delightful dessert. Each component plays a crucial role in achieving the perfect balance of flavors and textures. The key players here are the pie dough, which offers a crisp base, and the chocolate, which provides that rich essence. Together with the egg whites for the airy meringue, they come together to create a pie that’s not only delicious but also a feast for the eyes.
- 1 pie dough for 1 9-inch pie – The foundation of your pie, providing a buttery, flaky crust that perfectly complements the rich chocolate filling.
- 5 egg whites (room temperature, save the yolks) – Essential for creating a light and fluffy meringue that crowns the pie.
- ¼ teaspoon cream of tartar – Stabilizes the egg whites, ensuring they whip up perfectly.
- ½ cup sugar – Sweetens the meringue and helps achieve that glossy finish.
- ¾ cup sugar – Used in the chocolate filling, balancing the bitterness of the chocolate.
- ¼ cup cornstarch – Thickens the chocolate filling to a creamy consistency.
- ¼ teaspoon salt – Enhances the flavors of the chocolate and meringue.
- 2½ cups whole milk – Creates a rich and creamy chocolate filling.
- 2 oz unsweetened chocolate (roughly chopped) – The star ingredient for that deep chocolate flavor.
- 5 egg yolks – Adds richness and depth to the chocolate filling.
- 3 tablespoons unsalted butter (cubed) – Gives the filling a smooth and velvety texture.
- 1½ teaspoons vanilla extract – A touch of warmth that enhances the chocolate flavor.
Recipe Directions for Homemade Chocolate Meringue Pie
Making a Homemade Chocolate Meringue Pie is a delightful process that brings together a few techniques to create a stunning dessert. Follow these steps carefully, and you’ll find that the effort is well worth it. Let’s dive into the magic of pie-making!
- Preheat your oven to 375°F (190°C). This is essential for ensuring your pie crust bakes evenly and achieves that perfect golden color.
- On a lightly floured surface, roll out the pie dough to about a 12-inch circle. The dough should be thin but not so thin that it tears easily. Once rolled, gently roll the dough around the rolling pin and carefully transfer it to a 9-inch pie dish.
- Gently press the dough into the dish, ensuring it fits well into the edges. Trim any excess dough from the edges to achieve a clean look. Fold over the top part of the dough (about a ½ inch). Use your fingers to crimp the edges, giving it that classic pie appearance.
- Place the pie dish in the refrigerator for 1 hour, or in the freezer for 15 minutes. This helps the crust to chill and prevent shrinking during baking.
- While the crust is chilling, prepare to bake it. Preheat your oven to 375°F again if it’s cooled down.
- Line the chilled pie crust with parchment paper, then fill it with pie weights, dried beans, or uncooked rice. This will help keep the crust in shape as it bakes. Press into the bottom edges to avoid bubbling.
- Place the crust in the oven for 25 minutes. After that time, remove it and carefully take out the weights and parchment paper. Return the crust to the oven and bake for another 10 minutes, until it’s lightly golden. Set aside to cool.
- In a large bowl, or in the bowl of your stand mixer, add the room-temperature egg whites and cream of tartar. Use a hand mixer (or your stand mixer) on medium speed to mix the whites with the cream of tartar until they’re combined and frothy.
- Add the sugar (½ cup) gradually while increasing the speed to HIGH. Continue mixing on HIGH until stiff peaks form, which can take anywhere from 2 to 8 minutes depending on your mixer’s strength.
- Set the meringue aside and leave the oven on. Now, let’s prepare the chocolate filling. In a medium-sized saucepan, whisk together the sugar (¾ cup), cornstarch, and salt.
- Whisk in the whole milk until fully incorporated and the dry ingredients dissolve completely.
- Over medium heat, bring this mixture to a simmer, which should take about 4 to 5 minutes. You’ll notice it starting to thicken.
- Once thickened, turn off the heat and stir in the unsweetened chocolate until fully melted. This should create a smooth consistency. Then, stir in the egg yolks until you no longer see streaks.
- Turn the heat back on to medium and bring to a very gentle simmer again. Make sure to scrape any chocolate from the sides of the pan as you stir. Simmer for another 2 minutes.
- Turn off the heat and stir in the unsalted butter and vanilla, mixing until the butter has melted and is incorporated.
- Now, pour the hot chocolate filling into the prepared pie crust. Immediately spoon the meringue over the hot filling, spreading it to the edges of the crust. Ensure the meringue touches the crust to prevent shrinking.
- Place the pie in the oven for about 10 to 15 minutes, until the tips of the meringue turn a lovely golden brown. Remove the pie and let it cool on a baking rack on the counter for 1 hour.
- Finally, chill the pie in the refrigerator for at least 2 to 3 hours before slicing and serving. To slice, dip a sharp knife in a tall glass of hot tap water to ensure clean cuts.
Things Worth Knowing
- Room Temperature Egg Whites: Having egg whites at room temperature helps them whip better, achieving those airy peaks.
- Timing is Key: It’s essential to add the meringue while the chocolate filling is hot; this helps to reduce weeping, which is when liquid forms on top of the filling.
- Stabilizing Meringue: Adding cream of tartar is crucial in stabilizing the meringue, ensuring it holds its shape while baking.
- Cooling Process: Allow the pie to cool for at least 1 hour before chilling it in the refrigerator. This helps set the filling.
- Slicing Tips: For clean slices, dip your knife in hot water before cutting into the pie.
Variations to Try
If you’re looking to mix things up, here are some delicious variations on the classic Homemade Chocolate Meringue Pie. While the traditional version is a crowd favorite, experimenting with flavors can lead to delightful new discoveries. Let’s explore some creative ideas!
- Try Dark Chocolate: For a more intense flavor, opt for dark chocolate instead of unsweetened chocolate. This will give your pie a richer taste.
- Espresso Infusion: Adding a teaspoon of espresso powder to the chocolate filling can elevate the flavor and give it a mocha twist.
- Fruit Layer: Consider adding a layer of fresh raspberries or strawberries between the chocolate filling and meringue for a fruity touch.
- Nutty Flavors: Incorporate finely chopped nuts into the chocolate filling for added texture and flavor. Hazelnuts or almonds work particularly well.
- Different Meringue Styles: Experiment with flavored meringues! Try adding a bit of lemon zest to the meringue for a refreshing twist.
- Serving Suggestions: Serve the pie with a dollop of whipped cream or a sprinkling of cocoa powder for an extra touch.
- Storage: Store any leftovers covered in the refrigerator to keep the meringue from weeping.
What to Serve With Homemade Chocolate Meringue Pie
Pairing is essential when it comes to serving a Homemade Chocolate Meringue Pie. Here are some ideas to elevate your dessert experience:
- Whipped Cream: A dollop of fresh whipped cream alongside a slice enhances the richness of the pie.
- Fresh Berries: Serve with a side of fresh raspberries or strawberries to add a burst of freshness that balances the chocolate.
- Ice Cream: Vanilla or coffee-flavored ice cream makes a lovely accompaniment, providing a creamy contrast to the chocolate.
- Coffee: A cup of brewed coffee pairs exceptionally well with the sweetness of the pie, enhancing the chocolate flavor.
- Festive Occasion: This pie is perfect for celebrating special occasions like birthdays or holidays, providing a show-stopping finale to any meal.
- Picnics and Potlucks: Bring it to outdoor gatherings for a sweet treat that everyone will love, making it a standout among other desserts.
- Seasonal Decor: Consider decorating the serving table with seasonal fruits or flowers to create an inviting presentation that draws guests in.
FAQ
Conclusion
The Homemade Chocolate Meringue Pie is truly a delightful blend of rich chocolate and fluffy meringue that brings comfort and joy to any occasion. I encourage you to try making this pie in your own kitchen and watch how it can turn an ordinary meal into a special celebration. With its timeless appeal and delicious flavors, it’s bound to become a favorite among your friends and family!
Homemade Chocolate Meringue Pie
Equipment
- 9-inch pie dish
- Pie weights, dried beans, or rice
- Hand mixer or stand mixer
Ingredients
- 1 pie dough pie dough for 1 9-inch pie
- 5 egg whites egg whites room temperature, save the yolks
- ¼ teaspoon cream of tartar
- ½ cup sugar
- ¾ cup sugar
- ¼ cup cornstarch
- ¼ teaspoon salt
- 2½ cups whole milk
- 2 oz unsweetened chocolate roughly chopped
- 5 egg yolks egg yolks
- 3 tablespoon unsalted butter cubed
- 1½ teaspoon vanilla extract
Instructions
- Preheat your oven to 375°F (190°C). This is essential for ensuring your pie crust bakes evenly and achieves that perfect golden color.
- On a lightly floured surface, roll out the pie dough to about a 12-inch circle. The dough should be thin but not so thin that it tears easily. Once rolled, gently roll the dough around the rolling pin and carefully transfer it to a 9-inch pie dish.
- Gently press the dough into the dish, ensuring it fits well into the edges. Trim any excess dough from the edges to achieve a clean look. Fold over the top part of the dough (about a ½ inch). Use your fingers to crimp the edges, giving it that classic pie appearance.
- Place the pie dish in the refrigerator for 1 hour, or in the freezer for 15 minutes. This helps the crust to chill and prevent shrinking during baking.
- While the crust is chilling, prepare to bake it. Preheat your oven to 375°F again if it’s cooled down.
- Line the chilled pie crust with parchment paper, then fill it with pie weights, dried beans, or uncooked rice. This will help keep the crust in shape as it bakes. Press into the bottom edges to avoid bubbling.
- Place the crust in the oven for 25 minutes. After that time, remove it and carefully take out the weights and parchment paper. Return the crust to the oven and bake for another 10 minutes, until it’s lightly golden. Set aside to cool.
- In a large bowl, or in the bowl of your stand mixer, add the room-temperature egg whites and cream of tartar. Use a hand mixer (or your stand mixer) on medium speed to mix the whites with the cream of tartar until they’re combined and frothy.
- Add the sugar (½ cup) gradually while increasing the speed to HIGH. Continue mixing on HIGH until stiff peaks form, which can take anywhere from 2 to 8 minutes depending on your mixer’s strength.
- Set the meringue aside and leave the oven on. Now, let’s prepare the chocolate filling. In a medium-sized saucepan, whisk together the sugar (¾ cup), cornstarch, and salt.
- Whisk in the whole milk until fully incorporated and the dry ingredients dissolve completely.
- Over medium heat, bring this mixture to a simmer, which should take about 4 to 5 minutes. You’ll notice it starting to thicken.
- Once thickened, turn off the heat and stir in the unsweetened chocolate until fully melted. This should create a smooth consistency. Then, stir in the egg yolks until you no longer see streaks.
- Turn the heat back on to medium and bring to a very gentle simmer again. Make sure to scrape any chocolate from the sides of the pan as you stir. Simmer for another 2 minutes.
- Turn off the heat and stir in the unsalted butter and vanilla, mixing until the butter has melted and is incorporated.
- Now, pour the hot chocolate filling into the prepared pie crust. Immediately spoon the meringue over the hot filling, spreading it to the edges of the crust. Ensure the meringue touches the crust to prevent shrinking.
- Place the pie in the oven for about 10 to 15 minutes, until the tips of the meringue turn a lovely golden brown. Remove the pie and let it cool on a baking rack on the counter for 1 hour.
- Finally, chill the pie in the refrigerator for at least 2 to 3 hours before slicing and serving. To slice, dip a sharp knife in a tall glass of hot tap water to ensure clean cuts.
Notes
- Room Temperature Egg Whites: Having egg whites at room temperature helps them whip better, achieving those airy peaks.
- Timing is Key: It’s essential to add the meringue while the chocolate filling is hot; this helps to reduce weeping, which is when liquid forms on top of the filling.
- Stabilizing Meringue: Adding cream of tartar is crucial in stabilizing the meringue, ensuring it holds its shape while baking.
- Cooling Process: Allow the pie to cool for at least 1 hour before chilling it in the refrigerator. This helps set the filling.
- Slicing Tips: For clean slices, dip your knife in hot water before cutting into the pie.