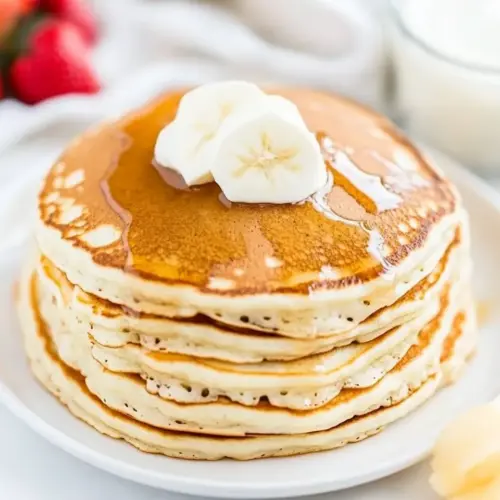
Homemade Buttermilk Pancakes
There’s something incredibly comforting about starting your day with a stack of warm, fluffy pancakes. That’s why I love making Homemade Buttermilk Pancakes on lazy weekends when the urge to indulge hits just right. It all began one chilly morning when I wanted to treat my family to a special breakfast. I decided to whip up a batch of pancakes using buttermilk, which I had left over from another recipe. The moment those pancakes hit the skillet, the kitchen filled with a delightful aroma that instantly lifted our spirits. Each pancake was golden and perfectly fluffy, served with a drizzle of maple syrup and a pat of butter melting on top. This experience has become a cherished tradition in our household, where we gather around the table, sharing stories and laughter while savoring each delicious bite.
Recipe Snapshot
25 mins
5 mins
20 mins
Medium
220 kcal
6g g
Gluten-Free, Low FODMAP
7g g
Mixing Bowl, Frying Pan, Skillet, Whisk, Food Processor
The Best Thing About This Homemade Buttermilk Pancakes
They’re Incredibly Fluffy
One of the standout features of Homemade Buttermilk Pancakes is their fluffy texture. The combination of buttermilk and baking powder creates a light and airy pancake that melts in your mouth. It’s the perfect base for toppings!
Quick and Easy to Make
You don’t need to be a culinary expert to whip up these delicious pancakes. With just a few simple ingredients, you can have breakfast ready in no time. The beauty of this recipe is that it’s straightforward and requires minimal effort, making it perfect for busy mornings or leisurely weekends alike.
Versatile and Customizable
The Homemade Buttermilk Pancakes recipe is incredibly versatile. You can easily customize the batter by adding your favorite ingredients like berries, nuts, or even a dash of cinnamon for a fun twist. The options are endless, so you can make a different version each time!
Perfect for Any Occasion
Whether it’s a family brunch, a special occasion, or just a regular Tuesday, these pancakes are always a hit. They’re perfect for satisfying cravings and can be enjoyed year-round, not just for breakfast but even as a delightful dessert.
Great for Meal Prep
What’s even better is that you can make a big batch of Homemade Buttermilk Pancakes and freeze them. They reheat beautifully, making them a convenient option for busy weekday mornings. Just pop them in the microwave or toaster, and you’re ready to go!
Delicious with Various Toppings
These pancakes can be topped with anything your heart desires. Whether you prefer classic maple syrup, fresh fruit, or a dollop of whipped cream, they’re designed to complement a variety of flavors. The sky’s the limit!
What’s In This Homemade Buttermilk Pancakes
The ingredients for Homemade Buttermilk Pancakes are simple yet powerful. Each plays a vital role in creating that irresistible fluffy texture and rich flavor. The key players include all-purpose flour, baking powder, and buttermilk, which together provide structure and leavening, while eggs add richness and moisture. Here’s a closer look at what you’ll need:
- 3 cups all-purpose flour: The backbone of the pancakes, providing structure.
- ¼ cup sugar: Adds just the right sweetness to balance the flavors.
- 1 ½ tablespoons baking powder: Ensures the pancakes rise perfectly.
- Pinch of sea salt: Enhances flavor and balances the sweetness.
- 3 large eggs: Adds richness and helps bind the ingredients together.
- 2 ¼ cups buttermilk: Provides a tangy flavor and contributes to the fluffiness.
- 1 cup whole milk: Adjusts the batter consistency for optimal pouring.
- ¼ cup melted unsalted butter + more for cooking: Adds flavor and helps achieve a golden-brown color.
Recipe Directions for Homemade Buttermilk Pancakes
Making Homemade Buttermilk Pancakes is a delightful process that fills your kitchen with warmth and wonderful smells. Follow these steps for a batch of pancakes that will leave everyone wanting more.
- Start by preheating your griddle or skillet to 350 degrees or medium-low heat. This step is important to ensure even cooking and that perfect golden-brown crust.
- In a large mixing bowl, combine 3 cups of all-purpose flour, ¼ cup of sugar, 1 ½ tablespoons of baking powder, and a pinch of sea salt. Whisk everything together until well mixed, ensuring no lumps remain.
- In a separate bowl, whisk together 3 large eggs, 2 ¼ cups of buttermilk, 1 cup of whole milk, and ¼ cup of melted unsalted butter until fully combined. This mixture should be smooth and creamy.
- Pour the wet ingredients into the bowl with the dry ingredients. Gently fold the batter together until everything is just combined. Be careful not to over-mix; some lumps are okay, and the batter should be a bit runny and chunky.
- Add about 2 teaspoons of unsalted butter to your heated griddle or skillet. Once melted, use a ladle to pour approximately ¾ cup of the pancake batter onto the hot surface.
- Cook the pancake for about 2 to 3 minutes. You’ll know it’s ready to flip when you see air bubbles forming on the surface and then popping.
- When the edges look set and the top is bubbly, it’s time to flip! Carefully turn the pancake over using a spatula and cook for an additional 30 seconds to 1 minute until golden brown.
- Continue the process until all batter is used, adding more butter to the pan as needed to prevent sticking.
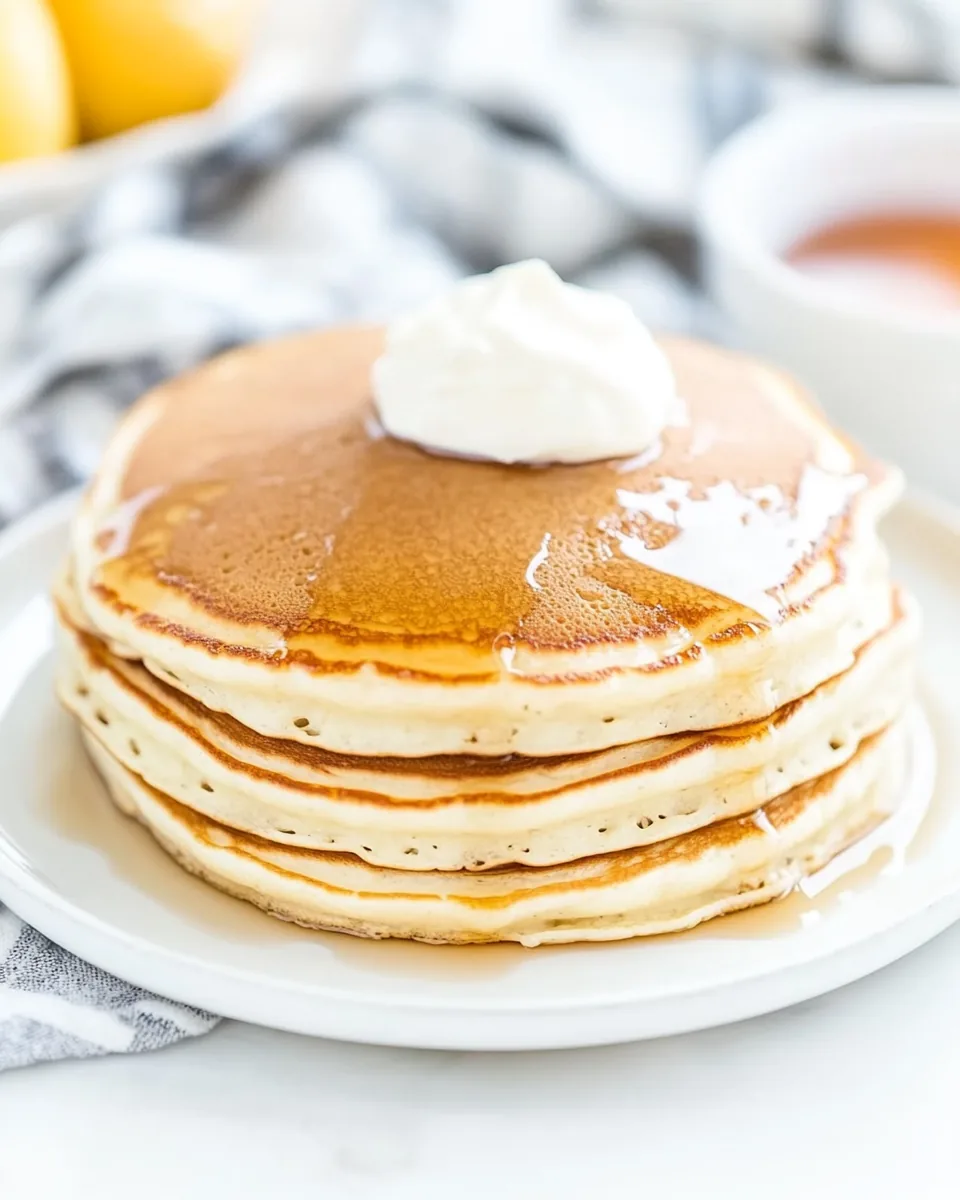
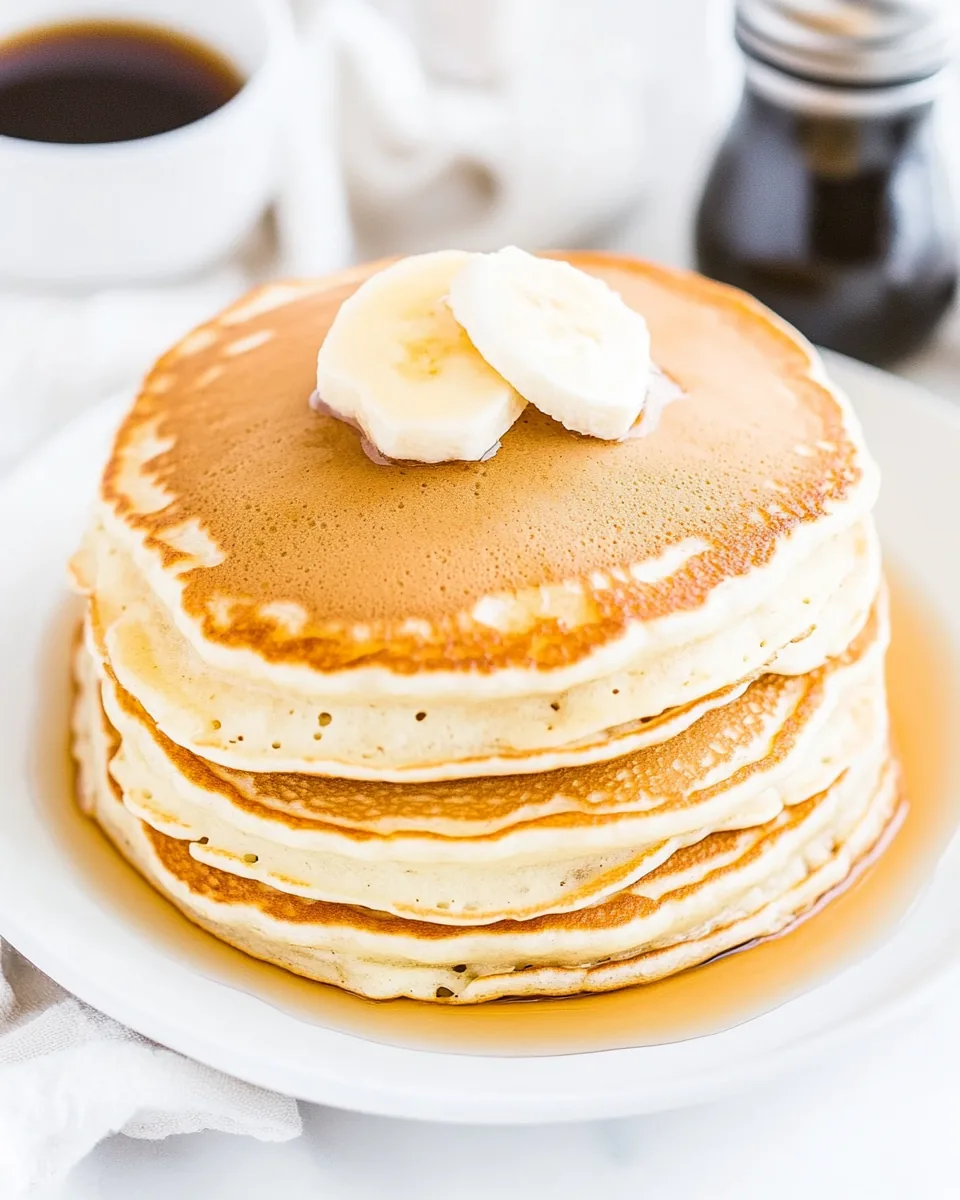
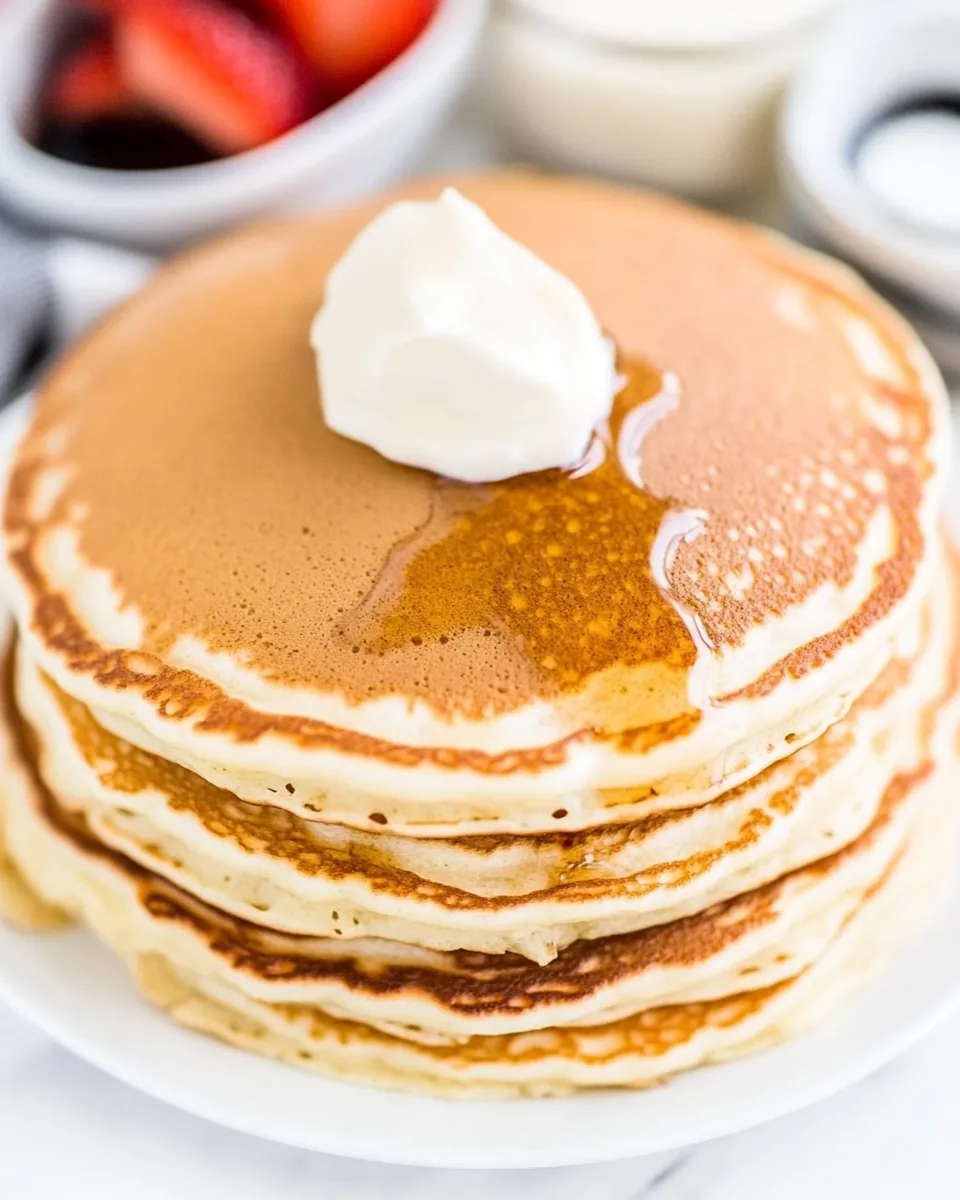
- Once cooked, serve the pancakes warm with a generous pat of butter and a drizzle of maple syrup. Enjoy every bite!
Things Worth Knowing
- Use a non-stick pan: To ensure the pancakes don’t stick, a good non-stick surface is essential.
- Don’t over-mix the batter: Over-mixing can result in tough pancakes. Gently fold until just combined.
- Rest the batter: Allowing the batter to sit for a few minutes can help improve texture.
- Temperature matters: Make sure your griddle is at the right temperature before adding the batter for even cooking.
- Keep pancakes warm: If making in batches, keep cooked pancakes warm in an oven set to low heat until all are ready to serve.
Helpful Notes about Homemade Buttermilk Pancakes
When it comes to making Homemade Buttermilk Pancakes, a few tips can enhance your experience and results. Here are some helpful notes:
- Storage: Keep leftover pancakes covered in the refrigerator for up to 3 days for the best flavor and freshness.
- Freezing: These pancakes freeze well! Place them in a single layer on a baking sheet, then transfer to a freezer bag once frozen. They can last up to 3 months.
- Reheating: To reheat, add a little butter to a skillet over low heat, cooking each side for 1 to 2 minutes until warmed through.
- Serving suggestions: Enjoy them with your favorite toppings like fresh fruit, whipped cream, or flavored syrups for a fun twist.
- Add-ins: Feel free to mix in chocolate chips, berries, or nuts to the batter for additional flavors!
- Consistency: If the batter is too thick, add a splash more milk until you reach your desired consistency.
Perfect Pairings for Homemade Buttermilk Pancakes
- Fresh Fruits: Serve with sliced bananas, strawberries, or blueberries for a refreshing touch.
- Maple Syrup: A classic choice, nothing beats the flavor of real maple syrup drizzled over warm pancakes.
- Yogurt: A dollop of Greek yogurt adds creaminess and a healthy twist to your breakfast.
- Breakfast Meats: Pair these pancakes with your favorite breakfast sausage or turkey bacon for a hearty meal.
- Whipped Cream: Elevate your stack with a layer of whipped cream for a decadent treat.
- Nut Butter: Spread on some almond or peanut butter for a protein-packed option.
- Occasions: Perfect for lazy weekends, family brunches, or even as a sweet dessert after dinner.
FAQ
Conclusion
Homemade Buttermilk Pancakes are truly a breakfast delight that brings warmth and joy to the table. Their fluffy texture and rich flavor make every bite a special treat, perfect for any occasion. I encourage you to try this recipe and make it your own with your favorite toppings and flavors. Enjoy the process and the delicious results!
Homemade Buttermilk Pancakes
Equipment
- Mixing Bowl
- Frying Pan
- Skillet
- Whisk
- Food Processor
Ingredients
- 3 cups all-purpose flour
- ¼ cup sugar
- 1 ½ tablespoons baking powder
- pinch of sea salt
- 3 large eggs
- 2 ¼ cups buttermilk
- 1 cup whole milk
- ¼ cup melted unsalted butter For cooking
Instructions
- Start by preheating your griddle or skillet to 350 degrees or medium-low heat. This step is important to ensure even cooking and that perfect golden-brown crust.
- In a large mixing bowl, combine 3 cups of all-purpose flour, ¼ cup of sugar, 1 ½ tablespoons of baking powder, and a pinch of sea salt. Whisk everything together until well mixed, ensuring no lumps remain.
- In a separate bowl, whisk together 3 large eggs, 2 ¼ cups of buttermilk, 1 cup of whole milk, and ¼ cup of melted unsalted butter until fully combined. This mixture should be smooth and creamy.
- Pour the wet ingredients into the bowl with the dry ingredients. Gently fold the batter together until everything is just combined. Be careful not to over-mix; some lumps are okay, and the batter should be a bit runny and chunky.
- Add about 2 teaspoons of unsalted butter to your heated griddle or skillet. Once melted, use a ladle to pour approximately ¾ cup of the pancake batter onto the hot surface.
- Cook the pancake for about 2 to 3 minutes. You’ll know it’s ready to flip when you see air bubbles forming on the surface and then popping.
- When the edges look set and the top is bubbly, it’s time to flip! Carefully turn the pancake over using a spatula and cook for an additional 30 seconds to 1 minute until golden brown.
- Continue the process until all batter is used, adding more butter to the pan as needed to prevent sticking.
- Once cooked, serve the pancakes warm with a generous pat of butter and a drizzle of maple syrup. Enjoy every bite!
Notes
- Storage: Keep leftover pancakes covered in the refrigerator for up to 3 days for the best flavor and freshness.
- Freezing: These pancakes freeze well! Place them in a single layer on a baking sheet, then transfer to a freezer bag once frozen. They can last up to 3 months.
- Reheating: To reheat, add a little butter to a skillet over low heat, cooking each side for 1 to 2 minutes until warmed through.
- Serving suggestions: Enjoy them with your favorite toppings like fresh fruit, whipped cream, or flavored syrups for a fun twist.
- Add-ins: Feel free to mix in chocolate chips, berries, or nuts to the batter for additional flavors!
- Consistency: If the batter is too thick, add a splash more milk until you reach your desired consistency.