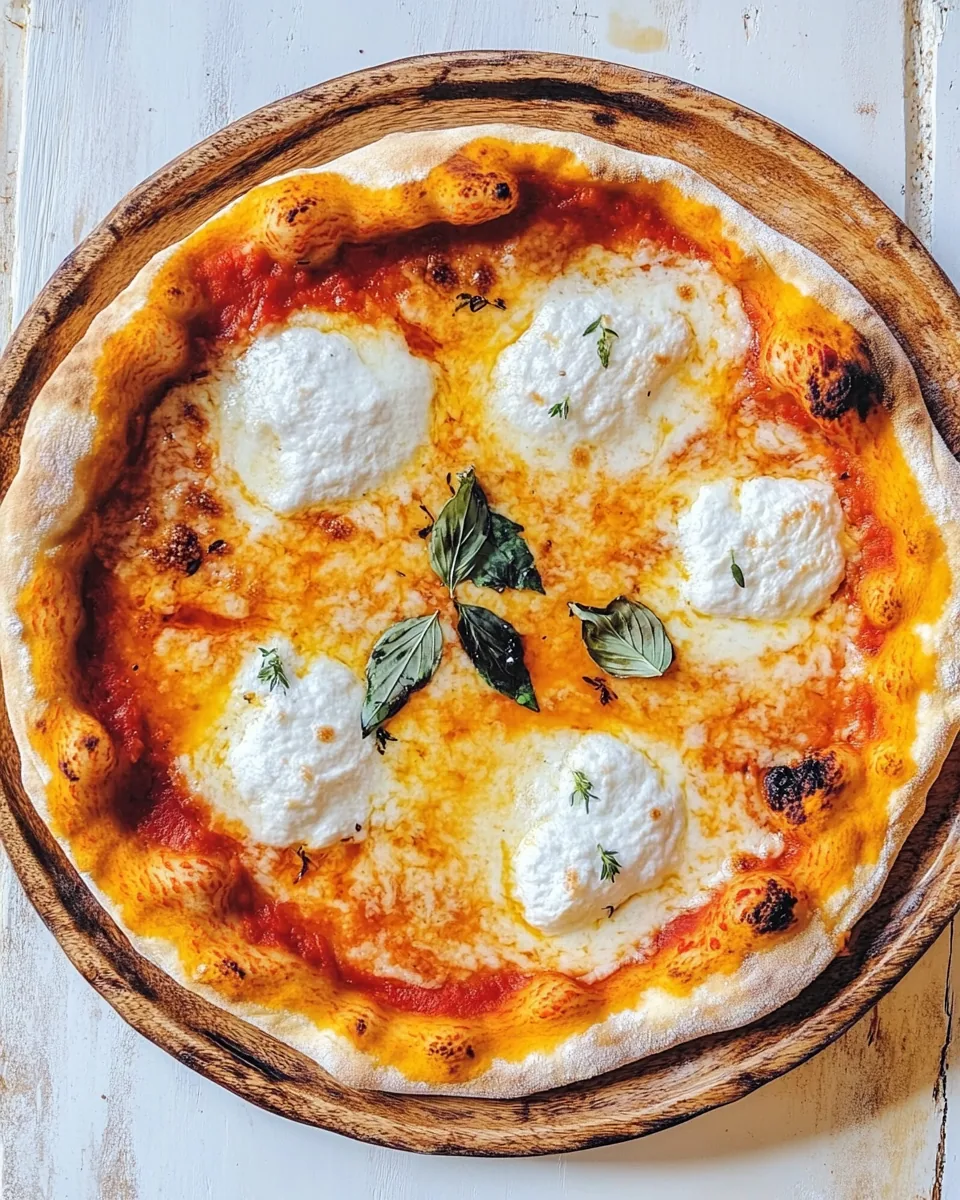
Felicia’s Pizza Crust
There’s something magical about homemade pizza, and with Felicia’s Pizza Crust, you can create that magic right in your own kitchen. I vividly remember my first attempt at making pizza from scratch. The aroma of warm dough rising in the kitchen was irresistible, drawing my family together in anticipation. As we gathered around the table, laughter and chatter filled the air, and the excitement grew as the crusts baked to a perfect golden brown. What makes Felicia’s Pizza Crust so special is not just the texture or the flavor but the joy it brings to our family gatherings. Each bite is a reminder of those cherished moments, where we customize our pizzas with our favorite toppings, creating a masterpiece unique to our tastes. This recipe has been a staple in our home, perfect for any occasion, be it a casual weeknight dinner or a fun family pizza night.
Recipe Snapshot
60 mins
0 mins
0 mins
Medium
210 kcal
6 g
Gluten-Free, Low FODMAP
2 g
Wooden Spoon, Peeler, Chef’s Knife, Whisk, Baking Sheet, Oven
With Felicia’s Pizza Crust, you can achieve a crisp yet chewy crust that holds up to any topping you desire. It’s simple, straightforward, and requires only a handful of ingredients. The best part? You control the flavors and the quality. There’s no need to rush to the store when you can whip up this delightful dough in no time. Trust me, once you try this Felicia’s Pizza Crust, you’ll never look at frozen pizza the same way again!
What Sets This Felicia’s Pizza Crust Apart
Perfectly Crispy Texture
The first thing that draws you to Felicia’s Pizza Crust is its incredible texture. The combination of water, yeast, and flour creates a delightful chewiness that you expect from a great pizza crust. The outside becomes beautifully crispy while the inside remains soft, making every bite a satisfying experience.
Customizable for Everyone
One of the reasons I love this recipe is its versatility. You can easily customize Felicia’s Pizza Crust to cater to everyone’s preferences. Whether you’re a fan of classic margherita or adventurous with toppings like barbecue chicken or veggie overload, this crust serves as the perfect base. You can even divide the dough to make small personal pizzas, allowing each family member to express their creativity!
Great for Meal Prep
Another reason to adore Felicia’s Pizza Crust is its meal prep potential. You can prepare the dough ahead of time and store it in the fridge for a couple of days or freeze it for future use. This means you can have a delicious homemade pizza ready to go whenever the craving strikes!
Economical and Fresh
Making your own pizza dough is not only fun but also economical. With few ingredients like flour, water, and yeast, you can create a big batch of dough for a fraction of the cost of store-bought options. Plus, there’s nothing quite like the taste of fresh dough that you made yourself!
Impress Your Friends and Family
Finally, serving up Felicia’s Pizza Crust at your next gathering is sure to impress your friends and family. Nothing beats the experience of homemade pizza, and they will love the effort you put into creating it. It sparks conversation, laughter, and a sense of togetherness that you can’t replicate with takeout.
What Goes Into Felicia’s Pizza Crust

Creating Felicia’s Pizza Crust involves a few staple ingredients that work harmoniously together. The key players are flour, yeast, and water. These essential components create the perfect dough that puffs up beautifully and holds all your favorite toppings. Each ingredient contributes to the crust’s flavor and structure, ensuring you have a pizza that tastes as good as it looks.
- 1¼ cups (300 ml) warm water (110°F/43°C to 115°F/46°C) – The perfect temperature for the water is crucial as it helps activate the yeast and starts the fermentation process. This step is essential for achieving the desired texture in your crust.
- 1½ teaspoons (5 grams) active dry yeast – This is the leavening agent that causes your dough to rise, resulting in a light and airy texture. Be sure to check the expiration date to ensure it’s still active!
- 1 tablespoon (14 grams) extra-virgin olive oil, optional – Adding a bit of olive oil not only enhances the flavor but also contributes to the crust’s tenderness.
- 2 teaspoons (12 grams) fine sea salt – Salt is essential for flavor and helps strengthen the dough, making it more cohesive.
- 1 teaspoon (4 grams) granulated sugar, optional – A touch of sugar can help activate the yeast and add a hint of sweetness that balances the savory toppings.
- 4 cups (500 grams) “00” flour, plus more for dusting – This type of flour is finely milled and ideal for making pizza crust due to its high protein content, ensuring a great structure and chew.
- Pizza sauce, fresh mozzarella cheese, and fresh basil, to serve – These toppings are traditional and pair perfectly with the crust, bringing freshness and flavor to your homemade pizza.
Cooking Instructions for Felicia’s Pizza Crust

Making Felicia’s Pizza Crust is a rewarding experience that will elevate your pizza game. Let’s dive into the steps to create this delightful crust that everyone will love.
- Start by pouring 1¼ cups (300 ml) of warm water into a large mixing bowl. Ensure the water temperature is between 110°F and 115°F. This warmth is essential for activating the yeast. Sprinkle 1½ teaspoons (5 grams) of active dry yeast over the surface of the water. Let it sit for about 5 to 10 minutes until it becomes foamy. This foam indicates that the yeast is active and ready to work.
- Once the yeast is frothy, whisk in 1 tablespoon (14 grams) of optional extra-virgin olive oil, 2 teaspoons (12 grams) of fine sea salt, and 1 teaspoon (4 grams) of optional granulated sugar. These ingredients add flavor and aid in the dough-making process. Mix until well combined.
- Slowly add 4 cups (500 grams) of “00” flour to the wet mixture. Start stirring with a wooden spoon or spatula until the dough begins to come together and forms a sticky mass. You may need to adjust the flour slightly based on the humidity of your environment.
- After mixing, lightly flour your hands and turn the dough out onto a floured work surface. Gently knead the dough for about 2 to 3 minutes. You want to develop some gluten here, so knead until the dough feels smooth and less sticky. Avoid over-kneading to prevent a tough texture.
- Once kneaded, shape the dough into a ball and place it in a lightly oiled large bowl. Cover the bowl tightly with plastic wrap or a kitchen towel. Set it aside in a warm, draft-free area to allow it to rise until it has doubled in size, around 1 hour.
- After the dough has risen, turn it out onto a lightly floured surface again. You will notice how puffy and airy it has become. Gently knead it just once or twice to release any excess air. Shape it into a round ball.
- For large pizzas, use the entire dough ball. If you prefer smaller pizzas, divide the dough into 4 equal portions, each weighing approximately 208 grams. This gives you the flexibility to create personal-sized pizzas.
- Next, position your oven rack in the bottom third of the oven and preheat to 450°F (230°C). Place a pizza stone in the cold oven to preheat for at least 1 hour. If you don’t have a pizza stone, preheat an upside-down rimmed baking sheet for at least 20 minutes to create a crispy crust.
- On a lightly floured sheet of parchment paper or a pizza peel, stretch your dough into a 14-inch circle for large pizzas or 6-inch circles for smaller ones. Be gentle while stretching to avoid tearing the dough.
- Spread your favorite pizza sauce over the surface of the stretched dough, leaving about a 1-inch border around the edges. This border will become the crust. Top with sliced fresh mozzarella cheese evenly across the sauce.
- Carefully slide the prepared pizza onto the preheated pizza stone or baking sheet in the oven. Bake until the crust is crisp and golden brown, which should take about 15 to 20 minutes. Keep an eye on it towards the end to avoid burning.
- Once baked, remove your pizza from the oven and let it cool for a minute or two. Garnish with fresh basil if desired, then slice up your homemade pizza and serve it hot!
Things Worth Knowing
- Temperature Matters: Ensuring your water is at the right temperature is essential for activating the yeast. Too hot, and you’ll kill the yeast; too cold, and it won’t activate properly.
- Flour Type: Using “00” flour gives your pizza a professional-quality crust. It has a higher protein content that helps form gluten, resulting in a chewier texture.
- Resting Time: Allowing the dough to rest is crucial for developing flavor and texture. Don’t rush this step; the longer it rests, the better the flavor.
- Don’t Overbake: Keep an eye on your pizza as it bakes. Overbaking can lead to a dry crust, while perfect baking ensures a juicy and crispy base.
- Experiment with Toppings: Feel free to experiment with different toppings and sauces! This crust is versatile and can handle all sorts of delicious combinations.
Tips for Success

To ensure your journey with Felicia’s Pizza Crust is a success, here are some tips to keep in mind:
- Storage: If you have leftovers, store them in an airtight container in the refrigerator for up to 3 days. To reheat, place in a hot oven for a few minutes to regain that crispy texture.
- Freezing: You can freeze the dough for up to 3 months. Just make sure to wrap it tightly in plastic wrap and place it in a freezer-safe bag.
- Pairing: Pair your pizza with a fresh salad or a side of roasted vegetables for a complete meal. A light balsamic vinaigrette goes perfectly with the pizza’s richness.
- Seasonal Toppings: Take advantage of seasonal produce for toppings. Fresh basil in summer or roasted squash in fall can elevate your pizza experience.
- Experiment with Cheeses: While fresh mozzarella cheese is traditional, feel free to mix in other cheeses like Parmesan or Fontina for added depth of flavor.
Serving Ideas for Felicia’s Pizza Crust
When it comes to serving Felicia’s Pizza Crust, the possibilities are endless. Here are some ideas to inspire you:
- Classic Pizza Night: Serve your homemade pizza as the star of a classic pizza night. Let everyone customize their own pizzas with a spread of toppings like fresh vegetables, assorted meats, and different cheeses.
- Casual Gatherings: This pizza is perfect for casual gatherings. Serve it with a side of dipping sauces like garlic butter or a spicy marinara to elevate the experience.
- Game Day: Make a variety of pizzas to enjoy while watching the game. It’s a great way to keep everyone satisfied and happy!
- Quick and Easy Lunch: Use leftover pizza for a quick and tasty lunch. Just reheat slices in the oven for a few minutes to bring back the crust’s crispiness.
- Seasonal Celebrations: Customize your pizza for seasonal celebrations, whether it’s a summer barbecue with fresh basil and tomatoes or a cozy winter gathering with hearty toppings.
- Gourmet Twist: Try drizzling a balsamic reduction over the top of your finished pizza for a gourmet touch. This adds a sweet tang that pairs beautifully with savory toppings.
FAQ
Conclusion
In summary, Felicia’s Pizza Crust is a delightful recipe that allows you to create your own personal pizzas with ease. It’s a fun, engaging process that promotes creativity in the kitchen and brings loved ones together around the dinner table. I encourage you to give this recipe a try. You’ll not only enjoy the fruits of your labor but also the joy it brings to your various occasions. Enjoy every cheesy, delicious bite!
Felicia's Pizza Crust
Equipment
- Wooden Spoon
- Peeler
- Chef's Knife
- Whisk
- Baking Sheet
- Oven
Ingredients
- 1¼ cups Water Warm (110°F/43°C to 115°F/46°C)
- 1½ teaspoons Active dry yeast
- 1 tablespoon Extra-virgin olive oil Optional
- 2 teaspoons Fine sea salt
- 1 teaspoon Granulated sugar Optional
- 4 cups 00 flour Plus more for dusting
- Pizza sauce To serve
- Fresh mozzarella cheese To serve
- Fresh basil To serve
Instructions
- Step 1: Start by pouring 1¼ cups (300 ml) of warm water into a large mixing bowl. Ensure the water temperature is between 110°F and 115°F. This warmth is essential for activating the yeast. Sprinkle 1½ teaspoons (5 grams) of active dry yeast over the surface of the water. Let it sit for about 5 to 10 minutes until it becomes foamy. This foam indicates that the yeast is active and ready to work.
- Step 2: Once the yeast is frothy, whisk in 1 tablespoon (14 grams) of optional extra-virgin olive oil, 2 teaspoons (12 grams) of fine sea salt, and 1 teaspoon (4 grams) of optional granulated sugar. These ingredients add flavor and aid in the dough-making process. Mix until well combined.
- Step 3: Slowly add 4 cups (500 grams) of “00” flour to the wet mixture. Start stirring with a wooden spoon or spatula until the dough begins to come together and forms a sticky mass. You may need to adjust the flour slightly based on the humidity of your environment.
- Step 4: After mixing, lightly flour your hands and turn the dough out onto a floured work surface. Gently knead the dough for about 2 to 3 minutes. You want to develop some gluten here, so knead until the dough feels smooth and less sticky. Avoid over-kneading to prevent a tough texture.
- Step 5: Once kneaded, shape the dough into a ball and place it in a lightly oiled large bowl. Cover the bowl tightly with plastic wrap or a kitchen towel. Set it aside in a warm, draft-free area to allow it to rise until it has doubled in size, around 1 hour.
- Step 6: After the dough has risen, turn it out onto a lightly floured surface again. You will notice how puffy and airy it has become. Gently knead it just once or twice to release any excess air. Shape it into a round ball.
- Step 7: For large pizzas, use the entire dough ball. If you prefer smaller pizzas, divide the dough into 4 equal portions, each weighing approximately 208 grams. This gives you the flexibility to create personal-sized pizzas.
- Step 8: Next, position your oven rack in the bottom third of the oven and preheat to 450°F (230°C). Place a pizza stone in the cold oven to preheat for at least 1 hour. If you don’t have a pizza stone, preheat an upside-down rimmed baking sheet for at least 20 minutes to create a crispy crust.
- Step 9: On a lightly floured sheet of parchment paper or a pizza peel, stretch your dough into a 14-inch circle for large pizzas or 6-inch circles for smaller ones. Be gentle while stretching to avoid tearing the dough.
- Step 10: Spread your favorite pizza sauce over the surface of the stretched dough, leaving about a 1-inch border around the edges. This border will become the crust. Top with sliced fresh mozzarella cheese evenly across the sauce.
- Step 11: Carefully slide the prepared pizza onto the preheated pizza stone or baking sheet in the oven. Bake until the crust is crisp and golden brown, which should take about 15 to 20 minutes. Keep an eye on it towards the end to avoid burning.
- Step 12: Once baked, remove your pizza from the oven and let it cool for a minute or two. Garnish with fresh basil if desired, then slice up your homemade pizza and serve it hot!
Notes
- Tip 1: If you have leftovers, store them in an airtight container in the refrigerator for up to 3 days. To reheat, place in a hot oven for a few minutes to regain that crispy texture.
- Tip 2: You can freeze the dough for up to 3 months. Just make sure to wrap it tightly in plastic wrap and place it in a freezer-safe bag.
- Tip 3: Pair your pizza with a fresh salad or a side of roasted vegetables for a complete meal. A light balsamic vinaigrette goes perfectly with the pizza's richness.
- Tip 4: Take advantage of seasonal produce for toppings. Fresh basil in summer or roasted squash in fall can elevate your pizza experience.
- Tip 5: While fresh mozzarella cheese is traditional, feel free to mix in other cheeses like Parmesan or Fontina for added depth of flavor.