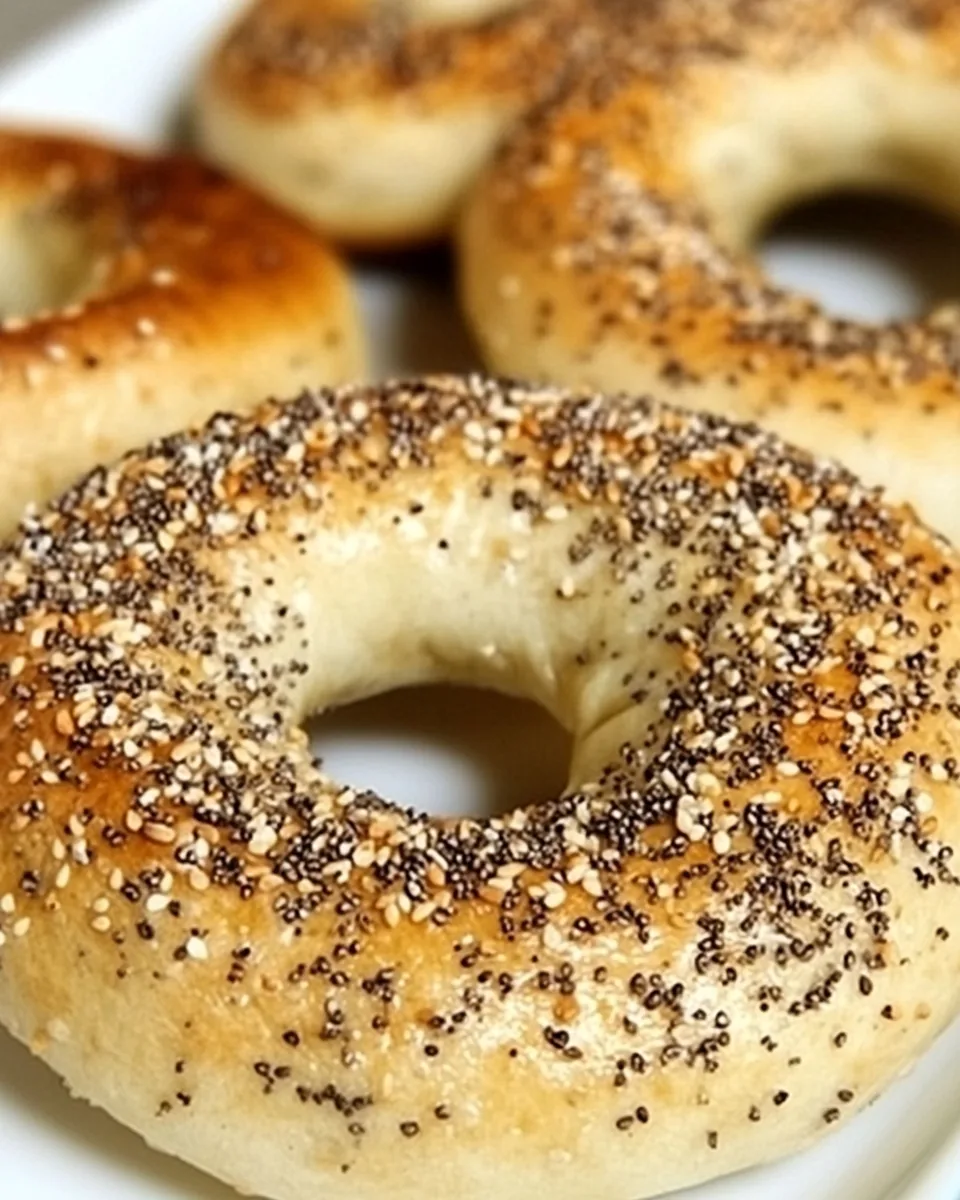
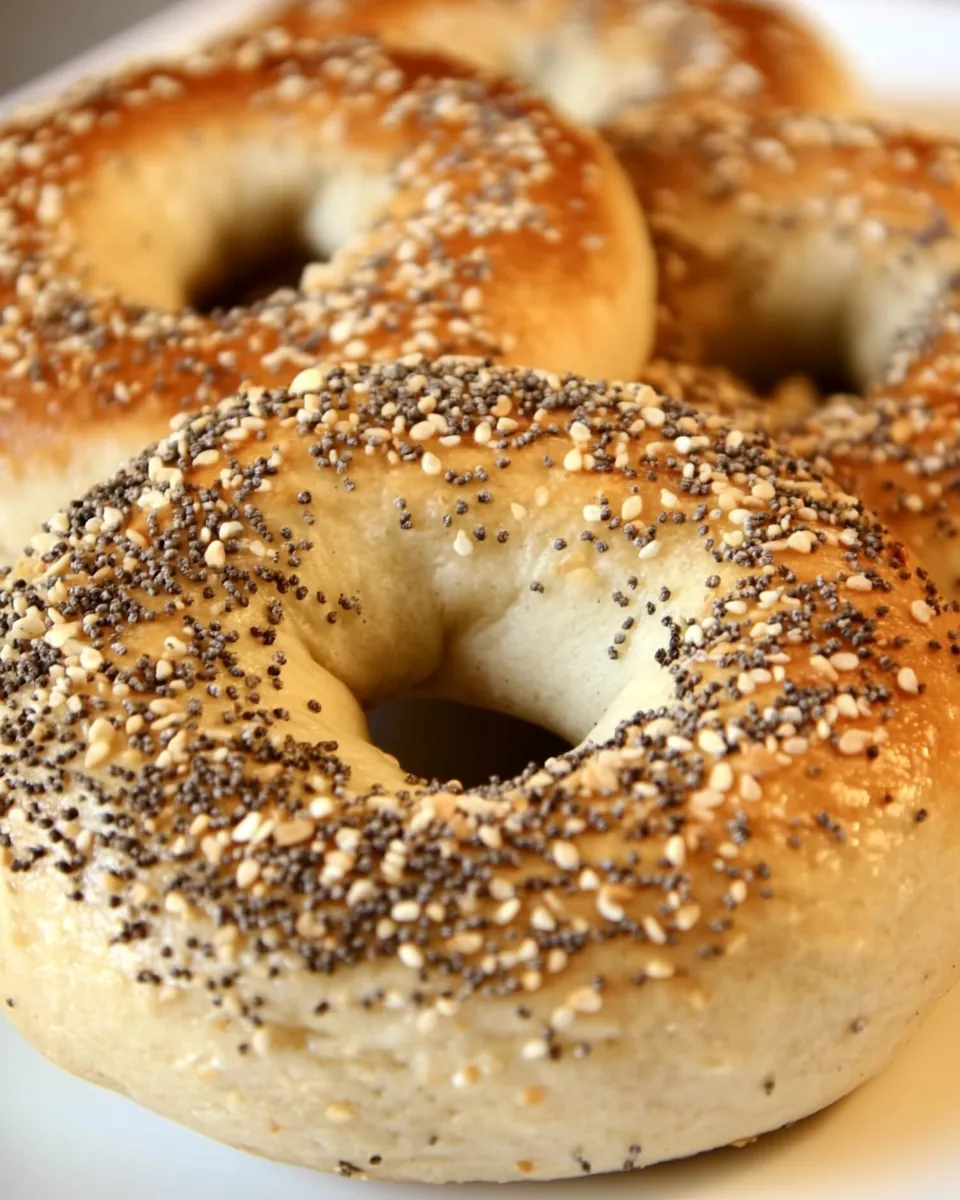
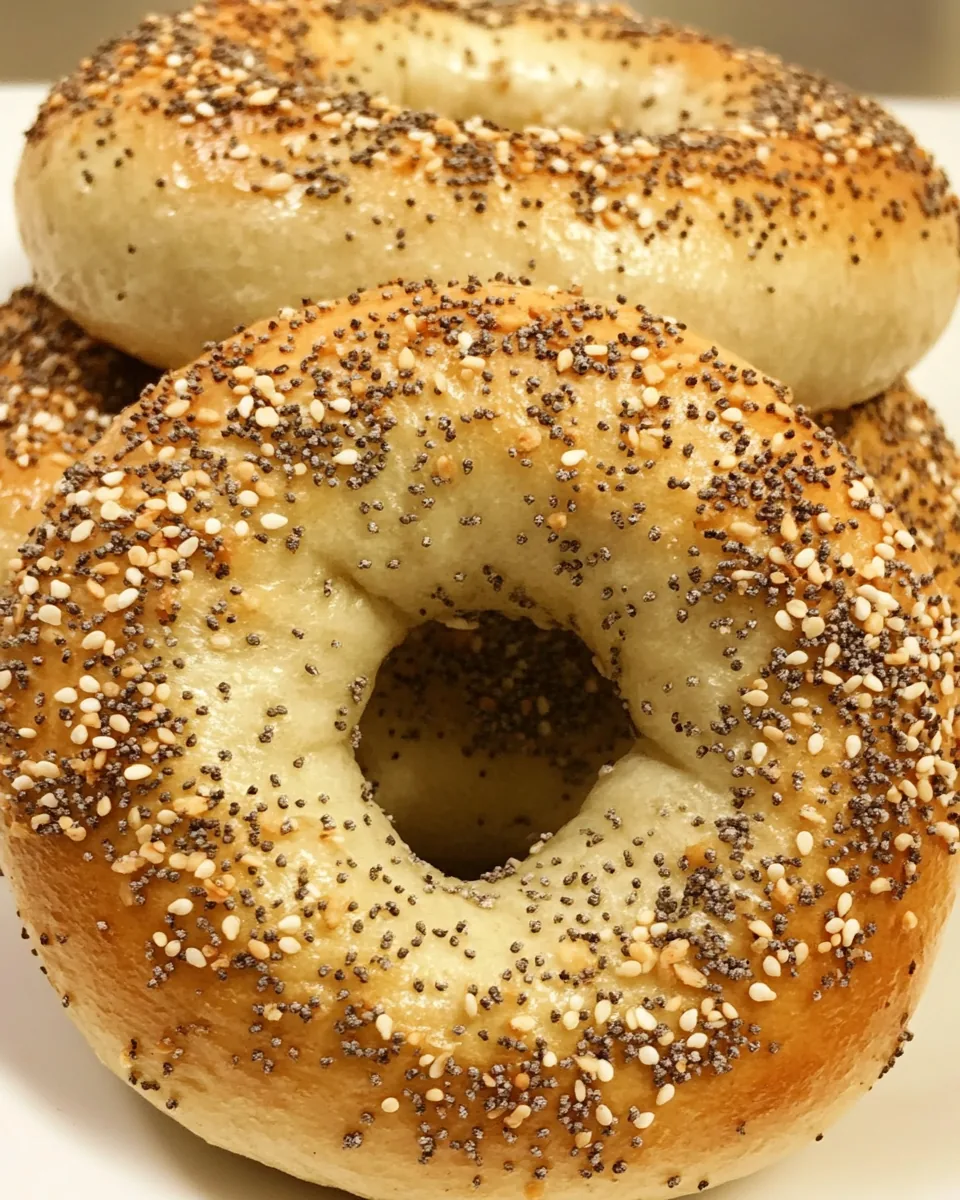
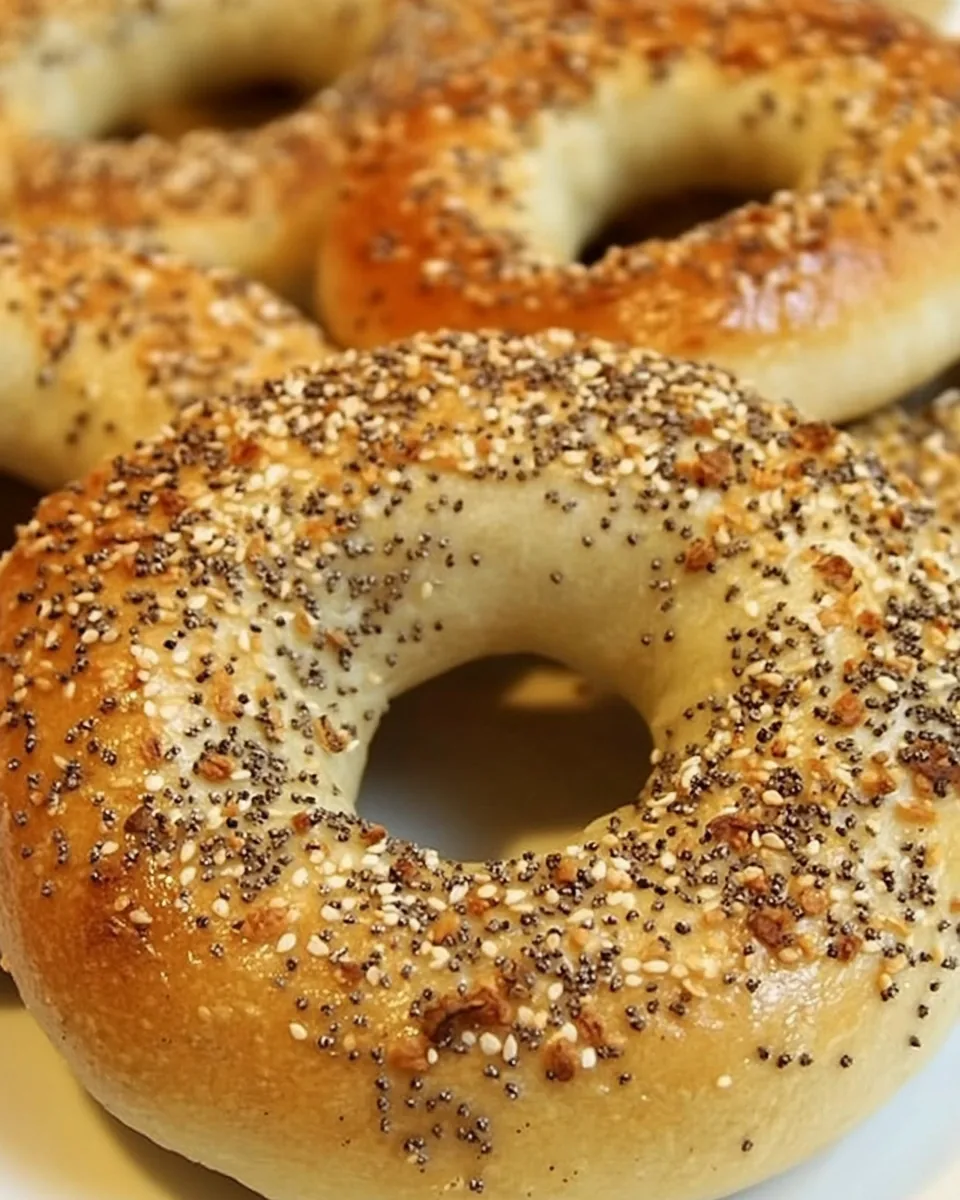
Everything Bagels
There’s something magical about the aroma of freshly baked bread wafting through the kitchen, and for me, that magic peaks with Everything Bagels. Growing up, my weekends were often filled with the warmth of family gatherings centered around breakfast. My relatives would bring their best dishes, but there was always a special box of bagels that caught everyone’s attention. The variety of toppings—poppy seeds, sesame seeds, and a sprinkle of garlic—drew me in, and I’d eagerly await my turn to grab one. These moments were not just about food; they were about connection, laughter, and the joy of sharing. Making Everything Bagels at home is a way of preserving that cherished memory, allowing me to recreate the love and comfort they bring. It’s an experience I look forward to, from the kneading of the dough to the excitement of watching them puff up in the oven. And let me tell you, when you pull those golden bagels out, it’s like a little piece of heaven on a plate.
Recipe Snapshot
1 hr 10 mins
50 mins
20 mins
Medium
250 kcal
8 g
AIP
1 g
Wooden Spoon, Mixing Bowl, Frying Pan, Chef’s Knife, Whisk, Baking Sheet, Large Pot, Oven
What’s Great About This Everything Bagels
They’re Versatile
One of the reasons I absolutely adore Everything Bagels is their versatility. Breakfast, lunch, or even a late-night snack, these bagels fit any occasion. You can top them with cream cheese and smoked salmon for a classic breakfast, or use them as the base for a sandwich loaded with your favorite fillings. The savory flavors from the toppings elevate any meal. I often serve them alongside fresh salads, and they never fail to impress.
Homemade Toppings
If you’re feeling adventurous, making your own everything bagel topping is an absolute game changer. It’s so simple, and you can customize it to fit your taste! By mixing together poppy seeds, sesame seeds, and dried garlic, you can create a topping that’s bursting with flavor. It’s a fun way to experiment, and each time I try a new ratio, I discover a delightful variation.
Perfect Texture
There’s an unmatched joy in biting into a freshly baked Everything Bagel. The exterior is perfectly crispy while the interior remains soft and chewy, creating that perfect balance. This texture is achieved through precise boiling and baking techniques, which I’ve honed over the years. When you take that first bite, the contrast is simply irresistible. It’s a little piece of culinary perfection!
Great for Meal Prep
Batch cooking is my secret weapon, and these bagels are the perfect candidate for meal prep. I often make a double batch, allowing me to freeze extras for those busy mornings. Just pop one in the toaster, and you have a delicious breakfast ready in minutes. It’s an easy way to ensure I always have something satisfying on hand, and the homemade taste beats store-bought options every time!
Fun Family Activity
Making Everything Bagels is not just about the end result; it’s about enjoying the process. I love involving my kids in the kitchen, and they have a blast kneading the dough and shaping the bagels. It’s a wonderful way to teach them about baking while also spending quality time together. The smiles on their faces when they see the bagels rise and finally come out of the oven are priceless!
Perfect for Any Season
Another fantastic aspect of Everything Bagels is that they are perfect for any season. Whether it’s a bright summer morning on the patio or a cozy winter afternoon indoors, these bagels fit right in. They’re satisfying and nourishing, making them an ideal choice year-round. Plus, they are an excellent addition to any brunch gathering!
What Goes Into Everything Bagels
When it comes to making Everything Bagels, the ingredients are simple yet essential. Each component plays a vital role in achieving that perfect flavor and texture. The key players include high-gluten or bread flour, which gives the bagels their necessary chewiness, and instant yeast for that delightful rise. The combination of toppings not only adds flavor but also creates a beautiful presentation, making them irresistible!
- 1 teaspoon instant yeast: This is key for a good rise, giving your bagels that fluffy interior.
- 4 cups high-gluten or bread flour: This flour is essential for achieving the right chewiness in your bagels.
- 2½ cups water, at room temperature: Necessary for activating the yeast and forming the dough.
- ½ teaspoon instant yeast: A little extra yeast can help with the fermentation process!
- 3¾ cups high-gluten or bread flour: Using a mix ensures the perfect dough consistency.
- 2¾ teaspoons salt: This enhances the flavor of the bagels, making them truly delicious.
- 2 teaspoons malt powder OR 1 tablespoon dark or light malt syrup, honey, or brown sugar: Adds sweetness and richness to the dough.
- 1 tablespoon baking soda: This will be added to the boiling water to help with browning.
- Cornmeal or semolina flour for dusting: Helps prevent sticking and adds a nice texture to the bagels.
- Everything Bagel Topping: This is the star of the show, combining various seeds and spices.
- 4 teaspoons poppy seeds: Adds a nutty flavor and a delightful crunch.
- 4 teaspoons sesame seeds: These add a nice crunch and a hint of nuttiness.
- 4 teaspoons dried garlic, minced or flaked: Gives that classic everything flavor!
- 4 teaspoons dried onion, minced or chopped: Complements the garlic and enhances the overall taste.
- 2 teaspoons kosher salt, or other coarse salt: To sprinkle on top before baking for added flavor.
Everything Bagels Instructions
Making Everything Bagels is a rewarding process that fills your kitchen with enticing aromas. You’ll find that each step is simple, but the results are truly impressive. Follow these detailed steps to create your own batch of delicious bagels!
- To make the sponge, stir 1 teaspoon instant yeast into 4 cups high-gluten or bread flour in a 4-quart mixing bowl. Add 2½ cups water, whisking or stirring only until it forms a smooth, sticky batter (like pancake batter). Cover the bowl with plastic wrap and leave at room temperature for approximately 2 hours, or until the mixture becomes very foamy and bubbly. It should swell to nearly double in size and collapse when the bowl is tapped on the countertop.
- To make the dough, in the same mixing bowl (or in the bowl of an electric mixer), add ½ teaspoon instant yeast to the sponge and stir. Then add 3¾ cups high-gluten or bread flour and all of the 2¾ teaspoons salt and 2 teaspoons malt powder. Stir (or mix on low speeds with the dough hook) until the ingredients form a ball, slowly working in the remaining ¾ cup flour to stiffen the dough.
- Transfer the dough to the counter and knead for at least 10 minutes (or for 6 minutes by machine). The dough should be firm, but still pliable and smooth. There should be no raw flour – all the ingredients should be hydrated. If the dough seems dry and rips, add a few drops of water and continue kneading. If the dough seems tacky or sticky, add more flour to achieve the stiffness required. The kneaded dough should feel satiny and pliable but not be tacky.
- Immediately divide the dough into 12 pieces for standard bagels, or 24 pieces if you are making mini bagels. Form the pieces into rolls.
- Cover the rolls with a damp towel and allow them to rest for approximately 20 minutes.
- Line 2 sheet pans with parchment paper and mist lightly with spray oil. Proceed with shaping the bagels by pushing a hole through the center of the roll with your thumb and stretching out the hole to 2 ½ inches in diameter, making sure that the resulting ring has a fairly even thickness all around.
- Place each of the shaped pieces 2 inches apart on the pan. Mist the bagels very lightly with the spray oil and cover loosely with plastic wrap. Let the pans sit at room temperature for about 20 minutes.
- Check to see if the bagels are ready to be retarded in the refrigerator by using the “float test.” Fill a small bowl with cool or room-temperature water. The bagels are ready to be retarded when they float within 10 seconds of being dropped into the water. Take one bagel and test it. If it floats, immediately return the tester bagel to the pan, pat it dry, cover the pan, and place it in the refrigerator overnight (it can stay in the refrigerator for up to 2 days). If the bagel does not float, return it to the pan and continue to proof the dough at room temperature, checking back every 10 to 20 minutes or so until a tester floats. The time needed to accomplish the float will vary, depending on the ambient temperature and the stiffness of the dough.
- The following day (or when you are ready to bake the bagels), preheat the oven to 500 degrees F with the two racks set in the middle of the oven. Bring a large pot of water to a boil (the wider the pot the better), and add 1 tablespoon baking soda. Have a slotted spoon or skimmer nearby.
- For Homemade Everything Bagel Topping, combine: 4 teaspoons poppy seeds, 4 teaspoons sesame seeds, 4 teaspoons dried garlic, 4 teaspoons dried onion, and 2 teaspoons kosher salt. This makes enough topping for 12 large bagels or 24 mini bagels.
- Remove the bagels from the refrigerator and gently drop them into the water, boiling only as many comfortably fit (they should float within 10 seconds). After 1 minute, flip them over and boil another minute. If you like very chewy bagels, you can extend the boiling to 2 minutes per side. While the bagels are boiling, sprinkle the same parchment-lined sheet pans with Cornmeal or semolina flour. As soon as the bagels come out of the water, top them with the Everything Bagel mixture.
- When all the bagels have been boiled, place the pans on the 2 middle shelves in the oven. Bake for approximately 5 minutes, then rotate the pans, switching shelves and giving the pans a 180-degree rotation. (If you are baking only 1 pan, keep it on the center shelf but still rotate 180 degrees.) After the rotation, lower the oven setting to 450 degrees F and continue baking for about 5 minutes, or until the bagels turn light golden brown. You may bake them darker if you prefer.
- Remove the pans from the oven and let the bagels cool on a rack for 15 minutes or longer before serving.
Things Worth Knowing
- Boiling Tip: Boiling your bagels is crucial to achieve that perfect chewy texture. The baking soda helps in browning and developing flavor.
- Shaping Tip: Make sure to shape the bagels with an even thickness around the hole to ensure even cooking.
- Resting Time: Allowing the dough to rest is important as it helps to relax the gluten, making it easier to shape.
- Float Test: Always perform the float test to check if your bagels are ready to be chilled in the refrigerator. It’s a key indicator of their readiness.
Expert Tips about Everything Bagels
Creating the perfect Everything Bagels is both an art and a science. With these expert tips, you can elevate your bagel-making game!
- Storage: To store leftovers, place your bagels in an airtight container at room temperature for up to 2 days. For longer storage, freeze them in a resealable bag. Just toast them directly from the freezer when you’re ready to enjoy!
- Freezing: You can freeze unboiled shapes too! Simply shape the bagels and flash freeze them on a baking sheet before transferring them to a freezer bag. When you’re ready to bake, just boil them from frozen.
- Pairing: Everything bagels pair wonderfully with cream cheese, avocado, or even as a sandwich base. Experiment with different spreads to find your favorite combination!
- Flour Selection: Using high-gluten flour is key to achieving the chewy texture characteristic of bagels. Don’t skip on this detail!
- Shaping Technique: For a more uniform shape, you can use the bench rest method to allow the shaped bagels to rest before boiling.
- Uniform Size: Try to make each bagel the same size for even baking. This also helps in portion control!
What to Serve Alongside Everything Bagels
When it comes to serving Everything Bagels, the possibilities are endless! Here are some delightful ideas to enhance your bagel experience:
- Classic Breakfast: Serve Everything Bagels with cream cheese and smoked salmon for a delicious breakfast option.
- Salads: Pair your bagels with a refreshing side salad, like a simple green salad or a Caesar salad, for a well-rounded meal.
- Lunch Treat: Use Everything Bagels as a sandwich base filled with fresh vegetables, deli meats, or your favorite spreads for a satisfying lunch.
- Brunch Highlight: These bagels are perfect for brunch gatherings, served with an array of toppings and fresh fruits.
- Seasonal Pairings: In summer, enjoy with fresh garden vegetables, and in winter, pair with warm soups for the ultimate comfort meal.
- Storage Tips: Store any leftover bagels in a paper bag at room temperature, or freeze them for later use.
FAQ
Conclusion
In summary, the homemade Everything Bagels bring together the perfect blend of flavors and textures, making them a delightful addition to any meal. I encourage you to try your hand at making these delicious bagels; the process is fun and the results are incredibly rewarding. Plus, there’s nothing quite like the taste of freshly baked bagels made right in your own kitchen!

Everything Bagels
Equipment
- Wooden Spoon
- Mixing Bowl
- Frying Pan
- Chef's Knife
- Whisk
- Baking Sheet
- Large Pot
- Oven
Ingredients
- 1 teaspoon instant yeast
- 4 cups high-gluten or bread flour
- 2.5 cups water at room temperature
- 0.5 teaspoon instant yeast
- 3.75 cups high-gluten or bread flour
- 2.75 teaspoons salt
- 2 teaspoons malt powder OR 1 tablespoon dark or light malt syrup, honey, or brown sugar
- 1 tablespoon baking soda
- Cornmeal or semolina flour for dusting
- Everything Bagel Topping for a homemade version, see below
- 4 teaspoons poppy seeds
- 4 teaspoons sesame seeds
- 4 teaspoons dried garlic minced or flaked
- 4 teaspoons dried onion minced or chopped
- 2 teaspoons kosher salt or other coarse salt
Instructions
- 1. To make the sponge, stir 1 teaspoon instant yeast into 4 cups high-gluten or bread flour in a 4-quart mixing bowl. Add 2½ cups water, whisking or stirring only until it forms a smooth, sticky batter (like pancake batter). Cover the bowl with plastic wrap and leave at room temperature for approximately 2 hours, or until the mixture becomes very foamy and bubbly. It should swell to nearly double in size and collapse when the bowl is tapped on the countertop.
- 2. To make the dough, in the same mixing bowl (or in the bowl of an electric mixer), add ½ teaspoon instant yeast to the sponge and stir. Then add 3¾ cups high-gluten or bread flour and all of the 2¾ teaspoons salt and 2 teaspoons malt powder. Stir (or mix on low speeds with the dough hook) until the ingredients form a ball, slowly working in the remaining ¾ cup flour to stiffen the dough.
- 3. Transfer the dough to the counter and knead for at least 10 minutes (or for 6 minutes by machine). The dough should be firm, but still pliable and smooth. There should be no raw flour – all the ingredients should be hydrated. If the dough seems dry and rips, add a few drops of water and continue kneading. If the dough seems tacky or sticky, add more flour to achieve the stiffness required. The kneaded dough should feel satiny and pliable but not be tacky.
- 4. Immediately divide the dough into 12 pieces for standard bagels, or 24 pieces if you are making mini bagels. Form the pieces into rolls.
- 5. Cover the rolls with a damp towel and allow them to rest for approximately 20 minutes.
- 6. Line 2 sheet pans with parchment paper and mist lightly with spray oil. Proceed with shaping the bagels by pushing a hole through the center of the roll with your thumb and stretching out the hole to 2 ½ inches in diameter, making sure that the resulting ring has a fairly even thickness all around.
- 7. Place each of the shaped pieces 2 inches apart on the pan. Mist the bagels very lightly with the spray oil and cover loosely with plastic wrap. Let the pans sit at room temperature for about 20 minutes.
- 8. Check to see if the bagels are ready to be retarded in the refrigerator by using the “float test.” Fill a small bowl with cool or room-temperature water. The bagels are ready to be retarded when they float within 10 seconds of being dropped into the water. Take one bagel and test it. If it floats, immediately return the tester bagel to the pan, pat it dry, cover the pan, and place it in the refrigerator overnight (it can stay in the refrigerator for up to 2 days). If the bagel does not float, return it to the pan and continue to proof the dough at room temperature, checking back every 10 to 20 minutes or so until a tester floats. The time needed to accomplish the float will vary, depending on the ambient temperature and the stiffness of the dough.
- 9. The following day (or when you are ready to bake the bagels), preheat the oven to 500 degrees F with the two racks set in the middle of the oven. Bring a large pot of water to a boil (the wider the pot the better), and add 1 tablespoon baking soda. Have a slotted spoon or skimmer nearby.
- 10. For Homemade Everything Bagel Topping, combine: 4 teaspoons poppy seeds, 4 teaspoons sesame seeds, 4 teaspoons dried garlic, 4 teaspoons dried onion, and 2 teaspoons kosher salt. This makes enough topping for 12 large bagels or 24 mini bagels.
- 11. Remove the bagels from the refrigerator and gently drop them into the water, boiling only as many comfortably fit (they should float within 10 seconds). After 1 minute, flip them over and boil another minute. If you like very chewy bagels, you can extend the boiling to 2 minutes per side. While the bagels are boiling, sprinkle the same parchment-lined sheet pans with Cornmeal or semolina flour. As soon as the bagels come out of the water, top them with the Everything Bagel mixture.
- 12. When all the bagels have been boiled, place the pans on the 2 middle shelves in the oven. Bake for approximately 5 minutes, then rotate the pans, switching shelves and giving the pans a 180-degree rotation. (If you are baking only 1 pan, keep it on the center shelf but still rotate 180 degrees.) After the rotation, lower the oven setting to 450 degrees F and continue baking for about 5 minutes, or until the bagels turn light golden brown. You may bake them darker if you prefer.
- 13. Remove the pans from the oven and let the bagels cool on a rack for 15 minutes or longer before serving.
Notes
- Tip 1: To store leftovers, place your bagels in an airtight container at room temperature for up to 2 days. For longer storage, freeze them in a resealable bag. Just toast them directly from the freezer when you’re ready to enjoy!
- Tip 2: You can freeze unboiled shapes too! Simply shape the bagels and flash freeze them on a baking sheet before transferring them to a freezer bag. When you’re ready to bake, just boil them from frozen.
- Tip 3: Everything bagels pair wonderfully with cream cheese, avocado, or even as a sandwich base. Experiment with different spreads to find your favorite combination!
- Tip 4: Using high-gluten flour is key to achieving the chewy texture characteristic of bagels. Don’t skip on this detail!
- Tip 5: For a more uniform shape, you can use the bench rest method to allow the shaped bagels to rest before boiling.