Dirt Cake
As a kid, whenever I heard the words Dirt Cake, my excitement levels would skyrocket. This delightful and playful dessert always meant a party or a fun gathering. I remember my friends and I would gather around the table, eager to dig into a dish that looked like it came straight from the garden but tasted like sheer bliss. The layers of crushed Oreos and creamy filling brought an unexpected joy that was simply irresistible. It’s one of those recipes that not only satisfies your sweet tooth but also brings out the child in all of us. Over the years, I’ve perfected my own version of Dirt Cake, and every time I make it, I’m transported back to those carefree days filled with laughter and fun.
Recipe Snapshot
10 mins
10 mins
0 mins
Easy
320 kcal
3 g
Gluten-Free, Low FODMAP
17 g
Food Processor, Mixing Bowl, Frying Pan
Not only is Dirt Cake incredibly delicious, but it’s also a breeze to make. You can whip it up in no time, making it the perfect choice for last-minute gatherings or when you want to impress your friends with a unique dessert. The combination of flavors—crunchy Oreos, creamy cream cheese, and sweet whipped topping—is simply magical. It’s a crowd-pleaser that has the power to make anyone’s day just a little bit brighter. So let’s dive into this nostalgic treat that still brings smiles and sweet memories to my kitchen!
Recipe Snapshot
10 mins
10 mins
0 mins
Easy
320 kcal
3 g
Gluten-Free, Low FODMAP
17 g
Food Processor, Mixing Bowl, Frying Pan
Why This Dirt Cake Works
Unlimited Creativity
What I absolutely love about Dirt Cake is how versatile it is. You can customize it to suit your taste or the occasion. Want to add some flair? Try mixing in different flavors of pudding or even adding a layer of chocolate mousse. The possibilities are endless!
Perfect for Any Occasion
This dessert shines at birthday parties, holiday celebrations, or even casual family dinners. It’s a fantastic way to bring a touch of fun and nostalgia to any gathering. Everyone from kids to adults can enjoy this whimsical treat.
Easy to Prepare
Even if you’re not an experienced baker, you can easily make Dirt Cake. With just a few simple ingredients and steps, you’ll be able to create a delicious dessert that looks impressive. It’s perfect for those who want to showcase their culinary skills without spending hours in the kitchen.
Fun Presentation
Part of the charm of Dirt Cake is in its presentation. Layering the crumbs and cream creates a delightful visual effect. You can even add gummy worms or candy bugs on top to make it even more playful, which is always a hit with the kids.
Make Ahead of Time
This dessert is ideal for prep-ahead cooking. You can assemble it a day in advance, allowing the flavors to meld together beautifully. Just keep it refrigerated, and you’re all set for your event!
Family Tradition
For many, Dirt Cake is more than just a dessert; it’s a family tradition. I love how it brings everyone together, creating moments filled with laughter and joy. It’s a recipe I look forward to sharing with future generations.
Ingredients Overview for Dirt Cake

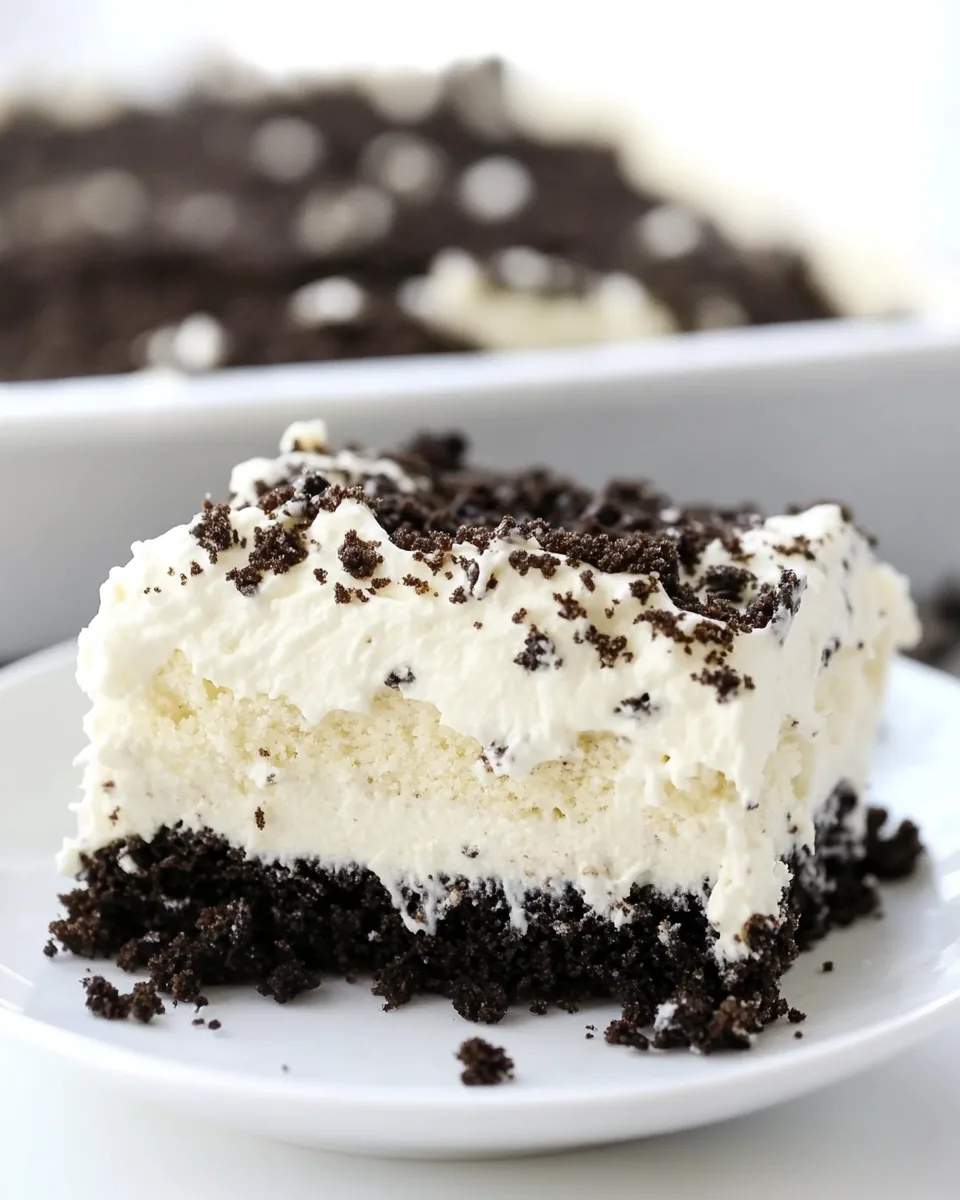
The ingredients for Dirt Cake are simple yet delightful. Each component plays a crucial role in creating that iconic flavor and texture. The crunchy Oreos provide the “dirt” and an irresistible crunch, while the combination of cream cheese, whipped topping, and pudding delivers a rich, creamy filling that balances the textures perfectly. Together, these ingredients create a dessert that’s not only visually appealing but also a hit with anyone who tries it.
- 1 (14.3-ounce) package Oreos: The classic choice for the base, providing a rich chocolate flavor and crunchy texture.
- 1 (8-ounce) package cream cheese, softened: Adds a rich and creamy element that complements the dessert perfectly.
- ½ cup unsalted butter, softened: Enhances the creaminess and helps bind the crust together.
- 1 cup powdered sugar: Sweetens the filling and balances the flavors beautifully.
- 1 (16-ounce) tub whipped topping: Offers a light and airy texture that makes the dessert feel indulgent.
- 2 (3.4-ounce) boxes instant white chocolate or vanilla pudding: The secret ingredient that adds creaminess and a hint of sweetness.
- 3 cups milk: Used to prepare the pudding mix, providing the necessary liquid for the creamy texture.
- 1 teaspoon vanilla extract: Enhances the overall flavor, adding a delightful aroma.
Step by Step Instructions for Dirt Cake
Making Dirt Cake is an enjoyable adventure in the kitchen! Follow these simple steps to create a dessert that will wow your family and friends. The process is straightforward and fun, allowing you to enjoy every moment of bringing this treat to life.
-
Start by crushing all the Oreos in a large resealable plastic bag or using a food processor until they resemble fine crumbs. This will be the base of your Dirt Cake, giving it that characteristic look. It’s a fun step, especially if you involve kids in the kitchen. Once crushed, set aside about one-third of the crumbs for topping the cake later.
Next, take a 9×13-inch baking dish and press two-thirds of the crushed Oreos firmly into the bottom. Make sure to create an even layer, as this will hold the filling beautifully. You can use the bottom of a glass or your hands to press it down.
In a large mixing bowl, combine the softened cream cheese and butter. Using a hand mixer, beat them together until the mixture is smooth and free of lumps. The goal is to create a creamy texture that will blend well with the other ingredients.
-
Once your cream cheese and butter are well mixed, gradually add the powdered sugar. Continue to mix until fully incorporated, and then gently fold in the whipped topping until the mixture is well combined and fluffy. This will create the rich filling for your Dirt Cake.
In a separate bowl, whisk together the pudding mix, milk, and vanilla extract. Mix until smooth and let it sit for a few minutes until it thickens. It’s important to allow it to sit so that it reaches the right consistency.
Once the pudding mixture is thickened, gently fold it into the cream cheese mixture. Be careful not to over-mix; you want to keep the light and airy texture of the filling intact.
-
Carefully pour the combined pudding and cream cheese mixture over the layer of crushed Oreos in the baking dish. Use a spatula to spread it evenly across the crust, ensuring every bit is covered.
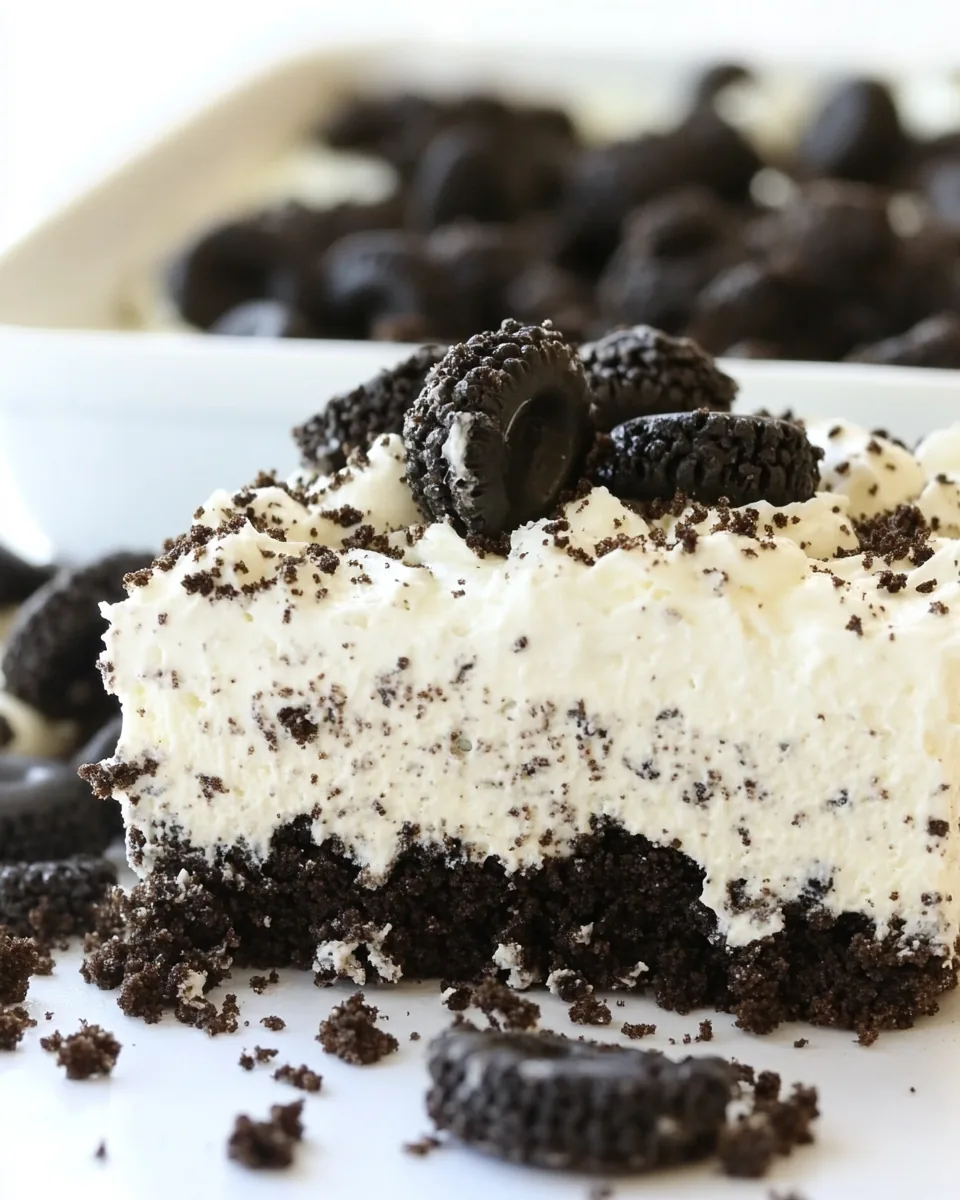
Finally, sprinkle the reserved crushed Oreos over the top of the filling. This not only adds to the visual appeal but also creates a delicious crunch on top of the soft filling.
Cover the dish with plastic wrap and place it in the refrigerator for at least three to four hours. This chilling time is essential. It allows the flavors to meld and the cake to set properly.
-
After the chilling period, your Dirt Cake is ready to be served! You can even decorate it with gummy worms or candy bugs for that extra fun touch. Enjoy the smiles and delight from everyone who gets to indulge in this delicious dessert!
Things Worth Knowing
- Texture Matters: The texture of your Dirt Cake should be creamy and crumbly. Make sure not to overmix your cream cheese mixture to keep it light.
- Chill Time: Allowing the cake to set in the refrigerator is crucial. It gives the flavors time to combine and the cake a chance to firm up.
- Layering Techniques: For a fun twist, consider adding layers of chocolate pudding or different toppings to enhance the flavors.
- Customizable Crust: While Oreos are traditional, feel free to experiment with different cookie types for a unique flavor.
Tips for Success
Creating the perfect Dirt Cake can be a fun experience with these helpful tips. They’ll enhance your baking skills and ensure your dessert turns out perfectly every time.
- Storage: Store any leftovers in an airtight container in the refrigerator. It should stay fresh for up to four days, although it’s often eaten much quicker than that!
- Freezing: You can freeze the assembled Dirt Cake for up to a month. Just make sure to wrap it well to prevent freezer burn.
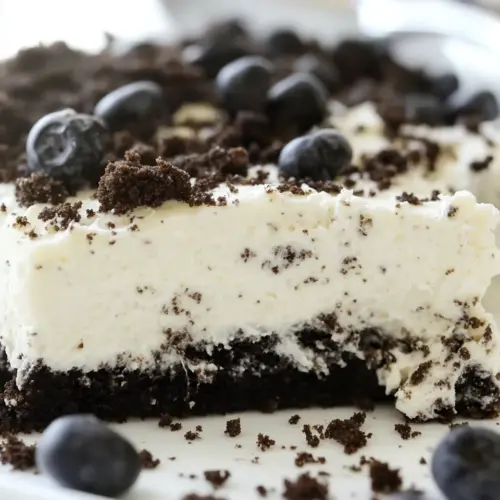
- Serving Ideas: Pair your Dirt Cake with fresh fruit or ice cream for an extra special treat.
- Garnishes: Get creative with toppings! Adding gummy worms or crushed candy can make it even more fun for kids.
- Individual Servings: Consider making mini Dirt Cakes in small cups for parties. They’re easier to serve and always a hit!
Serving Ideas for Dirt Cake
- Perfect for Parties: Dirt Cake is always a hit at birthday parties, family reunions, or school events. Its playful presentation makes it a favorite among kids.
- Seasonal Treat: While great all year round, consider making it during summer gatherings when kids can play outside.
- Pairing Side Dishes: Serve alongside light snacks like fruit skewers or a refreshing salad to balance the sweetness.
- Storage Tips: If you have leftovers, keep them stored in the refrigerator. Be sure to consume them within a few days for the best taste.
- Special Occasions: This dessert can be decorated with holiday-themed toppings for events like Halloween or Easter, making it a versatile choice.
FAQ
Conclusion
In summary, Dirt Cake is not just a dessert; it’s an experience filled with nostalgia and joy. It’s perfect for gatherings, and its playful presentation brings smiles to everyone’s faces. I encourage you to try making it for your next event or simply for a fun family dessert night. You won’t regret it—each bite is a delightful treat that will transport you back to your childhood. So grab your ingredients, let’s get baking, and create some wonderful memories together!
Dirt Cake
Equipment
- Food Processor
- Mixing Bowl
- Frying Pan
Ingredients
- 1 package Oreos (14.3-ounce)
- 1 package cream cheese (8-ounce, softened)
- ½ cup unsalted butter (softened)
- 1 cup powdered sugar
- 1 tub whipped topping (16-ounce or 4 cups whipped cream)
- 2 boxes instant white chocolate or vanilla pudding (3.4-ounce)
- 3 cups milk
- 1 teaspoon vanilla extract
Instructions
- Crush all the Oreos in a large resealable plastic bag or in the food processor until they are crumbs. Press two-thirds of the crushed cookies into the bottom of a 9×13-inch baking dish and set aside. Reserve the remaining crushed Oreos.
- In a large bowl, beat cream cheese and butter with a hand mixer until smooth. Mix in powdered sugar. Fold in whipped topping until well combined and set aside.
- In a separate bowl, mix pudding, milk, and vanilla extract. Let sit until thickened. Fold this mixture into the cream cheese mixture.
- Carefully pour the pudding/cream cheese mixture over the crumb crust in the pan.
- Sprinkle with the reserved crushed Oreos. Refrigerate for 3-4 hours before serving.
Notes
- Make ahead of time: Crush the Oreos as directed and keep them in a closed resealable plastic bag. Make the filling as directed and place in a large airtight container in the refrigerator for up to 24 hours. When ready to serve, assemble as directed above.
- Make it look like dirt: Use chocolate pudding instead of white chocolate pudding. Once assembled, add some candy bugs and gummy worms to the top.
- Make in individual cups: Add a scoop of crumbs to each cup, pipe in some filling, and top with more crumbs before adding the worms, dangling over the edges.