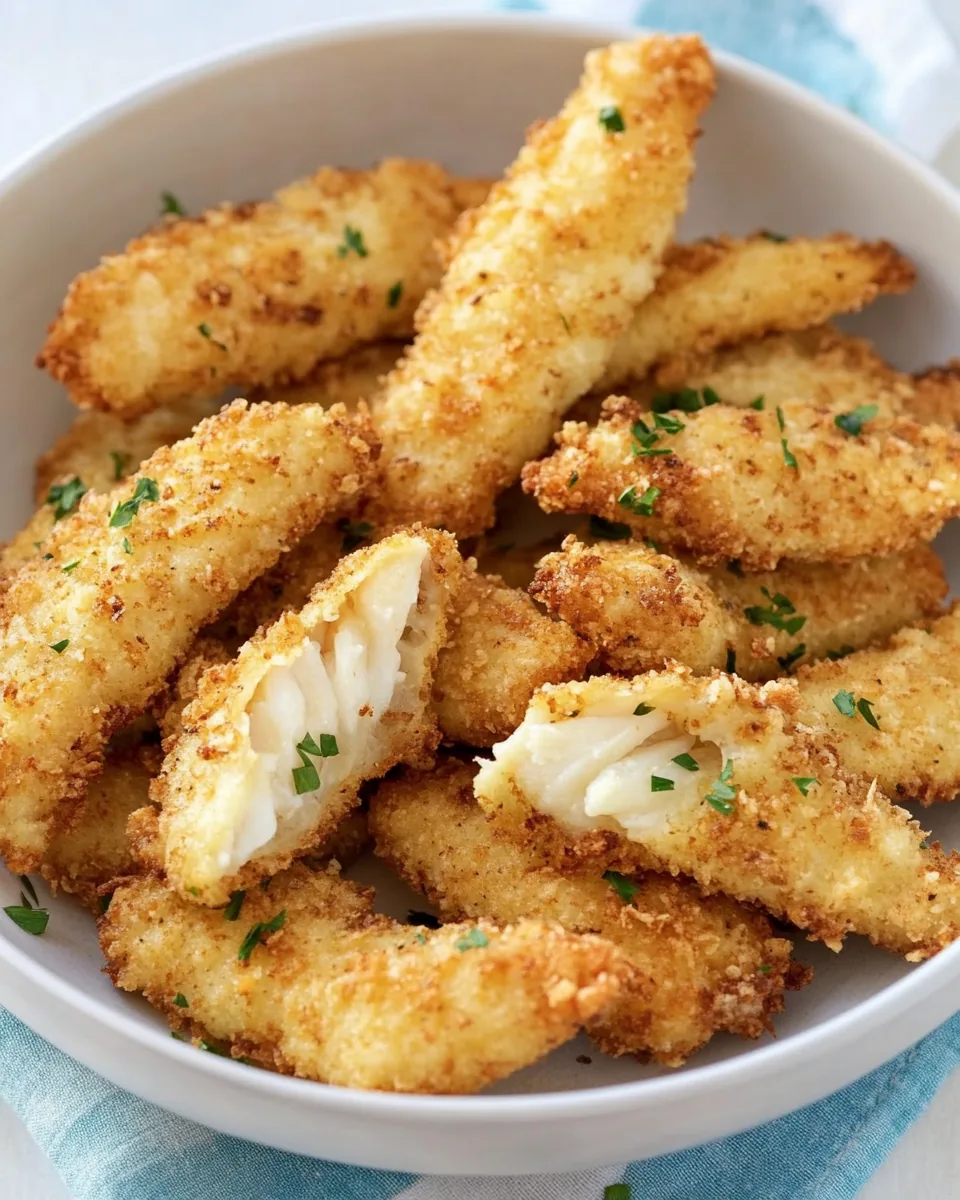
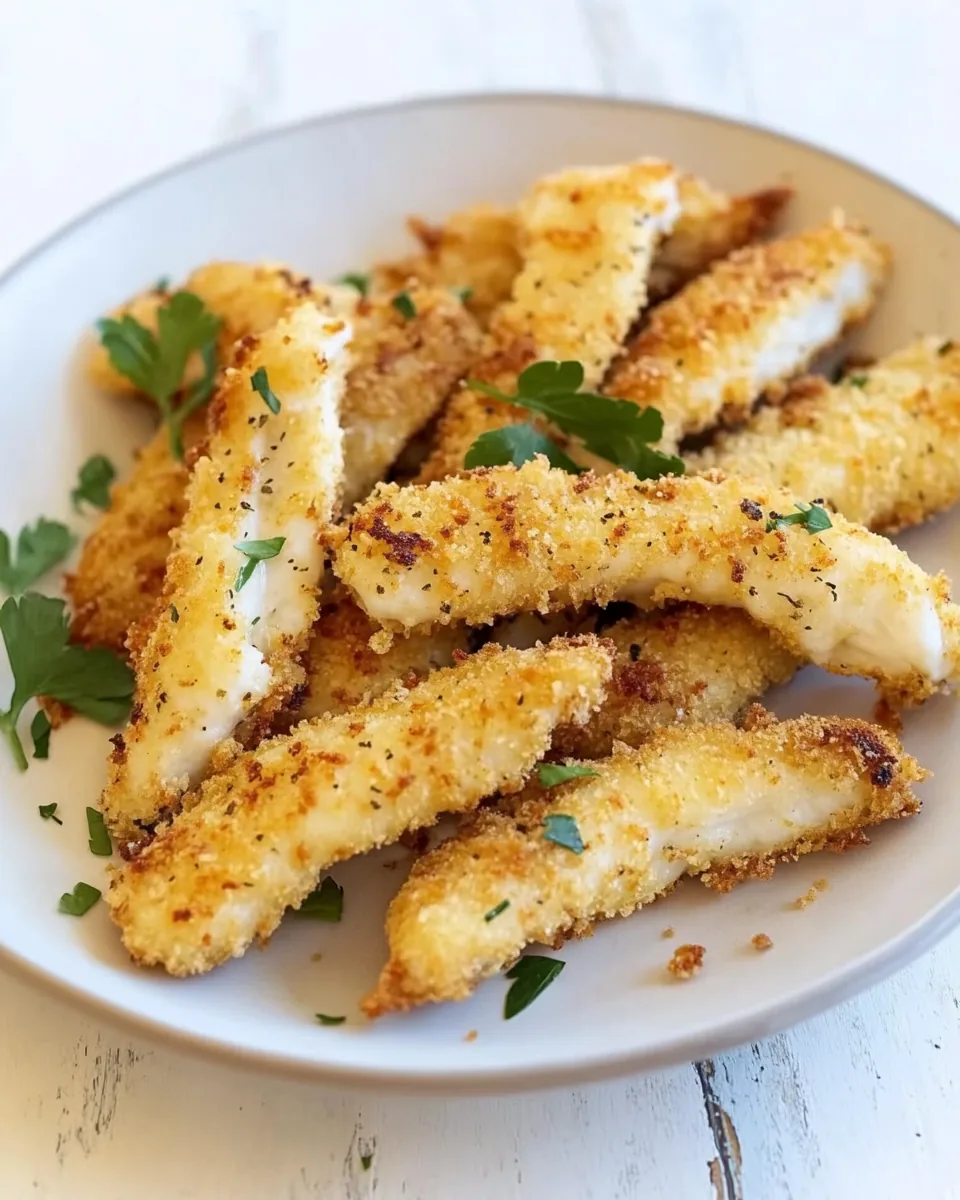
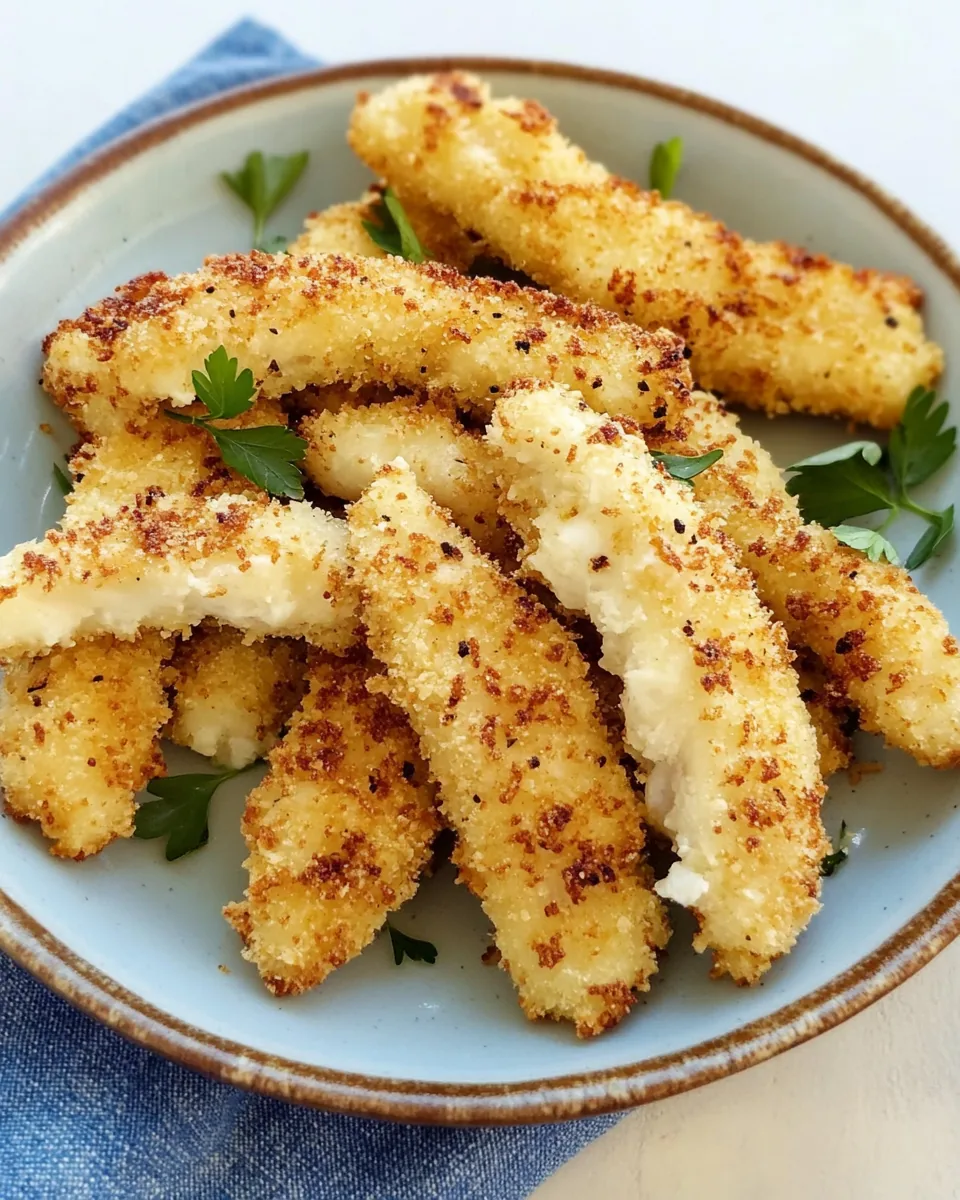
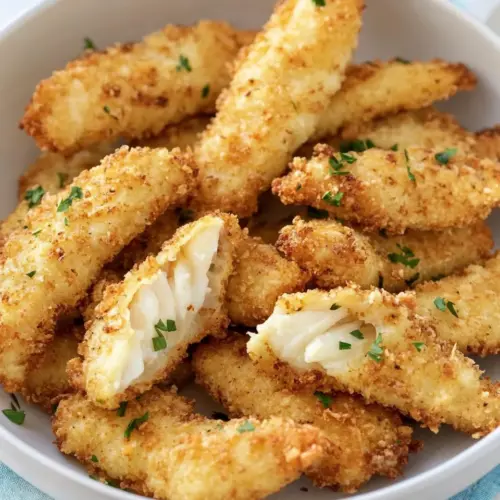
Crispy Fish Fingers
There’s something incredibly nostalgic about the first bite of Crispy Fish Fingers. Growing up, these were a staple in my home, a dish that never failed to bring smiles to my family’s faces. The delightful crunch of the breadcrumb coating paired with the tender fish inside is a combination that I still crave today. It’s a simple pleasure that’s perfect for both kids and adults alike. Whenever I prepare Crispy Fish Fingers, I’m transported back to joyful family dinners, laughter around the table, and the satisfaction of creating something that everyone loves. It’s not just about the food; it’s about the memories we create while enjoying it together.
Recipe Snapshot
17 mins
5 mins
12 mins
Medium
280 kcal
23 g
Keto, Paleo, Whole30
15 g
Wooden Spoon, Mixing Bowl, Frying Pan, Chef’s Knife, Baking Sheet, Oven
The Best Thing About This Crispy Fish Fingers
Quick and Easy Preparation
The ease with which Crispy Fish Fingers can be whipped up is one reason I adore this recipe. With minimal ingredients and steps, you can have a delicious dinner on the table in no time. It’s perfect for those busy weeknights when you want something satisfying without spending hours in the kitchen.
Kid-Friendly and Fun
Who doesn’t love finger food? Crispy Fish Fingers are not only fun to eat, but they also make it easy for kids to enjoy their meal without the fuss of cutlery. I love watching my little ones dip these crunchy bites into their favorite sauces, their faces lighting up with every bite!
Versatile Serving Options
This dish is incredibly versatile. You can serve Crispy Fish Fingers with a variety of sides – from fresh salads to creamy mashed potatoes. I often pair them with homemade tartar sauce or a zesty lemon wedge for a refreshing touch. The options are endless!
Perfect for Any Occasion
Whether it’s a casual family dinner or a small gathering with friends, Crispy Fish Fingers are a crowd-pleaser. They fit right in for lunch, dinner, or even as a party appetizer. There’s something undeniably comforting about serving this dish at any table.
Healthier Homemade Alternative
Making Crispy Fish Fingers at home allows you to control the ingredients. You can choose fresh fish and bake instead of fry, making it a healthier option compared to store-bought varieties. Plus, you can customize the seasonings to match your taste!
Budget-Friendly Meal
Lastly, this recipe is budget-friendly. With just a few affordable ingredients, you can create a satisfying meal that doesn’t break the bank. It’s a great way to enjoy a delicious seafood dish without splurging.
What’s In This Crispy Fish Fingers
When it comes to making Crispy Fish Fingers, the ingredients are simple yet effective. Each component plays a vital role in achieving that perfect crunch and flavor. The key players in this recipe are fresh fish, a creamy mayonnaise mixture, and flavorful breadcrumbs. Together, they create a satisfying dish that is not only delicious but also easy to prepare.
- 4 sole or tilapia filets, fresh or frozen, thawed – These fish filets are the stars of the dish. They provide a mild flavor and flaky texture that pairs beautifully with the crunchy coating.
- 1/2 cup mayonnaise (or vegan mayonnaise) – The mayonnaise adds moisture and richness to the fish, helping the breadcrumbs adhere perfectly.
- 1 teaspoon oregano – This herb brings a warm, earthy flavor to the party, enhancing the overall taste of the fish.
- 1 teaspoon garlic powder – A touch of garlic powder adds depth and savory notes to the fish fingers.
- 1/2 teaspoon kosher salt – Essential for seasoning, salt balances the flavors of the dish.
- 1 cup breadcrumbs or panko – The breadcrumbs provide that much-loved crunch, making every bite satisfying.
- cooking spray – A light spray helps the fish fingers achieve a golden-brown finish in the oven.
Step by Step Instructions for Crispy Fish Fingers
Preparing Crispy Fish Fingers is a straightforward process that you’ll find quite enjoyable. Let’s dive into the steps to create this delightful dish!
- Preheat your oven to 425F. This step is crucial for getting that crispy texture that we all love. A hot oven ensures that the fish cooks evenly and the breadcrumbs turn golden brown.
- While the oven heats up, slice the fish into strips about 1/2 inch wide and 2 inches long. The size doesn’t have to be perfect, but uniform pieces will ensure even cooking.
- In a medium-sized bowl, combine the mayonnaise, oregano, garlic powder, and kosher salt. Mix everything together until it’s smooth and well blended. This mixture is the secret to keeping the fish moist and flavorful.
- Once mixed, separate the sauce in half – set aside half for later use as a dipping sauce. This ensures you have enough for both coating the fish and serving.
- On a plate, place the breadcrumbs or panko. This will be the next step in the assembly line. Having everything in place makes the process smoother and more efficient.
- Now it’s time to coat the fish! Take each fish strip and roll it in the mayonnaise mixture first, ensuring it’s well covered. Then, transfer it to the breadcrumbs, rolling it until fully coated. This dual-layer coating is what makes them irresistible.
- Prepare your baking sheet by placing a metal rack on top and lightly spraying it with cooking spray. This allows the heat to circulate around the fish fingers, giving them that perfect crunch.
- Arrange the coated fish fingers on the rack, ensuring they don’t touch. Lightly spray the tops of the fish sticks with more cooking spray. This extra touch helps them crisp up while baking.
- Place the baking sheet in the preheated oven and bake for 12 to 15 minutes. Keep an eye on them; they should be golden brown and flaky inside. You’ll know they’re ready when you can see the crunch on the outside and the fish flakes easily.
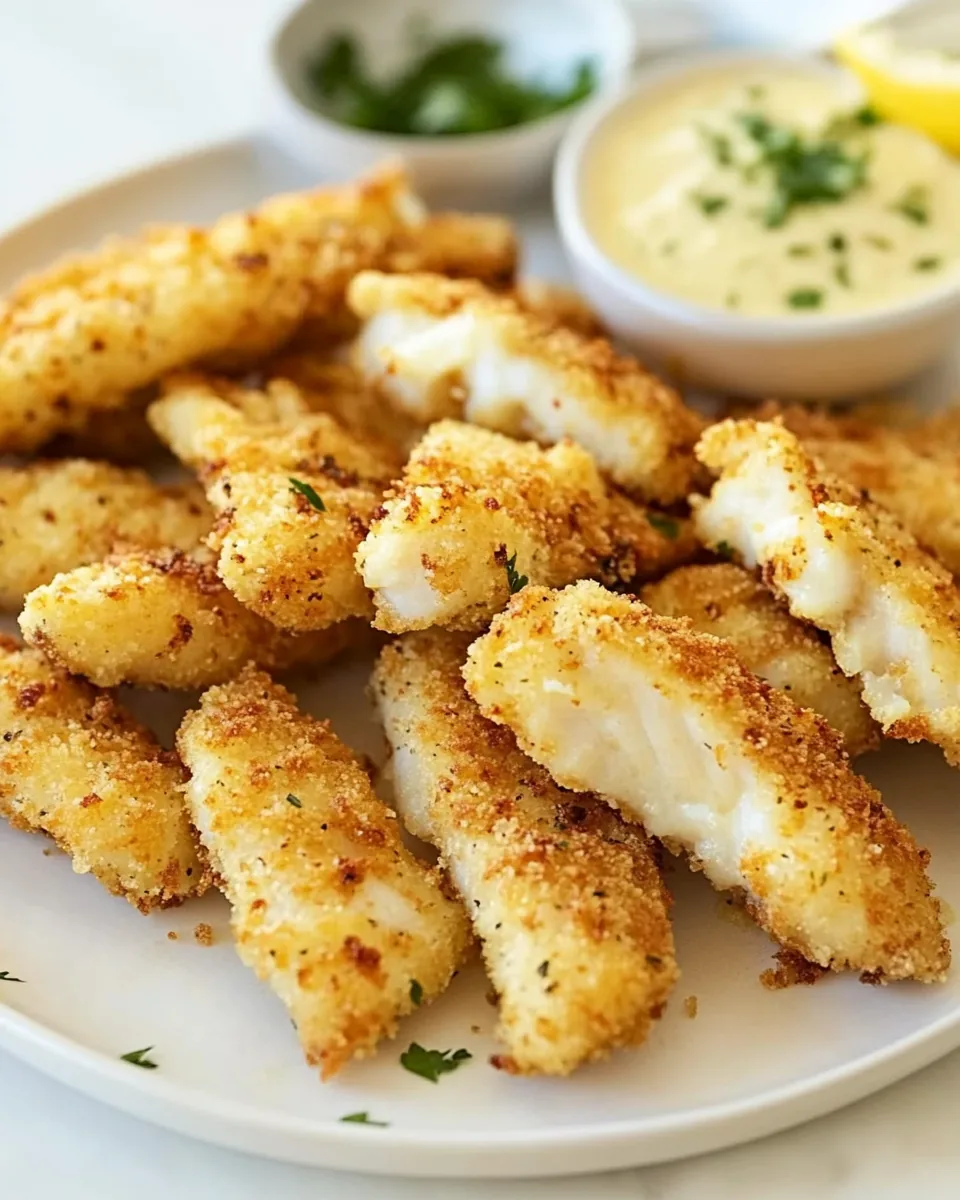
- Once baked, remove them from the oven and serve them with the remaining mayonnaise mixture as a dipping sauce. Enjoy your homemade Crispy Fish Fingers fresh out of the oven!
Things Worth Knowing
- Choose Fresh Fish: Always opt for fresh fish when possible for the best flavor. Frozen fish can also work well if thawed properly.
- Maintain Oil Temperature: If frying, ensure the oil is hot enough before adding the fish to achieve that crispy crust.
- Experiment with Spices: Feel free to add other spices to the breadcrumb mixture for a unique flavor profile, such as paprika or cayenne pepper.
- Watch Cooking Time: Every oven may vary slightly, so check your fish fingers a minute or two early to avoid overcooking.
Recipe Tips about Crispy Fish Fingers
To ensure your Crispy Fish Fingers turn out perfect every time, here are some helpful tips:
- Storage: Store any leftover fish fingers in an airtight container in the refrigerator for up to two days. Reheat in the oven to maintain crispiness.
- Freezing: Yes, you can freeze the uncooked fish fingers. Place them on a baking sheet to freeze individually before transferring to a freezer bag.
- Pairing: These fish fingers go exceptionally well with homemade tartar sauce, coleslaw, or a fresh garden salad.
- Serving Style: Serve with lemon wedges for guests to squeeze for an extra burst of flavor or alongside your favorite dipping sauces.
- Custom Variations: Try adding a pinch of chili powder or lemon zest to the breadcrumbs for a different flavor twist.
How to Enjoy Crispy Fish Fingers
Enjoying Crispy Fish Fingers is all about creativity and personal preference. Here are some fantastic ways to serve them:
- For Lunch: Pair them with a light salad for a refreshing lunch option. The crunch of the fish fingers complements fresh greens perfectly.
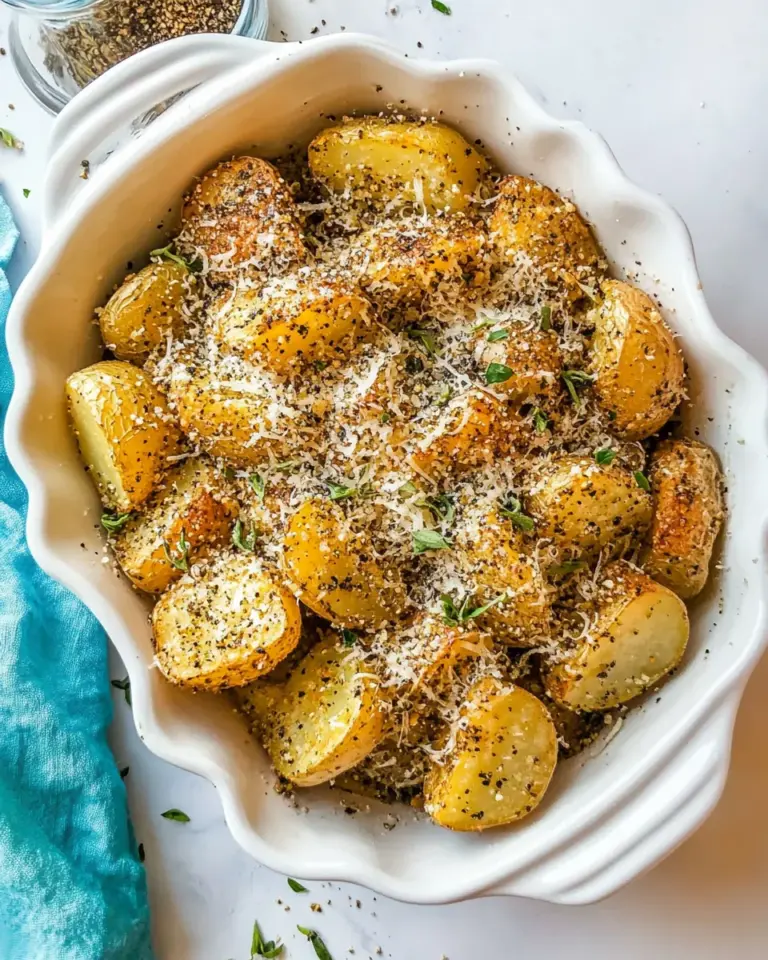
- Dinner Delight: Serve alongside mashed potatoes and steamed vegetables for a comforting family dinner.
- Party Appetizer: These fish fingers make excellent finger food for gatherings. Serve them on a platter with assorted dips for guests to enjoy.
- Game Day Snack: Perfect for watching the big game, these can be served with spicy dipping sauces to satisfy the crowd’s cravings.
- Storage Tips: Store leftovers in an airtight container in the fridge, and reheat in the oven for best results.
- Seasonal Pairings: These fish fingers are a hit all year round, but during summer, they work wonderfully with fresh cucumber salad or corn on the cob.
FAQ
Conclusion
The charm of Crispy Fish Fingers lies in their delightful crunch and tender interior that makes them a family favorite. Whether you’re whipping them up for a quick weeknight dinner or serving them at a gathering, they’re sure to please. Don’t hesitate to try this recipe and share the joy with your loved ones!
Crispy Fish Fingers
Equipment
- Wooden Spoon
- Mixing Bowl
- Frying Pan
- Chef's Knife
- Baking Sheet
- Oven
Ingredients
- 4 filets sole or tilapia fresh or frozen, thawed
- 1/2 cup mayonnaise (or vegan mayonnaise)
- 1 teaspoon oregano
- 1 teaspoon garlic powder
- 1/2 teaspoon kosher salt
- 1 cup breadcrumbs (or panko)
- cooking spray
Instructions
- Preheat your oven to 425F. This step is crucial for getting that crispy texture that we all love. A hot oven ensures that the fish cooks evenly and the breadcrumbs turn golden brown.
- While the oven heats up, slice the fish into strips about 1/2 inch wide and 2 inches long. The size doesn't have to be perfect, but uniform pieces will ensure even cooking.
- In a medium-sized bowl, combine the mayonnaise, oregano, garlic powder, and kosher salt. Mix everything together until it's smooth and well blended. This mixture is the secret to keeping the fish moist and flavorful.
- Once mixed, separate the sauce in half – set aside half for later use as a dipping sauce. This ensures you have enough for both coating the fish and serving.
- On a plate, place the breadcrumbs or panko. This will be the next step in the assembly line. Having everything in place makes the process smoother and more efficient.
- Now it’s time to coat the fish! Take each fish strip and roll it in the mayonnaise mixture first, ensuring it's well covered. Then, transfer it to the breadcrumbs, rolling it until fully coated. This dual-layer coating is what makes them irresistible.
- Prepare your baking sheet by placing a metal rack on top and lightly spraying it with cooking spray. This allows the heat to circulate around the fish fingers, giving them that perfect crunch.
- Arrange the coated fish fingers on the rack, ensuring they don’t touch. Lightly spray the tops of the fish sticks with more cooking spray. This extra touch helps them crisp up while baking.
- Place the baking sheet in the preheated oven and bake for 12 to 15 minutes. Keep an eye on them; they should be golden brown and flaky inside. You'll know they’re ready when you can see the crunch on the outside and the fish flakes easily.
- Once baked, remove them from the oven and serve them with the remaining mayonnaise mixture as a dipping sauce. Enjoy your homemade Crispy Fish Fingers fresh out of the oven!
Notes
- Tip 1: Store any leftover fish fingers in an airtight container in the refrigerator for up to two days. Reheat in the oven to maintain crispiness.
- Tip 2: Yes, you can freeze the uncooked fish fingers. Place them on a baking sheet to freeze individually before transferring to a freezer bag.
- Tip 3: These fish fingers go exceptionally well with homemade tartar sauce, coleslaw, or a fresh garden salad.
- Tip 4: Serve with lemon wedges for guests to squeeze for an extra burst of flavor or alongside your favorite dipping sauces.
- Tip 5: Try adding a pinch of chili powder or lemon zest to the breadcrumbs for a different flavor twist.