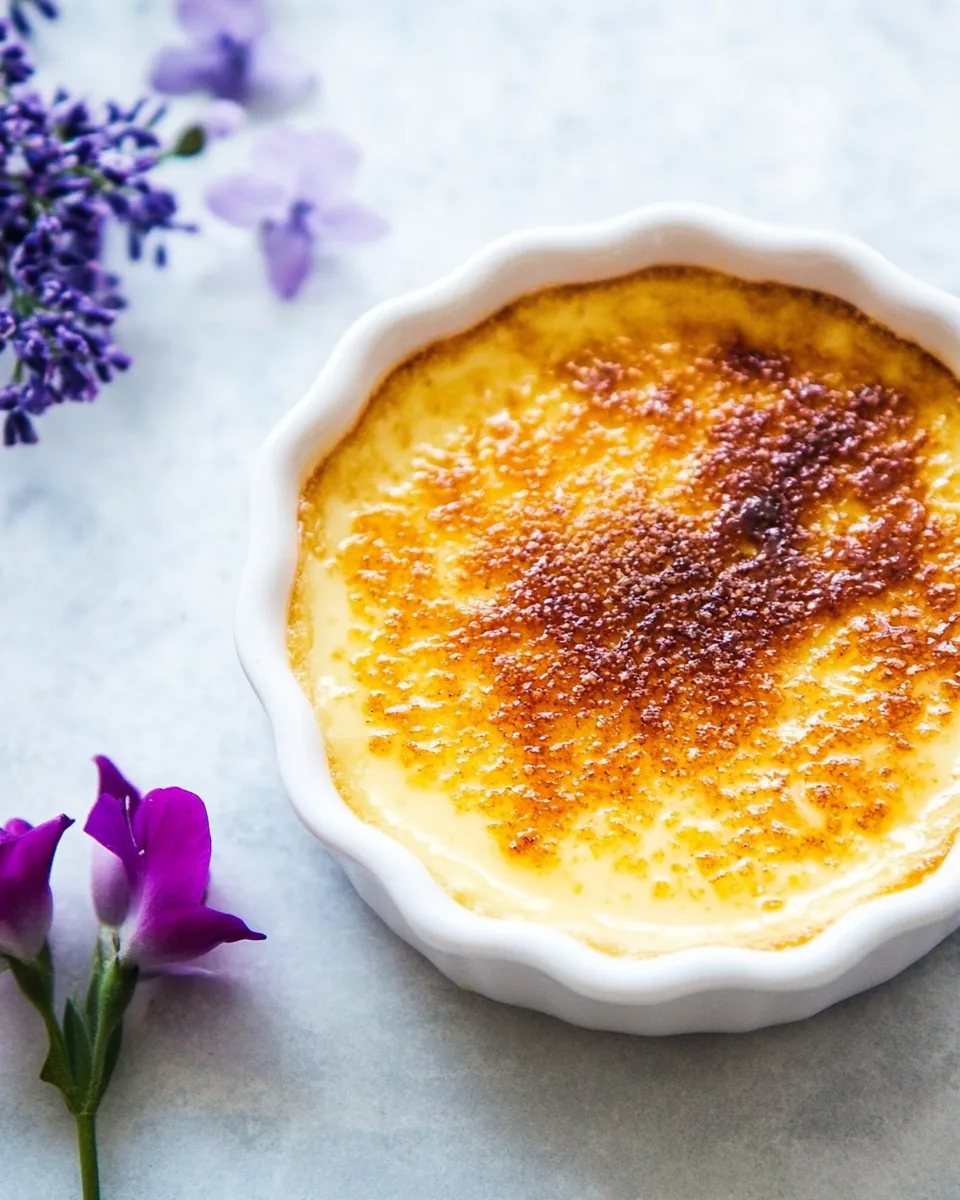
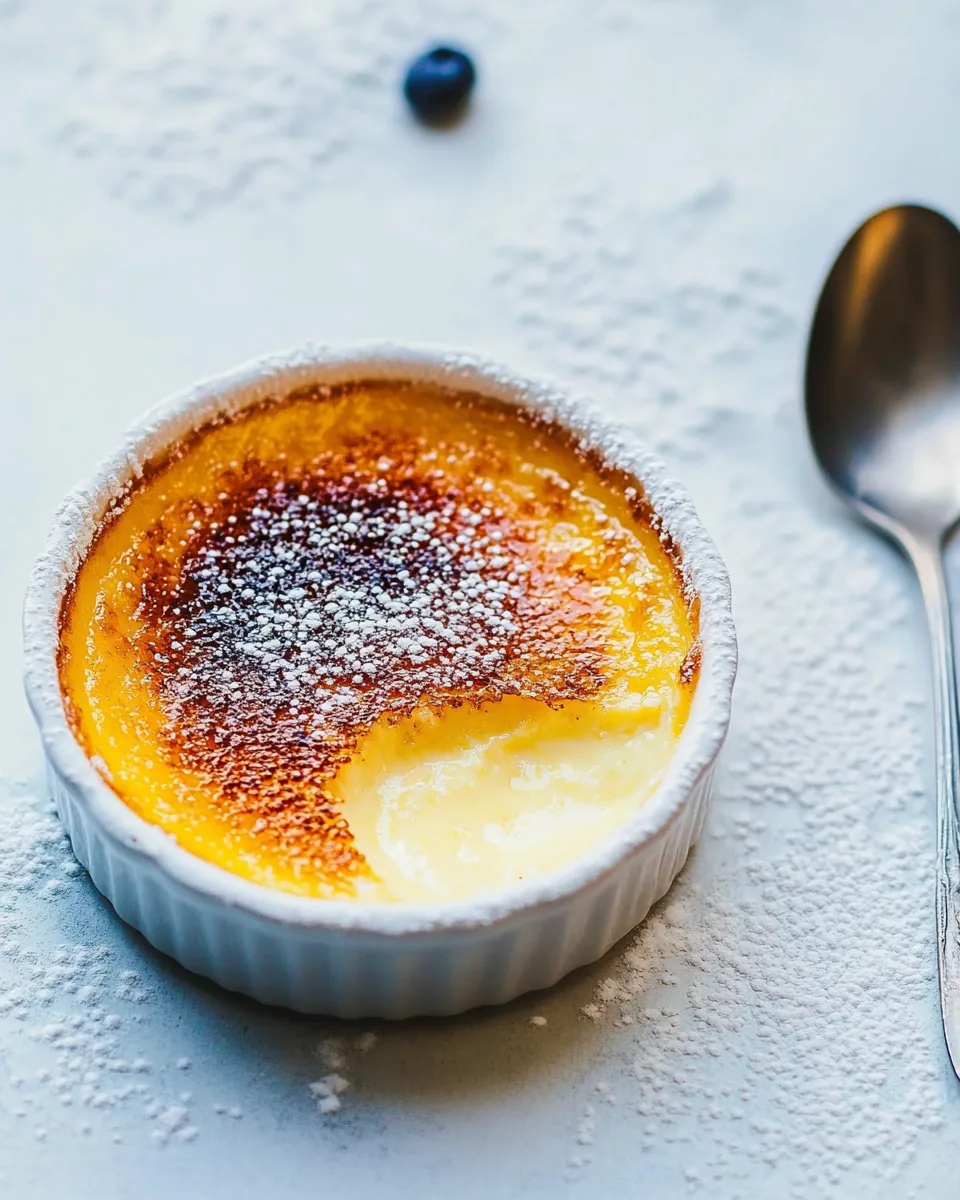
Crème Brûlée
There’s something magical about the first crack of the caramelized sugar on top of a well-made Crème Brûlée. I remember the first time I made it; the kitchen filled with an irresistible aroma of warm cream and sugar, a promise of indulgence. The anticipation builds as you torch the sugar, watching it transform from granular to golden and crispy. This dessert is not just a treat; it’s an experience, a little celebration that you can enjoy right at home. Every bite is a delicate balance between the creamy custard and that crunchy sugar top, creating a delightful contrast that keeps you coming back for more. Whether it’s a special occasion or a simple weeknight indulgence, this Crème Brûlée is sure to impress. It’s surprisingly easy to make and once you master the technique, you’ll want to share it with everyone you know. I love serving it at dinner parties where I can showcase my culinary skills, and the look on my friends’ faces when they take that first bite is priceless.
Recipe Snapshot
50 mins
20 mins
30 mins
Medium
350 kcal
6 g
Gluten-Free, Low FODMAP
25 g
ramekins, kitchen torch, medium pot, 9 x 13-inch baking pan
The Magic of This Crème Brûlée
It’s a Classic Dessert
There’s a reason Crème Brûlée has remained a favorite over the years. This classic French dessert has a rich history, and its combination of textures and flavors is timeless. When people think of impressing guests, this dessert often comes to mind. It’s elegant yet surprisingly simple, making it a perfect choice for both novice and experienced bakers.
An Element of Surprise
One of the best parts about serving Crème Brûlée is the dramatic crack of the caramelized sugar when you tap it with your spoon. This surprising element adds a fun twist to the dining experience, making it memorable. Watching your guests eagerly break through the sugar crust is a joy in itself!
Customization
While the traditional Crème Brûlée focuses on vanilla, the flavor possibilities are endless. You can infuse it with your favorite flavors, such as citrus zest, coffee, or even lavender. This adaptability makes it perfect for any season or occasion, whether you want a light dessert in summer or a warming spice in winter.
Perfect for Entertaining
This dessert can be made ahead of time and chilled in the refrigerator. This makes it an excellent choice for entertaining because you can focus on your guests instead of worrying about last-minute cooking. Just torch the sugar right before serving for an impressive finish.
It’s Truly Indulgent
With its creamy custard base and that satisfying crunchy top, Crème Brûlée is a luxurious treat that feels indulgent without being overwhelmingly rich. Each spoonful is a moment of bliss, offering a little escape from the everyday hustle and bustle. It’s the perfect way to end a meal on a sweet note.
Everything You Need for Crème Brûlée

In any great recipe, the ingredients play a crucial role in determining the final outcome. The combination of rich flavors in this Crème Brûlée works in harmony, creating a luscious custard paired perfectly with a crisp, caramelized sugar topping. Here’s what you’ll need:
- 1 full vanilla bean or 1/2 tablespoon vanilla extract or 1 teaspoon vanilla bean paste – The flavor base of your custard, providing that rich vanilla aroma.
- 1/4 teaspoon salt – Enhances the flavor of the cream and balances the sweetness.
- 2 cups heavy cream – The key component for a rich and creamy texture.
- 5 large egg yolks – Provides structure and richness to the custard.
- 3/4 cup granulated sugar (divided) – Sweetens the custard and is also used for caramelizing the top.
- 6 cups water – Used for the water bath that helps cook the custards evenly.
- Fresh berries (optional, for serving) – A lovely garnish that adds a pop of color and freshness.
Preparation Steps for Crème Brûlée
Making Crème Brûlée might seem intimidating, but once you break it down into steps, you’ll see it’s quite manageable. The process involves warming the cream, whisking the yolks, and baking the custards in a gentle water bath. Follow these detailed steps to create your own delicious version.
-
Preheat your oven to 325°F. This initial step is crucial because a steady temperature will ensure even cooking of your custards, leading to a smooth texture.
If you’re using a vanilla bean, slice it open and scrape out the seeds. Put the seeds in a large bowl, and place the empty pod in a medium pot along with salt and heavy cream. This will infuse the cream with rich vanilla flavor.
Heat the cream mixture over low heat until it simmers, but don’t let it boil. This typically takes about 10 minutes. Remove it from heat, and discard the vanilla pod. If you’re using vanilla extract or vanilla bean paste, stir it in now.
-
In the bowl with the vanilla seeds, add egg yolks and 1/2 cup of sugar. Whisk them together gently. Be cautious as whisking too vigorously can add air, which is not desirable for this custard.
While whisking, gradually pour in 1/4 of the warmed cream mixture. This step is essential for tempering the eggs, preventing them from scrambling. Mix until combined, then slowly add the remaining cream mixture while whisking consistently.
Position your ramekins in a 9×13-inch pan. Carefully pour the custard mixture into the ramekins, filling them almost to the top. This ensures each custard will cook evenly.
-
Now, carefully scoop boiling water into the pan until it’s halfway up the sides of the ramekins. This water bath will create gentle heat, ensuring that your custards bake without curdling.
Transfer the pan to the oven and bake for 30 to 35 minutes. The custards should be set but with a slight jiggle in the center when you gently shake them.
Once baked, remove the ramekins from the water bath and let them cool at room temperature. After that, chill them in the fridge for at least 6 to 8 hours, or up to 4 to 5 days. This step allows the flavors to meld and the texture to firm up.
-
When ready to serve, sprinkle the remaining 1/4 cup of sugar evenly over the custards. Swirl the sugar for even coverage, tipping excess into the next ramekin. Caramelize the sugar using a kitchen torch until it’s golden or slightly charred. Garnish with fresh berries for added flair and serve immediately.
If you don’t have a torch, you can broil the sugar-topped custards instead. Ensure they are chilled for at least 24 hours, then adjust your oven rack to the topmost position and set it to high broil. Broil the sugar for 1 to 3 minutes, watching closely to prevent burning. Refrigerate for an additional 10 to 20 minutes to re-firm the custard.
Things Worth Knowing
- Watch the Temperature: It’s crucial to keep the cream on low heat to prevent it from boiling.
- Consistent Whisking: When adding cream to the eggs, whisk slowly to prevent adding air into the mixture.
- Water Bath Trick: A water bath helps to evenly distribute heat, preventing the custard from curdling.
- Chill Time Matters: Letting the custards chill for several hours is essential for achieving that perfect texture.
Helpful Notes about Crème Brûlée
Making Crème Brûlée is a rewarding experience, and having a few tips in mind can help you get the best results. Here are some suggestions to keep in mind:
- Storage: Allow the Crème Brûlée to cool to room temperature before storing. Cover each dish with plastic wrap and refrigerate for up to 2 to 3 days.
- Freezing: While it’s best served fresh, you can freeze the custards before caramelizing the top. Thaw overnight in the refrigerator and torch just before serving.
- Pairing: Serve alongside fresh fruits or a light sorbet for a refreshing contrast.
- Flavor Variations: Experiment with different flavors like orange zest or espresso for a unique twist.
- Serving Style: Present in individual ramekins for an elegant touch at any gathering.
Pairing Suggestions for Crème Brûlée
When it comes to serving Crème Brûlée, the options are as varied as they are delicious. Here are some ideas to make your dessert experience even better:
- Fresh Berries: Garnishing with berries adds a burst of color and a tart contrast to the rich custard.
- Light Sorbet: A scoop of lemon or raspberry sorbet can refresh the palate after the creamy dessert.
- Coffee: Pairing with a cup of coffee or espresso enhances the flavors and rounds out your meal beautifully.
- Cheese Plate: Serve with a selection of cheeses for a delightful cheese and dessert course.
- Seasonal Fruits: Utilize seasonal fruits like peaches or figs to add a natural sweetness and seasonal flair.
- Celebration Events: This dessert is perfect for special occasions, such as anniversaries or dinner parties, where you want to impress your guests.
FAQ
Conclusion
The Crème Brûlée is truly a showstopper, combining creamy custard with a satisfying crunch of caramelized sugar that never fails to impress. It’s perfect for both special occasions and everyday indulgence. I encourage you to try making this classic dessert at home—you won’t regret it. Once you master the technique, you’ll be hooked!
Crème Brûlée
Equipment
- Ramekins
- kitchen torch
- Medium Pot
- 9 x 13-inch baking pan
Ingredients
- 1 full vanilla bean
- 1/4 teaspoon salt
- 2 cups heavy cream
- 5 large egg yolks must be at room temperature
- 3/4 cup granulated sugar divided, or superfine sugar if you have it!
- 6 cups water
- Fresh berries optional, for serving
Instructions
- Preheat oven to 325°F.
- If using a vanilla bean, slice it open and scrape out the seeds. Put the seeds in a large bowl. Place the empty pod in a pot and combine with salt and heavy cream.
- Heat the cream mixture on the stove until it simmers, without boiling (low heat for about 10 minutes). Remove from heat; discard the vanilla pod. Stir in vanilla extract or paste if you’re using those instead.
- Meanwhile, in your bowl with vanilla seeds, add egg yolks and 1/2 cup sugar. Whisk (by hand) until combined. Simultaneously, bring 6 cups of water to a boil.
- Do not whisk too briskly or you’ll end up with a custard that rises and falls or has lots of bubbles on the surface. While whisking at a slow and steady pace, gradually pour in 1/4 of the warmed cream mixture into the egg and sugar blend. Mix until combined, then continue to add remaining cream mixture, while whisking consistently.
- Position ramekins in a 9×13-inch pan. Pour the custard mixture into the ramekins, filling almost to the top. Carefully (using a glass liquid measuring cup) scoop boiling water into the pan until it’s halfway up the sides of the ramekins.
- Carefully transfer to oven and bake 30–35 minutes until the custards are set (with a slight jiggle in the center when you gently shake). Remove from water bath and allow to cool at room temperature, then chill in fridge for 6–8 hours (or up to 4–5 days).
- When ready to serve, sprinkle remaining 1/4 cup sugar evenly over the custards. Swirl the sugar for even coverage, tipping excess into the next ramekin. Caramelize the sugar using a kitchen torch until it’s golden or slightly charred. Garnish with fresh berries and serve immediately.
- Alternative Caramelization (no torch): Ensure brûlées are chilled for at least 24 hours. Adjust oven rack to topmost and set to high broil. Broil sugar-topped custards for 1–3 minutes, watching very closely. Then refrigerate for 10–20 minutes to re-firm custard.
Notes
- Tip 1: For quick room temperature eggs, immerse un-cracked eggs in warm water for 3–5 minutes. Alternatively, separate cold eggs and allow the yolks to reach room temperature in a bowl.
- Tip 2: If you don’t have a kitchen torch, you can use the broiler to caramelize the sugar on top of the custards.
- Tip 3: Feel free to experiment with flavors by adding citrus zest or spices to the custard mix.
- Tip 4: Make sure to watch the broiler closely to prevent burning the sugar.
- Tip 5: This dessert can be prepared a day in advance, making it perfect for entertaining!