Chocolate Cream Pie
There’s something truly special about a Chocolate Cream Pie that brings back memories of family gatherings and summer cookouts. I can still recall the first time I took a bite of this velvety dessert as a child. My grandmother, with her impeccable baking skills, would whip up this pie, making it look so effortless. The combination of a rich chocolate filling and a crisp pie crust was nothing short of magic. Now, every time I prepare this Chocolate Cream Pie, I’m transported back to those warm afternoons spent in her kitchen, laughter ringing in the air. It’s a dessert that not only satisfies your sweet tooth but also warms your heart. Whether it’s a special celebration or a simple dinner at home, this pie always steals the show.
Recipe Snapshot
35 mins
25 mins
10 mins
Medium
400 kcal
6 g
Gluten-Free, Low FODMAP
22 g
Wooden Spoon, Mixing Bowl, Frying Pan, Chef’s Knife, Whisk, Large Pot, Blender, Baking Sheet, Food Processor
What We Adore About This Chocolate Cream Pie
1. A Timeless Classic
The Chocolate Cream Pie is not just another dessert; it’s a timeless classic that has a special place in many hearts. Its rich, creamy filling combined with a flaky crust creates a perfect harmony that appeals to everyone, from children to adults. Making this pie invokes a sense of nostalgia, reminding us of simpler times spent with family and friends.
2. Decadent Flavor
One of the main reasons I adore this pie is its deep, decadent flavor. The bittersweet chocolate combined with the creamy filling strikes the right balance between richness and sweetness. It’s indulgent without being overpowering, making each slice a delightful experience. Every bite melts in your mouth, leaving you longing for more.
3. Versatile for Any Occasion
Whether it’s a birthday party, holiday celebration, or just a weekend treat, the Chocolate Cream Pie fits seamlessly into any occasion. Its universal appeal means it can be served at summer barbecues or cozy winter gatherings. It’s the kind of dessert that makes people smile, no matter the season.
4. Simple Yet Impressive
What I love most about this pie is how simple it is to prepare, yet it looks incredibly impressive. You don’t need to be a master baker to pull this off. The steps are straightforward, and the results are beautiful. When I present this pie, it never fails to receive oohs and aahs from my guests!
5. Perfect for Leftovers
If you happen to have any leftovers, they’re just as delightful the next day. The flavors meld and deepen overnight in the fridge, making each slice even more enjoyable. It’s a dessert that keeps on giving, bringing joy long after the first serving.
Everything You Need for Chocolate Cream Pie
Creating the perfect Chocolate Cream Pie starts with selecting the right ingredients. Each component plays a vital role in achieving the ultimate flavor and texture. The rich filling, made from quality chocolate, is the star, while the crust provides the necessary crunch. Together, these ingredients create a harmonious balance that is simply irresistible.
- Blind Baked Pie Crust: A flaky base that holds the creamy filling, providing the perfect crunch.
- Bittersweet Chocolate: The key to deep chocolate flavor, choosing a higher cocoa percentage intensifies the richness.
- Unsalted Butter: Adds creaminess and richness to the filling.
- Granulated Sugar: Sweetens the filling, balancing the bitterness of the chocolate.
- Dutch Process Cocoa Powder: Gives a rich chocolate flavor and a beautiful color.
- Cornstarch: A thickening agent that ensures the filling sets perfectly.
- Salt: Enhances the flavors and balances the sweetness.
- Egg Yolks: Contributes to the richness and helps thicken the filling.
- Whole Milk: Adds creaminess and a smooth texture to the filling.
- Heavy Cream: Whipped to perfection, it becomes the gorgeous topping.
- Vanilla Extract: A dash of vanilla elevates the flavor profile.
Recipe Directions for Chocolate Cream Pie
Making a Chocolate Cream Pie may seem daunting, but it’s a straightforward process that yields delicious results. Follow these steps to create a pie that will impress everyone at your table.
For the pie crust, prepare and bake the blind baked pie crust as directed. Once baked, let it cool completely. The crust needs to be fully cooled to hold the filling properly.
For the filling, place chopped chocolate and butter in a large mixing bowl. Pour in the vanilla extract. Set a large sieve over the bowl and set aside. This will help remove any lumps later on.
-
In a 3-quart saucepan, whisk together granulated sugar, cocoa powder, cornstarch, and salt until well blended. This ensures that the dry ingredients are evenly distributed before adding the wet ingredients.
Whisk in the egg yolks and 1/2 cup of the milk until well combined. This mixture will start to thicken as it cooks, so it’s important to mix well.
Mix in the remaining 2 1/2 cups of milk. This creates a smooth consistency that will cook down into a beautiful filling.
-
Set the mixture over medium heat and cook while whisking constantly. It’s crucial to scrape the bottom corners of the pan to prevent any sticking or burning. Look for bubbles to form over the top surface, indicating it’s time to boil.
Let the mixture boil for 1 minute while whisking constantly. This will help thicken the filling and develop its flavors.
Pour the mixture into the sieve set over the chocolate mixture, then press it with a silicone spatula against the sieve to remove lumps. You want a silky smooth filling, so this step is important!
-
Stir the strained mixture with the chocolate and butter mixture until everything is melted and combined. The heat from the filling will melt the chocolate, creating a rich texture.
Pour the mixture into the cooled pie crust and spread into an even layer. This ensures that every slice has the same amount of filling.
Spray a piece of plastic wrap with non-stick cooking spray and press it against the surface of the pudding mixture. Make sure not to wrap it snugly around the pie, as this can create steam and soften the crust.
-
Transfer the pie to the fridge and chill it for at least 4 hours to let it cool and set. The longer it sits, the more the flavors meld.
For the topping, pour the heavy cream in a large mixing bowl. Add granulated sugar and the vanilla extract. Using an electric hand mixer, whip the mixture on high speed until very stiff peaks form.
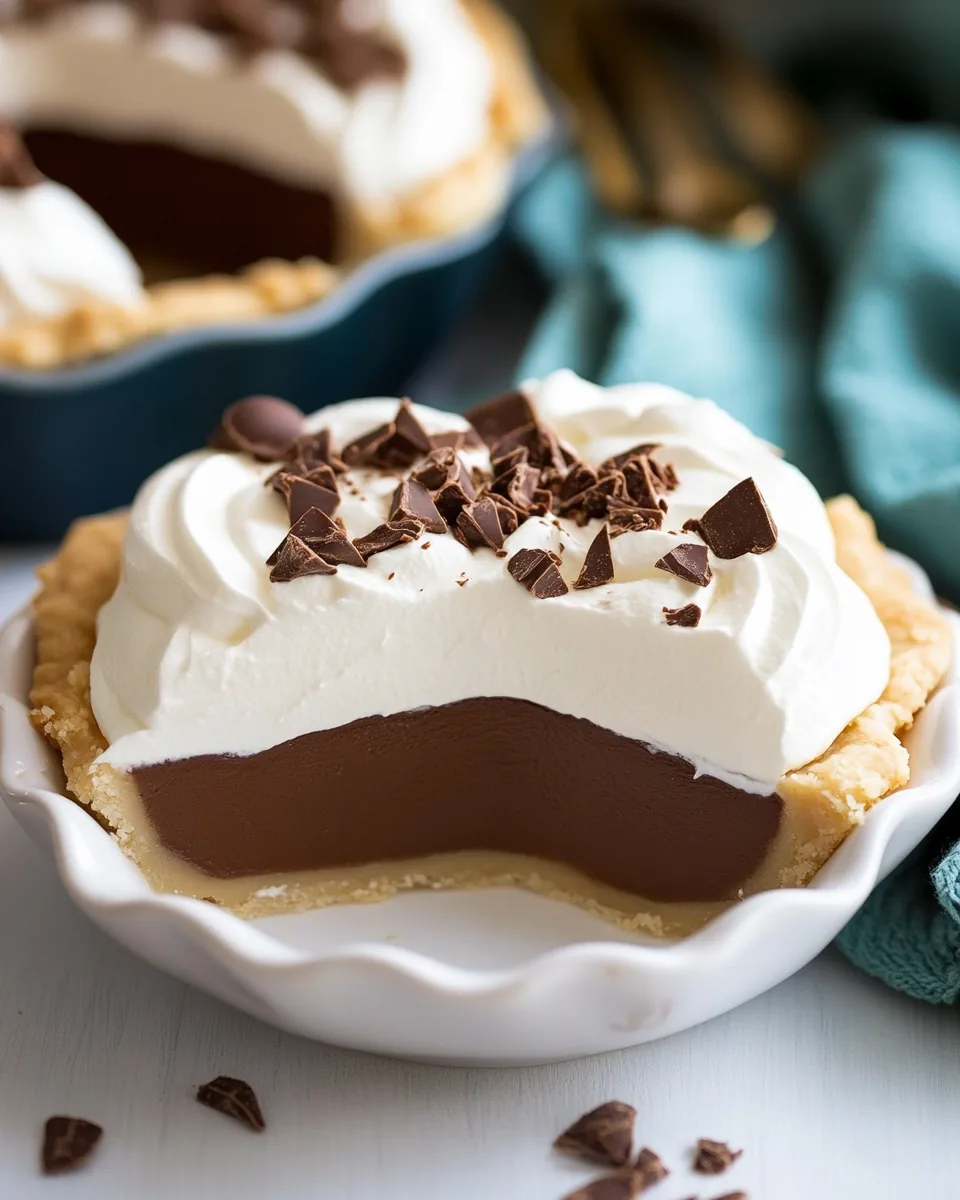
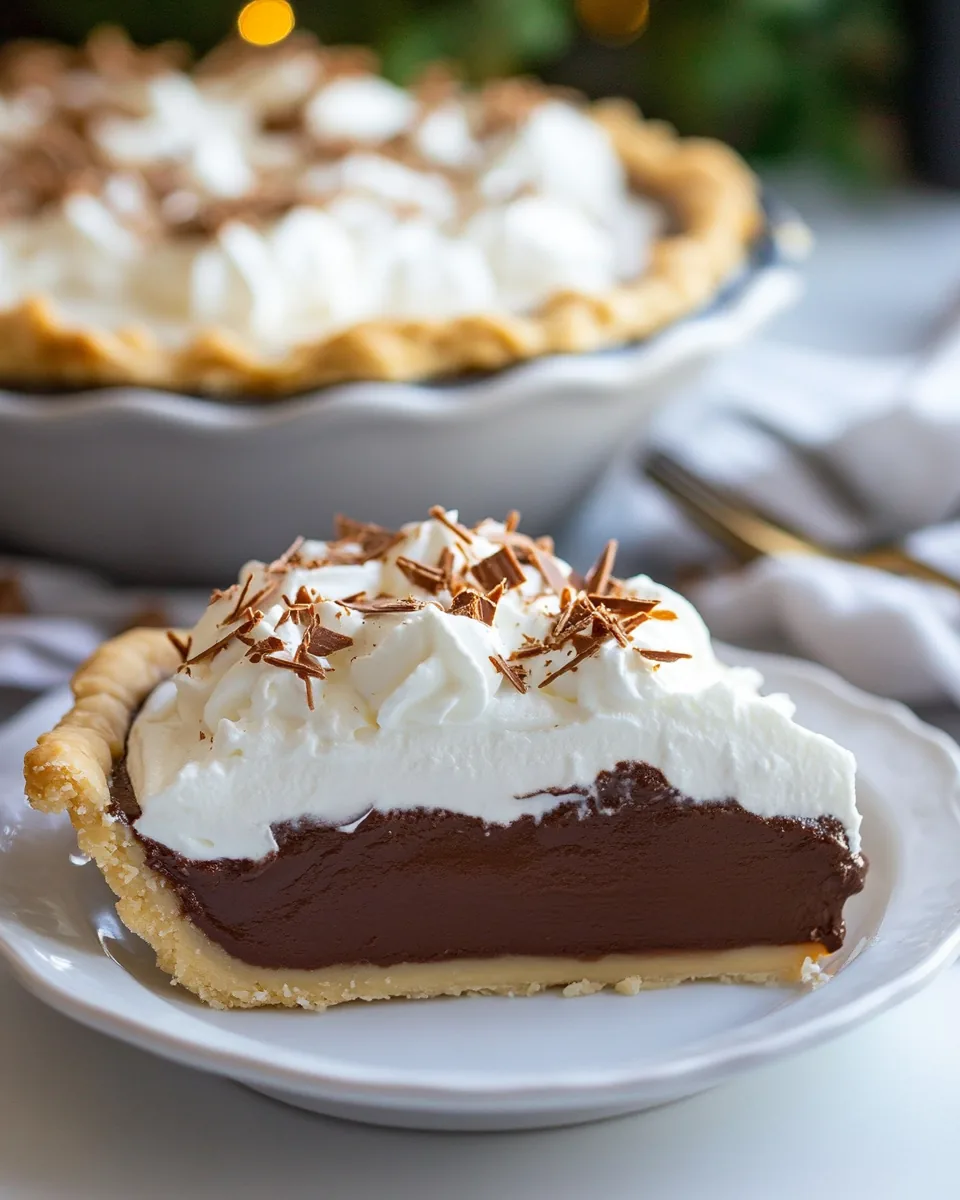
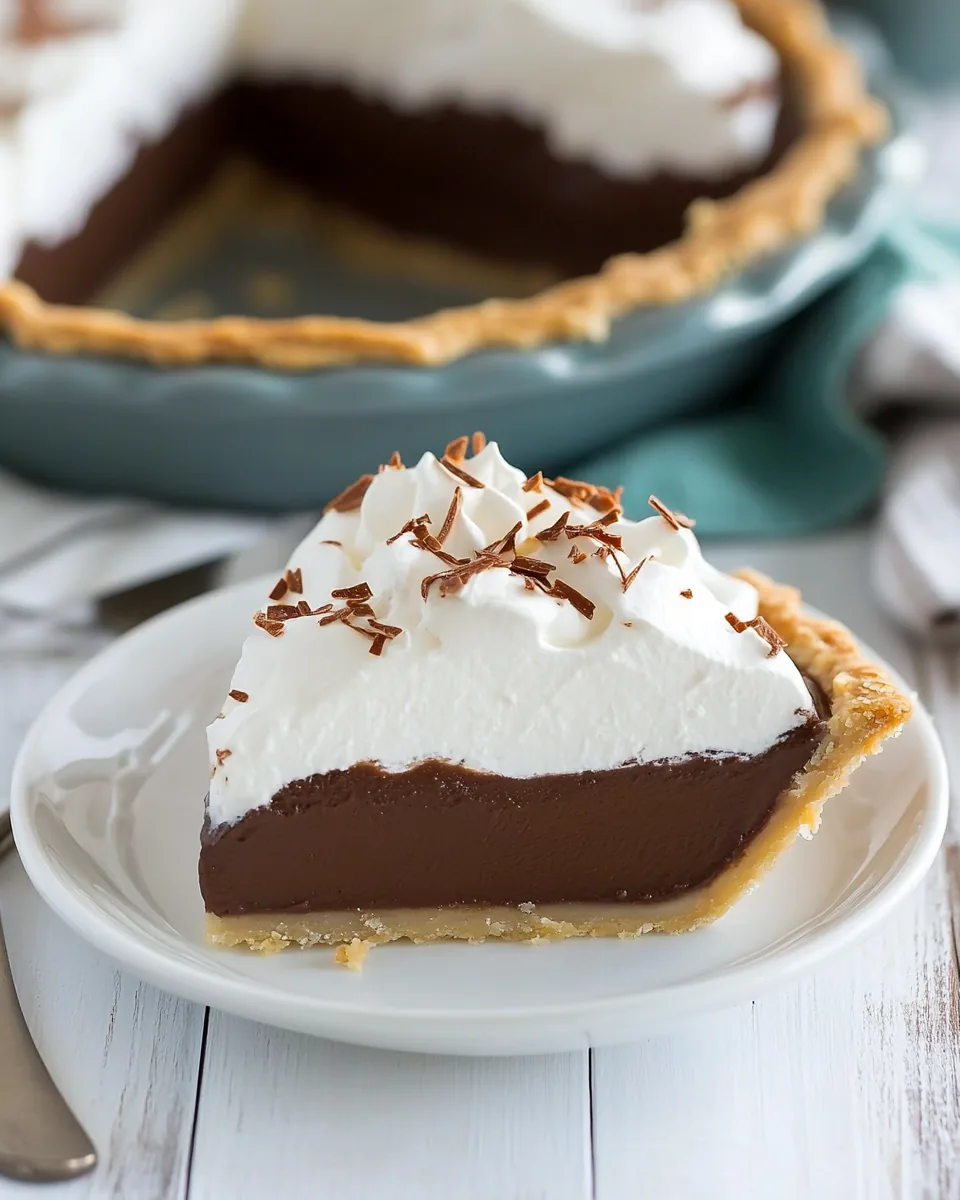
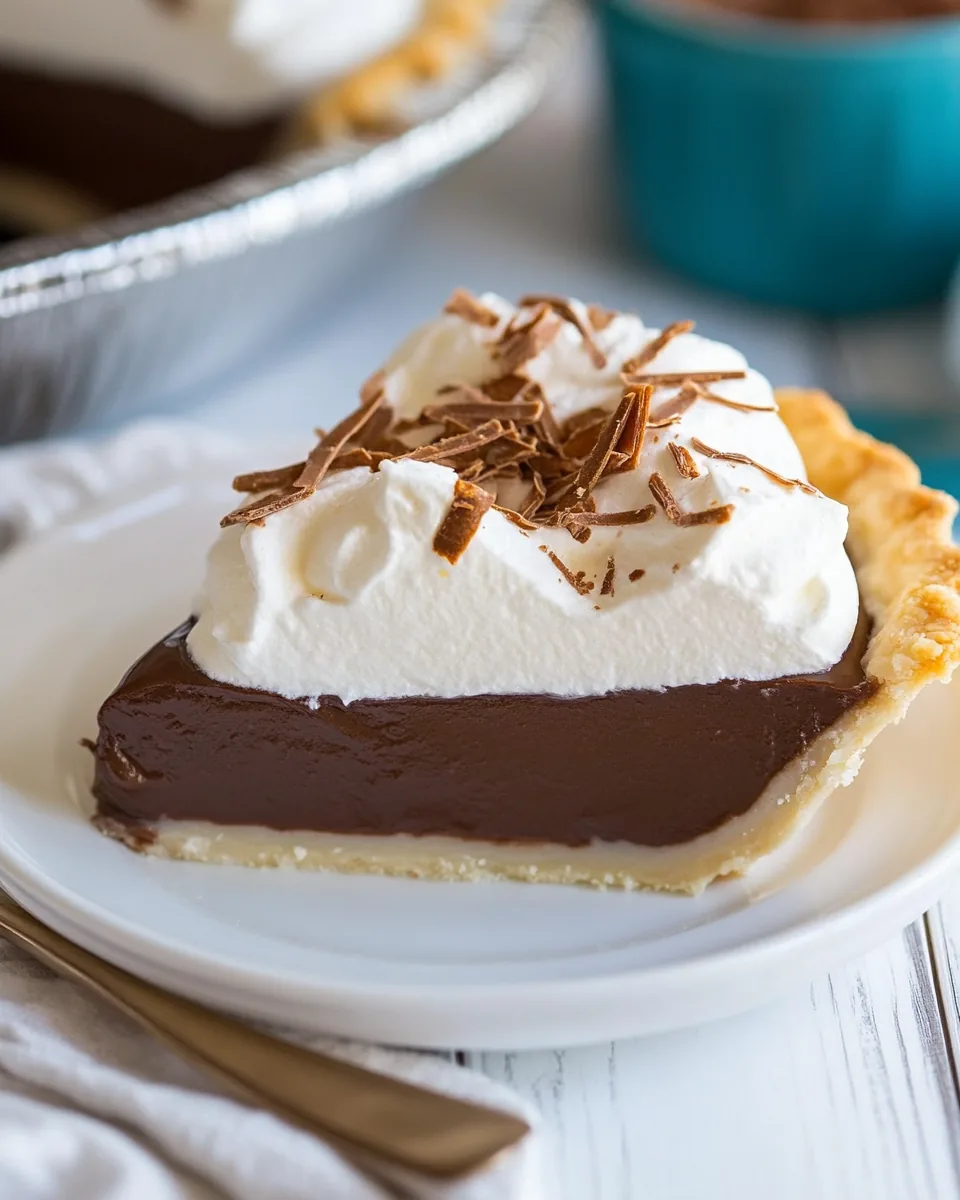
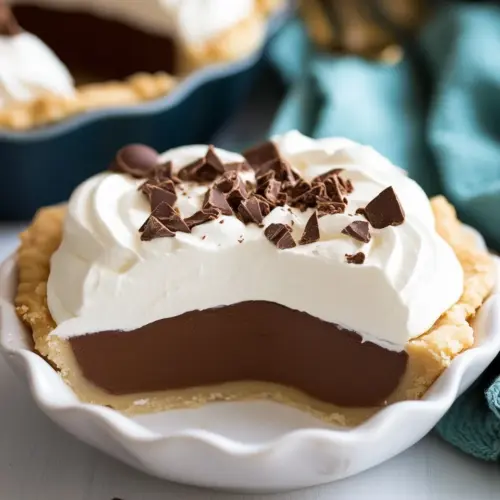
Spread the whipped cream over the chocolate filling, creating a beautiful layer on top. If desired, garnish with chocolate shavings or dust with cocoa powder for an extra touch.
-
Cut into slices just before serving and enjoy this delightful dessert. Keep any leftovers stored in the fridge for up to three days for the best taste.
Things Worth Knowing
- Cooling Time: Chilling the pie for at least 4 hours is crucial for it to set properly and develop flavor.
- Whipping Cream: Make sure the heavy cream is cold to achieve stiff peaks when whipping.
- Melting Chocolate: Use high-quality chocolate for the best flavor; the bittersweet variety enhances the pie’s richness.
- Pie Crust: Pre-baking the crust prevents it from becoming soggy from the filling.
How to Switch It Up
Here are some fun ways to add your personal touch to the Chocolate Cream Pie. Each variation can make the dessert feel new and exciting!
- Add a Peanut Butter Layer: Spread a layer of peanut butter over the crust before adding the chocolate filling for a delicious twist.
- Use Milk Chocolate: For a sweeter pie, opt for milk chocolate instead of bittersweet chocolate.
- Fresh Berries: Top the whipped cream with fresh berries like raspberries or strawberries for a pop of color and flavor.
- Mint Extract: Add a few drops of mint extract to the chocolate filling for a refreshing mint chocolate version.
- Cocoa Nibs: Sprinkle cocoa nibs on top of the whipped cream for an added crunch and chocolate flavor.
- Different Creams: Experiment with flavored whipped creams like coconut or almond for a unique topping.
What to Serve Alongside Chocolate Cream Pie
- Fresh Fruit Salad: A bright, refreshing fruit salad is the perfect contrast to the rich pie.
- Ice Cream: Serve with a scoop of vanilla ice cream for added creaminess and temperature contrast.
- Chocolate Sauce: Drizzle some chocolate sauce over the top for an extra indulgent experience.
- Whipped Cream: You can never go wrong with a bit more whipped cream on the side!
- Seasonal Treats: Pair with seasonal desserts like pumpkin pie in the fall or berry tarts in the summer for a delightful dessert spread.
- Tea or Coffee: A cup of warm tea or coffee is a great way to round out the meal.
FAQ
Conclusion
The Chocolate Cream Pie is a delightful dessert that combines nostalgia with indulgence. Its rich, creamy filling and flaky crust make it a standout treat that everyone loves. I encourage you to try making this pie at home; it’s easier than you think and perfect for impressing your guests. With each slice, you’re not just serving dessert, but also a slice of joy and warmth. So go ahead, embrace your inner chef!
Chocolate Cream Pie
Equipment
- Wooden Spoon
- Mixing Bowl
- Frying Pan
- Chef's Knife
- Whisk
- Large Pot
- Blender
- Baking Sheet
- Food Processor
Ingredients
- 1 blind baked pie crust Blind Baked Pie Crust
- 4 oz Bittersweet Chocolate 60 to 65 percent, chopped small
- 3 Tbsp Unsalted Butter cut into 1 Tbsp pieces
- 2 tsp Vanilla Extract
- 2/3 cup Granulated Sugar (136 g)
- 1/4 cup Dutch Process Cocoa Powder scoop and level to measure (24 g)
- 1/4 cup Cornstarch scoop and level to measure (33 g)
- 1/4 tsp Salt
- 3 large Egg Yolks
- 3 cups Whole Milk divided (710 ml)
- 1 1/4 cups Heavy Cream (295 ml)
- 2 1/2 Tbsp Granulated Sugar (30 g)
- 1/4 tsp Vanilla Extract
Instructions
- For the pie crust, prepare and bake the blind baked pie crust as directed. Once baked, let it cool completely. The crust needs to be fully cooled to hold the filling properly.
- For the filling, place chopped chocolate and butter in a large mixing bowl. Pour in the vanilla extract. Set a large sieve over the bowl and set aside. This will help remove any lumps later on.
- In a 3-quart saucepan, whisk together granulated sugar, cocoa powder, cornstarch, and salt until well blended. This ensures that the dry ingredients are evenly distributed before adding the wet ingredients.
- Whisk in the egg yolks and 1/2 cup of the milk until well combined. This mixture will start to thicken as it cooks, so it’s important to mix well.
- Mix in the remaining 2 1/2 cups of milk. This creates a smooth consistency that will cook down into a beautiful filling.
- Set the mixture over medium heat and cook while whisking constantly. It’s crucial to scrape the bottom corners of the pan to prevent any sticking or burning. Look for bubbles to form over the top surface, indicating it’s time to boil.
- Let the mixture boil for 1 minute while whisking constantly. This will help thicken the filling and develop its flavors.
- Pour the mixture into the sieve set over the chocolate mixture, then press it with a silicone spatula against the sieve to remove lumps. You want a silky smooth filling, so this step is important!
- Stir the strained mixture with the chocolate and butter mixture until everything is melted and combined. The heat from the filling will melt the chocolate, creating a rich texture.
- Pour the mixture into the cooled pie crust and spread into an even layer. This ensures that every slice has the same amount of filling.
- Spray a piece of plastic wrap with non-stick cooking spray and press it against the surface of the pudding mixture. Make sure not to wrap it snugly around the pie, as this can create steam and soften the crust.
- Transfer the pie to the fridge and chill it for at least 4 hours to let it cool and set. The longer it sits, the more the flavors meld.
- For the topping, pour the heavy cream in a large mixing bowl. Add granulated sugar and the vanilla extract. Using an electric hand mixer, whip the mixture on high speed until very stiff peaks form.
- Spread the whipped cream over the chocolate filling, creating a beautiful layer on top. If desired, garnish with chocolate shavings or dust with cocoa powder for an extra touch.
- Cut into slices just before serving and enjoy this delightful dessert. Keep any leftovers stored in the fridge for up to three days for the best taste.
Notes
- Tip: Wait to make and add the whipped cream to the pie until you are almost ready.
- Chocolate Shavings: For the chocolate shavings, take about a 1 1/2-inch piece of a chocolate bar, heat it in the microwave for about 10 seconds, then shave off the edge with a vegetable peeler.
- Nutrition Estimate: Includes crust, filling, and whipped topping.