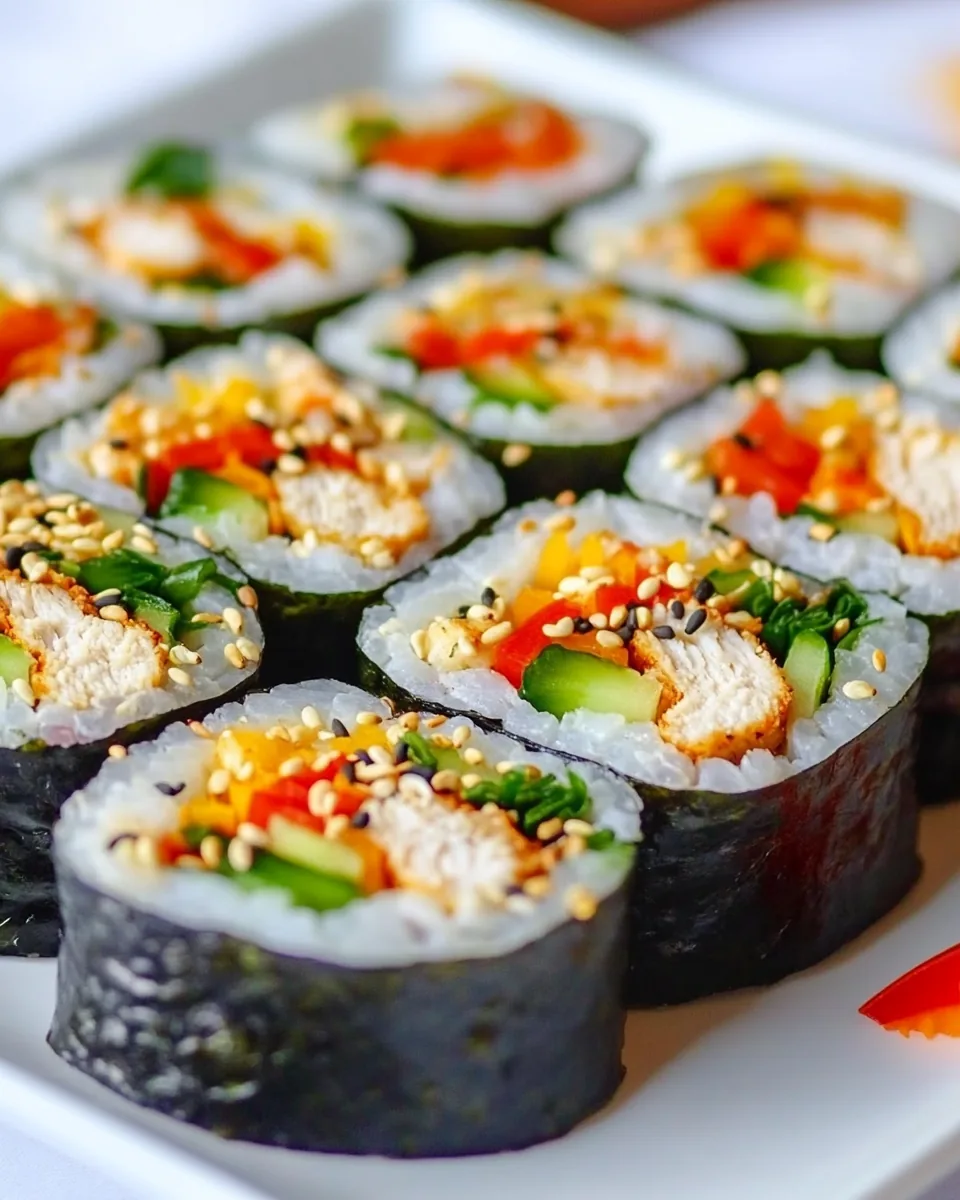
Chicken Kimbap
The first time I tried Chicken Kimbap, I was immediately hooked. The combination of flavors and textures is simply irresistible. I remember sitting in a cozy little Korean restaurant, the aroma of fresh ingredients wafting through the air. As I took my first bite, I was transported to a world of savory chicken, crisp vegetables, and perfectly seasoned rice. Making Chicken Kimbap at home has since become a cherished tradition in my kitchen. It’s not just a meal; it’s an experience filled with joy and creativity.
Recipe Snapshot
1 hr 30 mins
90 mins
0 mins
Medium
320 kcal
12 g
Whole30, Vegan, Gluten-Free
10 g
Wooden Spoon, Mixing Bowl, Frying Pan, Skillet, Chef’s Knife, Saucepan, Large Pot
What Sets This Chicken Kimbap Apart
A Delicious Culinary Adventure
One of the standout features of Chicken Kimbap is how customizable it is. You can use any fresh vegetables you have on hand, making it a flexible option for any occasion. It allows you to incorporate whatever you love or want to use up in your fridge.
Great for Sharing
This dish is perfect for gatherings or family meals. Slicing the kimbap into bite-sized pieces makes it easy to share and enjoy. It brings people together, as everyone can appreciate the delightful flavors and beautiful presentation.
Health Benefits
Chicken Kimbap is also a healthier alternative to many fast foods. Packed with lean protein, fresh vegetables, and sushi rice, it’s a balanced meal that’s not only satisfying but also nutritious.
Easy to Prepare
Despite its impressive look, Chicken Kimbap is surprisingly straightforward to prepare. With just a little practice, you’ll be able to roll it up like a pro! The process of assembling each component is fun and allows you to enjoy the cooking experience.
Perfect for Meal Prep
It’s also a fantastic meal prep option. You can make a big batch ahead of time, and it keeps well in the fridge. This means you can enjoy homemade kimbap on busy weekdays without the hassle of cooking from scratch.
Endless Variations
Lastly, Chicken Kimbap opens the door to endless variations. You can switch up the protein or vegetables based on your preferences or what’s in season.
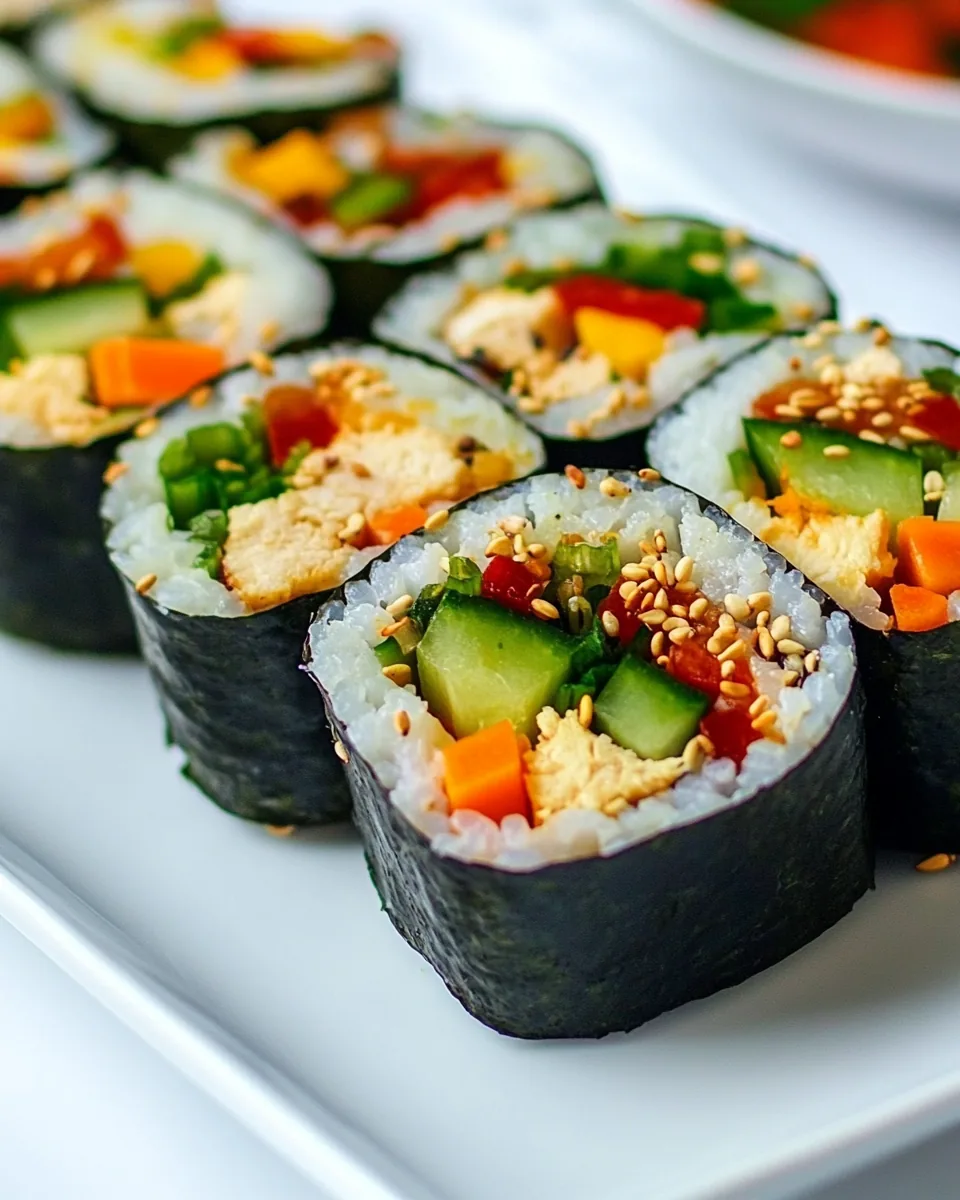
Chicken Kimbap Ingredients

In making Chicken Kimbap, the choice of ingredients is crucial to achieving that authentic taste and texture. Each component plays a vital role; from the chicken to the nori (seaweed), they work harmoniously to create a truly memorable dish.
- Sushi Rice – 400g sushi rice forms the main base of the kimbap. Its sticky texture keeps the roll intact and complements the other ingredients beautifully.
- Vinegar – 2 tbsp vinegar adds a tangy flavor to the rice, enhancing its taste.
- Sugar – 1 tbsp sugar balances the acidity of the vinegar, giving the rice a subtle sweetness.
- Salt – 1 tsp salt is essential for flavoring the rice and enhancing the overall dish.
- Nori – 4 algae leaves nori wrap all the ingredients together, adding a unique umami flavor.
- Chicken Breast – 150g chicken breast provides protein and a savory taste, making it the heart of the kimbap.
- Egg – 1 egg adds richness and texture to the dish.
- Flour – 1 tbsp flour is used for dredging the chicken before frying, creating a delicious crust.
- Cucumber – 1 cucumber, thinly sliced, adds crunch and freshness.
- Bell Pepper – 1/4 bell pepper brings vibrant color and sweetness.
- Carrots – 30g carrots add a lovely crunch and a hint of sweetness.
- Green Salad – 1 small green salad provides freshness and enhances the overall flavor.
- Soy Sauce – 1 tsp soy sauce gives a savory kick to the kimbap.
- Green Onion – 1 small green onion, chopped, adds a mild onion flavor that complements the other ingredients.
Putting Together Chicken Kimbap

Creating Chicken Kimbap is such a rewarding process! Follow these steps, and soon you’ll have beautifully rolled kimbap ready to enjoy.
Start by thoroughly washing 400g of sushi rice in several changes of water to remove excess starch. Drain it well. In a pot with a lid, bring to a boil 525 to 550 ml (about 2 1/3 cups) of water with a pinch of salt.
Add the drained rice to the boiling water, cover with a lid, and simmer gently until all the water is absorbed. Look for the rice to start sticking a little to the pot, indicating it’s done. Avoid stirring too much.
-
While the rice cooks, prepare your marinade. In a small saucepan, combine 2 tbsp of vinegar, 1 tbsp of sugar, and 1 tsp of salt. Bring to a simmer until the sugar and salt dissolve completely.
Once the rice is cooked, transfer it to a large bowl and let it cool slightly. Pour the marinade over the rice and gently mix, ensuring it’s evenly coated. This step is crucial for flavor!
Next, take your 150g of chicken breast and slice it into thin strips. Season with salt and pepper, then dredge in 1 tbsp of flour.
-
Prepare a batter by mixing 1 egg with some cold water and a little more flour. Dip the chicken strips into the batter, then fry them in a pan with hot oil until they turn golden brown and crispy. This adds a delicious crunch to your kimbap.
Now it’s time to roll! Place a sheet of 4 algae leaves nori on a sushi rolling mat lined with foil. Spread a thin layer of the seasoned rice over about 3/4 of the nori, leaving some space at the top for rolling.
To prevent sticking, wet your hands with cold water when handling the rice. This makes it easier to spread and roll. On top of the rice, layer the fried chicken, sliced cucumber, bell pepper, carrots, and some green salad.
-
Using the bamboo mat, tightly roll the kimbap away from you, applying gentle pressure. Once rolled, seal the edges by wetting them with a little water.
To slice, use a sharp knife and wipe it on a damp cloth between cuts for clean slices. Aim for pieces about 1 to 1.5 cm (1/3 to 2/3 of an inch) thick.
For the omelet, beat 4 eggs with 1 tsp of soy sauce and chopped green onion. Cook in a non-stick omelet pan over medium heat, rolling it as it cooks. Once done, slice it into strips.
-
Finally, arrange your Chicken Kimbap on a platter and serve with additional soy sauce, pickled ginger, and wasabi for dipping.
Things Worth Knowing
- Use quality rice: The type of rice used will greatly affect the final texture of your kimbap. Always opt for sushi rice for the best results.
- Keep ingredients fresh: Fresh vegetables enhance the taste and crunch of your kimbap. Use seasonal produce for the best flavor.
- Practice makes perfect: Rolling kimbap can be tricky at first. Don’t be discouraged if your rolls aren’t perfect! With practice, you’ll master the technique.
- Experiment with fillings: Feel free to try different proteins and vegetables. Tofu, crab, or even cooked vegetables can be great additions.
- Serve right away: Kimbap is best enjoyed fresh, as the nori can become soggy over time. If storing, keep the ingredients separate until ready to eat.
Variations to Try
Once you’re comfortable with the basic Chicken Kimbap recipe, there are plenty of exciting variations to explore. Here are some ideas to inspire your creativity.
- Vegetarian Kimbap: Omit the chicken and use a variety of fresh vegetables like avocado, radish, and bell pepper for a refreshing twist.
- Spicy Tuna Kimbap: Substitute the chicken with spicy tuna mixed with mayonnaise and sriracha, adding a kick to your rolls.
- BBQ Chicken Kimbap: Use leftover BBQ chicken for a smoky flavor that pairs beautifully with the rice and vegetables.
- Fruit Kimbap: For a sweet treat, add slices of mango or strawberries instead of savory fillings for a dessert version.
- Kimchi Kimbap: Add a layer of kimchi for a tangy kick. The fermented flavor complements the other ingredients wonderfully.
- Vegan Kimbap: Replace the chicken with marinated tofu and add roasted vegetables for a hearty and satisfying meal.
Pairing Suggestions for Chicken Kimbap
Serving Chicken Kimbap can be an art in itself! Here are some delightful pairing suggestions to elevate your meal experience:
- Fresh Salad: A simple green salad with a light vinaigrette complements the richness of the kimbap.
- Miso Soup: The warm umami flavors of miso soup provide a comforting contrast to the cold kimbap.
- Kimchi: Serve with a side of spicy kimchi for an authentic Korean experience that always enhances the meal.
- Pickled Radishes: Sweet and crunchy pickled radishes are a classic accompaniment that balances the savory flavors.
- Sesame Oil: A drizzle of toasted sesame oil over the kimbap adds an aromatic touch that enhances every bite.
- Tea: Pair your kimbap with a refreshing green tea or traditional Korean barley tea to cleanse the palate.
- Casual Occasions: Perfect for picnics, lunchboxes, or a casual dinner, Chicken Kimbap is versatile for any setting.
FAQ
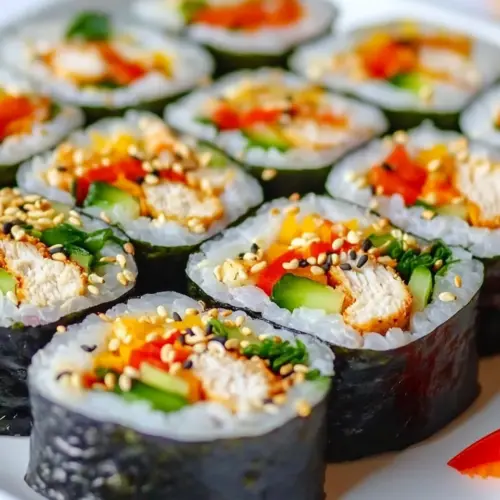
Conclusion
Chicken Kimbap is a delightful dish that combines savory flavors and fresh ingredients into a roll that’s both satisfying and nutritious. Whether you’re enjoying it on a picnic or at home, this dish is sure to impress your family and friends. I encourage you to try making it yourself and discover the joy of this wonderful Korean treat!
Chicken Kimbap
Equipment
- Wooden Spoon
- Mixing Bowl
- Frying Pan
- Skillet
- Chef's Knife
- Saucepan
- Large Pot
Ingredients
- 400 g Sushi Rice
- 2 tbsp Vinegar
- 1 tbsp Sugar
- 1 tsp Salt
- 4 leaves Nori
- 150 g Chicken Breast
- 1 number Egg
- 1 tbsp Flour
- 1 number Cucumber
- 1/4 number Bell Pepper
- 30 g Carrots
- 1 small Green Salad
- 4 number Eggs
- 1 tsp Soy Sauce
- 1 small Green Onion
Instructions
- Start by thoroughly washing 400g of sushi rice in several changes of water to remove excess starch. Drain it well. In a pot with a lid, bring to a boil 525 to 550 ml (about 2 1/3 cups) of water with a pinch of salt.
- Add the drained rice to the boiling water, cover with a lid, and simmer gently until all the water is absorbed. Look for the rice to start sticking a little to the pot, indicating it’s done. Avoid stirring too much.
- While the rice cooks, prepare your marinade. In a small saucepan, combine 2 tbsp of vinegar, 1 tbsp of sugar, and 1 tsp of salt. Bring to a simmer until the sugar and salt dissolve completely.
- Once the rice is cooked, transfer it to a large bowl and let it cool slightly. Pour the marinade over the rice and gently mix, ensuring it’s evenly coated. This step is crucial for flavor!
- Next, take your 150g of chicken breast and slice it into thin strips. Season with salt and pepper, then dredge in 1 tbsp of flour.
- Prepare a batter by mixing 1 egg with some cold water and a little more flour. Dip the chicken strips into the batter, then fry them in a pan with hot oil until they turn golden brown and crispy. This adds a delicious crunch to your kimbap.
- Now it’s time to roll! Place a sheet of 4 algae leaves nori on a sushi rolling mat lined with foil. Spread a thin layer of the seasoned rice over about 3/4 of the nori, leaving some space at the top for rolling.
- To prevent sticking, wet your hands with cold water when handling the rice. This makes it easier to spread and roll. On top of the rice, layer the fried chicken, sliced cucumber, bell pepper, carrots, and some green salad.
- Using the bamboo mat, tightly roll the kimbap away from you, applying gentle pressure. Once rolled, seal the edges by wetting them with a little water.
- To slice, use a sharp knife and wipe it on a damp cloth between cuts for clean slices. Aim for pieces about 1 to 1.5 cm (1/3 to 2/3 of an inch) thick.
- For the omelet, beat 4 eggs with 1 tsp of soy sauce and chopped green onion. Cook in a non-stick omelet pan over medium heat, rolling it as it cooks. Once done, slice it into strips.
- Finally, arrange your Chicken Kimbap on a platter and serve with additional soy sauce, pickled ginger, and wasabi for dipping.
Notes
- Storage: To store leftovers, place them in an airtight container in the fridge. They are best consumed within two days to maintain freshness.
- Freezing: While freezing is possible, it’s best to consume kimbap fresh as freezing can alter the texture of the rice and vegetables.
- Pairing: Serve with a side of kimchi and miso soup for an authentic Korean meal experience.
- Customizing: Feel free to switch up the fillings based on your preferences or seasonal ingredients.
- Presentation: For a beautiful presentation, arrange the kimbap on a platter and garnish with pickled ginger and wasabi.