Candied Nuts
Candied Nuts are the sort of snack I reach for when I want something both cozy and a little bit festive.
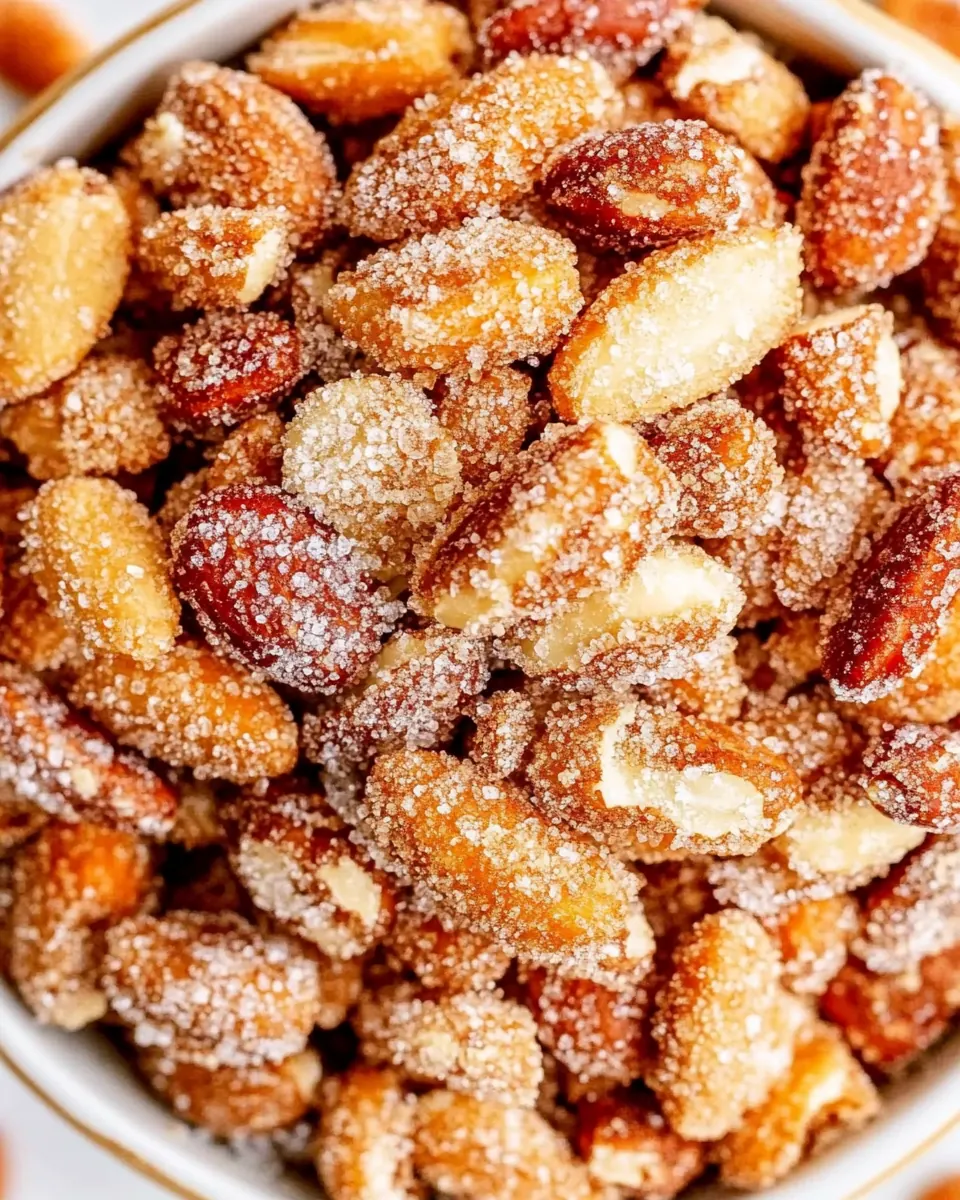
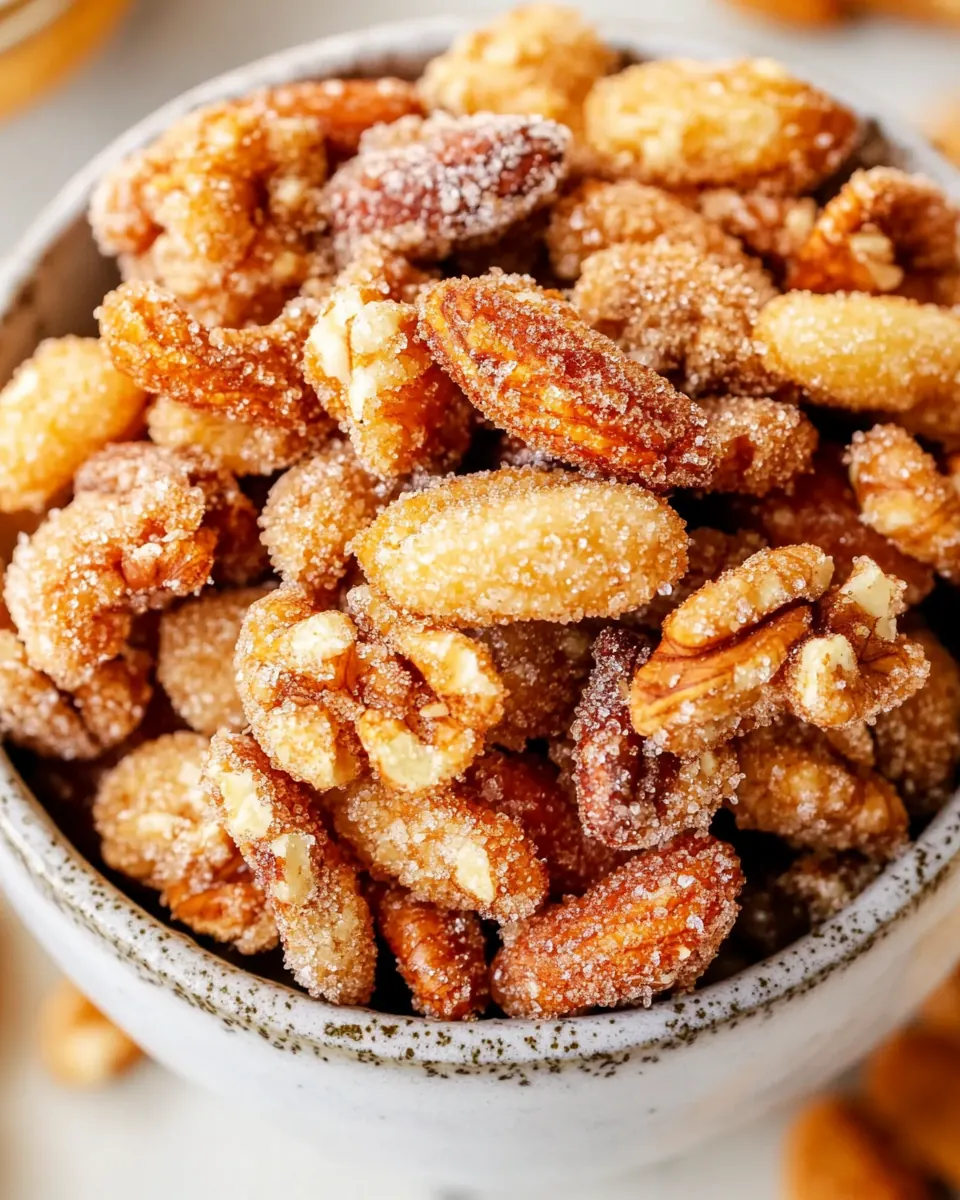
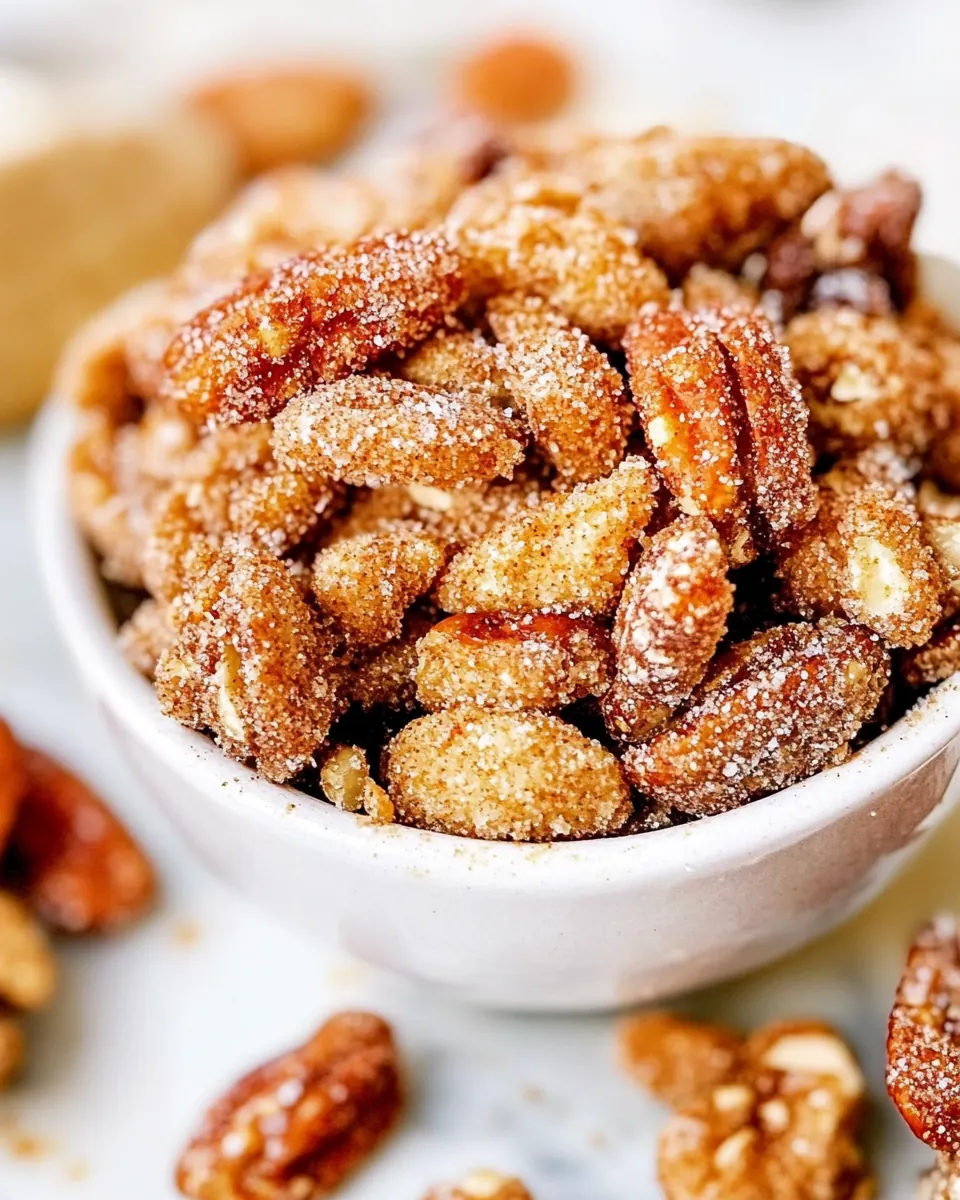
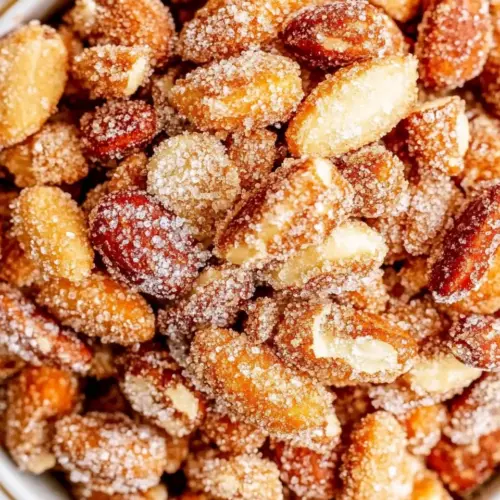
I still remember making my first batch on a rainy afternoon, stirring a pan of bubbling sugar while the house smelled of cinnamon and warm caramel. I had a mix of cashews, pecans, almonds, and peanuts on the counter, and the simple act of coating each one felt almost meditative. The crunchy texture paired with a light spice made them vanish at the first gathering I brought them to, and ever since I have a special jar reserved for guests.
This version of Candied Nuts is straightforward, forgiving, and perfect for gifting. I like to make a big batch when the air turns cooler in the fall, because the scent of sugar and cinnamon feels like a warm invitation to slow down. It is a recipe that lets you play with proportions, but still rewards attention to the pan and timing.
Recipe Snapshot
10 mins
5 mins
5 mins
Easy
200 kcal
American
Vegan, Gluten-Free
Desserts
Large frying pan or deep pot, Spatula or wooden spoon, Plate or chopping board
What’s Great About This Candied Nuts
They are incredibly simple to make
I love that Candied Nuts ask for just a handful of pantry staples. With sugar, water, cinnamon, a pinch of salt, and a splash of vanilla extract, you can transform plain nuts into something celebratory. I find this accessibility makes it my go to when I need a quick homemade gift or an elegant party nibble.
Textural contrast is the star
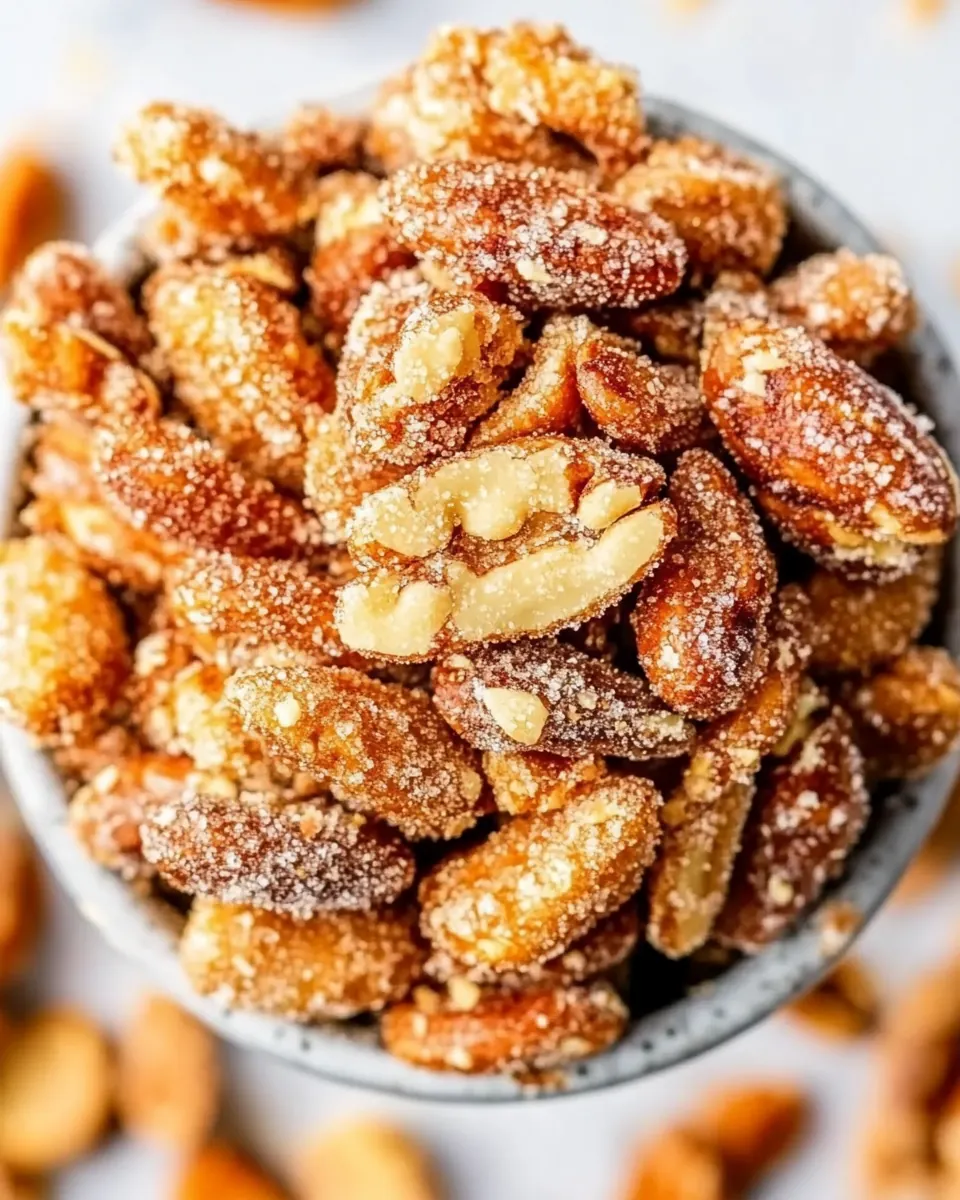
The glossy caramel coating that crisps and then slightly shatters gives a delightful contrast to the creamy interior of each nut. I always watch for that moment when the sugar begins to crystallize on the surface, because that is when you know the bite will be satisfyingly crunchy rather than sticky. This balance keeps people coming back for more.
Flavor is customizable
I appreciate how easy it is to nudge the flavor profile. The recipe already uses warm cinnamon and a hint of vanilla extract, but you can emphasize one note over another depending on the occasion. For holiday gifting I prefer a stronger cinnamon hit, while for casual snacking I keep it lighter and let the natural taste of the nuts shine.
Great for entertaining and gifting
I often package these Candied Nuts in small jars with a ribbon, because they hold well at room temperature for a couple of weeks. They feel thoughtful without being fussy, and they travel well to potlucks or dinner parties. I like recipes that make hosting feel effortless, and this one does exactly that.
Versatile use in cooking and snacking
Beyond snacking, I sometimes crumble a handful over a salad for extra crunch, or use them as a topping for roasted vegetables or desserts. Their sweet, spiced coating adds an unexpected layer of texture and flavor that elevates simple dishes in a pinch.
What to Buy for Candied Nuts
I think of these ingredients as a team where each player has a clear job. The nuts provide body and richness, the sugar is the transforming element that creates the crisp coating, and cinnamon and vanilla extract bring warm aromatic notes that make the snack feel seasonal. A small amount of salt brightens the flavors, while water helps the sugar dissolve uniformly so the coating finishes smoothly.
- 3 cups nuts I used cashews, pecans, almonds and peanuts: Provide crunch and rich flavor; offers a mix of buttery, earthy, and sweet notes that form the base of the candied nuts. Can be varied for texture contrast and visual interest, and toasting them slightly enhances aroma and depth. Acts as the primary component that absorbs the sugary coating and carries the seasoning.
- 1 teaspoon salt: Enhance overall flavor balance and prevent sweetness from becoming cloying; helps to highlight the natural nuttiness and spices. Dissolves into the sugar coating to bring a subtle savory finish that deepens complexity, and also aids in preserving shelf life by moderating taste.
- 1 tablespoon cinnamon: Add warm, aromatic spice that complements the sugar and nuts; contributes to the characteristic sweet-spiced profile of candied nuts. Blends with other seasonings and helps create a cohesive, fragrant coating that appeals to the senses. Can be adjusted for intensity depending on preference.
- 1 teaspoon vanilla extract: Provide a sweet, aromatic accent that rounds out flavors; imparts a delicate floral-vanilla note that elevates the caramelized sugar. Helps to bind and enhance other flavorings when mixed into the syrup before coating the nuts, adding depth without additional sweetness.
- 1 cup sugar: Create the primary sweet coating that caramelizes and crisps on the nuts; melts with the water to form the syrup that crystallizes into a crunchy shell. Controls the level of caramelization and sweetness, making it essential for texture and the classic candied finish.
- 1/4 cup water: Form the liquid base for dissolving and heating the sugar; controls syrup consistency and prevents burning while allowing flavors to meld. Evaporates during cooking to help the sugar reach the proper concentration for crystallization and coating the nuts.
Cooking Method for Candied Nuts
I approach the cooking with calm focus, because the process moves quickly once the sugar starts to change. Keep your tools close, stir intentionally, and pay attention to the visual and aromatic cues so you can pull the pan at just the right moment.
- Heat a large frying pan or deep pot on medium heat. When hot, add the sugar, salt, cinnamon, vanilla, and water and mix until fully combined. Allow to heat up, stirring occasionally.: You will notice the pan surface warming and a faint shimmer when it is ready, which lets the sugar dissolve evenly. Use a pan with a heavy bottom to distribute heat, otherwise the sugar may develop hot spots and burn. A common mistake is turning the heat up too high, which causes rapid scorching instead of controlled melting.
- When the sugar has completely melted, add the nuts and mix until fully incorporated. Watch over the pan and continue stirring often until most of the sugar has been coated and is beginning to crystallize.: As the mixture begins to warm, you will hear tiny pops and see the sugar crystals glisten before they dissolve. Stirring helps the sugar dissolve into the water , and blending in the salt , cinnamon , and vanilla extract ensures even flavor distribution. Avoid vigorous stirring that can splash the hot syrup, and do not leave the pan unattended because sugar can go from melted to burnt quickly.
- Remove pan from the heat and allow to sit for 1-2 minutes. Using a spatula or wooden spoon, stir the nuts once more to avoid overly large clusters and set on a plate or chopping board to cool completely.: The mixture will transition from cloudy to clear and glossy as the sugar melts, releasing a warm caramel scent. Occasional stirring prevents localized boiling and keeps the flavor uniform. The mistake to avoid here is constant, aggressive stirring, which can encourage premature crystallization or uneven cooking.
- When the sugar has completely melted, add the nuts and mix until fully incorporated: After adding the nuts , the pan will hiss softly and you will see the liquid sugar glaze each piece. The visual cue is a shiny, wet coating across the nuts . Mixing quickly but steadily ensures every nut gets an even coat. If you add the nuts too early or the sugar is not fully melted, you may end up with grainy patches.
- Watch over the pan and continue stirring often until most of the sugar has been coated and is beginning to crystallize: The mixture will shift from glossy to matte as the sugar crystallizes, and you may feel a slight grit under the spoon before it fully sets. That change signals the perfect moment to remove heat soon, because the nuts will crisp as they cool. A frequent error is leaving the pan on the heat too long, which yields overly brown, bitter coating instead of crisp sweet shells.
- Remove pan from the heat and allow to sit for 1 to 2 minutes: Sitting briefly off the heat lets the residual warmth finish the crystallization process without risking burning. You will notice the aroma deepen and the syrup thicken slightly. Be mindful that residual heat can continue to brown the sugar, so resist the urge to keep it on the burner longer than instructed.
- Using a spatula or wooden spoon, stir the nuts once more to avoid overly large clusters and set on a plate or chopping board to cool completely: As you stir, you can break up beginning clusters and spread the nuts into a single layer for faster cooling. The sound will change from a wet sliding to a dry, delicate scrape as they set. A misstep here is piling them while still tacky, which creates unwanted clumps; spread them thin and give them room to cool.
Helpful Notes about Candied Nuts
I like to use this section as a small field guide for better results. These notes will help you avoid the common pitfalls and give you options for storage, texture, and presentation.
- Cluster option For more cluster sized portions, allow the coated nuts to sit undisturbed for about 10 minutes before breaking up, this produces larger chunks that are delightful for sharing.
- Storage at room temperature Caramelized nuts can be stored in an airtight container at room temperature for up to two weeks, keep them away from humidity to preserve crispness.
- Refrigeration To extend shelf life, refrigerate the nuts for up to one month, but allow them to come to room temperature before serving so the texture softens slightly.
- Freezing Freeze the cooled nuts in a freezer safe container for up to two months, separate layers with parchment paper to prevent sticking.
- Oven method If you prefer to oven bake, preheat to 250F/120C and use whipped egg whites to help the sugar adhere, then bake until crisp, stirring periodically for even caramelization.
Side Dish Ideas for Candied Nuts
These Candied Nuts can be served in many ways, and I like to think about how they complement texture and temperature on the plate. Below are ideas for occasions, pairings, and storage that make the most of their sweet and spiced profile.
- Snack bowls Serve a small dish of Candied Nuts on a coffee table during casual gatherings, they pair well with warm drinks and light conversation.
- Salad topper Sprinkle chopped Candied Nuts over a leafy salad for a sweet crunch that contrasts with tangy dressings during lunch or light dinner.
- Gift jars Package in small jars tied with ribbon for holiday gifts or hostess presents, they hold well at room temperature for up to two weeks.
- Party mix addition Combine with dried fruit and plain nuts to add variety to a party mix for game nights or casual entertaining.
- Seasonal pairing I often serve these in the fall alongside baked apples or warm spiced tea, the flavors echo the season and feel comforting.
- Storage tip Keep them in an airtight container away from humidity, and if you need longer storage, freeze for up to two months and thaw at room temperature before serving.
FAQ
Conclusion
Candied Nuts are special because they turn simple pantry ingredients into a crunchy, spiced treat that feels both homemade and festive. The combination of glossy caramelized sugar, warm cinnamon, and a pinch of salt creates a snack that is balanced and addictive. I encourage you to try this recipe when you want an easy, crowd pleasing nibble or a thoughtful edible gift. It is forgiving, quick to make, and offers plenty of room to personalize, so give it a go and enjoy the cozy aroma while you work.
Candied Nuts
Equipment
- Large frying pan or deep pot
- Spatula or wooden spoon
- Plate or chopping board
Ingredients
- 3 cups nuts I used cashews, pecans, almonds and peanuts Provide crunch and rich flavor; offers a mix of buttery, earthy, and sweet notes that form the base of the candied nuts. Can be varied for texture contrast and visual interest, and toasting them slightly enhances aroma and depth. Acts as the primary component that absorbs the sugary coating and carries the seasoning.
- 1 teaspoon salt Enhance overall flavor balance and prevent sweetness from becoming cloying; helps to highlight the natural nuttiness and spices. Dissolves into the sugar coating to bring a subtle savory finish that deepens complexity, and also aids in preserving shelf life by moderating taste.
- 1 tablespoon cinnamon Add warm, aromatic spice that complements the sugar and nuts; contributes to the characteristic sweet-spiced profile of candied nuts. Blends with other seasonings and helps create a cohesive, fragrant coating that appeals to the senses. Can be adjusted for intensity depending on preference.
- 1 teaspoon vanilla extract Provide a sweet, aromatic accent that rounds out flavors; imparts a delicate floral-vanilla note that elevates the caramelized sugar. Helps to bind and enhance other flavorings when mixed into the syrup before coating the nuts, adding depth without additional sweetness.
- 1 cup sugar Create the primary sweet coating that caramelizes and crisps on the nuts; melts with the water to form the syrup that crystallizes into a crunchy shell. Controls the level of caramelization and sweetness, making it essential for texture and the classic candied finish.
- 1/4 cup water Form the liquid base for dissolving and heating the sugar; controls syrup consistency and prevents burning while allowing flavors to meld. Evaporates during cooking to help the sugar reach the proper concentration for crystallization and coating the nuts.
Instructions
- Heat a large frying pan or deep pot on medium heat. When hot, add the sugar, salt, cinnamon, vanilla, and water and mix until fully combined. Allow to heat up, stirring occasionally.: You will notice the pan surface warming and a faint shimmer when it is ready, which lets the sugar dissolve evenly. Use a pan with a heavy bottom to distribute heat, otherwise the sugar may develop hot spots and burn. A common mistake is turning the heat up too high, which causes rapid scorching instead of controlled melting.
- When the sugar has completely melted, add the nuts and mix until fully incorporated. Watch over the pan and continue stirring often until most of the sugar has been coated and is beginning to crystallize.: As the mixture begins to warm, you will hear tiny pops and see the sugar crystals glisten before they dissolve. Stirring helps the sugar dissolve into the water , and blending in the salt , cinnamon , and vanilla extract ensures even flavor distribution. Avoid vigorous stirring that can splash the hot syrup, and do not leave the pan unattended because sugar can go from melted to burnt quickly.
- Remove pan from the heat and allow to sit for 1-2 minutes. Using a spatula or wooden spoon, stir the nuts once more to avoid overly large clusters and set on a plate or chopping board to cool completely.: The mixture will transition from cloudy to clear and glossy as the sugar melts, releasing a warm caramel scent. Occasional stirring prevents localized boiling and keeps the flavor uniform. The mistake to avoid here is constant, aggressive stirring, which can encourage premature crystallization or uneven cooking.
- When the sugar has completely melted, add the nuts and mix until fully incorporated: After adding the nuts , the pan will hiss softly and you will see the liquid sugar glaze each piece. The visual cue is a shiny, wet coating across the nuts . Mixing quickly but steadily ensures every nut gets an even coat. If you add the nuts too early or the sugar is not fully melted, you may end up with grainy patches.
- Watch over the pan and continue stirring often until most of the sugar has been coated and is beginning to crystallize: The mixture will shift from glossy to matte as the sugar crystallizes, and you may feel a slight grit under the spoon before it fully sets. That change signals the perfect moment to remove heat soon, because the nuts will crisp as they cool. A frequent error is leaving the pan on the heat too long, which yields overly brown, bitter coating instead of crisp sweet shells.
- Remove pan from the heat and allow to sit for 1 to 2 minutes: Sitting briefly off the heat lets the residual warmth finish the crystallization process without risking burning. You will notice the aroma deepen and the syrup thicken slightly. Be mindful that residual heat can continue to brown the sugar, so resist the urge to keep it on the burner longer than instructed.
- Using a spatula or wooden spoon, stir the nuts once more to avoid overly large clusters and set on a plate or chopping board to cool completely: As you stir, you can break up beginning clusters and spread the nuts into a single layer for faster cooling. The sound will change from a wet sliding to a dry, delicate scrape as they set. A misstep here is piling them while still tacky, which creates unwanted clumps; spread them thin and give them room to cool.
Notes
- Cluster option For more cluster sized portions, allow the coated nuts to sit undisturbed for about 10 minutes before breaking up, this produces larger chunks that are delightful for sharing.
- Storage at room temperature Caramelized nuts can be stored in an airtight container at room temperature for up to two weeks, keep them away from humidity to preserve crispness.
- Refrigeration To extend shelf life, refrigerate the nuts for up to one month, but allow them to come to room temperature before serving so the texture softens slightly.
- Freezing Freeze the cooled nuts in a freezer safe container for up to two months, separate layers with parchment paper to prevent sticking.
- Oven method If you prefer to oven bake, preheat to 250F/120C and use whipped egg whites to help the sugar adhere, then bake until crisp, stirring periodically for even caramelization.