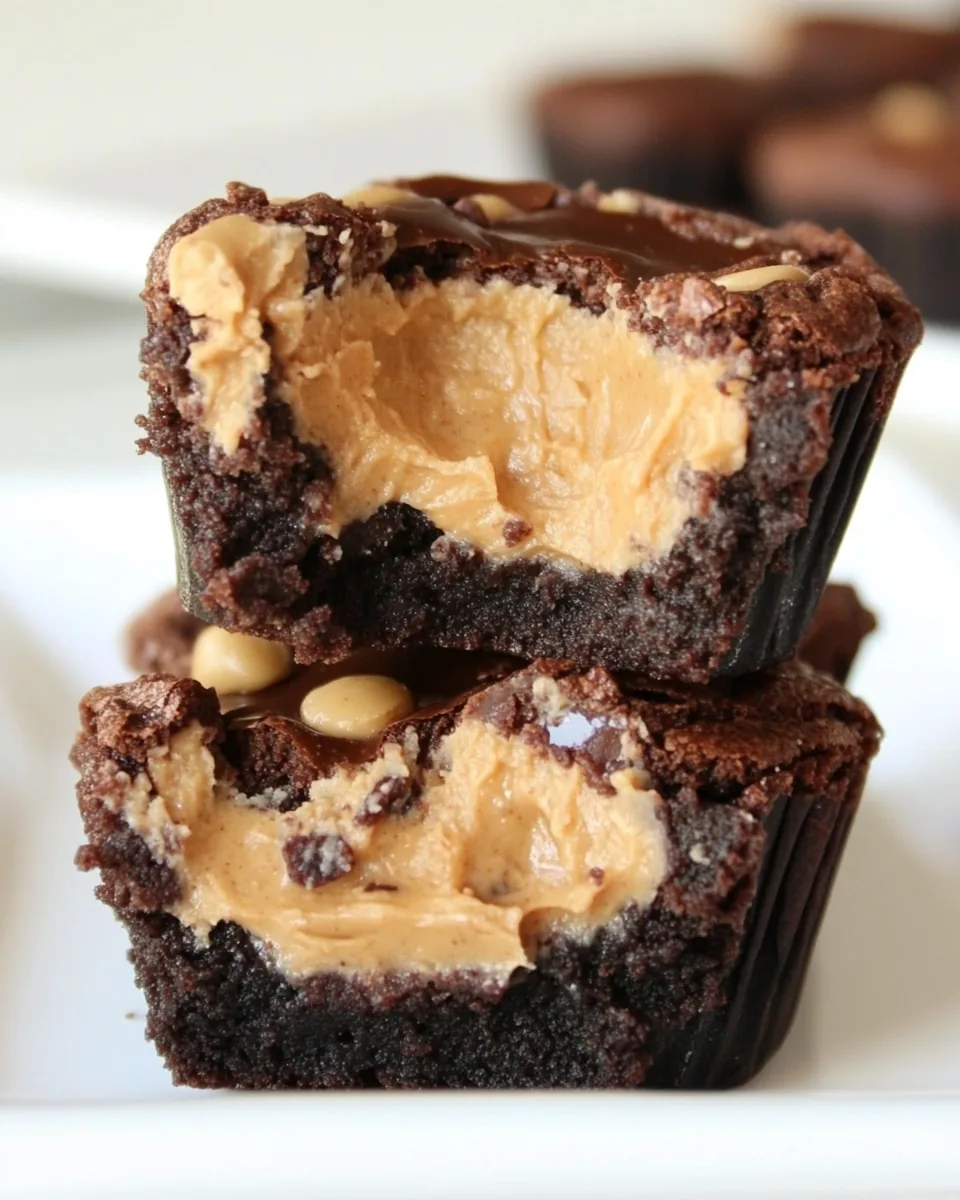
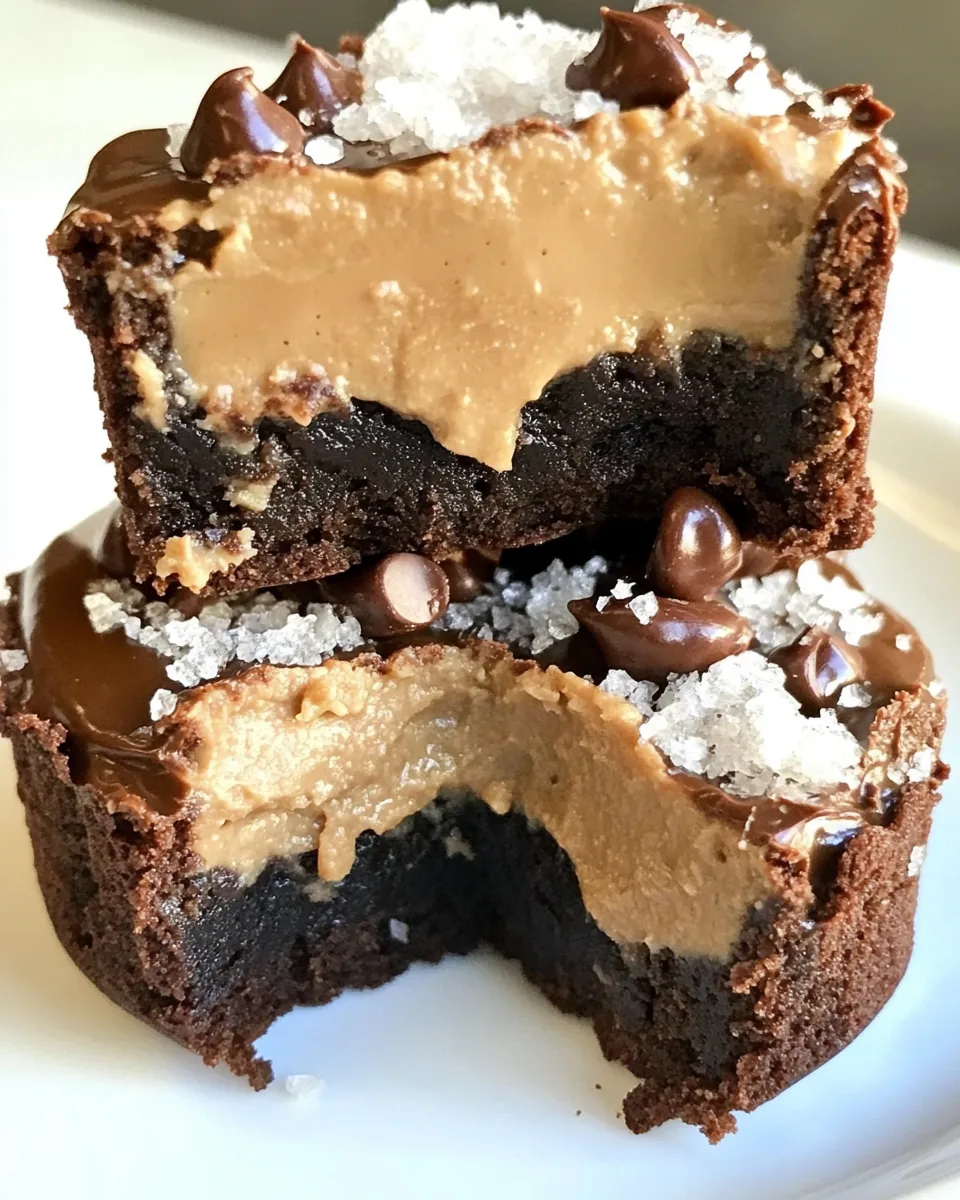
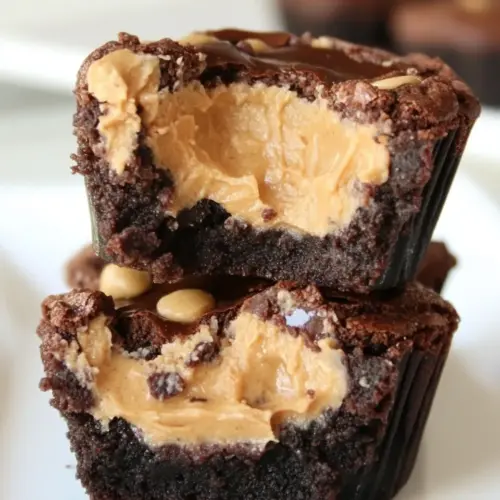
Brownie Peanut Butter Cups
There’s something utterly delightful about the combination of rich chocolate and creamy peanut butter, and that’s exactly why I love making Brownie Peanut Butter Cups. Whenever I have a sweet craving, these little treats are my go-to. They take me back to my childhood, when I first discovered the magic of chocolate and peanut butter together. I remember making them for friends and family, and the smiles that followed were always worth the effort. These brownie cups not only look impressive but also taste amazing, with a fudgy brownie base topped with a gooey peanut butter center. The best part? They’re simple to make and perfect for sharing, whether it’s at a gathering or just as a little treat for yourself.
Recipe Snapshot
25 mins
10 mins
15 mins
Medium
210 kcal
3 g
Gluten-Free, Low FODMAP
10 g
Wooden Spoon, Frying Pan, Blender, Baking Sheet, Oven
Why Try This Brownie Peanut Butter Cups
1. Perfect Combination of Flavors
The marriage of chocolate and peanut butter in Brownie Peanut Butter Cups is a classic that never gets old. The deep, rich flavor of the brownie perfectly offsets the creamy, nutty goodness of peanut butter. Each bite is a harmonious blend that will satisfy your sweet tooth in the best way possible.
2. Easy to Make
One of the best aspects of this recipe is how easy it is to whip up. You don’t need to be a master baker to create something that looks and tastes like it came from a bakery. With just a few simple steps, you can have a delicious batch ready to enjoy.
3. Versatile Treats
These brownie cups are incredibly versatile. You can enjoy them as is, or you can get creative by adding your favorite toppings or mix-ins. Think chopped nuts, additional chocolate chips, or even a drizzle of caramel for an extra special touch.
4. A Crowd Pleaser
If you’re looking for something to bring to a party or gathering, Brownie Peanut Butter Cups are sure to impress. They’re bite-sized, making them easy to share, and who can resist that combination of flavors? They’re perfect for any occasion, from birthdays to casual get-togethers.
5. Great for Meal Prep
Not only are these brownie cups a wonderful treat, but they also store well. You can make a batch ahead of time and keep them in the fridge for a quick sweet fix during the week. Just pop one in the microwave for a few seconds to warm it up, and you’ll have a comforting dessert ready in no time.
What’s In This Brownie Peanut Butter Cups

The ingredients for Brownie Peanut Butter Cups are a wonderful mix of sweet and savory, all coming together to create these indulgent treats. The star of the show is undoubtedly the rich brownie mix, which forms the perfect base. Each component plays a crucial role in delivering that blissful flavor we all love.
- Granulated Sugar: Adds sweetness to the brownie mixture, helping to create a rich flavor.
- Unsalted Butter: Provides moisture and richness, creating a tender brownie texture.
- Water: Helps to blend the ingredients smoothly.
- Semi-Sweet Chocolate Chips: Adds bursts of chocolate flavor throughout the brownies.
- Large Egg: Gives the brownies structure and helps bind all the ingredients together.
- Vanilla Extract: Enhances sweetness and adds a warm flavor note.
- All-Purpose Flour: The backbone of the brownie, providing structure and texture.
- Baking Soda: Helps the brownies rise slightly, creating a light texture.
- Peanut Butter Chips: Provides a delightful peanut butter flavor and texture, plus extra for garnish.
- Creamy Peanut Butter: The creamy center that makes these brownie cups irresistible.
How to Make Brownie Peanut Butter Cups
Making Brownie Peanut Butter Cups is a fun and fulfilling process that I always enjoy. The aroma that fills your kitchen while they bake is simply divine. Let’s get started on creating these delicious bites!
- Preheat your oven to 350 degrees Fahrenheit (175 degrees Celsius). Spray or grease 12 muffin cups to prevent sticking. If you’re feeling adventurous, you can even make mini muffin bites and adjust the baking time accordingly, about 8 minutes should do!
- In a large microwave-safe bowl, combine granulated sugar, unsalted butter, and water. Microwave on high for about 1 minute until the butter is melted. Stir until the mixture is smooth and well combined.
- Add in 3/4 cup of semi-sweet chocolate chips and stir until melted and creamy. Then, incorporate the large egg and vanilla extract, mixing until everything is nicely blended together.
- Next, add the all-purpose flour and baking soda, stirring until just combined. It’s important not to overmix; you want your brownies to be tender!
- Let the batter cool at room temperature for a bit. This is crucial as it allows you to mix in the peanut butter chips and remaining semi-sweet chocolate chips without melting them.
- Spoon the brownie batter into the prepared muffin cups, filling each one about three-quarters full. This will give them room to rise.
- Bake for 13 to 15 minutes, or until the tops are set and a toothpick inserted into the center comes out slightly wet. Keep an eye on them, as they can go from perfect to overdone quickly!
- Once baked, remove the pan and place it on a wire rack. You might notice that the centers of the brownies will fall a little upon cooling—this is normal! If they don’t sink enough, lightly tap the centers with a teaspoon to create a small well.
- In a small microwave-safe bowl, add creamy peanut butter and microwave on high for 45 seconds. Stir to make it smooth and creamy.
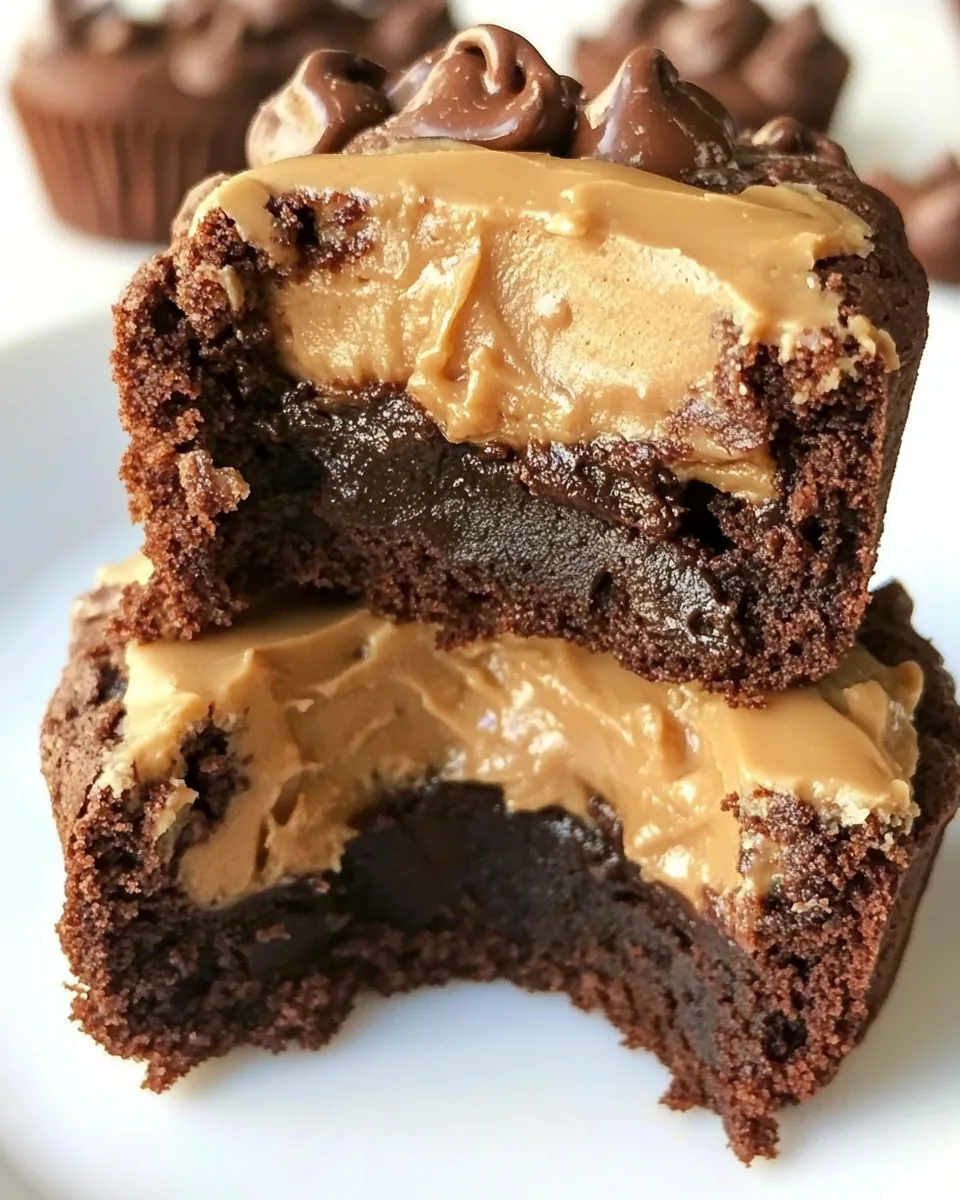
- While the brownie cups are still hot, carefully spoon about a tablespoon of the warm peanut butter into the center of each brownie. This will create that gooey, irresistible center that everyone loves.
- Finally, sprinkle some more semi-sweet chocolate chips and peanut butter chips on top for an extra touch of deliciousness. Allow them to cool completely in the pan before serving.
Things Worth Knowing
- Check for Doneness: To ensure your brownies are perfectly baked, always do the toothpick test. The toothpick should come out with a few moist crumbs, not completely clean.
- Cooling is Key: Allowing the brownies to cool helps set the texture, making them easier to remove from the muffin cups without breaking.
- Storage Tips: Store any leftovers in an airtight container at room temperature for 2 to 3 days, or in the fridge for up to a week.
- Variations: Feel free to swap out the peanut butter for almond butter or any other nut butter for a different flavor profile.
- Serving Suggestions: These brownies are delightful as is, but they also pair well with a scoop of vanilla ice cream or whipped cream on the side.
Recipe Tips about Brownie Peanut Butter Cups
Here are some helpful tips to keep in mind when making Brownie Peanut Butter Cups. Following these will ensure you achieve the best results possible!
- Storage: To keep your brownie cups fresh, store them in an airtight container at room temperature. They’ll stay good for about 3 days, or up to a week in the fridge.
- Freezing: Yes, you can freeze these brownie cups! Allow them to cool completely, then place them in a freezer-safe container. They can last in the freezer for up to 3 months. Just thaw before serving.
- Pairing: These brownie cups are perfect with a scoop of vanilla ice cream or a dollop of whipped cream. They also make a fun addition to a dessert platter!
- Brownie Bites: If you prefer smaller treats, you can use a mini muffin pan and reduce the baking time to about 8 to 10 minutes.
- Chocolate Lovers: For an extra chocolatey flavor, consider adding chocolate chunks to the brownie batter or using dark chocolate chips instead of semi-sweet.
How to Serve Brownie Peanut Butter Cups
Serving Brownie Peanut Butter Cups is just as fun as making them! Here are some creative ideas to elevate your serving experience:
- As a Dessert: These brownie cups are the perfect ending to any meal. Serve them warm with ice cream or whipped cream for a deliciously indulgent treat.
- Snack Time: They make for an excellent afternoon snack, especially when you’re craving something sweet. Pair with a glass of cold milk or your favorite hot beverage.
- Party Treats: These brownie cups are ideal for parties! Arrange them on a decorative platter and watch them disappear as guests enjoy their chocolatey goodness.
- Picnic Perfect: Pack them in your picnic basket as a sweet treat to enjoy outdoors. They travel well and are always a hit!
- Chocolate Fondue: For a fun twist, serve them alongside a chocolate fondue station. Guests can dip the brownie cups into the melting chocolate for an extra indulgent experience.
- Seasonal Celebrations: Consider decorating them with seasonal toppings, such as sprinkles for birthdays or drizzles of colored chocolate for holidays!
FAQ
Conclusion
What makes Brownie Peanut Butter Cups so special is their irresistible combination of chocolate and peanut butter, making them the perfect treat for any occasion. I encourage you to try making these delightful bites—you won’t regret it! They’re a simple way to bring joy to your day or to share with loved ones. Enjoy every delicious moment!
Brownie Peanut Butter Cups
Equipment
- Wooden Spoon
- Frying Pan
- Blender
- Baking Sheet
- Oven
Ingredients
- 3/4 cup Granulated Sugar
- 1/4 cup Unsalted Butter
- 1 tablespoon Water
- 3/4 cup Semi-Sweet Chocolate Chips
- 1 large Egg
- 1/2 teaspoon Vanilla Extract
- 1 cup All-Purpose Flour
- 1/4 teaspoon Baking Soda
- 1/2 cup Peanut Butter Chips
- 1/2 cup Semi-Sweet Chocolate Chips
- 3/4 cup Creamy Peanut Butter
Instructions
- Preheat your oven to 350 degrees Fahrenheit (175 degrees Celsius). Spray or grease 12 muffin cups to prevent sticking. If you're feeling adventurous, you can even make mini muffin bites and adjust the baking time accordingly, about 8 minutes should do!
- In a large microwave-safe bowl, combine granulated sugar, unsalted butter, and water. Microwave on high for about 1 minute until the butter is melted. Stir until the mixture is smooth and well combined.
- Add in 3/4 cup of semi-sweet chocolate chips and stir until melted and creamy. Then, incorporate the large egg and vanilla extract, mixing until everything is nicely blended together.
- Next, add the all-purpose flour and baking soda, stirring until just combined. It's important not to overmix; you want your brownies to be tender!
- Let the batter cool at room temperature for a bit. This is crucial as it allows you to mix in the peanut butter chips and remaining semi-sweet chocolate chips without melting them.
- Spoon the brownie batter into the prepared muffin cups, filling each one about three-quarters full. This will give them room to rise.
- Bake for 13 to 15 minutes, or until the tops are set and a toothpick inserted into the center comes out slightly wet. Keep an eye on them, as they can go from perfect to overdone quickly!
- Once baked, remove the pan and place it on a wire rack. You might notice that the centers of the brownies will fall a little upon cooling—this is normal! If they don't sink enough, lightly tap the centers with a teaspoon to create a small well.
- In a small microwave-safe bowl, add creamy peanut butter and microwave on high for 45 seconds. Stir to make it smooth and creamy.
- While the brownie cups are still hot, carefully spoon about a tablespoon of the warm peanut butter into the center of each brownie. This will create that gooey, irresistible center that everyone loves.
- Finally, sprinkle some more semi-sweet chocolate chips and peanut butter chips on top for an extra touch of deliciousness. Allow them to cool completely in the pan before serving.
Notes
- Storage: To keep your brownie cups fresh, store them in an airtight container at room temperature. They'll stay good for about 3 days, or up to a week in the fridge.
- Freezing: Yes, you can freeze these brownie cups! Allow them to cool completely, then place them in a freezer-safe container. They can last in the freezer for up to 3 months. Just thaw before serving.
- Pairing: These brownie cups are perfect with a scoop of vanilla ice cream or a dollop of whipped cream. They also make a fun addition to a dessert platter!
- Brownie Bites: If you prefer smaller treats, you can use a mini muffin pan and reduce the baking time to about 8 to 10 minutes.
- Chocolate Lovers: For an extra chocolatey flavor, consider adding chocolate chunks to the brownie batter or using dark chocolate chips instead of semi-sweet.